


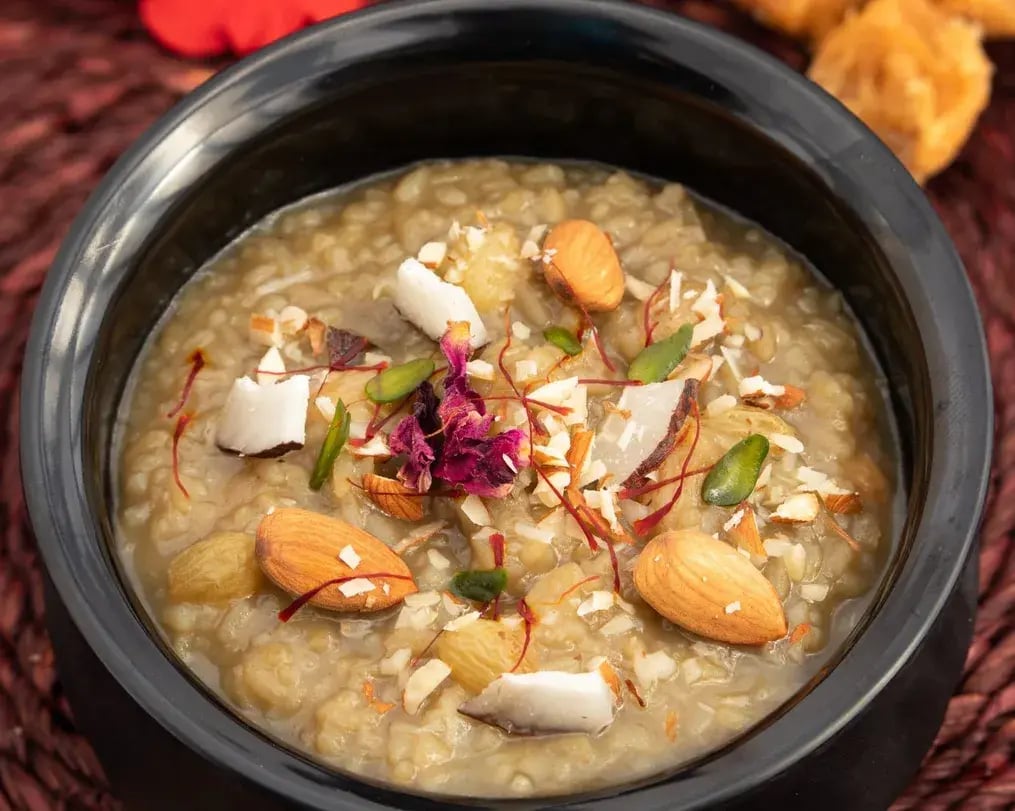
Coconut milk kheer with dates could not get easier and healthier than this! So we have some tips and tricks for you to get it right!
Kheer is a beloved rice pudding which is often infused with cardamom and saffron, and typically made with dairy. Here, the traditional kheer turns vegan with a bit of a health boost with the addition of dates and dairy being replaced with coconut milk. Meet coconut milk kheer with dates, that is the perfect dessert for the health-conscious, vegan folks, and also those with a low tolerance towards dairy. This kheer is an indulgent dessert that’s both comforting and nourishing, which is made without the need for refined sugar or dairy. So, we have some tips and tricks on making the best of the ingredients from the rice, dates,s and the coconut milk in the kheer.
1. Use Full-Fat Coconut Milk
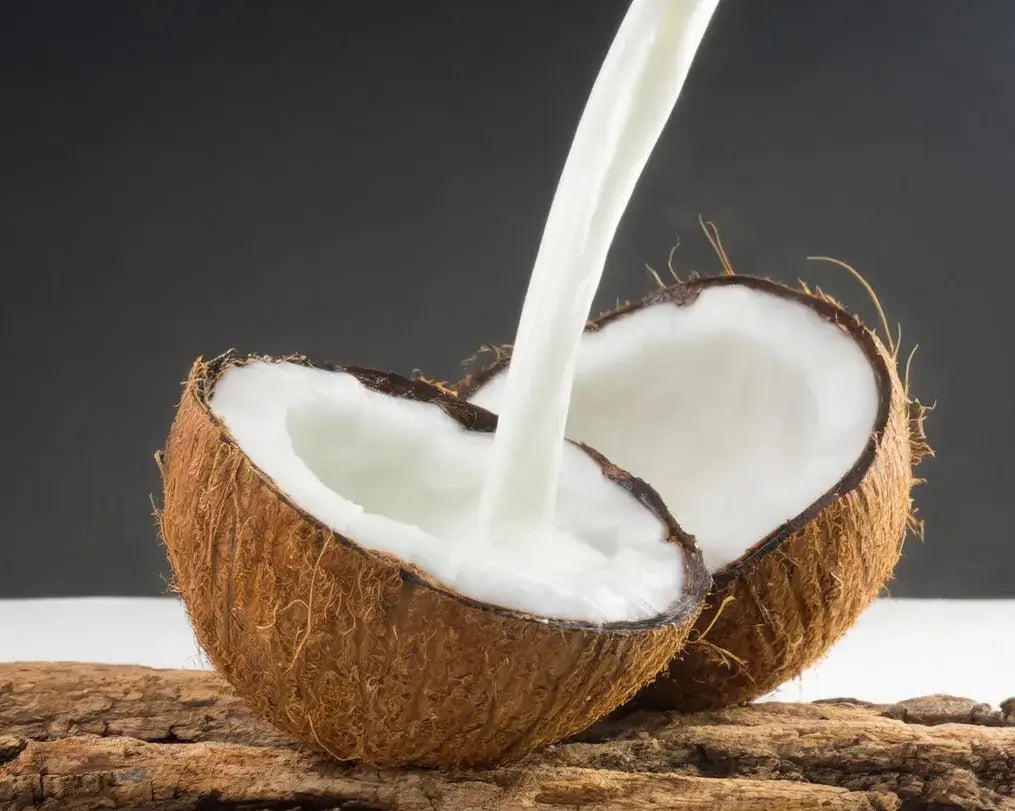
Full-fat coconut milk is essential for getting the right thickness and consistency in coconut kheer. Lesser fat content makes for a runny kheer, and the versions sold in cartons don’t have enough fat in them. The fat in full-fat coconut milk gives the dessert body and richness, which is especially important when there’s no dairy involved. During cooking, the coconut milk slowly reduces and thickens, so it’s important to use the right type. One good approach is to add one can of coconut milk early in the cooking process and save another to stir in near the end. Make sure to always shake the can well before using to mix the coconut cream and water inside.
2. Soak or Grind the Rice Before
Short-grain rice varieties, which are aromatic, are ideal for use in kheer because they break down better during cooking and release more starch, which naturally thickens the kheer. Like every other rice-based recipe, soaking the rice for at least 30 minutes before softens it, reduces the cooking time, and helps it break down faster once it’s simmering in the coconut milk. If you prefer a very smooth consistency, you can grind the soaked rice into a coarse paste before cooking. This helps release starch more quickly and gives the kheer a thick, uniform texture with no visible rice grains. On the other hand, if you like some wholeness in every bite, in the kheer, use whole soaked rice without grinding.
3. Add Dates at Different Times
When using dates in kheer, you must be mindful when you add them. For example, if you add all the chopped dates at the start, they will break down completely during cooking and become part of the runny mix. This gives the kheer a rich, caramel-like flavor and sweetness, but won’t give it any body. To get a more balanced result, it’s best to divide the chopped dates into two portions. Add half at the beginning of cooking so they soften and blend into the kheer, and add the second half later, around the last 10 to 15 minutes, so that some pieces stay intact and you get to find bits and pieces of them when you eat the kheer.
4. Cook on Low Heat and Stir Often
This dish depends on slow cooking to develop the right flavor and thickness. Cooking on high heat or rushing the process can cause the coconut milk to separate or burn, especially as the rice thickens the mixture. A low simmer allows the flavors to build and the ingredients to disintegrate properly. Use a heavy-bottomed pan for best results and stir the mixture regularly, scraping the bottom to prevent any sticking. The rice also needs time to release its starch, and the coconut milk needs time to reduce and thicken. A total cooking time of around 35 to 45 minutes is ideal, but this can vary depending on the amount of liquid and the type of rice used.
5. Finish with Spices and Some Final Adjustments

Once the rice is fully cooked and the thickness feels right, it’s time to finish the kheer with the addition of spices and any other ingredients you wish to add. A small amount of freshly ground cardamom or a few strands of saffron in warm coconut milk will boost the flavor of the coconut milk kheer with dates, which can be stirred in toward the end for more aroma. If the kheer is too thick, stir in a few spoonfuls of almond milk or cashew milk to loosen it slightly and give it a silkier finish. After turning off the heat, let the kheer sit for 10 minutes so it thickens slightly as it cools. If served chilled, it will set into a denser, pudding-like texture, which many people prefer. Garnish with chopped pistachios, slivered almonds, or toasted coconut.
Like This Article?
More Like This


Popular Articles


Trending Web Stories

Curated Recipes


