


When making a classic caramel custard for Father’s Day, just keep these 5 tips in mind so that they turn out just right. After all, this is not a day you want to mess up on
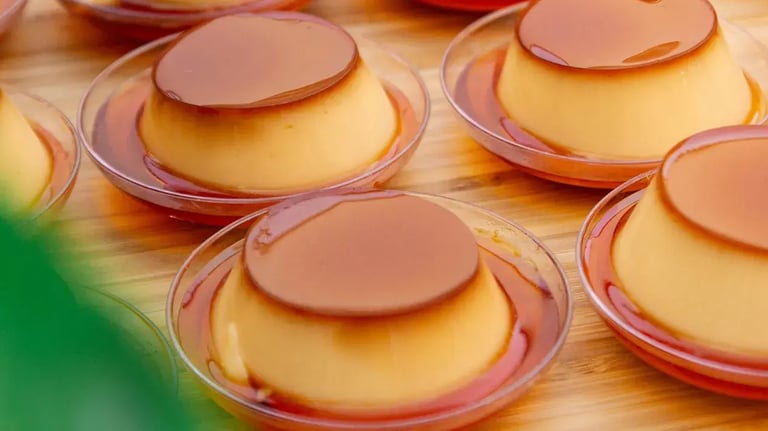
Few desserts strike the perfect balance between simplicity and elegance quite like caramel custard. With its luscious texture, glossy amber top, and gentle vanilla flavor, this timeless treat is a beautiful way to end any celebratory meal. And what better occasion than Father’s Day to show love and appreciation with a homemade dessert that speaks to comfort and care? But as deceptively simple as caramel custard may seem, achieving that silky smooth, melt in the mouth consistency can be tricky. A few wrong turns, and you could end up with rubbery custard, grainy caramel, or unsightly bubbles. To ensure your dish is restaurant quality, here are five foolproof tips when making the classic caramel custard for Father’s Day.
The caramel
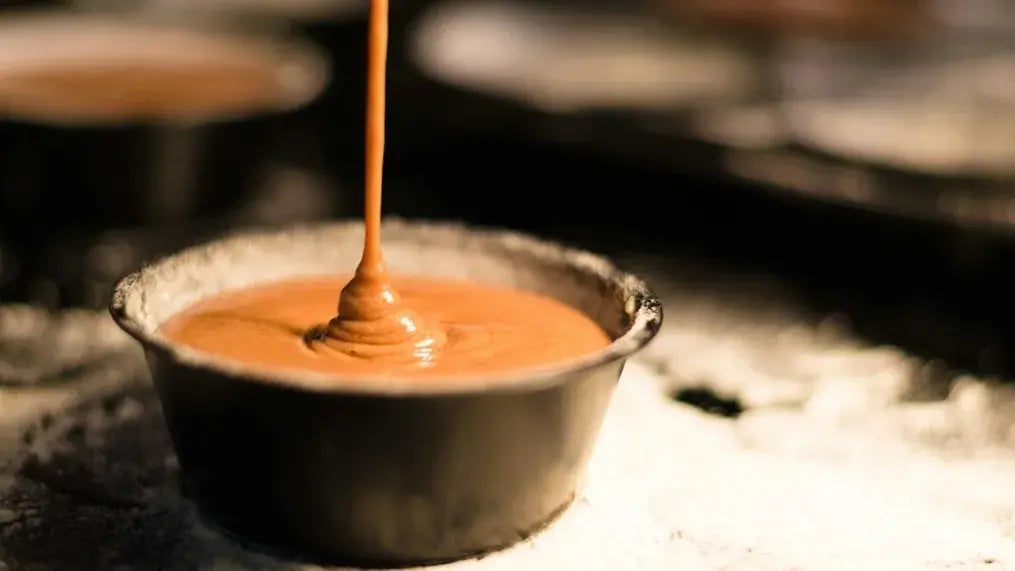
The first layer of your custard, the caramel, is crucial. It should be rich in flavor and color, but not bitter. The goal is a golden amber hue that brings depth and complexity without crossing into burnt territory. Here are some tips:
- Use a light colored, heavy bottomed pan so you can monitor the color as it darkens.
- Combine the sugar and a little water, then cook over medium heat without stirring -- just swirl the pan gently. But make sure to keep it moving or it will stick to the base of the pan and it might burn.
- Watch closely. Once it turns a deep honey or amber color, immediately pour it into your ramekins.
- Keep in mind that the caramel continues cooking even after the heat is turned off, so don’t wait for it to get too dark.
- Prepare the ramekins in advance and work quickly, as caramel hardens fast once poured.
The milk
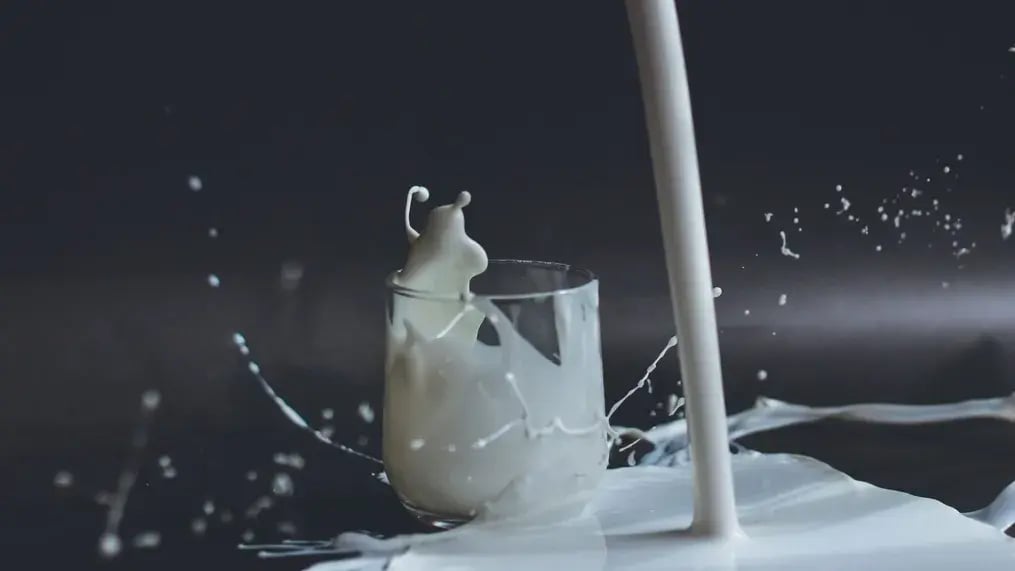
Your custard mixture is a delicate emulsion of eggs, milk, and sugar. Heating the milk is essential to gently start the cooking process, but overheating can lead to scrambled eggs and a curdled texture. To get it right:
- warm the milk just until it’s hot to the touch or starts to steam, but don’t let it boil.
- If you're using cream or a milk cream combo, warm them together for a richer custard.
- When adding warm milk to your eggs, pour slowly while whisking constantly. This prevents the eggs from cooking too fast.
The straining
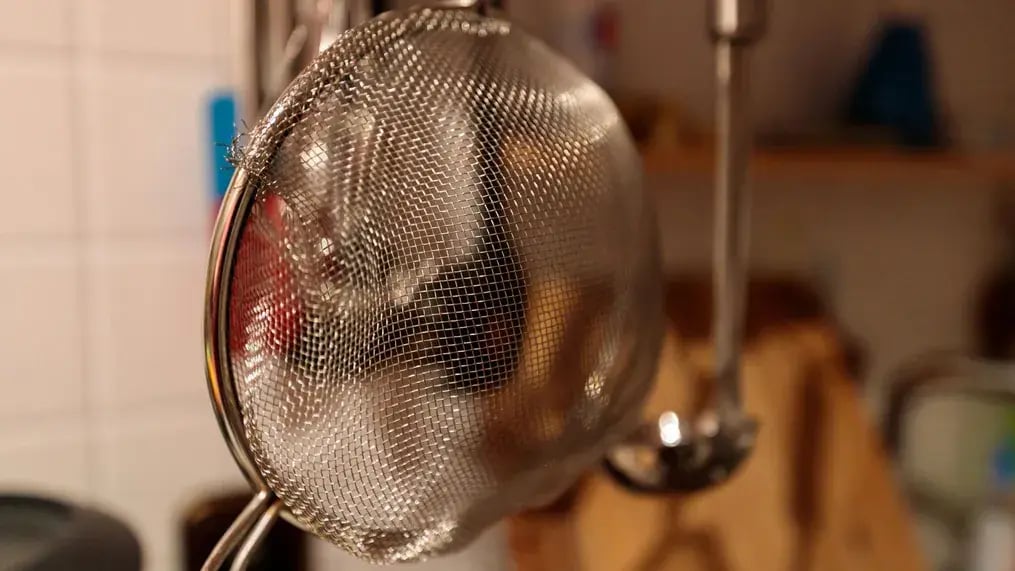
Even if you've whisked your custard gently and thoroughly, there may still be bits of egg or undissolved sugar crystals. Straining is your secret weapon for a pristine, luxurious texture. Once your custard base is fully mixed, pour it through a fine mesh sieve directly into a jug or bowl before filling your ramekins. This removes any lumps and results in a flawless final texture. Essentially, straining ensures that your custard is silky and uniform, with no unpleasant surprises.
The baking
One of the most common mistakes in making caramel custard is baking it at too high a temperature or without a water bath. This causes the eggs to cook too quickly, resulting in a rubbery or overbaked texture. The water bath ensures even, gentle cooking, protecting the custard from direct heat and helping it stay ultra smooth. So here’s what you need to do:
- Place your filled ramekins in a large baking dish or roasting pan.
- Pour hot water into the pan until it comes about halfway up the sides of the ramekins.
- Bake at a low temperature, around 325F or 160C, until the custard is just set. It should still jiggle slightly in the center.
- Cover the pan loosely with foil to prevent the tops from browning or forming a skin.
The cooling
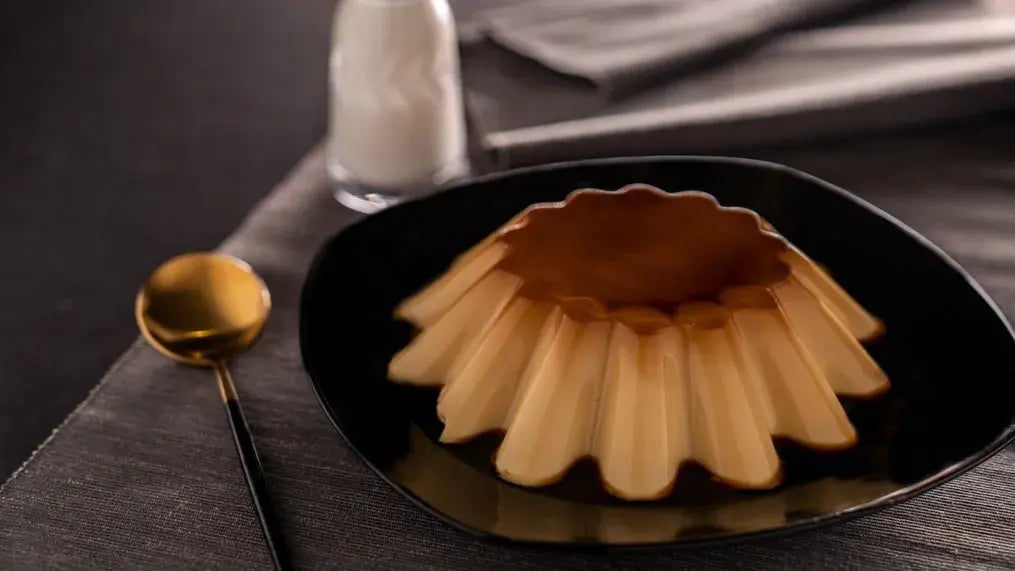
One of the final steps, and often overlooked, is proper cooling. Rushing this process can cause the custard to collapse or release too much liquid. So after baking, let the custard cool to room temperature in the water bath. This allows the cooking process to complete gently. Then refrigerate for at least 4 hours, preferably overnight. This firms up the custard and helps the caramel soften, making it easier to unmold. Run a knife around the edge of the ramekin, then invert onto a plate. If it doesn’t release immediately, dip the bottom of the ramekin in warm water for 15 seconds. Keep these tips in mind because patience pays off. A chilled custard not only tastes better but also looks more polished when served.
Like This Article?
More Like This


Popular Articles


Trending Web Stories

Curated Recipes


