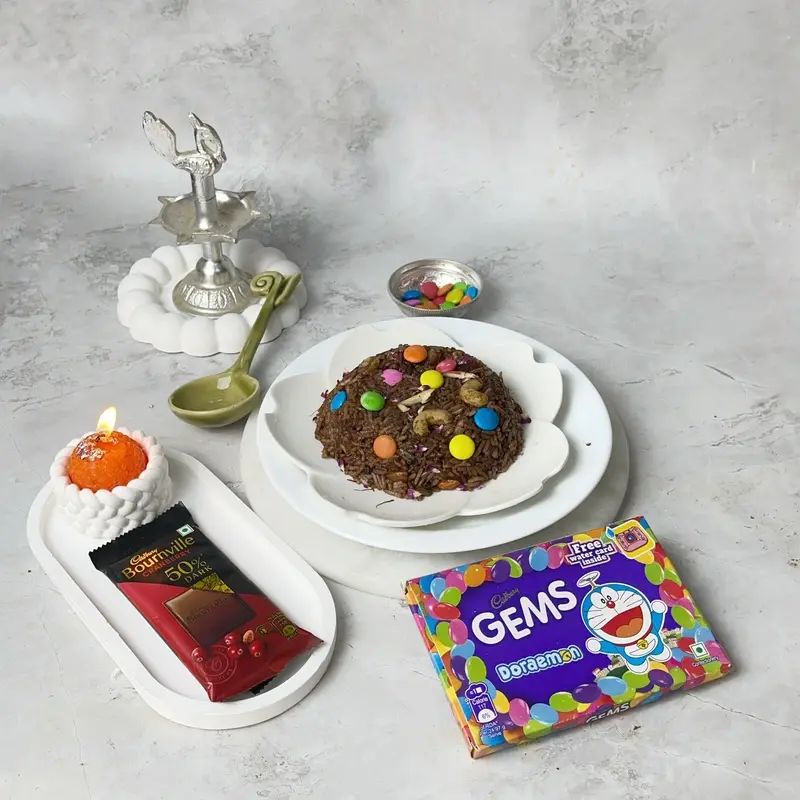












Follow these tips and learn how to make soft sandesh at home without overmixing it.

Sandesh is a classic Bengali sweet known for its delicate texture and melt-in-the-mouth quality.
Mastering it, especially modern versions like cocoa sandesh with dry fruits, requires more than following a recipe. The way you handle chhena, or fresh curdled milk, plays a crucial role in determining the final texture. One of the most common pitfalls is over-mixing the chhena, which can result in a dense, rubbery, or greasy sweet instead of the delicate texture that defines good sandesh. From curdling and draining the chhena to kneading, flavouring, cooking, and cooling, every stage requires some care. Whether you are making traditional sandesh or experimenting with chocolate and nuts, these practical tips will help you set it properly without overworking the mixture.
Getting the Chhena Right

Curdling the Milk
A good sandesh starts with good chhena. The milk should be curdled just right, not too hot or too cold. Ideally, full-fat milk is brought to a gentle boil and curdled with lemon juice or vinegar.
Make sure you add the acid gradually and do not use too much of it, as over-acidifying the milk will make the cheena rubbery.
Once it separates, the curds should be immediately strained through muslin cloth and rinsed under cold water to remove the acidic flavor.
Straining and Draining
Now comes the critical part, which is the draining. You don’t want all the moisture gone. If it’s too dry, the sandesh will be crumbly. If it’s too wet, it won’t set. Aim for a consistency where the chhena feels moist but not soggy. Let it hang for 40 minutes, but check at the 20-minute mark. Press gently with your palm. If it holds shape but feels soft, it’s ready.
Kneading Without Overworking
The Right Kneading Technique

Kneading chhena is done to smooth it and bring everything together into a dough-like consistency. For traditional sandesh, the goal is to break down the graininess slightly without turning it into a paste. Over-mixing releases too much fat from the chhena, leaving the mixture greasy. A good rule of thumb is that if you can form a soft ball in your hand that doesn’t crack but isn’t oily either, your chhena is perfectly kneaded. When kneading, always use the heel of your palm and not your fingers. The palm provides even pressure and helps mash the chhena into a smooth texture without tearing or overhandling it. Work in gentle, sweeping motions. Push the chhena out, fold it back in, and repeat.
For a smoother result, knead the chhena while it is still slightly warm. The gentle warmth makes it easier to smooth out without requiring excessive pressure or prolonged kneading.
Why to Avoid a Food Processor
Avoid using a processor even though it’s tempting, because it overworks the proteins and gives you a rubbery base.
Adding Flavor the Right Way
Folding in Cocoa or Sweeteners

For flavored sandesh, it’s best to knead the chhena plain first, just enough to smooth it out. Once that’s done, add your cocoa powder and sweetener. Mix them in gently, ideally by folding and pressing instead of aggressive stirring. This prevents you from over-mixing while still incorporating your flavoring thoroughly. If using melted chocolate or condensed milk, make sure they’ve cooled to room temperature before adding. Hot mixtures can destabilize the chhena, affecting the final texture.
Cooking the Chhena Mixture
Low Heat and Constant Stirring

Some sandesh recipes require lightly cooking the mixture after kneading, especially if you’re adding ingredients like cocoa or dry fruits. When doing this, always use low heat and stir constantly. The goal is to slightly dry out the mixture, not to cook it down into a paste. If the mixture starts sticking to the pan or becomes oily, it’s a sign you’ve overheated or overworked it. Use a nonstick or heavy-bottomed pan, and remove it from the stove as soon as it starts coming together as a dough. Overcooking will make your sandesh dry, tight, and overly dense.
Also, when combining chhena with ingredients on the heat, use a flat wooden spatula and stir in slow, circular motions. This allows the ingredients to incorporate evenly without breaking the texture. Wooden tools are gentler than metal and help you maintain control over the mixing process.
Knowing When to Stop Cooking
Your mixture is ready when it starts to leave the sides of the pan and becomes soft and cohesive. Make sure it looks soft and not runny; overcooking will lead to dry, crumbly sandesh rather than the soft texture you want.
Cooling and Shaping
Always let the sandesh mixture cool to room temperature before you mold or shape it. Heat softens the fat content in chhena and makes it prone to smearing or collapsing. Cooling firms up the base and allows you to shape the sandesh with precision, irrespective of whether you're using molds, rolling it into truffles, or shaping by hand. If you're layering or filling with a dry fruit center, this step is crucial to help each component stay distinct.
Storing Sandesh
Store your sandesh in an airtight container and refrigerate it. Homemade sandesh can be consumed within 2-3 days. Since it contains fresh cheena, avoid leaving it at room temperature for long periods, especially in warm weather.
Frequently Asked Questions
Why does my sandesh turn out rubbery or dense? 
Your Sandesh might turn rubbery or dense if the chhena is over-acidified, over-kneaded, or overcooked. If you use too much lemon juice or vinegar, or overcook, this will affect the texture.
Can I use a mixer instead of hand-kneading the chhena?
It is better to knead chhena by hand. A mixer or food processor can overwork the chhena, releasing excess fat and resulting in a rubbery or greasy texture; hence, it is better to knead it by hand.
How do I know when the sandesh mixture is done cooking?
The sandesh mixture is done cooking when it starts leaving the sides of the pan and becomes soft and cohesive. Make sure it is soft and not runny. Remove the mixture from the pan before it becomes dry.
How long does homemade sandesh stay fresh?
Your homemade sandesh can be stored in an airtight container in the refrigerator. You can consume it within 2-3 days.
Like This Article?
More Like This



Popular Articles


Trending Web Stories



Curated Recipes