



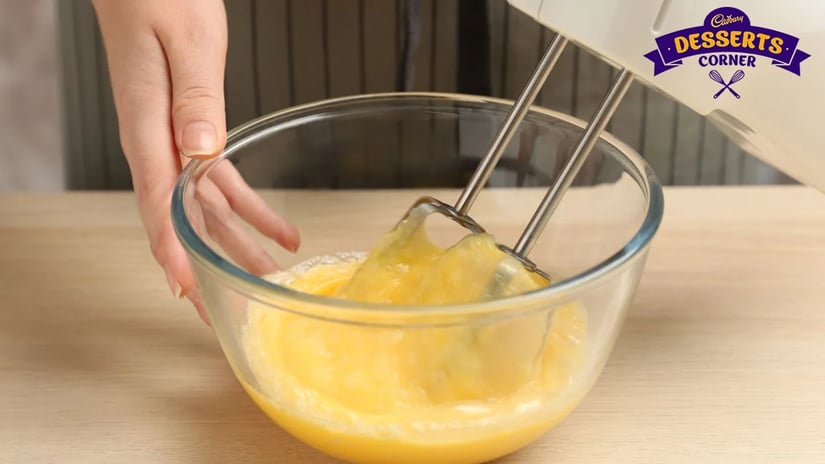


Learn how to beat egg yolks with easy techniques to achieve proper texture, ensuring better structure and consistency in dessert preparation for any get-together.
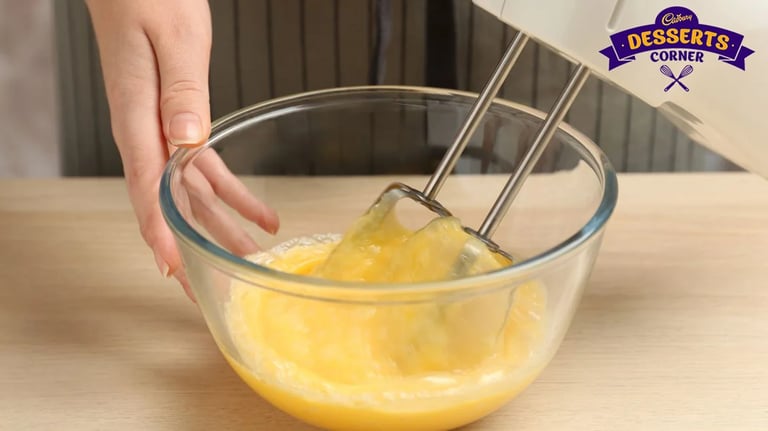
In the world of baking and creating desserts, egg yolks are like a treasure trove. Their vibrant color and creamy texture have the power to transform mixtures into velvety delights. Whether you're preparing a custard, a light and fluffy sponge cake or a decadent crème brûlée, the success of these treats often relies on how you beat those precious egg yolks.
Why do we place importance on egg yolks? It's because they play a crucial role in desserts. They emulsify mixtures, by binding ingredients together, creating a consistency. When beaten, egg yolks capture air bubbles that lend volume and lightness to your dessert creations. Moreover, they boast a flavor profile that adds depth and richness unlike anything.
Whisking egg yolks may seem like a mundane task. However, it’s actually an art, one that many home cooks strive to master. The right balance of technique, timing and patience in this regard can take your dessert from ordinary to extraordinary. This guide will walk you through the intricacies of beating egg yolks, ensuring that your next sweet treat is not just good, but truly impressive.
A Step-by-Step Guide to Achieving Perfectly Whipped Egg Yolks
Step 1: Selecting the Right Eggs
The first step towards achieving perfect whipped egg yolks is making sure you choose the right eggs. Opt for high quality eggs that have an orange-yellow yolk. This indicates their freshness and overall quality. It's also important to let the eggs reach room temperature before starting, as this helps the yolks whip up fully and quickly.
Step 2: Separating the Yolks
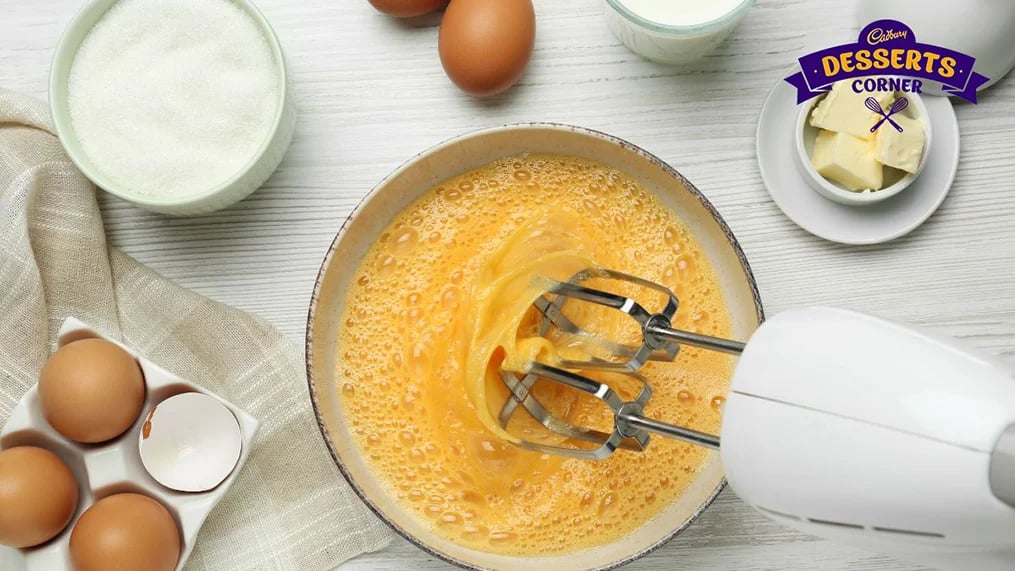
Separating the yolks from the whites is a step in ensuring good results. Even a small amount of egg white or shell can hinder the yolks from reaching their volume when whipped. To minimize any risks of contamination, use a dry bowl specifically for the yolks. You might consider using the three-bowl method; crack each egg into one bowl initially then separate each yolk into another bowl. This method reduces any chances of cross contamination.
Step 3: Initiating Whipping
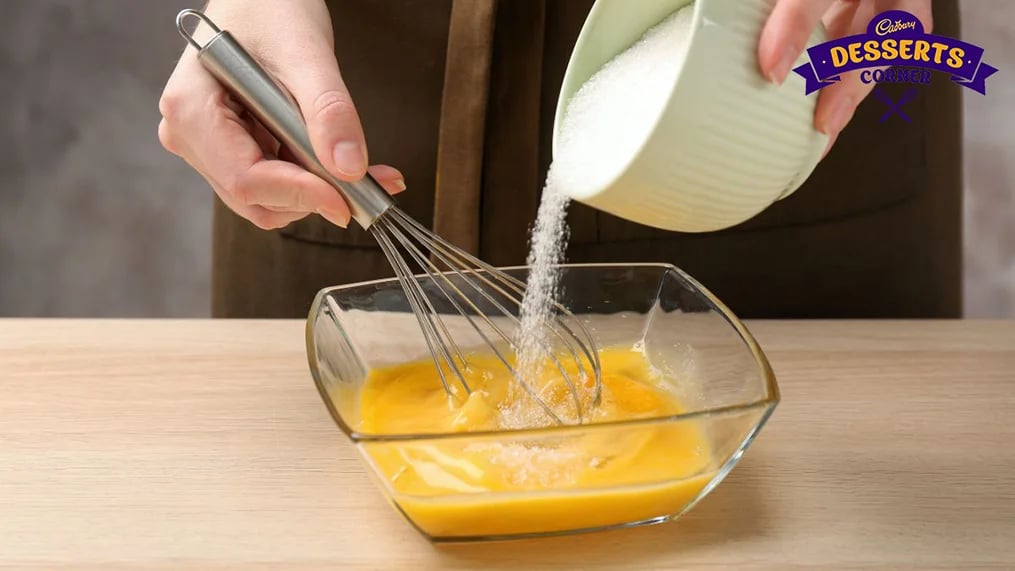
To begin whipping, your egg yolks utilize either a whisk or an electric mixer set at speed. If you plan to add sugar to your recipe, do so gradually during this process. Sugar aids in stabilizing and providing structure to the whipped yolks. Initially, you'll notice that the yolks are thick and sticky; however, as you continue to whip them, they will gradually lighten in color while increasing in volume.
Step 4: Look for the Ribbon Stage
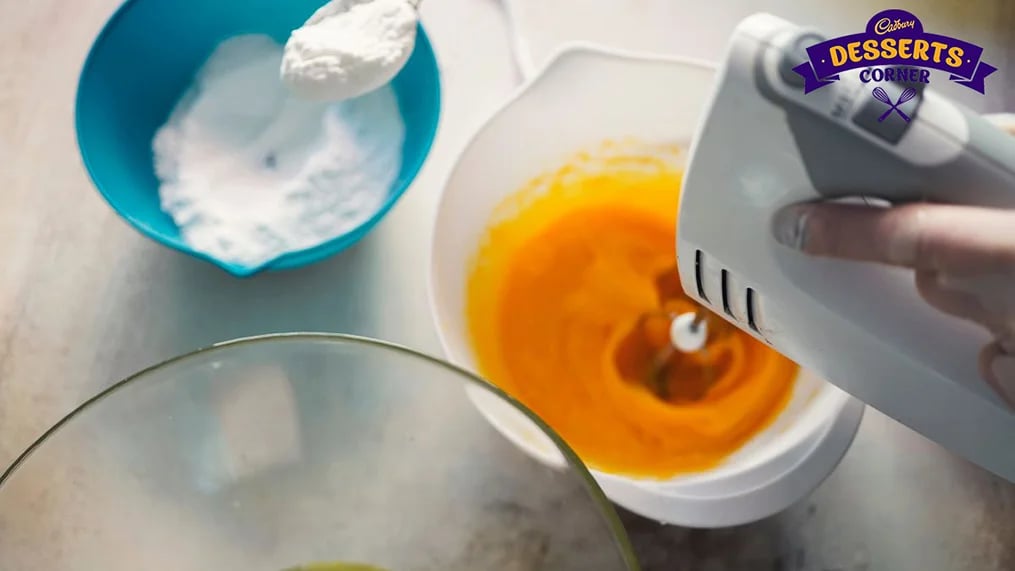
The ribbon stage holds importance when it comes to whisking egg yolks. It's that moment when the yolks reach a smooth consistency and form a beautiful ribbon like trail as you lift the whisk. This stage signifies that the yolks are perfectly whipped, full of air and ready to work their magic in your dessert creation.
Step 5: Incorporate with Care
Once your whipped yolks are ready, it's time to gently incorporate them into your dessert mixture. This step requires delicacy and attention: use a spatula to carefully fold the yolks into the mixture, ensuring not to deflate them. The gentle folding preserves the air you worked meticulously to incorporate, resulting in an airy dessert.
Mastering the art of whipping egg yolks brings about a transformation in dessert making. It's a skill that enhances both the quality of your desserts and boosts your confidence as a home chef. Remember, patience and practice are ingredients. With every batch of egg yolks you whip, you're not just getting closer to creating a dessert, you're taking strides towards perfection.
Egg Yolk Recipes: Desserts
Fresh Fruit Tart
The French fruit tart — tarte aux fruits — is one of the foundational preparations of classical patisserie, with the format established in French professional kitchens during the 18th century as pastry chefs developed standardized preparations for the growing café and restaurant culture of Paris. The crème pâtissière — pastry cream — is the primary application of beating egg yolks in this recipe: the yolks are beaten with sugar to the ribbon stage, then cooked with milk and starch to produce a thick, smooth cream that holds its shape when spread into the tart shell.
Ingredients
Pastry shell: 200 grams / 1⅔ cups plain flour, 100 grams / 7 tablespoons cold unsalted butter, 50 grams / ¼ cup icing sugar, 1 large egg yolk, 2 tablespoons cold water
Crème pâtissière: 4 large egg yolks, 100 grams / ½ cup caster sugar, 30 grams / 4 tablespoons cornstarch, 500 ml / 2 cups full-fat whole milk, 1 teaspoon vanilla extract, 20 grams / 1½ tablespoons unsalted butter
Topping: 300 grams mixed fresh fruit — strawberries, kiwi, raspberries, blueberries — 3 tablespoons apricot jam warmed for glaze
How to Make
Step 1 — Make and Blind-Bake the Pastry Shell:
Rub cold butter into sifted flour and icing sugar until the mixture resembles fine breadcrumbs. Add the egg yolk and cold water, bring together into a dough without kneading, wrap, and chill for 30 minutes. Roll to three millimeters, line a 23-centimeter tart tin, and blind-bake at 180°C for 15 minutes with weights then 8 minutes without until golden.
Step 2 — Beat Egg Yolks to Ribbon Stage:
Whisk the four egg yolks and caster sugar together vigorously until the mixture triples in volume, turns pale yellow, and falls from the whisk in a thick, continuous ribbon — approximately three to four minutes of active whisking. This is the whipped egg yolks technique at the heart of the pastry cream — the ribbon stage ensures the starch is evenly distributed through the yolk structure before heat is applied.
Step 3 — Cook the Pastry Cream
Whisk the cornstarch into the ribbon-stage yolk mixture until smooth. Heat the milk to a gentle simmer, then pour slowly over the yolk mixture while whisking continuously to temper the yolks without scrambling them. Return the combined mixture to the saucepan over medium heat, whisking constantly until it thickens and comes to a boil, then continue for 1 more minute.
Step 4 — Finish and Cool the Cream
Remove from heat, whisk in the vanilla extract and butter until smooth and glossy. Press plastic wrap directly against the surface and refrigerate until completely cold — a minimum of two hours. Beat briefly, then spread to restore a smooth, spreadable consistency.
Step 5 — Assemble and Glaze
Spread the cold pastry cream into the baked shell to an even layer. Arrange the fresh fruit decoratively over the surface. Brush the warmed apricot jam over the fruit as a glaze to protect the surface and add shine.
Red Velvet Brownies
Red velvet as a flavor category emerged from American Southern baking in the early 20th century, where natural cocoa's anthocyanin pigments reacted with acidic buttermilk to produce a slight reddish hue that was later amplified with food coloring as artificial colors became widely available.
Ingredients
- 150 grams / 5 oz dark chocolate, melted
- 115 grams / ½ cup unsalted butter, melted
- 200 grams / 1 cup caster sugar
- 3 large egg yolks
- 1 large whole egg
- 1 tablespoon natural unsweetened cocoa powder
- 120 grams / 1 cup plain flour
- 1 teaspoon red food coloring
- 1 teaspoon vanilla extract
- ½ teaspoon white wine vinegar
Cream cheese swirl: 150 grams full-fat cream cheese, 2 tablespoons caster sugar, 1 egg yolk
How to Make
Step 1 — Beat Egg Yolks with Sugar
Whisk the three egg yolks, one whole egg, and caster sugar together until slightly pale and the sugar has partially dissolved — approximately two minutes of brisk whisking. This step differs from the ribbon stage in that a full-volume increase is not required; the goal is partial dissolution of the sugar and even distribution throughout the yolk structure.
Step 2 — Add Chocolate and Flavorings
Pour the cooled, melted chocolate and butter into the egg-sugar mixture and stir to combine. Add the red food coloring, vanilla extract, and white wine vinegar — the vinegar reacts with the cocoa's natural compounds to enhance the red color and adds a slight sharpness that balances the sweetness.
Step 3 — Fold in Flour
Sift the flour and cocoa powder together, then fold into the chocolate mixture until just combined. Overmixing at this stage develops gluten and produces a tough, cakey result rather than the dense, fudgy brownies the recipe requires.
Step 4 — Make Cream Cheese Swirl
Beat the cream cheese, sugar, and egg yolk together until smooth. Spoon the red brownie batter into a lined 20-centimeter square tin, then drop spoonfuls of the cream cheese mixture across the surface and drag a skewer through both layers to create the characteristic marble swirl.
Step 5 — Bake and Cool
Bake at 180°C for 22 to 25 minutes until the edges are set, and a skewer at the center comes out with moist crumbs. Cool completely in the tin — minimum 90 minutes — before cutting with a warm, dry knife.
Pumpkin Crème Brûlée
Crème brûlée is one of the oldest documented custard preparations in European culinary history — versions appear in French, English, and Catalan historical cooking records from the 17th century, with the Catalan crema catalana predating the French version by at least a century.
Ingredients
- 5 large egg yolks
- 100 grams / ½ cup caster sugar, plus extra for brûlée
- 300 ml / 1¼ cups heavy cream
- 120 grams / ½ cup pumpkin purée
- 1 teaspoon ground cinnamon
- ¼ teaspoon ground nutmeg
- ¼ teaspoon ground ginger
- ½ teaspoon vanilla extract
How to Make
Step 1 — Beat Egg Yolks and Sugar
Whisk the five egg yolks and caster sugar together until the mixture is pale yellow and slightly thickened — approximately two to three minutes. The yolks do not need to reach full ribbon stage for crème brûlée; the goal is even sugar distribution and a smooth, uniform yolk base that will set cleanly under heat.
Step 2 — Combine with Cream and Pumpkin
Heat the heavy cream to a gentle simmer — do not boil. Whisk the pumpkin purée and spices into the beaten yolk mixture, then add the hot cream in a slow, steady stream while whisking continuously to temper the yolks. Strain through a fine-mesh sieve to remove any lumps or cooked egg from the surface.
Step 3 — Fill Ramekins
Divide the custard mixture equally between four to five ramekins, filling each to within five millimeters of the top. Place the ramekins in a deep baking dish and fill the dish with boiling water to reach halfway up the sides of the ramekins — this water bath ensures the custard cooks gently from the exterior inward rather than from the base up.
Step 4 — Bake Gently
Bake at 150°C for 40 to 50 minutes until the custard is set at the edges but retains a slight, uniform wobble at the center when the ramekin is gently shaken. The wobble firms during the cooling period — a completely firm custard in the oven is overcooked. Refrigerate for a minimum of four hours.
Step 5 — Brûlée and Serve
Scatter 1 to 1.5 teaspoons of caster sugar evenly over the cold custard surface, then caramelize with a kitchen blowtorch, moving in small circular motions until the sugar is uniformly amber and crackling. Serve within three minutes of torching — the caramel absorbs moisture from the custard surface progressively and loses its crispness quickly.
Custard Donuts
Filled donuts — known variously as Berliner, Krapfen, Bismarck, or jelly donuts, depending on geography — have appeared in European baking since at least the 16th century, with German and Polish varieties among the most historically documented.
Ingredients
Dough: 300 grams / 2½ cups strong white bread flour, 7 grams / 2¼ teaspoons instant yeast, 40 grams / 3 tablespoons caster sugar, 3 large egg yolks, 120 ml / ½ cup warm whole milk, 60 grams / ¼ cup unsalted butter softened, ½ teaspoon salt
Custard filling: 4 egg yolks, 80 grams / 6 tablespoons caster sugar, 25 grams / 3 tablespoons cornstarch, 400 ml / 1⅔ cups whole milk, 1 teaspoon vanilla extract, 15 grams / 1 tablespoon unsalted butter
Frying: Neutral oil to a depth of 10 centimeters
Finish: Caster sugar for rolling
How to Make
Step 1 — Make and Prove the Dough
Combine flour, yeast, sugar, and salt. Beat the egg yolks with the warm milk and add to the dry ingredients, mixing to a shaggy dough. Work in the softened butter gradually, then knead for 10 minutes until smooth and elastic. Cover and proof at room temperature for 1 to 1.5 hours, until doubled.
Step 2 — Shape and Second Prove
Knock back the proved dough and divide it into ten equal portions of approximately 50 grams each. Shape each into a smooth ball, place on a lined baking tray, cover, and prove for 45 minutes until noticeably puffed. Properly proved donuts fry to a uniform light gold on all sides — under-proved donuts fry unevenly.
Step 3 — Make the Custard Filling
Beat the egg yolks and sugar to the ribbon stage, whisk in the cornstarch, then temper with hot milk and cook over medium heat, whisking continuously until thick and just boiling. Remove from heat, whisk in vanilla and butter, press film against the surface, and refrigerate until cold.
Step 4 — Fry the Donuts
Heat the neutral oil to 175°C — test with a small piece of dough, which should rise to the surface within two seconds and turn golden within 90 seconds. Fry three to four donuts at a time for two to three minutes per side until deep golden brown. Drain on paper towels and roll in caster sugar while still hot.
Step 5 — Fill with Custard
Transfer the cold custard to a piping bag fitted with a thin nozzle. Insert the nozzle into the side of each cooled donut and pipe until the donut feels noticeably heavier and a small amount of custard appears at the entry point.
German Chocolate Cupcakes
German chocolate cake has a name that is misleading in its geographic implication — it was created in 1852 by Sam German, an English-American baker who developed a sweet baking chocolate for the Baker's Chocolate Company, and the cake bears his name rather than any connection to Germany. It is a cooked frosting that uses how to beat egg yolks and then cook them with dairy to produce a thick, caramel-colored, textured topping, unlike standard buttercream.
Ingredients
Cupcakes: 100 grams / ¾ cup plain flour, 30 grams / 4 tablespoons natural cocoa powder, 1 teaspoon baking powder, 100 grams / ½ cup caster sugar, 80 grams / 5½ tablespoons unsalted butter softened, 2 large egg yolks plus 1 whole egg, 100 ml / 7 tablespoons buttermilk, 1 teaspoon vanilla extract
Coconut-pecan frosting: 3 large egg yolks, 200 ml / ¾ cup evaporated milk, 150 grams / ¾ cup caster sugar, 80 grams / 5½ tablespoons unsalted butter, 1 teaspoon vanilla extract, 120 grams / 1½ cups desiccated coconut, 80 grams / ⅔ cup toasted pecans, roughly chopped
How to Make
Step 1 — Make the Cupcake Batter
Cream butter and sugar until pale and fluffy. Beat in the egg yolks and whole egg one at a time, adding the vanilla extract with the final addition. Fold in the sifted flour, cocoa powder, and baking powder alternately with the buttermilk. Divide between twelve lined cupcake cases and bake at 180°C for 18 to 20 minutes.
Step 2 — Beat Egg Yolks for Frosting
Whisk the three egg yolks and caster sugar together until slightly pale, and the sugar has partially dissolved. This is a lighter beating than the ribbon stage — two minutes of active whisking is sufficient. The yolks will be cooked over heat, so excessive pre-beating is not required.
Step 3 — Cook the Frosting Base
Combine the beaten yolks, evaporated milk, and butter in a medium saucepan over medium heat. Cook, stirring continuously, for eight to ten minutes until the mixture thickens considerably, turns a caramel color, and coats the back of a spoon. Do not allow it to boil.
Step 4 — Add Coconut and Pecans
Remove from heat and stir in the vanilla extract, desiccated coconut, and toasted pecans. Allow to cool completely — the frosting thickens further as it cools to a spreading consistency.
Step 5 — Top and Serve
Spoon the cooled coconut-pecan frosting generously over the top of each cooled cupcake. The frosting does not pipe — it is spooned into a mound. Serve at room temperature; refrigerating the assembled cupcakes firms the frosting to a hard, less pleasant consistency.
Frequently Asked Questions
1. What is the ribbon stage for egg yolks? 
When whipped egg yolks and sugar have tripled in volume, turned pale yellow, and fall from the whisk or beater in a thick, continuous ribbon that holds its shape on the surface of the mixture for two to three seconds before dissolving back in, this is called the ribbon stage.
2. How do you beat egg yolks?
How to beat egg yolks depends on how you want to use them. Use a balloon whisk or hand mixer on medium-high speed for three to four minutes, or until the yolks are pale, thick, and fall in a steady stream. This is the ribbon stage in custard preparations.
3. Can I beat egg yolks without sugar?
Yes, beating egg yolks without sugar makes a smooth, fluid emulsified base that works well in mayonnaise, hollandaise, and some savory custard recipes. Sugar is usually added to desserts because it helps stabilize the foam structure during beating and lowers the temperature at which the yolks solidify during cooking.
Like This Article?
More Like This
Popular Articles


Trending Web Stories


Curated Recipes