


Diwali sweets at home recipes focus on quick preparation and basic techniques, making them suitable for beginners & ideal for creating traditional treats easily.

You don't need to be a great cook or have special tools to make Diwali sweets at home. The most popular festival sweets are made with simple ingredients and techniques that are easy to find in most kitchens. Chocolate peda, coconut ladoo, and chocolate barfi are three easy sweets that are great for beginners.
Each one takes less than 30 minutes of active cooking, uses five to eight basic ingredients, and makes food that is good enough to give as a gift, share, or serve at a Diwali party. The steps are simple enough for kids to help with shaping and decorating, so the preparation is part of the celebration itself.
During Diwali, Indian families exchange and share sweets. Making them at home instead of buying them from a mithai shop is a tradition that connects families to both the making and the eating. These three recipes were chosen because they are easy enough for beginners to follow.
Fun & Easy Diwali Sweets for Beginners
You don't need to temper the sugar syrup, keep an eye on the temperature, or use complicated shaping tools. All three of these Diwali sweets at home can be made at home and taste just like the ones you would get from a store.
Chocolate Peda – Quick & Festive Treat

About Chocolate Peda
Chocolate peda is a modern version of the traditional Indian peda made with milk. It has cocoa powder added to the usual milk powder base. It is soft and a little fudgy, and it has the melt-in-your-mouth quality of traditional peda, plus the taste of chocolate. It sets quickly, is easy to shape, and looks so good that it could be given as a gift.
Key Ingredients
- 200 grams / 1⅔ cups full-fat milk powder
- 30 grams / 4 tablespoons natural unsweetened cocoa powder
- 80 grams / 6 tablespoons caster sugar or jaggery powder
- 30 grams / 2 tablespoons ghee
- 100 ml / 7 tablespoons full-fat whole milk
- ½ teaspoon ground cardamom
- Optional: chopped pistachios, almonds, or dried rose petals for garnish
Flavor Combinations Table
| Base | Flavor | Fat | Sweetener | Aroma |
| Full-fat milk powder | Cocoa powder | Ghee | Caster sugar or jaggery | Cardamom |
How to Make (Steps)
Step 1 — Heat Ghee
Put the ghee in a pan with a heavy bottom and turn the heat down as low as it will go. Let it melt completely and cover the bottom of the pan before adding any other ingredients. This stops the milk powder from sticking and burning when it first touches the pan.
Step 2 — Add Dry Ingredients
Put the cocoa powder and milk powder into the melted ghee. Use a spatula to stir the powders into the fat right away and keep stirring to keep any dry spots from burning on the hot pan surface.
Step 3 — Add Milk and Sugar
As the sugar dissolves and the mixture starts to come together into a single mass, keep stirring it over low heat. This is correct: the mixture will look like a liquid at first.
Step 4 — Cook Until the Mixture Leaves the Pan Sides
Stir on low heat for 10 to 12 minutes more, or until the mixture gets a lot thicker, pulls away from the sides of the pan cleanly, and holds its shape when you press a small amount between your fingers. At this point, take it off the heat right away.
Step 5 — Cool, Shape, and Garnish
Mix in the cardamom powder well. Let the mixture cool for about five to eight minutes, or until it is cool enough to handle. Lightly grease your hands with ghee and shape the dough into small, flat rounds or balls. Put a piece of garnish on top of each finished peda.
Tips & Tricks
Stir Continuously on Low Heat
Stir constantly over low heat If you leave the milk powder base for peda alone for even 30 seconds on medium or high heat, it will burn very quickly. The only way to stop this from happening is to keep stirring. Cooking on low heat for the full 10 to 12 minutes makes a smooth, evenly cooked mixture. If the finished mixture has any brown spots, it means that it has been burned in a specific area and cannot be fixed.
Do Not Overcook
Don't cook too long. You should take the mixture off the heat as soon as it pulls away from the sides of the pan and holds its shape when pressed. If you cook it any longer, it will become hard and chewy instead of the soft, fudgy texture that is typical. As the mixture cools, it gets firmer, so the right time to take it out is when it feels a little softer than the final texture.
Chill Slightly Before Shaping
Letting the cooked mixture cool for five to eight minutes before shaping it will reduce the likelihood of sticking to your hands and help the fat start to set, making the peda surfaces smoother and cleaner. When you shape peda when it's too hot, they flatten out under their own weight before the fat has set enough to hold the shape.
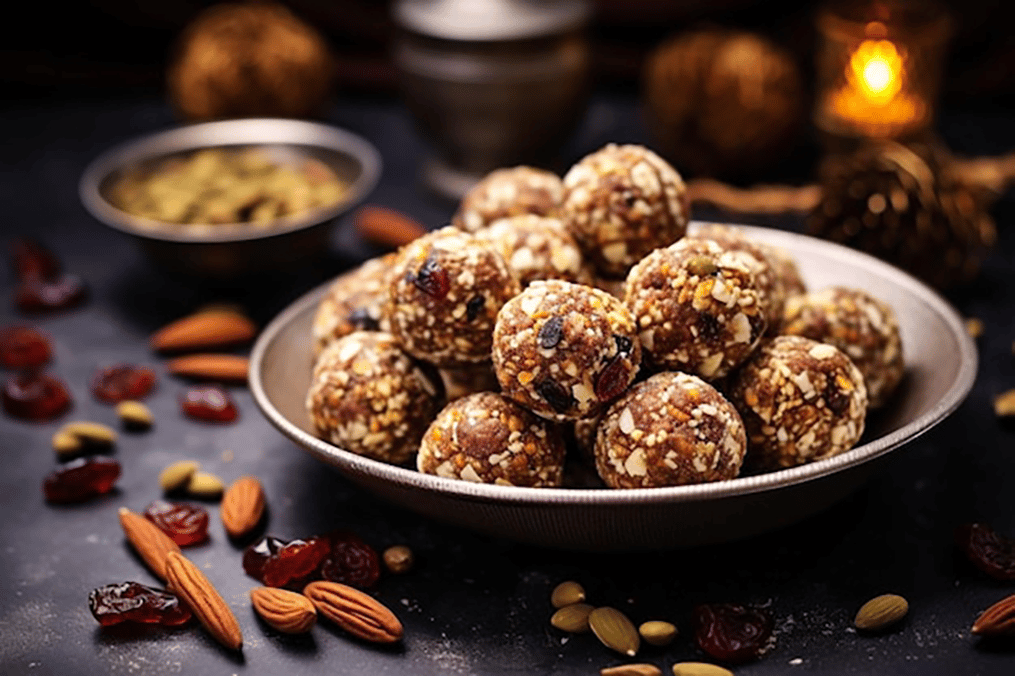
Coconut Ladoo – No-Fuss Sweet for Kids
About Coconut Ladoo
One of the most popular Diwali sweets recipes made at home is coconut ladoo. This is because it only takes ten minutes to cook, has three ingredients, and kids can shape it on their own. The end result is a soft, mildly sweet ball that tastes like coconut and is fun to chew.
Key Ingredients
- 200 grams / 2 cups desiccated coconut, plus extra for rolling
- 200 grams / ¾ cup sweetened condensed milk
- ½ teaspoon ground cardamom
- 1 teaspoon ghee for greasing hands
Flavor Combinations Table
| Base | Binder | Aroma | Rolling |
| Desiccated coconut | Sweetened condensed milk | Cardamom | Desiccated coconut |
How to Make (Steps)
Step 1 — Combine Coconut and Condensed Milk
Put the sweetened condensed milk and desiccated coconut in a heavy-bottomed pan on low heat. As soon as you add the condensed milk, stir it in so that it covers each coconut strand evenly from the start of the cooking process.
Step 2 — Cook Until Thickened
Stir the mixture constantly over low heat for five to seven minutes, or until it thickens, pulls away from the sides of the pan, and stays together when pressed. The mixture shouldn't be dry; it should look wet but hold together.
Step 3 — Add Cardamom
Take the pan off the heat and add the cardamom that has been ground. Stir the spice in well for 30 seconds to make sure it is evenly spread out before the mixture cools. Adding cardamom after the heat is off keeps more of its aromatic volatile oils than adding it while cooking.
Step 4 — Cool to Handling Temperature
Let it cool down to a temperature that you can handle. Let the mixture cool for five minutes so that you can handle it easily. It will get a little firmer during this time of cooling. If it looks too soft to shape right after cooking, the short cooling time fixes this without having to put it in the fridge.
Step 5 — Shape and Roll
Shape and Roll Grease your palms with a little ghee and shape one tablespoon of the mixture at a time into smooth, round balls. Press down hard to make the ladoo compact. For a clean, dry finish, roll each shaped ladoo in more desiccated coconut.
Tips & Tricks
Do Not Overcook the Mixture
When you heat the condensed milk, it quickly loses its water, and the coconut quickly absorbs it. If you cook the ladoos for even two minutes longer than the right time, they will be dry, crumbly, and hard to shape into smooth balls. When you take the mixture off the heat, it should still look a little shiny and wet. It firms up enough while it cools down, so it doesn't need any more cooking time.
Grease Hands with Ghee
When your hands are cold or dry, the coconut mixture sticks to them too much when you shape it, making the finished ladoos rough and uneven. A thin layer of ghee on the palms gives you the slip you need to shape things smoothly and cleanly. This is the shaping step that kids can help with best once the mixture has cooled down to a safe temperature for them to handle.
Use Desiccated Coconut for Convenience
Freshly grated coconut makes a ladoo that is a little softer and smells better, but it doesn't last as long and is best eaten the same day. Desiccated coconut is better for making ladoos ahead of time because it makes them firmer and keeps their shape at room temperature for three to four days. It is also always available, no matter what time of year it is.
Chocolate Barfi – Easy Fusion Dessert

About Chocolate Barfi
Chocolate barfi is a mix of the traditional Indian barfi format (a set, sliceable milk-based sweet) and cocoa powder. The texture is the same as regular barfi, but the flavor is very different. It doesn't need to be baked, sets at room temperature, and cuts into neat squares.
Key Ingredients
- 200 grams / 1⅔ cups full-fat milk powder
- 30 grams / 4 tablespoons natural unsweetened cocoa powder
- 200 grams / ¾ cup sweetened condensed milk
- 30 grams / 2 tablespoons ghee
Flavor Combinations Table
| Base | Flavor | Binder | Fat |
| Full-fat milk powder | Cocoa powder | Condensed milk | Ghee |
How to Make (Steps)
Step 1 — Heat Ghee
Put a heavy-bottomed pan on low heat and add the ghee. Before adding any other ingredients, let it melt all the way and cover the pan.
Step 2 — Add Milk Powder and Cocoa
Mix the cocoa powder and full-fat milk powder into the melted ghee. At this point, the mixture should look crumbly, which is normal. Keep stirring to mix the dry ingredients with the fat.
Step 3 — Add Condensed Milk
Pour the sweetened condensed milk over the dry, crumbly mixture and mix it all together well. When you first mix the ingredients together, they will look lumpy. Keep stirring over low heat, and the condensed milk will heat up and smooth out over time.
Step 4 — Cook Until Thick and Smooth
For eight to ten minutes, keep cooking and stirring until the mixture is completely smooth, thick, and pulls away cleanly from the sides of the pan. The final product should be thick and smooth, like fudge.
Step 5 — Set, Cut, and Serve
Move the mixture to a greased tray or baking dish lined with parchment paper. Use the back of a greased spoon to spread it out into an even layer about one centimeter thick. Let it sit at room temperature for 45 minutes to an hour, then use a sharp knife to cut it into squares.
Tips & Tricks
Stir Continuously for a Smooth Texture
If you don't pay attention to the mixture, the cocoa powder will tend to clump up on the pan's surface. To keep the cocoa powder from clumping up and to get the smooth texture that makes a good barfi, you need to stir it constantly from the time you add the condensed milk. Lumps that form while cooking don't go away on their own; you have to pay attention to them the whole time you're cooking to keep them from happening.
Grease the Tray Before Transferring
For easy removal after setting, the tray or parchment sheet must be well-greased or lined. If barfi is spread on an ungreased surface, it sticks and tears instead of coming off cleanly. Using a thin layer of ghee instead of butter to grease the squares keeps any leftover dairy flavor from getting on the surface of the finished squares.
Cool Completely Before Cutting
When you cut the barfi before it has fully set at room temperature, the edges of the pieces are dirty and compressed because the soft mixture smears under the knife instead of cutting cleanly. The firm, sliceable texture that lets a sharp knife make clean, defined square edges only comes after waiting the full 45 minutes to an hour.
Why These Sweets Are Perfect for Beginners
- You don't need any special tools; regular kitchen pans and spatulas will do.
- All three preparations take less than 15 minutes to cook.
- No temperature monitoring of the sugar syrup; the right consistency is determined by sight and touch.
- All three are safe for kids to help with the shaping steps.
- All three use common pantry items that you can find at any grocery store.
Tips for Making Diwali Sweets with Kids (New)
Choose Shaping Over Cooking Tasks
All three recipes call for constant stirring over heat during the cooking stages, which is not safe for children to do on their own. The shaping steps—rolling ladoos, pressing peda, and garnishing barfi—are safe, fun, and show results right away. Giving kids jobs to do after cooking lets them help out in a meaningful way without worrying about their safety.
Pre-Measure All Ingredients
It's easy to cook when all the ingredients are measured and set up before you start. This is because you have to stir all three preparations constantly, so you can't stop and measure while you're cooking. Before cooking, pre-measuring also lets kids see how much of each ingredient they need and how the recipe works in general.
Focus on the Process
It's okay that the shapes a child makes when learning to roll ladoos or press peda don't look like the professional, uniform shapes that an experienced person makes. The Diwali sweets at home are valuable for both learning and emotional reasons because you are involved in the process, not because they look perfect.
Frequently Asked Questions
What are the easiest Diwali sweets for beginners? 
Coconut ladoo is the easiest to make and needs the fewest ingredients of the three. It only takes five minutes of hand-stirring and hand-rolling. Chocolate peda and chocolate barfi both need a little more care while they are cooking, but a first-time sweet maker can still make them if they follow the directions carefully.
Can kids help in making Diwali sweets?
Yes, all three recipes have a shaping stage that is safe for kids to do once the mixture has cooled down enough to be handled. Chocolate barfi is the easiest for little kids to make because they don't have to touch the hot mixture with their hands. Coconut ladoo is the easiest for them to make.
Which Diwali sweet requires no baking?
Chocolate peda, coconut ladoo, and chocolate barfi are all made on the stovetop, so you don't need an oven. Coconut ladoo is the least hot of the three and is the closest to a no-cook dish.
How can I make Diwali sweets quickly at home?
Coconut ladoo cooks the fastest, taking only five to seven minutes. It takes eight to ten minutes to make chocolate barfi. Ten to twelve minutes are needed to make chocolate peda. You can make all three from start to finish, including cooling and shaping, in 30 minutes. This makes it easy to make Indian sweets recipes even on Diwali day.
Like This Article?
More Like This


Popular Articles


Trending Web Stories


Curated Recipes


