


4 mins
Mar 28, 2026
EN
हिं
Oreo Mousse Recipe – Easy 3-Ingredient Oreo Dessert in Minutes Recipe

Rishita Thalluri
A quick chocolate mousse combines minimal ingredients to produce a uniform dessert with a creamy texture, suitable for chilled serving at any gathering.
Difficulty:easy
Serves:2
Time:20 mins
Contains egg: No
Oreo Mousse is a fast and easy-to-make dessert that provides a creamy texture without having to work hard to create it. This eggless dessert can be prepared without any cooking, which makes it perfect for both planned events as well as last-minute cravings. The recipe only uses three ingredients, so it’s super simple with no complicated steps involved. Crushed Oreo cookies combined with the light cream create a deliciously rich dessert that will hold together once chilled. Th......Read More
Ingredients You Need
for Oreo Mousse
2
Servings
How To Make Oreo Mousse (Step-by-Step Guide)
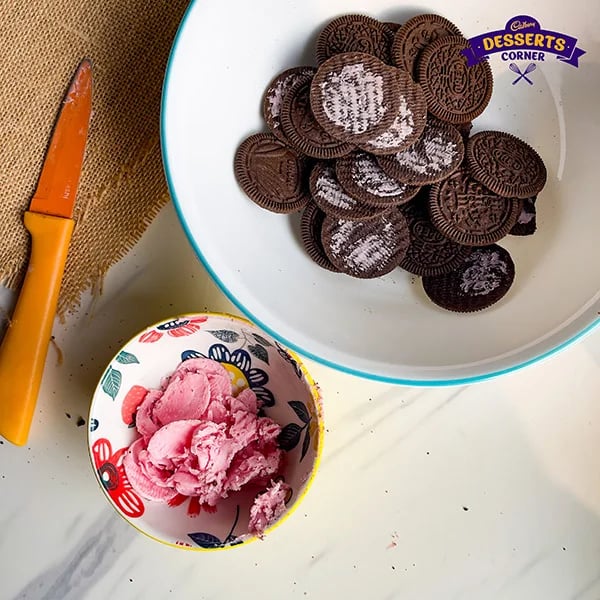
Step 1 — Separate the Oreo Cream and Cookies
Separate each Oreo cookie into two halves: one with cream filling and one without. Put the cream-filled halves in one bowl and the plain cookie halves in another. When you twist the biscuit, the cream filling should come off easily. You don't need to scrape it off if the biscuits are at room temperature. This is the most important step that sets apart a truly well-made Oreo mousse from one that just uses whole crushed biscuits. The cream filling, which is beaten separately into the whipped cream, spreads more evenly through the mousse than it would if it were mixed in with the whole-biscuit crumb.
Step 2 — Grind the Cookie Halves
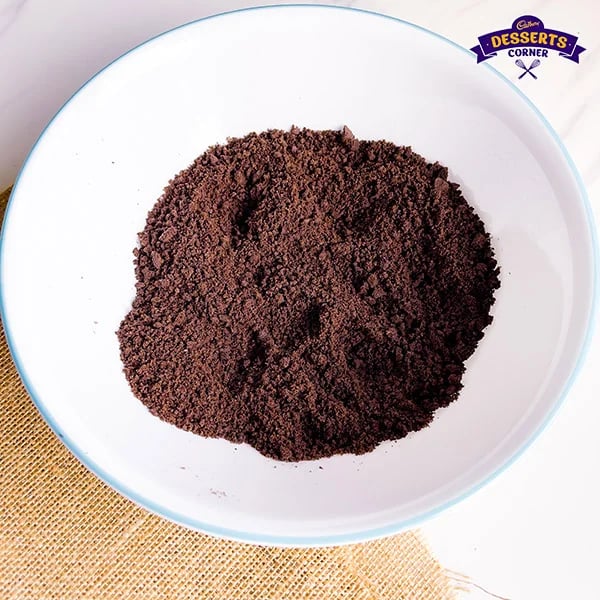
Put the plain cookie halves in a food processor and pulse them for about 20 seconds on the pulse setting until they are a fine, even crumb. You can also put them in a zip-lock bag and crush them with a rolling pin until there are no large pieces left. Set aside 2 tablespoons of the best crumbs for garnish on top, and reserve the rest to mix into the mousse base.

Step 3 — Whisk Oreo Cream and Sugar
Put the Oreo cream filling and powdered sugar in a bowl and mix them with a fork or small whisk until completely smooth and even. This should take about a minute of fast mixing. This step mixes sugar into the cream filling, making it softer so it can be added to the whipped cream without forming lumps. If you're using it, add the vanilla extract and a pinch of salt and mix for a short time to combine.

Step 4 — Add Heavy Cream and Whip
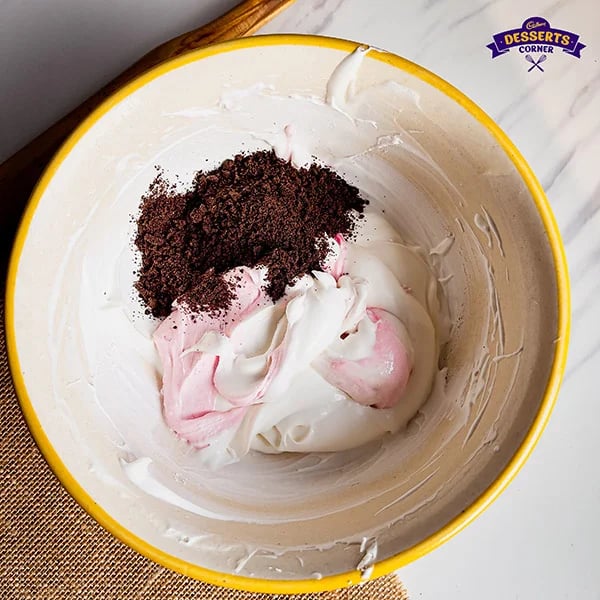
Pour the very cold heavy cream over the beaten Oreo cream mixture, then mix with a hand mixer on medium speed until soft peaks form. When you lift the beater, the cream should have a gently drooping tip instead of a firm, sharp one. Oreo mousse should have soft peaks. If the peaks are too stiff, the mousse will be too firm and lose the lightness that makes a good mousse recipe different from a heavy, dense filling. Stop whipping right away when the soft peak stage is reached and start folding.
Step 5 — Fold in Crumbs, Pipe, and Chill
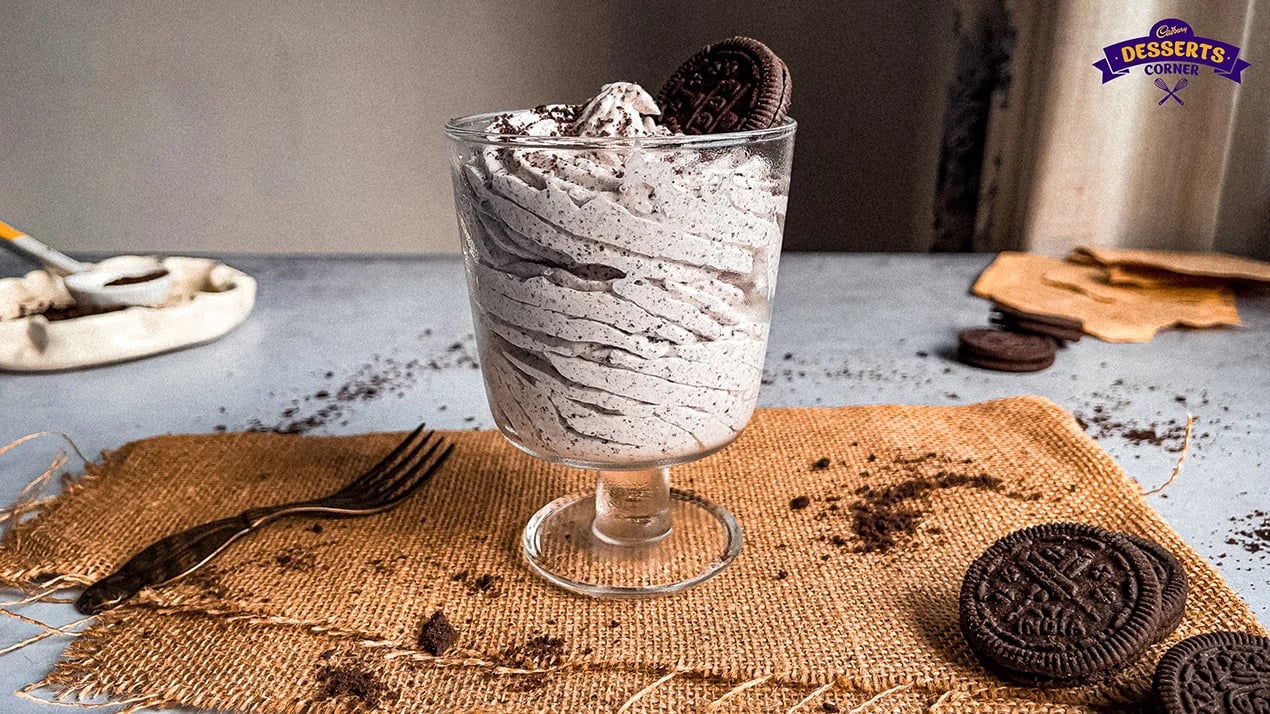
Use four or five wide, slow strokes to fold the reserved Oreo cookie crumbs into the soft-peaked cream mixture. The crumbs should be spread out through the mousse without losing the air that was added when it was whipped. Put the finished Oreo chocolate mousse into individual serving glasses with a spoon or a piping bag. Smooth or swirl the top, then chill for at least two hours before serving. Right before serving, sprinkle the reserved fine Oreo crumbs over each glass.
How To Get The Perfect Light And Creamy Mousse Texture
There are three things that need to be done at different times during the recipe to get the light, airy texture that sets a well-made Oreo mousse apart from a denser cream preparation. The right temperature for the cream is the most important thing. Cream that is really cold when you whip it (ideally at or below 4°C) holds the foam structure for longer and traps air better than cream that has been at room temperature. The second variable is the difference between soft peaks and over-whipping. The mousse is better off with soft peaks because they make the mousse light and airy, while stiff peaks make it denser and firmer. The third method is to gently fold the cookie crumbs into the whipped cream. This keeps the air structure of the whipped cream intact. If you stir quickly, the foam will deflate and the mousse will be denser and less pleasant.
Oreo Mousse vs Chocolate Mousse – What’s The Difference?
Oreo mousse and a classic chocolate mousse both have a light, whipped-cream texture, but they taste very different and are made in different ways. A ganache, which is melted chocolate mixed with cream, is the base for classic chocolate mousse. It gives the dessert a rich, cocoa-forward flavor and a denser, more structured set. Oreo mousse uses the Oreo cream filling instead of the ganache base. This gives it a cookies-and-cream flavor that is sweeter, less chocolatey, and noticeably lighter in texture than a traditional mousse recipe. The Oreo dessert format is also much faster because it doesn't need to melt chocolate, keep the temperature stable, or make ganache. This means that it can be made in a fraction of the time that a properly made chocolate mousse takes.
Why Chilled Equipment Matters When Making Mousse
The temperature of the tools used to whip the cream directly affects how stable and full the Oreo mousse is when it's done. A cold bowl and cold beaters keep the cream at the right temperature while it is being whipped. Warm metal surfaces slowly transfer heat to the cream as it is whipped, raising the temperature above the point at which fat globules can form stable foam. Putting the bowl and beaters in the freezer for 10 minutes before starting yields much more volume at the soft peak stage than starting with the equipment at room temperature. A mousse that is lighter per unit volume and more stable, that keeps its shape longer while it cools down without settling or collapsing, is made by keeping more air in the mixture while it is being whipped. This is a simple, free method that always results in a better mousse recipe.
Pro Tips For Perfect Oreo Chocolate Mousse Every Time
In order to get the right texture for your mousse, it is important to control the temperature and your technique. If you chill your mixing bowl and whisk before making your mousse, you will be able to whip the cream faster and more effectively.
You should also ensure that the cream remains cold while you make your mousse because if the temperature of the cream warms up, it won't be able to hold as much air.
Overmixing is the most common way to ruin your mousse. If you fold too much or stir too aggressively, you will deflate your mousse, and it will become dense.
If you bowl gently, you will maintain the lightness that gives mousse its signature taste. It is just as important to keep an eye on the whipped cream while you are whipping it. Once you reach soft peaks, you mustn't over-whip it. Make sure the cream is chilled, and not at room temperature.
Easy Variations Of Oreo Dessert You Can Try
There are many serving options available with this Oreo mousse. It can be layered in cups or jars for an Oreo-themed parfait. Layering with extra Oreo crumbs provides a contrast in visual (appearance) and textural (bite) qualities to the dish.
Forming a no-bake pie is also an option. The mousse can be used as a filling for an Oreo pre-made crust and placed into the crust when making the pie. Adding toppings such as chocolate ganache and/or whipped cream will bring an added richness to the Oreo Pie. Fresh fruit, such as strawberries, creates contrast in both texture and flavor to the pie.
For a plated dessert, the mousse can be piped into shapes or combined with other components, such as sponge crumbs or biscuit bases. The simplistic nature of the mousse's base recipe allows for a variety and flexibility in its finished presentation.
Creative Ways To Serve Oreo Mousse
Dessert Glasses
Putting the Oreo mousse in clear dessert glasses that show the smooth, pale mousse surface against the dark Oreo crumb on top makes a presentation that instantly shows what the dessert is all about. Tall, narrow glasses make the mousse look deeper and more formal than wide, shallow serving bowls. A whole Oreo cookie pressed into the top of the mousse at a slight angle serves as both a garnish and a way to tell what the flavor is.
Mini Jars
Putting the chocolate oreo mousse into small 150-milliliter mason jars makes single servings that are completely self-contained, don't need any serving utensils other than a spoon, and seal up for easy transport or storage in the fridge between service times. The jar format is especially useful for desserts at picnics or in packed lunches where serving glass desserts isn't practical. A small printed label on each jar that tells you what flavor it is adds a thoughtful, personal touch that makes it perfect for giving as a gift.
Piped Plated Dessert
Using a piping bag with a large star nozzle, pipe the partially chilled Oreo mousse onto a flat dessert plate in a rosette pattern. Then, sprinkle Oreo crumbs and a light dusting of cocoa powder around the base of the rosette. This makes a plated dessert that is appropriate for a formal dinner. The visible ridges and peaks of the piped rosette shape show how light and fluffy the mousse is. The mousse should only be chilled for 30 minutes for this presentation to work best. If it has been fully set, it won't pipe cleanly.
Layered Party Cups
To make a three-layer party format that works well for big groups, put the mousse recipe in small clear party cups with a bottom layer of Oreo crumbs, a middle layer of mousse, and a top layer of crushed crumbs and one Oreo half. It only takes a little bit longer to prepare to make 20 cups than it does to make four individual glasses. The clear cup shape lets each guest see the layers clearly before they eat.
Common Mistakes To Avoid While Making Mousse
Over-Whipping Cream
If you whip cream too much, the fat structure of the cream changes into butter over time, and the cream turns into a grainy, separated mass that can't be folded into the Oreo cream mixture without making lumps. It only takes 20 to 30 seconds to go from soft to stiff peaks at high speed. Most of the time, you can stop processing when the tip starts to droop every 15 seconds during the last stage. If you whip cream too much, the mousse will be denser than if you do it right, and there is no way to fix it.
Warm Ingredients
Using cream that has warmed to room temperature or a bowl that keeps heat from previous use stops the cream from reaching stable soft peaks while whipping. This makes a mousse that falls apart while it is in the fridge instead of setting to the right airy texture. Before you start whipping, all of the cream parts should be cold from the fridge. The Oreo cream filling can be at room temperature, but the whipping cream needs to be cold.
Too Many Oreo Crumbs
If you add all of the crumbs to the mousse base instead of saving some for the garnish, the mousse will be dense and heavy with biscuits, which will make it lose the light, airy quality that makes a properly made chocolate mousse different from a biscuit-based dessert. The crumbs that are mixed into the base should only be enough to give the cream the Oreo flavor. About three tablespoons of crumbs per 250 milliliters of cream should do the trick. The rest of the crumbs work better as a visual and textural surface element.
Aggressive Folding
Using a circular stirring motion instead of a folding motion to mix the Oreo crumbs into the whipped cream breaks down the foam structure instead of going around it, slowly letting out the air that makes the mousse light. The right way to fold the crumbs into the foam without breaking it up is to make a wide, slow arc from the bottom of the bowl to the top. It's better to accept a little unevenness in the way the crumbs are spread out than to have to fold them more times to get them all the same.
How To Store And Freeze Oreo Mousse
To preserve its freshness, the mousse should be stored in an airtight container in the refrigerator, where it will maintain its quality for 3-4 days. Keeping the lid on the container prevents the mousse from soaking up other odors and keeps the texture of the mousse intact.
If the mousse needs to be kept longer, it can be frozen for up to 1 month. When frozen, the mousse will become firmer and have an ice cream consistency. You can either allow the mousse to defrost in the refrigerator prior to serving or eat the mousse while frozen, which creates a completely different texture.
FAQs About Oreo Mousse
Can I make Oreo mousse without heavy cream? 
The best dairy-free replacement for heavy cream in this Oreo mousse recipe is full-fat coconut cream that has been chilled overnight and whipped until soft peaks form. It gives the same light texture and a hint of coconut flavor that doesn't really compete with the Oreo flavor.
Is Oreo mousse the same as chocolate mousse?
No, Oreo mousse has a cookies-and-cream flavor because it uses the Oreo cream filling as its base. A classic chocolate mousse, on the other hand, has a richer, more cocoa-forward flavor because it uses a ganache base. The Oreo chocolate mousse format is also much faster to make because you don't have to melt the chocolate or keep an eye on the temperature.
Can I use other cookies instead of Oreos?
Yes, any chocolate cream biscuit will work for this recipe. The Oreo cream filling, on the other hand, gives this dessert its unique flavor. Generic biscuits don't have as strong of a flavor or as specific of a result. Oreo cookies are the best choice for the most authentic cookies-and-cream flavor.
How long does Oreo mousse last in the fridge?
Mousse oreo preparations stay fresh for up to two days if you store them in an airtight container in the fridge with plastic wrap on top. After two days, the cream structure loses its airy lightness, and the Oreo crumb garnish gets completely wet from the mousse base.
Can I freeze Oreo mousse?
Yes, for up to two weeks in a container that is airtight. When you thaw it, the texture is denser than when it was in the fridge because ice crystals form inside the whipped cream structure. Put it in the fridge for two hours to thaw, then sprinkle fresh Oreo crumbs on top right before serving to bring back the textural difference.
Like This Recipe?

Thank you for rating the recipe!
Recipe by Categories
Popular Articles

7 Stunning Black Forest Cake Design Ideas From ...

7 Creative Car Theme Cake Designs For Birthdays ...
4 mins
Mar 27, 2026

Active Vs. Instant Yeast: Which Is Best For Your ...
3 mins
Mar 30, 2026

15 Sri Lankan Sweets That Reflect Island Culinary ...
5 mins
Mar 29, 2026

15 Famous Turkish Sweet Classics That Define The ...
4 mins
Mar 31, 2026
Recommended Recipes


