


Here’s a detailed guide to make a simple and uncomplicated chocolate icebox cake that requires no baking and calls for only 4 ingredients.
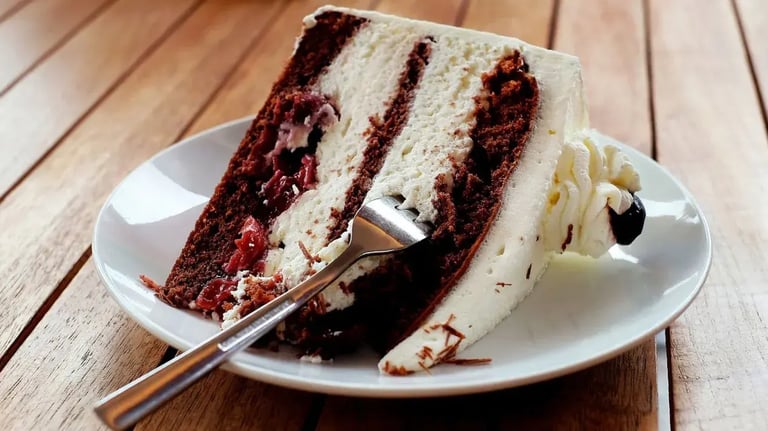
When you're craving a show-stopping dessert that takes minimal effort, nothing beats a chocolate icebox cake. This no-bake wonder is rich, creamy, and delightfully nostalgic. And the best part is that you only need four simple ingredients to pull it off. No oven, no fancy techniques, just layers of goodness and a little chill time in the fridge. So here’s how to make your own 4 ingredient chocolate icebox cake at home.
Ingredients:
- 2 cups heavy whipping cream
- 2 tablespoons powdered sugar (or to taste)
- 1 teaspoon vanilla extract
- 1 pack (200 g) chocolate graham crackers or any thin chocolate wafer cookies
- Optional garnish ideas:
- shaved chocolate
- cocoa powder
- chocolate chips
- crushed cookies
Method:
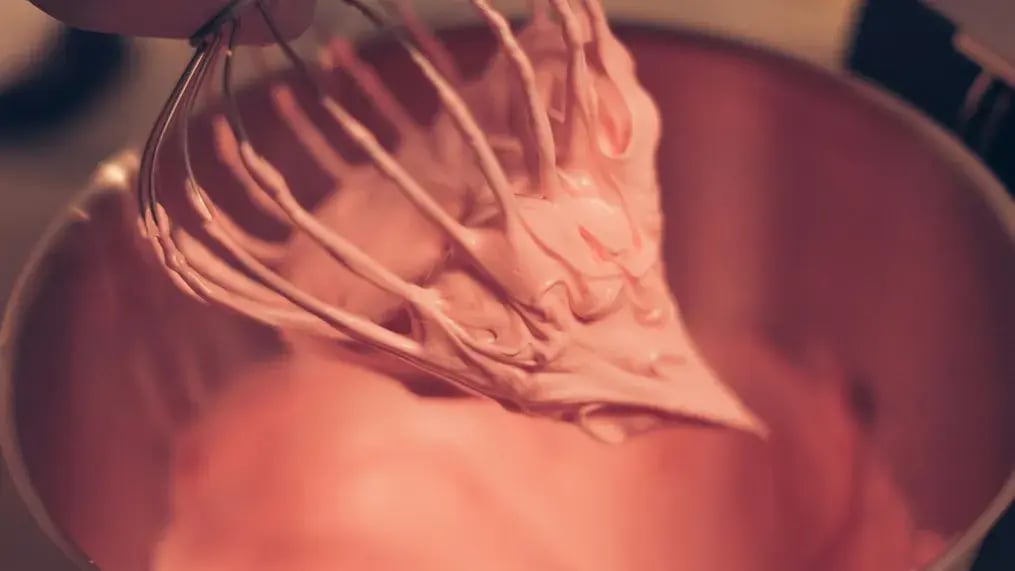
- In a large mixing bowl, pour in the heavy whipping cream, powdered sugar, and vanilla extract. Using an electric mixer, whip the mixture on medium to high speed until stiff peaks form. This takes about 5 minutes. You want the cream to be thick enough to hold its shape but not overwhipped into butter. Taste and adjust sweetness, if needed. Chill your mixing bowl and beaters for 10 minutes before whipping because cold tools equal better whipped cream.
- Choose a loaf pan, square dish, or even a deep plate, anything that allows for easy layering. You can line your pan with parchment paper for easier removal later, but it’s not necessary if you're planning to scoop and serve.
- Start by spreading a thin layer of whipped cream at the bottom of the dish, as this helps anchor the first cookie layer.
- Layer the chocolate graham crackers or wafers side by side to cover the whipped cream. Break a few if needed to make them fit neatly. Then, spread about ½ to ¾ cup of whipped cream over the cookies, smoothing it out with a spatula.

- Repeat the layering of cookies, whipped cream, more cookies and so on, until you run out of ingredients. End with a final layer of whipped cream on top. You should get about 3 to 4 layers, depending on the size of your pan.
- Once the cake is assembled, cover it tightly with plastic wrap or foil and place it in the refrigerator for at least 6 hours, preferably overnight. During this time, the cookies will soak up moisture from the cream and soften into cake-like layers. That’s the magic of an icebox cake.
- After chilling, remove the cake from the fridge and add any toppings you like, like a light dusting of cocoa powder, curls of dark chocolate, a handful of chocolate chips, or crushed cookies.

- To slice neatly, use a sharp knife dipped in hot water and wiped dry between cuts.
- Serve cold and enjoy every creamy, chocolatey bite.
- If you want to get creative, try turning this cake into individual servings using mason jars or small glasses. Just layer crushed cookies and whipped cream in each jar and refrigerate as usual, and they are perfect for parties, picnics, or portion control.
- The cake is ideal for prep, and it actually gets better the longer it chills. You can make it up to 2 days in advance. Keep leftovers tightly covered in the fridge for up to 4 days. The cake may soften more over time, but the flavor stays amazing. For a firmer texture, almost like ice cream cake, freeze the whole cake for 2 hours before slicing. You can also store slices in the freezer individually wrapped for up to a month.
Notes:
- For the cookies, you can use chocolate wafers, chocolate graham crackers or even Marie biscuits. Thinner cookies soften better.
- Powdered sugar gives you more control and blends smoothly into the cream, but you can also use maple syrup or honey.

- In a pinch, store bought whipped topping can be used. It won’t be as rich as a freshly whipped cream, but it holds up well.
- You can also experiment with flavors. Options include:
- Fresh berries between layers, especially strawberries or raspberries
- A drizzle of melted chocolate or ganache on top
- A thin layer of peanut butter under the cookies
- Crushed peppermint candy or toffee bits for crunch
- You can swap vanilla extract with almond or coffee extract for a subtle twist in flavor.
- For a slightly tangy version, fold a few spoonfuls of cream cheese or Greek yogurt into the whipped cream.
Like This Article?
More Like This

No Bake Sweet Treats to Enjoy Alongside a Cup of Coffee
5 mins
Jun 29, 2024

The Art of Pastry Decoration: 8 Easy Techniques and Beautiful Recipes
4 mins
Jun 29, 2024

Effortless Independence Day Treats: Quick No-Bake Tricolor Dessert Ideas
3 mins
Jul 6, 2026

7 Clever No-Bake Dark Chocolate Dessert Ideas For Stress-Free Winter Celebration
5 mins
Feb 18, 2026
Popular Articles

Holy Fasting Treats: A Comprehensive Sawan Vrat Sweet Recipes List
4 mins
Jun 23, 2026

Divine Devotion: Auspicious Shravan Month Sweet Offerings to Lord Shiva
4 mins
Jun 22, 2026


Trending Web Stories


Curated Recipes

Easiest Cocoa Meringue
1:10 hoursmedium

Chocolate Oreo Poke Cake
4:55 hourseasy

Oreo Mango Icecream Cake
6:30 hourseasy

Bournville Hot Cocoa Bomb
41 minsmedium

No-Fuss Banana Dairy Milk Chocolate Cake
1:10 hourseasy