


Celebrate Guru Purnima with a balanced, neat kaju katli recipe. Learn how to make it right and slice those iconic diamond cuts with ease.
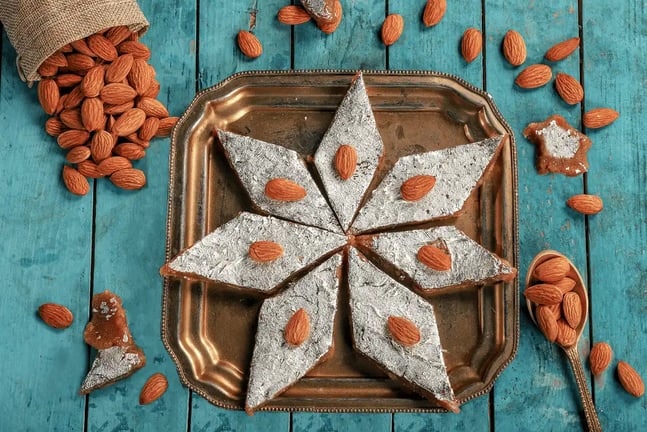
That classic diamond, shining with silver leaf or without, delicate yet firm to grasp—there's something earthy about it. For many households, it's not merely sweet—it's a sign of respect, of gifting, of celebrations that whisper softly. One such day is Guru Purnima, where the offering is as important as the feeling behind it.
Cashew sweets have been a staple of Indian festivals for ages, but kaju katli holds a special position. Perhaps it's the richness of ground cashew, or the way it gets ready with few ingredients. And yet, it's not as simple as it seems—particularly when you want it to set in shape and slice just so. Let’s admit that a wonky katli or a crumbling corner of katli is a bit too close for comfort for anyone who's ever attempted making it at home.
That's why this time, on Guru Purnima on 10th July, take the first step towards precision. Not rigidity, but balance—a process that honors the elegance of this mithai and lands you that crisp, clean diamond cut. From the perfect blend to the last slice, here's a well-thought kaju katli recipe that ensures you get it just perfect.
Kaju Katli Recipe
Ingredients:
- 1 cup unsalted cashew nuts
- ½ cup sugar
- ¼ cup water
- 1 tsp ghee (optional, for greasing)
- Silver varak (optional)
Method:
- Grind the cashews in short pulses to a fine powder—be sure not to over-blend, or you’ll get oily bits.
- In a wide non-stick pan, mix the sugar and water and let it come to a boil.
- Lower the flame and simmer till the syrup reaches a one-string consistency.
- Now add the cashew powder in small batches and stir continuously on low heat.
- The mix will start to come together—firm yet pliable.
- As soon as the mixture begins to release from the pan walls, remove the heat and allow it to cool just to work with.
- Knead the warm mixture lightly on a greased surface, and roll it out using a greased rolling pin to approximately ¼ inch thickness.
- Add varak if desired. After cooling, cut diagonals to achieve those lovely diamonds.
Grinding Cashews
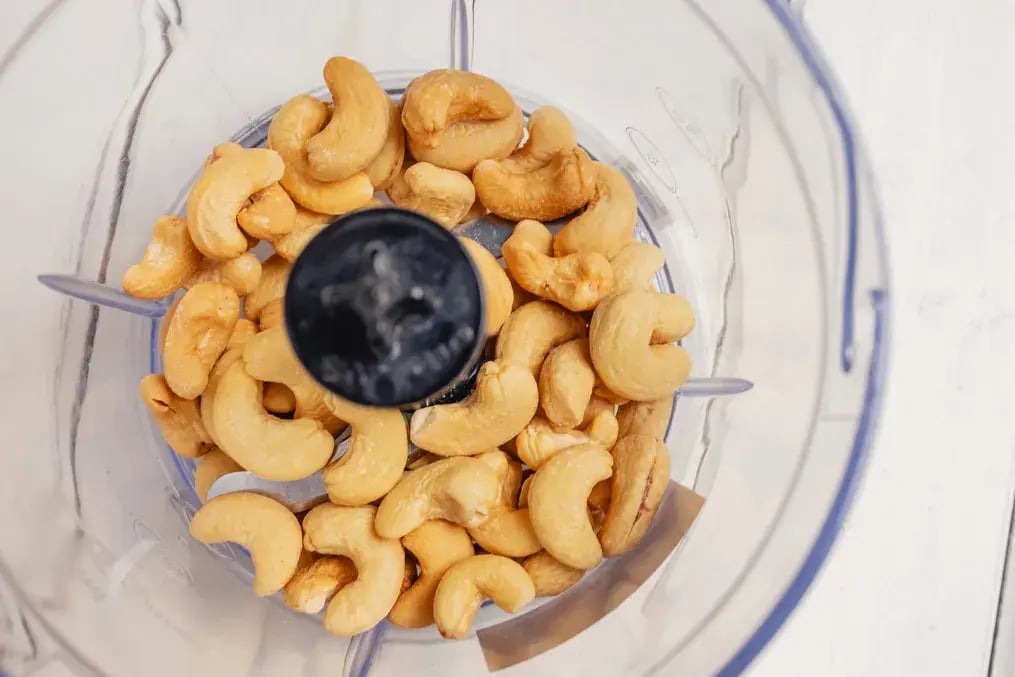
The initial point of accuracy starts with grinding your cashews. Home cooks will over-process most of the time, making the nuts oily and greasing up the dough. The trick is pulsing the cashews in brief spurts. This maintains the powder soft and dry. Sift the powder after it is ground to eliminate any coarse particles that will disrupt the smoothness. If necessary, grind the coarse particles again separately—never together. This technique provides you with a uniform foundation for the kaju katli recipe and makes the final dough more manageable. It also avoids oiliness that can impact the neatness of cuts later.
Achieving the Perfect Sugar Syrup
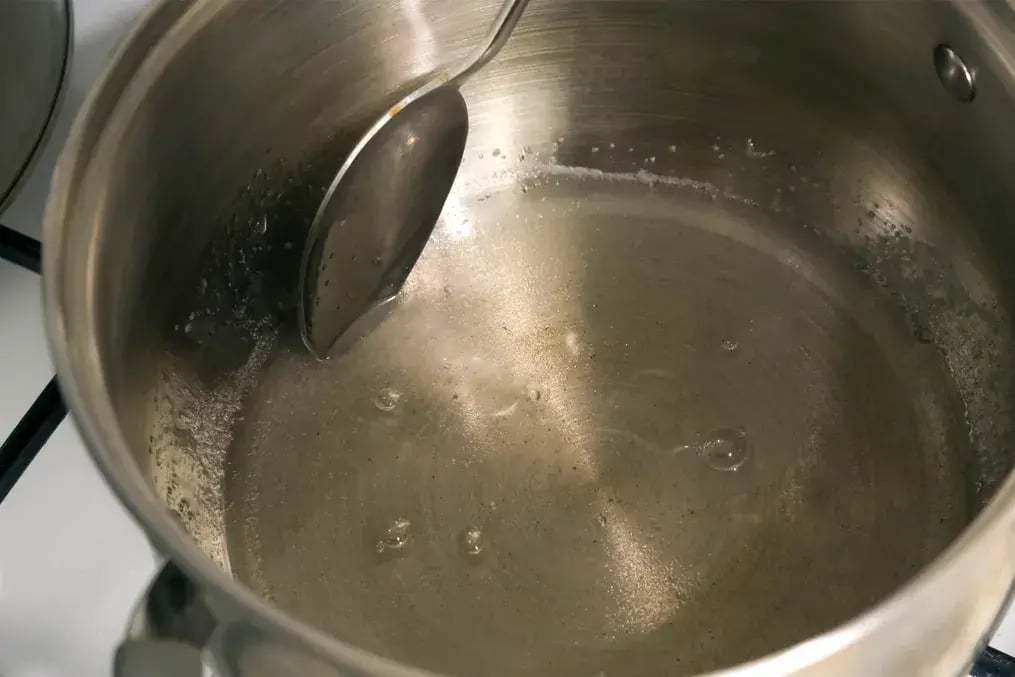
This is where the balance of the recipe resides. A syrup that’s too thin will make the mixture soft and sticky, while one that’s overcooked will lead to a crumbly dough. You’re looking for the single-thread consistency—when a drop of syrup between your fingers stretches into one steady thread. It takes just a few minutes once the sugar dissolves, so keep your flame low and fingers ready. This process might take one or two attempts, but the moment you acquire the timing, it changes your whole kaju katli recipe result. Introduce the cashew powder only after this phase is completed. Undercooked or overcooked syrup is one of the major reasons why most people end up with katlis that won't retain their shape.
Stirring with Patience
After adding cashew powder, the stirring must be gentle and regular. Some try heating faster or speed up the process to speed up the thickening of the mixture. But high-heat fast stirring leads to uneven cooking and the mixture typically turning out grainy. Use a flat silicone spatula and stir slowly in circular motions, making sure there are no lumps. Scrape the sides frequently. This patience is what brings the mix to a dough-like consistency, which is essential for making neat cuts later. Your stirring determines not just consistency, but how evenly the dough sets.
Knowing When to Turn Off the Heat
This step is about intuition as much as it is about sight. You’ll know the mixture is ready when it leaves the sides of the pan and gathers slightly toward the center. It cannot be too runny or too firm. One trick is to pinch out a little bit and attempt to roll it between your fingers—you should find it like a soft ball and should not stick. Switch off the heat just at this point. If left too long, it hardens too quickly on kneading; if too soon, it remains too soft to cut cleanly. This ideal moment of transition is the secret to a neat kaju katli recipe.
Kneading When It's Warm
Allow the mixture to cool just long enough to touch—around two to three minutes after taking it off the heat. Grease your hands lightly with ghee and knead it into a soft, flexible dough. If it cracks or shatters while kneading, add a few drops of warm milk or water and gently go on. The kneading smooths out any graininess and makes the final katli even.
Rolling Evenly for Uniform Cuts
Roll on a greased surface or between two parchment sheets to avoid uneven rolling. Roll with even pressure—not too thin, not too thick. About ¼ inch is perfect. Uneven rolling renders diamond cuts irregular and inconsistent in shape, particularly at the edges. You can even have small rolling pin guides (or steel rulers) on both sides for exact height. Don't hurry through this step—tidiness begins with uniformity here. After rolling, leave it to rest for a few minutes to harden before you cut it.
The Steady Hand Diagonal Cut
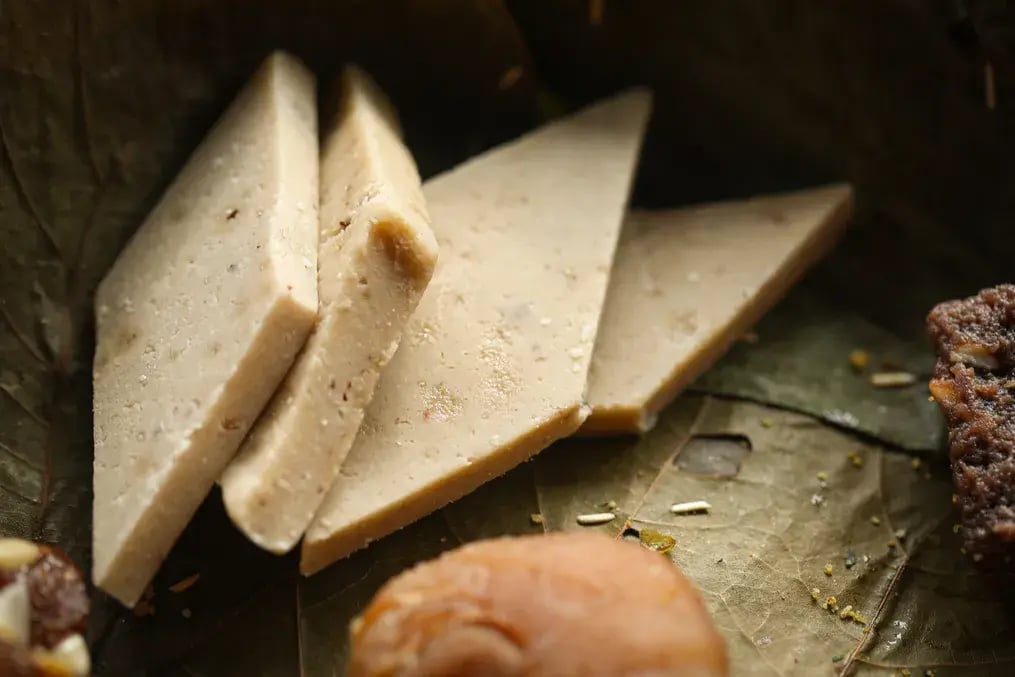
This is where most home chefs mess up—the last cuts. Use a sharp blade or a pastry cutter with a narrow edge. First, draw straight parallel lines on the sheet, then flip the sheet and cut diagonally to create diamond shapes. Scrape the blade after two or three cuts to prevent drag. You may also guide your lines with a ruler if you're fussy about symmetry. Don't press hard—soft glides give clean edges. If the dough has rested and been rolled well, you'll find each diamond come off neatly—retaining shape, retaining flavor, and retaining the love that you've put into this Guru Purnima sweet.
Like This Article?
More Like This


Popular Articles


Trending Web Stories


Curated Recipes


