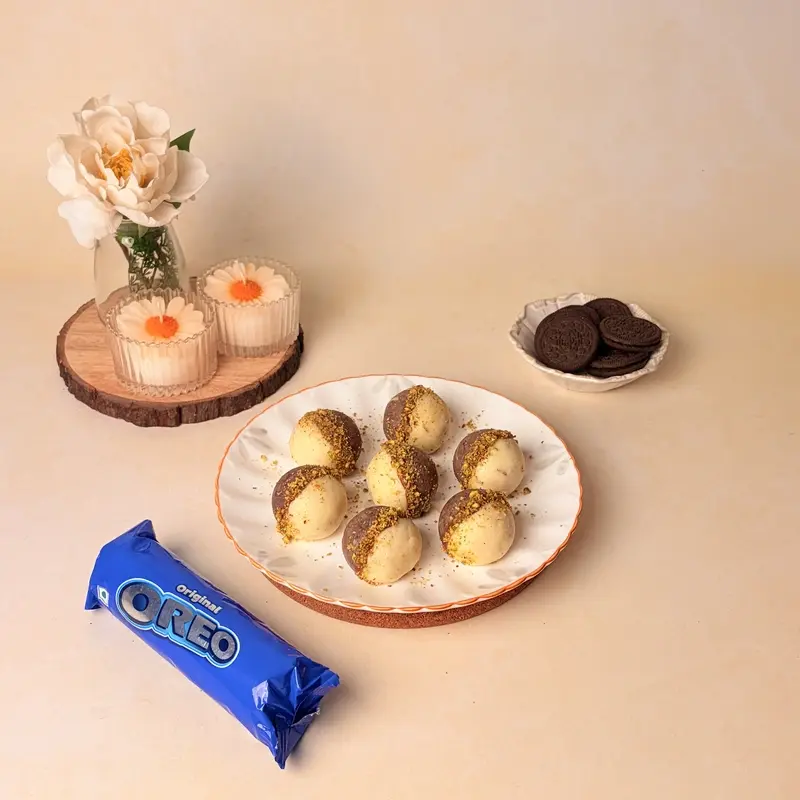






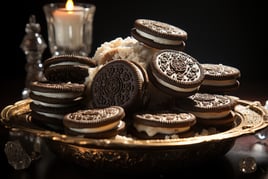





Make Oreo chocolate truffle balls with just three ingredients for an easy homemade treat. These 3 ingredient Oreo truffles are perfect for gifting or parties.

Introduction
Sometimes the best gifts come from the simplest of recipes, and these 3-Ingredient Oreo Chocolate Truffle Balls are the perfect example. This no-bake treat takes less than thirty minutes of hands-on time and only uses Oreo cookies, cream cheese, and a chocolate coating, yet looks and tastes like something much more involved.
Regular Oreos work best for this recipe, not Double Stuf or flavored Oreos, as the cream filling ratio in a regular Oreo is already balanced with the amount of cream cheese used here. These truffles are rolled chilled and dipped in melted chocolate to create a smooth, shiny shell around a rich, fudgy center that holds up well for gifting. Whether wrapped in a plain box for a holiday exchange or dressed up with a few flavor variations for a birthday, the simplicity of this recipe makes it easy to scale up for a crowd without sacrificing the polished, homemade look that makes truffles such a popular gift.

Ingredients:
- 1 pack (around 36 cookies) Oreo biscuits
- 1 block (225 g) cream cheese, softened. Full-fat cream cheese works best for a rich, creamy texture
- 200 g semi-sweet or dark chocolate for coating. You can also use milk chocolate if you prefer a sweeter truffle
Optional garnish ideas:
- White chocolate drizzle
- Crushed Oreos
- Sea salt
- Sprinkles
- Edible glitter
- Chopped nuts
Method:
-
Start by placing all the Oreo cookies in a food processor. Blitz until they turn into fine crumbs. The filling will blend in with the cookies and help bind the mixture, so no need to scrape it off. Or put the Oreos in a ziplock bag and crush them with a rolling pin until you get a sand-like.
-
In a large mixing bowl, combine the Oreo crumbs and softened cream cheese. Use a spatula, wooden spoon, or clean hands to mix until you have a thick, uniform dough. The mixture should hold together easily when you roll it between your palms. If the mixture feels too sticky to shape, chill it in the refrigerator for 15 minutes to firm up slightly.
-
Scoop out small portions of the Oreo mixture using a tablespoon or small cookie scoop. Roll them into smooth balls and place them on a baking sheet or plate lined with parchment paper. You should get around 24 truffle balls from one batch.
-
Once done, chill the balls in the freezer for 20 minutes. This helps them firm up and makes them easier to coat in chocolate.
-
While the balls are chilling, melt the chocolate. You can use a microwave or a double boiler. Break the chocolate into pieces and microwave in a heat safe bowl in 20-second intervals, stirring between each until fully melted and smooth. Or place the chocolate in a heatproof bowl set over a saucepan of simmering water, and make sure the bowl doesn’t touch the water. Stir gently until melted. Let the melted chocolate cool slightly so it’s still runny but not too hot. This helps coat the truffle balls more evenly.
-
Using a fork or toothpick, dip each chilled Oreo truffle ball into the melted chocolate. Let the excess drip off before placing it back on the parchment lined tray. If you want to add a garnish, sprinkle it on right away before the chocolate sets. Repeat until all the truffles are coated. If the chocolate begins to harden before you finish, just warm it up again briefly.
-
Place the tray of coated truffles in the fridge for at least 30 minutes, or until the chocolate is firm to the touch. Once set, they’re ready to be packaged or eaten.
-
These Oreo chocolate truffle balls make beautiful homemade gifts. To dress them up, use mini cupcake liners to keep each truffle separate and neat. Pack in small treat boxes or jars tied with ribbon. Add handwritten gift tags for a personal touch.
-
Store in the fridge in an airtight container for up to a week. If gifting, include a note that they’re best enjoyed chilled.
-
Using the food processor to crush the Oreos will give you a finer, more even crumb than using a rolling pin, and the finer crumb will generally yield a smoother, easier-to-roll truffle with fewer visible chunks in the final ball.
Gifting and Packaging
Since these truffles need to be kept in the refrigerator to maintain their firmness, it’s helpful to place a small printed or handwritten card with storage instructions in the gift box. Someone might not realize just by looking at the treats that they need to be chilled and not left on a counter.
Storage
Store in the refrigerator for daily use:
- Place the finished Oreo truffles in an airtight container in the refrigerator to keep them fresh and maintain their texture. Chilling will also keep the chocolate coating firm when served, and the creamy center will remain pleasantly soft.
Freezing for longer storage:
- These truffles can be kept in a well-sealed, airtight container in the freezer for up to 1 month. This means they’re handy if you want to make treats ahead of a birthday, celebration, or gifting occasion.
Thaw them out properly:
- If you want to serve frozen truffles, just take the container from the freezer and put it in the refrigerator to let them slowly thaw when you are ready to serve. Do not leave them at room temperature too long, as the cream cheese filling and the chocolate coating can become softer.
Protect the coating:
- Store the truffles in a single layer or in layers separated by parchment paper so that they don’t stick together. This also helps to keep the chocolate coating free of cracks, marks, or damage during the storage of the truffles.
A convenient make-ahead treat:
- Freezing allows you to make Oreo truffles well in advance, making last-minute gifting a breeze. Simply defrost the amount you need in the fridge before serving, and transfer to a fresh gift box or serving platter.
Flavor Variations
For a fun birthday cake version, make classic Oreo truffles into a colorful treat with a festive twist. After you’ve combined the Oreo crumbs and cream cheese, add in the rainbow sprinkles and mix. Shape the mixture into small, even balls. Don’t overmix, or the sprinkles will bleed their color into the filling. Once the truffles have been rolled and chilled, dip each one in melted chocolate and allow the coating to harden completely. Top off with a few more rainbow sprinkles while the chocolate is still a little soft. These truffles' colorful finish makes them particularly suitable for birthday parties, dessert tables, or homemade gift boxes.
Want a red velvet version? Swap out the Oreos for red velvet ones for a more decadent treat. Make the filling by mixing crushed cookies with cream cheese, as for the truffles. Form the truffles and chill. Dip the chilled balls into melted chocolate and let the coating set. For an extra red velvet ‘frosting’ touch, drizzle the finished coating with white chocolate. This variation is perfect for celebrations and special occasions, with the contrasting white drizzle providing a polished finish and emphasizing the red velvet-inspired center.
Frequently Asked Questions
Can I use Double Stuf Oreos instead of regular for this recipe? 
Double Stuff is not recommended, as the extra cream filling throws off the balance of cream cheese and creates a softer mix that is more difficult to roll.
Can Oreo truffle balls be frozen for later?
Yes, these truffles do freeze well for up to a month in an airtight container, and you can thaw them in the refrigerator before serving.
What's the best way to keep the chocolate coating from cracking?
Allowing the truffles to reach a uniform temperature before dipping, and preventing the temperature from fluctuating too much during chilling, helps the coating stay on.
Can I make these without a food processor?
Yes, sealed up in a bag and whacked with a rolling pin will work as an alternative, but the crumb will be a little coarser than if you used a food processor.
Like This Article?
More Like This



Popular Articles


Trending Web Stories


Curated Recipes