






4 mins
Aug 6, 2026
EN
हिं
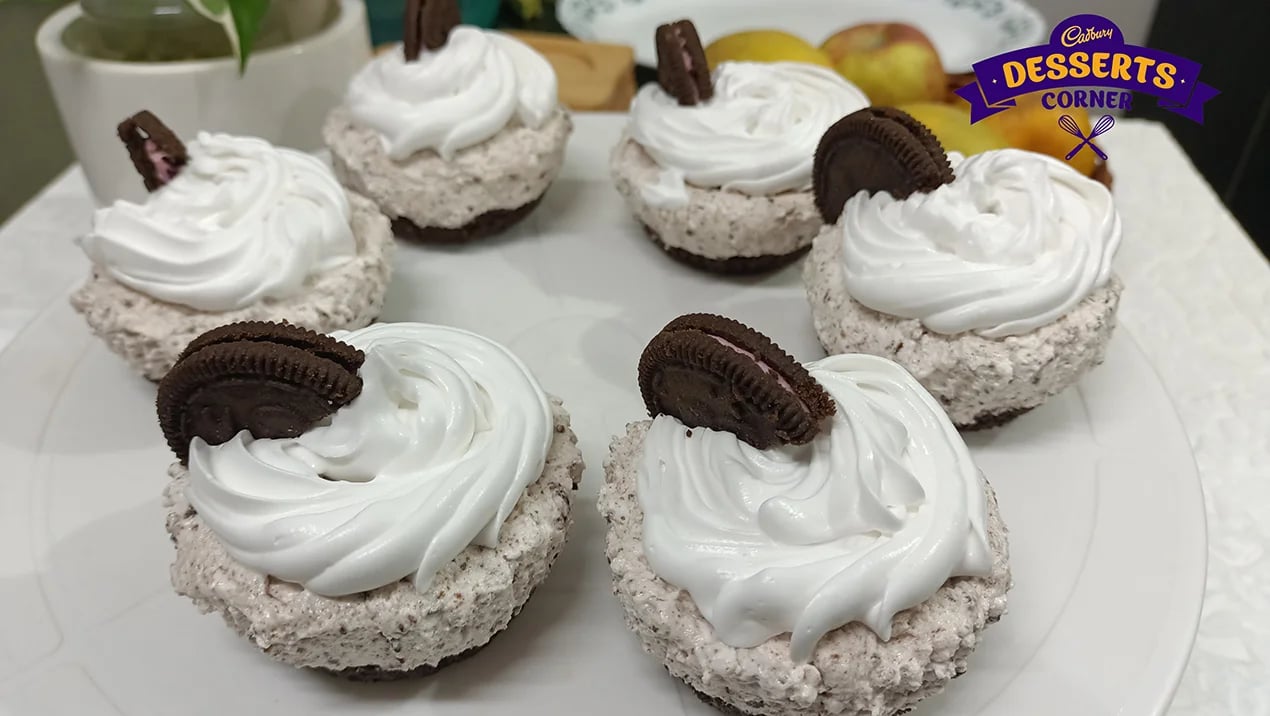
Strawberry Oreo Cheesecake (No-Bake Creamy Dessert with Oreo Crust) Recipe
 Amelia Lalngaihawmi

Amelia Lalngaihawmi
 Published: Dec 20, 2023
Last Updated Date:May 26, 2026
Published: Dec 20, 2023
Last Updated Date:May 26, 2026


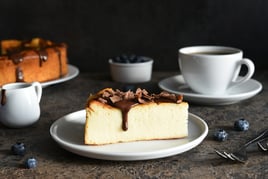
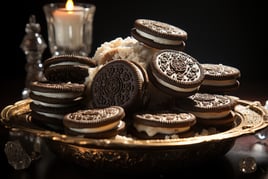
A layered dessert, strawberry Oreo cheesecake combines a firm base with a smooth filling, creating a stable structure suitable for chilled serving without baking.

Difficulty:medium

Serves:6

Time:45 mins

Contains egg: No
Cheesecakes come in different shapes, sizes, and flavors, each as exciting as the other. We can all agree that every version of cheesecake is equally delicious. There are no-bake, baked, and steamed versions (made in a bain marie) of cheesecakes that you can either make at home or find at your closest bakery. Some recipes demand time, while others take just 10 to 15 minutes to assemble.
No-bake cheesecakes usually have a classic cracker crust blended with butter that perfectly compleme......Read More
Ingredients That Make
This Cheesecake
Set Perfectly
6
Servings
For the Recipe
- Strawberry-flavored Oreo Cookies – 2 Big packets of 131 gms
- Melted Butter (Unsalted) – 29 ml
- Cream Cheese – 105 ml
- Whipping cream (half thawed in the refrigerator) – 197 ml
Step-by-Step: How To Make Strawberry Oreo Cheesecake
Making The Oreo Cookie Base
Put the Oreo cookies in a food processor and pulse them until they are a fine, even crumb. There shouldn't be any big pieces left.
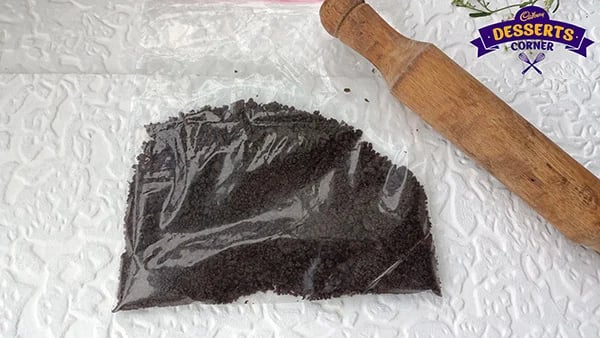
Put the mixture in a bowl, add the melted butter, and mix until every crumb is evenly coated and the mixture sticks together when you press it. Using the flat bottom of a glass, press the crumb mixture firmly and evenly into the bottom of a lined springform tin. To make a solid, cohesive base instead of a loose, crumbly one, apply steady, firm pressure. Put the pressed base in the fridge for 20 minutes to harden before adding the filling.
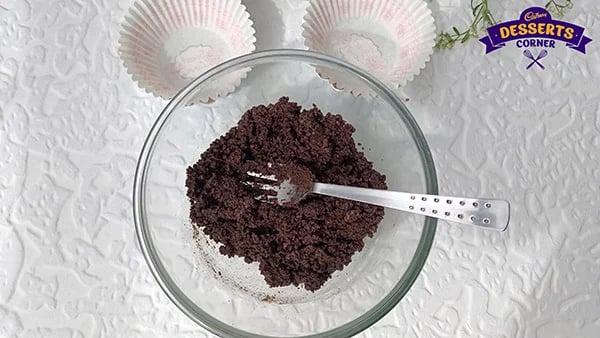
Preparing The Creamy Cheesecake Filling
Use a hand mixer on medium speed to mix the cream cheese and powdered sugar together until they are completely smooth, pale, and free of lumps.
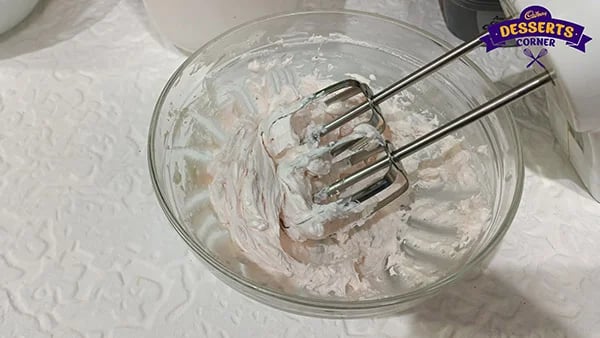
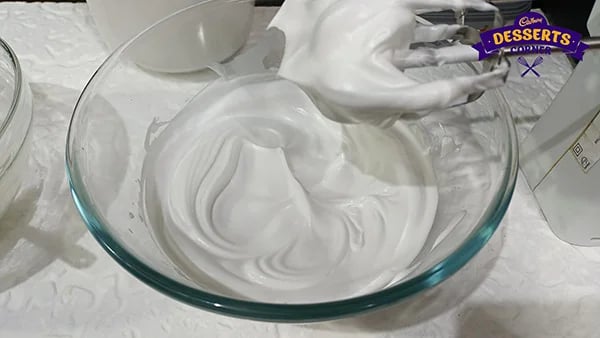
This should take about two to three minutes. Whip the cold heavy cream in a different bowl until it forms stiff peaks. Then, in two parts, gently fold the whipped cream into the cream cheese base, instead of stirring. The filling should be thick and light, leaving a clean impression when you press a spoon against it. If it looks runny, the cream wasn't whipped enough before being folded.
Assembling And Layering The Cheesecake
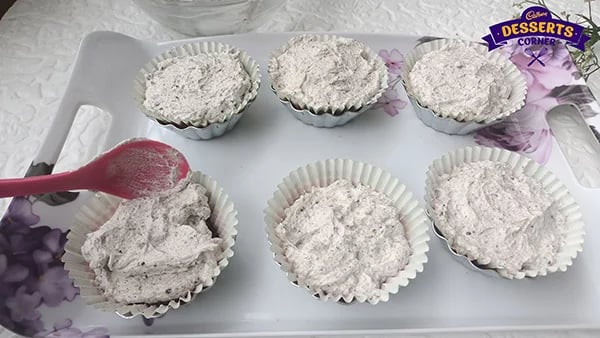
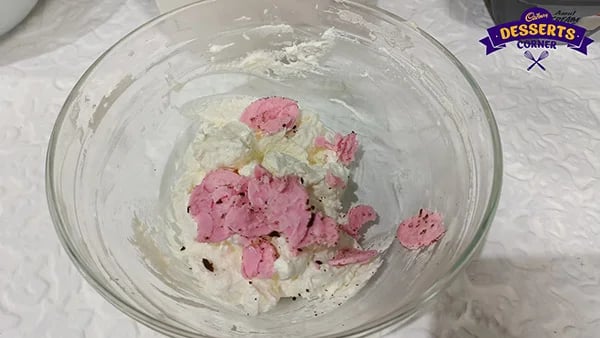
With three or four gentle strokes, fold the crushed Oreo pieces and strawberry slices that have been patted dry into the filling. It's more important not to overmix the filling than to make sure the pieces are evenly distributed. Pour the filling you prepared over the chilled Oreo base. Use an offset spatula to spread it out evenly, starting from the center and working your way out. Lightly tap the tin on the counter twice to release any air pockets that may have formed between the filling and the crust.
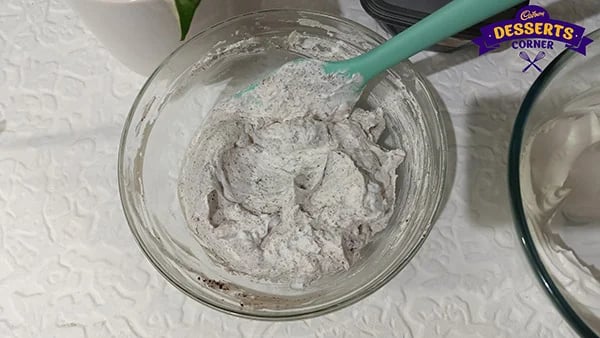
Chilling For The Perfect Set
Wrap the cheesecake tightly in plastic wrap and refrigerate for at least 6 hours. Leaving it overnight will make it set more evenly. When you press on the center and the edges of the cheesecake, they should feel firm all the way through, and the filling should have pulled away from the sides of the tin a little. When you take off the springform ring, an under-set cheesecake will collapse in the middle. If you're not sure if it's set after six hours, it's always better to put it in the fridge for two more hours than to try to serve a filling that isn't stable.
Decorating For A Bakery-Style Finish
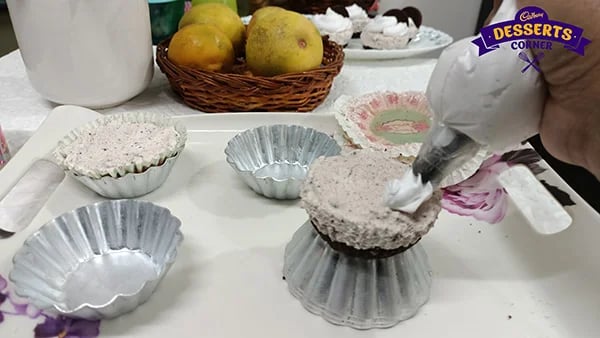
Use a star nozzle to pipe whipped cream rosettes around the outside edge of the chilled cheesecake. Keep the piping bag steady so that each rosette is the same size. Put a whole, fresh strawberry in the middle of each cream rosette and gently press it into the cream so it stands up. Put whole Oreo cookies between some of the rosettes to make the cake look different. The dark cookie against the light cream and red strawberry makes the three-color combination that gives this Oreo and strawberry cheesecake its unique look. A light dusting of powdered sugar through a sieve on the finished surface gives it a clean, professional look.
Common Mistakes That Ruin No-Bake Cheesecake
Runny Filling
Runny filling can happen if the cream cheese is low-fat, warm, or not whipped enough. The only filling that doesn't run is made by mixing full-fat cream cheese at room temperature (soft enough to dent with a finger but not greasy) with whipped cream that is stiff. If the filling looks runny before it cools, put it back in the fridge for 30 minutes to let it firm up a little, then pour it over the crust.
Overmixing
Beating the cream cheese too long past the point where it is smooth and free of lumps adds air through vigorous agitation rather than controlled whipping. This makes a filling that looks big but falls apart during the set period. Instead of beating the cream cheese and sugar together until they are smooth, fold in the whipped cream. This makes a filling that is more stable and airy, and keeps its shape after refrigeration.
Using Warm Cream
Cream that hasn't been chilled all the way through before whipping doesn't make stable foam. The fat globules that make up the structural network of whipped cream come together more slowly at higher temperatures, making a soft foam that falls apart in a few minutes. Always use cream straight from the fridge. If your kitchen is warm, put the bowl and beaters in the freezer for ten minutes before you start.
Low-fat Ingredients
Every time you cut down on the fat in the filling, the cheesecake set becomes less stable. Low-fat cream cheese has too much water, and reduced-fat cream doesn't have enough fat to whip into stable peaks. A strawberry Oreo cheesecake made with full-fat ingredients sets up well and cuts well. When made with low-fat substitutes, the filling is usually soft, unstable, and not very satisfying.
Pro Tips For A Smooth & Velvety Texture
Use Cold Ingredients At The Correct Temperature
Use cold ingredients at the right temperature. This may seem like a contradiction, but it's very important. The cream cheese needs to be really soft (room temperature) so that it doesn't get lumpy when you blend it, and the whipping cream needs to be really cold so that the foam stays stable. Both conditions must be met at the same time. The answer is to take the cream cheese out of the fridge 45 minutes before you need it, and leave the whipping cream in the fridge until you need it. The main technical difference between a professional-quality strawberry Oreo cheesecake filling and an amateur one is that a professional knows how to handle two parts at different temperatures.
Fold Instead Of Stir
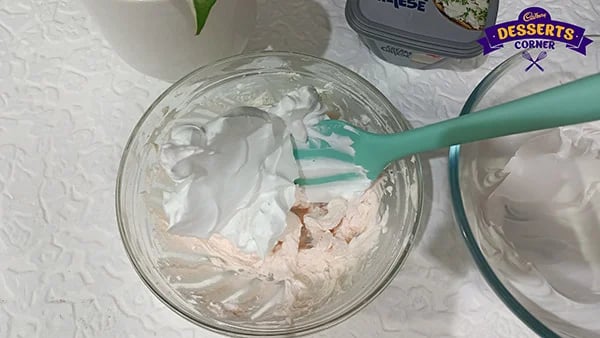
Instead of stirring, fold the whipped cream into the filling. The airy structure of the whipped cream makes the filling light and helps it set firmly in the fridge. When you stir the cream into the cream cheese base, the foam structure breaks down. When you fold it, it stays intact. The right way to do it is to make a wide, slow arc from the bottom of the bowl up. Add three or four strokes per addition until everything is mixed in. It's okay if the filling looks a little streaky after being folded; getting a uniform color isn't worth the extra deflation it takes.
Achieving Stable Peaks
Before you fold the whipped cream into the cream cheese, the whipped cream should reach stiff peaks, meaning the tip should hold its shape without drooping. This is a more advanced stage of whipping than the soft or medium peaks that many recipes call for. It makes a filling that stays together longer during the set period and makes a cleaner slice. The best way to check the peak stage visually before moving on to the folding stage is to briefly turn the bowl upside down. If the cream is properly whipped, it will not move.
Creative Variations To Try
Strawberry Compote Layer
To make a simple strawberry compote, cook fresh strawberries with a little sugar and lemon juice until they thicken. Then, cool the mixture and spread it over the set cheesecake as a topping layer. This makes an Oreo cheesecake with strawberries version that has a stronger fruit flavor than just fresh berries on top. The compote makes a smooth, shiny layer of fruit that cuts cleanly with the cream cheese filling. Let the compote cool completely before putting it on the cheesecake. If you put warm compote on the cheesecake, the filling will melt.
Chocolate Drizzle Version
Pouring a thin stream of melted dark chocolate over the finished, decorated strawberry cheesecake with an Oreo base makes a visual link between the Oreo crust and the top surface. It also adds a bitter flavor that brings out the acidity of the strawberries and the tanginess of the cream cheese. After the decoration is done, a spoon or piping bag is used to drizzle the icing from a height of 30 centimeters. It hardens in two minutes at room temperature on the cold cheesecake surface.
Layered Cheesecake Jars
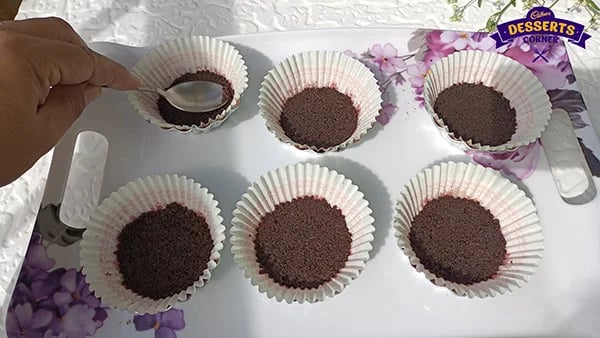
Instead of making the same recipe in one springform tin, you can make it in individual mason jars. This makes it easy to take to picnics or casual get-togethers. There is a crushed Oreo base layer, a cheesecake filling layer, and a fresh strawberry slice and Oreo on top of each jar. The jar format also makes it less likely that the cheesecake will fall apart when you cut it, which is good for bakers who aren't sure of their skills.
Storage, Shelf Life & Make-Ahead Tips
You can keep a strawberry Oreo cheesecake in the fridge for up to three days after making it. Just cover it loosely with plastic wrap to protect the decoration without pressing against the whipped cream rosettes. After three days, the fresh strawberries on top start to go bad, and the Oreo crust gets softer as moisture from the filling moves through it. You can freeze it. Just wrap the cheesecake tightly in plastic wrap and freeze it for up to a month. Before serving and decorating, let it thaw in the fridge overnight. You can make the Oreo crust and cheesecake filling up to 48 hours ahead of time and store them in the fridge. For the best look, add the fresh strawberries and Oreos within two hours of serving.
Frequently Asked Questions
Why is my no-bake cheesecake not setting? 
The most common reasons are cream that wasn't whipped long enough to form stiff peaks before folding, low-fat cream cheese with too much water, or not enough time in the fridge. It takes at least six hours in the fridge for a strawberry Oreo cheesecake made with full-fat ingredients to set properly. If the cheesecake is still soft after six hours, placing it in the fridge for another two to four hours usually fixes the problem.
How long should I refrigerate cheesecake?
A no-bake Oreo and strawberry cheesecake needs at least six hours to go from a poured consistency to a sliceable one. Putting it in the fridge overnight, for about eight to ten hours, makes it firmer and easier to cut. You can keep the cheesecake in the fridge for up to three days before serving it without it losing much of its quality.
Can I use regular Oreos instead of strawberry Oreos?
Yes, original Oreo cookies work best for this recipe because their dark cocoa flavor contrasts the strawberry and cream cheese filling the best. The strawberry-flavored Oreo cookies make a crust that is more fruity, which makes the base and filling taste more similar. Either type works structurally.
Like This Recipe?

Thank you for rating the recipe!
Recipe by Categories
Popular Articles
Sweet Celebrations Effortless Office Party ...

Teddy Bear Chocolate Cookies: Perfect Bakes For ...
5 mins
Sep 30, 2026

Corporate Celebrations: Festive Independence Day ...
3 mins
Jul 5, 2026

Effortless Independence Day Treats: Quick No-Bake ...
3 mins
Jul 6, 2026
Flavorful Freedom: Creative Patriotic Dessert ...
3 mins
Jul 7, 2026
Recommended Recipes