


Want to make a rich dessert without the oven? Try this Chocolate Pie Recipe with Nutty Crust at home – read more to learn to make it!

Is it too much to consider turning on the oven in the middle of a hectic day? There are afternoons or evenings when you're just wanting something that tastes a little high-end but with minimal heat and effort. Perhaps it's a little gathering at home, a surprise birthday, or an everyday self-care Sunday where you desire to spoil yourself but without using all evening preparing food.
The nutty crust chocolate pie recipe is just the solution for days like these. It's rich, satisfying, and still wonderfully refreshing. No baking, no fuss steps. Just some pantry staples, a bit of chill time, and a dessert that's almost too pretty to eat. And, it keeps for days in the fridge, so you can prep ahead and sit back and enjoy when your company arrives. Stick with me and find out step by step how to execute this no-bake miracle at home!
Chocolate Pie with Nutty Crust: No-Bake Recipe in 6 Steps
Step 1: Prepare Your Ingredients

Begin by preparing everything beforehand. For the crust, you will require 1 cup of mixed nuts (such as almonds, walnuts, cashews), 1 cup of digestive biscuits, 1/4 cup of melted unsalted butter, and 2 tablespoons of honey. For the chocolate filling, you'll need 1 cup dark chocolate chunks or chips, 1/2 cup heavy cream, 2 tablespoons butter, and 1 teaspoon vanilla extract. Pre-measuring ensures the process becomes smoother and quicker. It also avoids last-minute runs to the pantry after starting.
Step 2: Prepare the Nutty Crust
Pulse the biscuits and nuts together in a food processor until they become crumbly mix. You want a coarse mixture, not a powder. Mix this into a bowl, then add melted butter and honey and combine until it holds together. Press the mixture firmly into the base and sides of a tart pan. Smooth the surface with the back of a spoon or flat-bottomed glass. When finished, refrigerate the base for at least 30 minutes. A chilled crust sets better and provides a hard foundation for the rich chocolate filling.
Step 3: Prepare the Chocolate Filling
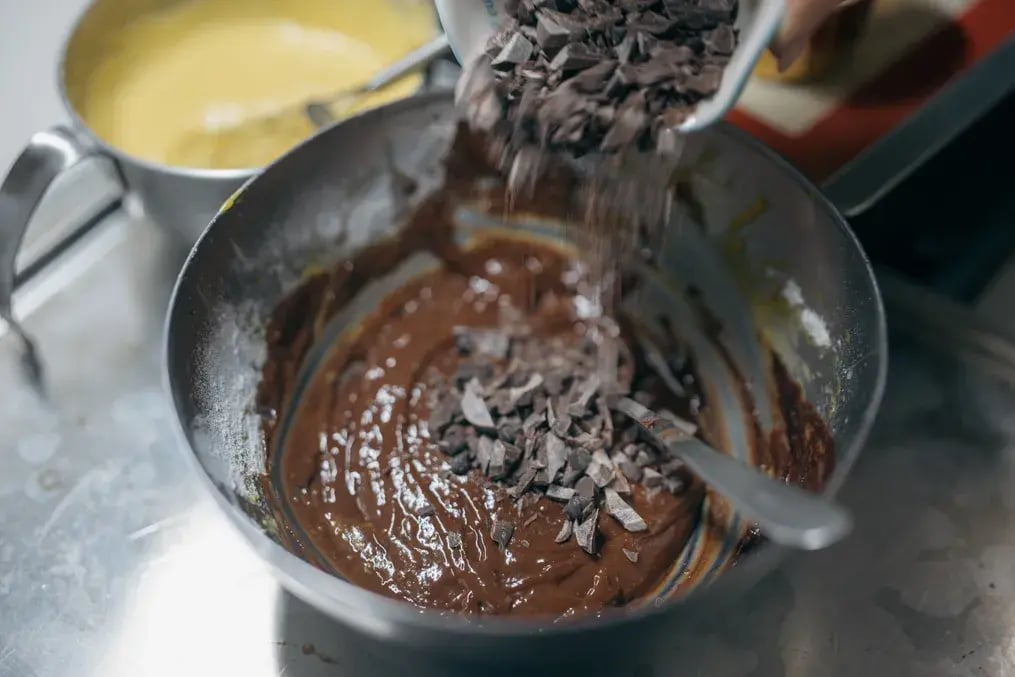
Pour the cream into a small saucepan and heat over very low heat until it barely begins to steam. Do not boil. Remove from the heat and add in the dark chocolate and butter. Let it stand for a minute, then stir slowly until it all melts into a smooth blend. Stir in the vanilla extract. If you prefer it sweeter, you can stir in a spoonful of powdered sugar. Leave the filling slightly thick so that it rests nicely over the nutty crust without running.
Step 4: Assemble the Pie
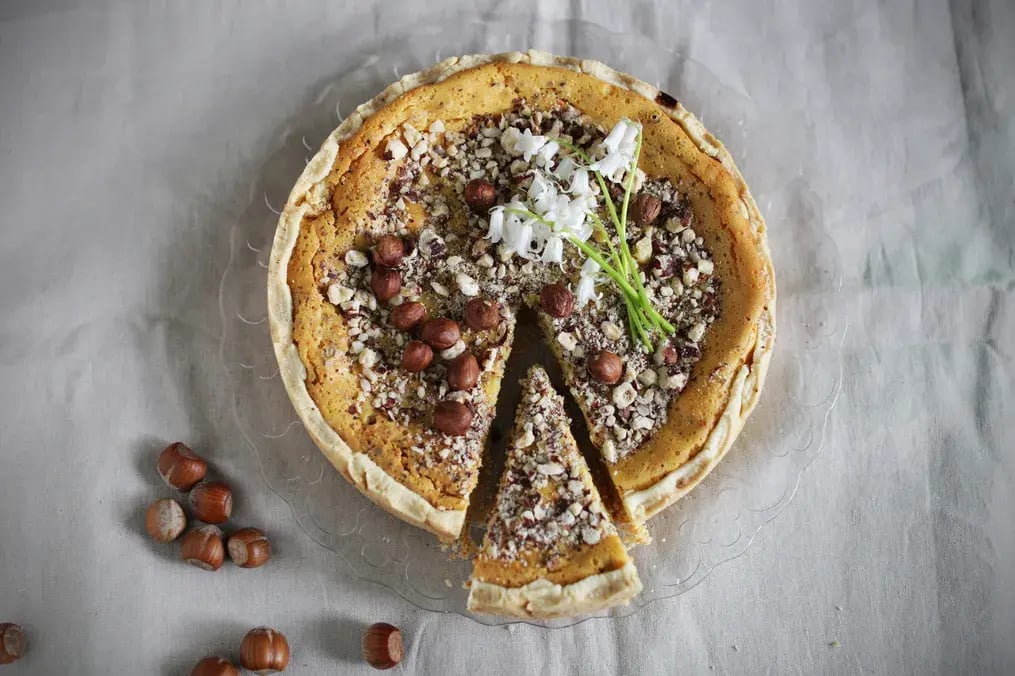
Remove the chilled crust from the refrigerator. Fill the center with chocolate filling and spread it softly using a spatula. Gently tap the tart pan onto the counter to expel trapped air bubbles. To add some extra nutty taste, place some chopped nuts over the tart. They'll stick well onto the warm chocolate and provide an appealing appearance and crunch when the pie is being cut later.
Step 5: Chill to Set
Return the assembled pie to the refrigerator. Chill for a minimum of 4 hours, but overnight if you can spare the time. Chilling not only sets the chocolate solidly but also gives the nutty crust time to seal with the filling. Loosely cover the tart with foil or a plate to keep it fresh and stop any fridge odors from seeping in. Don't be tempted to slice it too early; proper chilling time ensures that it's much easier and cleaner to cut.
Step 6: Slice and Serve
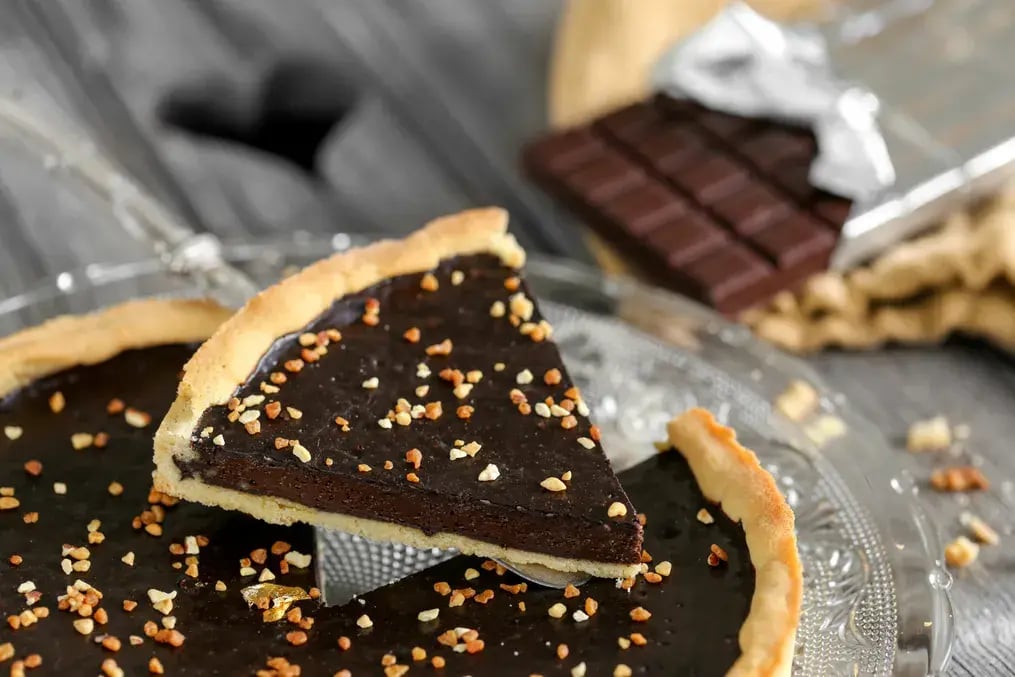
When the pie is well set, take care to lift it out of the tart pan. Cut it using a sharp knife that's been dipped in hot water to give neat and clean cuts. Clean the knife after each cut for optimal results. Serve each slice as is, or top with a scoop of vanilla ice cream or a dollop of whipped cream for added flair. This nutty crust chocolate pie recipe is decadent enough to be enjoyed on its own but versatile enough to complement nicely with simple toppings.
Like This Article?
More Like This


Popular Articles


Trending Web Stories


Curated Recipes


