






Chocolate-dipped desserts are great for parties, but the challenge comes when the coating doesn't stay. Here’s how to keep the chocolate coating from cracking.
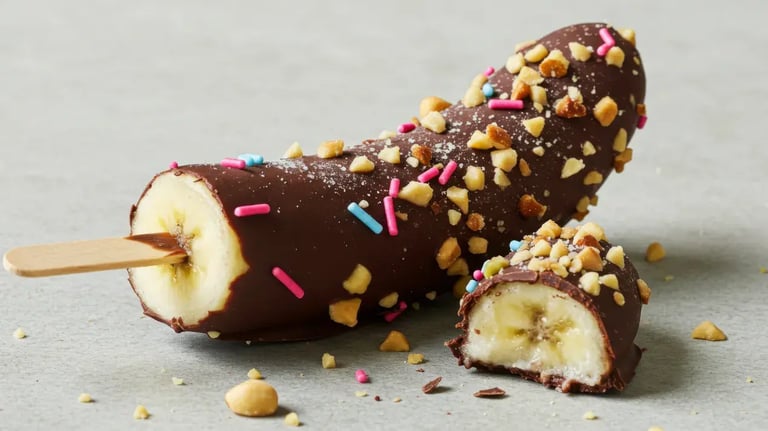
One of the most heartbreaking feelings is when you leave the chocolate in the refrigerator to set, but come back to a chalky finish or cracks. If you struggle to get a smooth coating, don’t be disheartened; you’re not alone. In most scenarios, the root cause of the issue is that the chocolate was not handled properly. From tempering the chocolate to maintaining precise temperatures, there are guidelines you need to follow to ace professional-looking confections. So, what are you waiting for? Read on to know everything about tempering chocolate and the tips to get a glossy and crack-free coating.
Why Chocolate Coating Cracks Or Melts Easily
Before you start with the tempering process, it’s important to understand why chocolate coating fails in the first place. Here are some of the reasons why.
-
The temperature difference between the filling and the melted chocolate can cause the coating to crack.
-
Chocolate is made with cocoa butter that solidifies into different crystals. When the melted chocolates cool without proper tempering, unstable crystals form, which make the coating soft.
-
If you’re working in a humid environment, the moisture can make the chocolate grainy.
-
Real chocolate with cocoa butter requires tempering to set properly. Compound chocolate, on the other hand, is made with vegetable fats or palm oil, and it is easier to set.
What Is Chocolate Tempering?
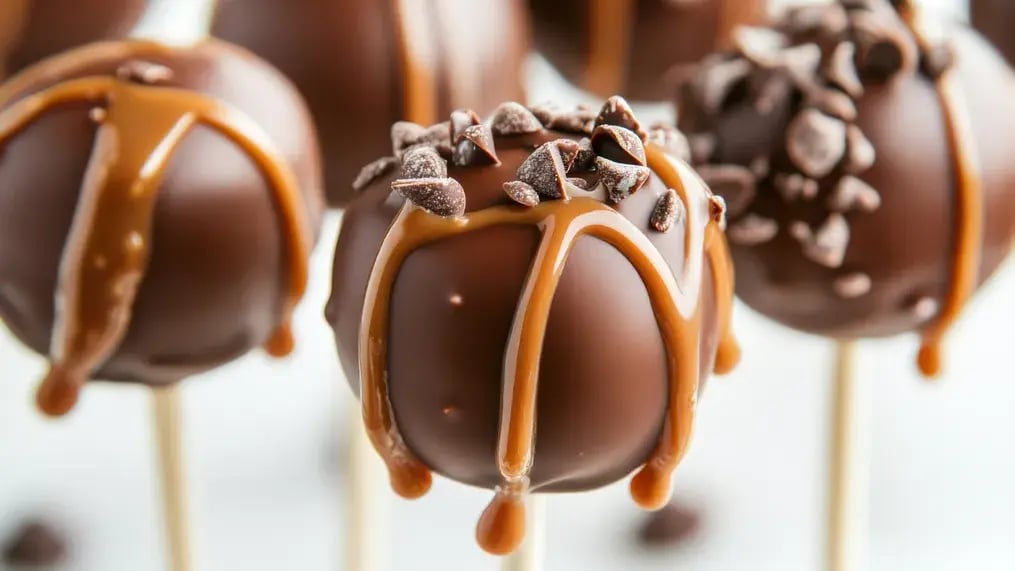
Tempering chocolate is the process of melting the chocolate and then encouraging the formation of stable cocoa butter crystals. It then becomes glossy and gives a stable coating. The best way to know if the chocolate is tempered correctly is by its snap. When broken, if the chocolate snaps instead of bending or crumbling, know that you’ve done a great job. The major difference between tempered and untempered chocolate is that untempered chocolate has a softer texture and lacks a shine. While both are edible, if you’re making desserts like cake pops or truffles, you need chocolate tempering for a glossy finish.
Signs Your Chocolate Has Been Overheated

When you’re working with chocolate, one of the most common mistakes is to overheat it. Here are some warning signs that can save your overheated chocolate.
-
The chocolate is getting a thick and giant texture due to the clumping of proteins and sugar particles in the cocoa butter.
-
The melted chocolate is starting to look dull or has a matte finish.
-
You’re smelling a burnt note, which happens when the chocolate starts to scorch.
-
The chocolate is becoming too thick or too thin so that you’re not able to coat.
What Is Seized Chocolate And How To Prevent It
Seized chocolate is the stiff, grainy, and unworkable mass that is one of the most frustrating experiences while tempering chocolate. Chocolate seizes when a water droplet is added to the melted chocolate. Even indirect moisture can make the cocoa butter clump. So, if you’re dipping a wet spoon into the chocolate or steam enters the environment, the sugar and cocoa particles in the chocolate separate and make a thick paste. If you end up with seized chocolate, you can add some warm oil and stir vigorously. In most cases, it is the thick paste that loosens up and gets back its texture. To avoid getting seized chocolate, always melt the chocolate in a dry bowl or use a double boiler. Also, ensure your utensils are dry before adding them to the melted chocolate.
The Chocolate Seeding Method Explained
If you’re a beginner at tempering chocolate, the chocolate seeding method is the easiest way to do so. You can start by melting two-thirds of your chocolate. Once melted, you can add the chopped remaining chocolate and stir constantly. As the chopped seed chocolate melts into the already warm chocolate, the overall temperature lowers and forms stable crystals, thus tempering the entire batch of chocolate.
However, the chocolate seeding method works best with high-quality chocolate that contains well-tempered cocoa butter. If you’re using different chocolates, the ideal temperature for melting dark chocolate is between 50 and 55°C, and the working temperature after seeding is 30°C. As for milk chocolate, the melting temperature should be around 45-50°C, and around 30°C for working. White chocolate melts between 40 and 45°C and works at around 28°C
The chocolate seeding method works wonders when you want a hard coating. So, if you’re making chocolate coating for cake pops or truffles, the seeding method can give you a high-quality finish.
Best Chocolate For Candy Coating And Dessert Pops
If you’re confused between compound chocolate and couverture chocolate, here’s the difference. Couverture chocolate is the real chocolate made with cocoa butter and has to be tempered before using. Compound chocolate is better for beginners, as it delivers the authentic flavor without the need for tempering. Then there are candy melts, which are a form of compound chocolate that are sold in colored wafers. Since they come in a range of colors, they’re a go-to choice for making cake pops.
If you’re working in a warmer climate, compound chocolate and candy melts are the safer options for chocolate candy coating. Also, while buying chocolate, check for the cocoa butter percentage. The one with the higher cocoa butter percentage will give you a firmer coating.
How To Keep Chocolate Coating Smooth And Glossy

Follow these tips to keep your chocolate coating smooth and glossy:
-
Melt the chocolate slowly using a double boiler.
-
Stir constantly to avoid hotspots.
-
Add coconut oil to melted chocolate to make it smoother.
-
While coating, ensure the melted chocolate is not too thick.
Don't Freeze Dessert Pops Too Hard
Resist the urge to freeze the dessert pops to speed up the chilling process, as the extreme cold can cause the chocolate coating to crack. When chilling in a refrigerator at 4-6°C, the chocolate firms up the coating without giving it a temperature shock. Ideally, chilling the cake pops in the fridge for about half an hour is enough to set.
Let Chilled Pops Rest Before Dipping
Once the cake pops are set, let them rest before dipping, especially if you’re dipping them in melted chocolate, as the temperature difference can be considerable. Just wait about 10 to 15 minutes, then add the other fillings or toppings. To prevent condensation on dessert pops, don’t move the chilled pops to a humid environment. All you need to do is work quickly after resting the pops and ensure the temperature difference isn’t a lot for the coating to crack.
Chocolate Coating For Cake Pops: Common Mistakes
-
Using too thick chocolate that doesn’t coat well.
-
Overcrowding the cake pops with too many toppings.
-
Dipping frozen cake pops without resting.
-
Not inserting the sticks into the cake pops correctly.
Chocolate Coating For Truffles: How To Get A Perfect Shell
-
For a professional-looking truffle, aim for a thin shell.
-
Use a truffle-dipping fork to submerge the truffle and lift it.
-
Dark chocolate works best for making a chocolate coating for truffles.
-
Avoid touching the truffle with your bare hands to prevent getting fingerprints and melting.
How To Create A Hard Chocolate Coating
You need just three things to create a hard chocolate coating: proper chocolate tempering, correct cooling, and choosing the right chocolate. When tempered correctly, you’ll automatically get that snap. Once you dip the pop in chocolate, place it in a cool environment. You can mix in compound chocolate to get a harder shell. As for the finished pieces, store them at a cool temperature before serving.
Coconut Oil In Melted Chocolate: Does It Help?
Coconut oil helps to make the melted chocolate thinner and gives the chocolate coating a glossier finish. For every 200 grams of chocolate, you can add about 5 ml of coconut oil. However, if you’re tempering real chocolate, adding coconut oil is not recommended, as the results can be an extremely soft coating. If you don’t have coconut oil, you can also use cocoa butter.
Best Ways To Set Chocolate Without Cracking
-
Allow the chocolate to cool at room temperature. While refrigeration can speed up the process, it also increases the chances of condensation.
-
Don’t place the chocolate in a humid kitchen or a moist environment.
-
Don’t place the warm chocolate directly into the freezer.
-
Once set, store in airtight containers.
Compound Chocolate Vs Tempered Chocolate: Which Is Better?
| Aspect | Compound Chocolate | Tempered Chocolate |
| Ease of use | Very easy to melt and use; no tempering needed | Requires precise temperature control and tempering |
| Texture & flavour | Sweeter, slightly waxy texture | Richer cocoa flavor with a glossy finish and clean snap |
| Best for beginners | Ideal for first-time bakers and quick coating jobs | Better once you’re comfortable handling chocolate |
| Professional preference | Good for convenience and large batches | Preferred for premium desserts and professional results |
| Which is better? | Best for ease, speed, and stability | Best for flavor, texture, and polished finish |
Frequently Asked Questions About Chocolate Tempering And Coating
Why does chocolate coating crack on cake pops? 
Chocolate coating for cake pops usually cracks when there is a temperature difference between the filling and the melted chocolate.
What is the best method for tempering chocolate?
The chocolate seeding method is the best for tempering chocolate, especially for beginners.
How do you fix seized chocolate?
You can fix seized chocolate by whisking in warm oil or cream.
Why does overheated chocolate become grainy?
When chocolate is pushed past its melting temperature, the proteins and sugar start to separate, making the chocolate grainy.
How do you make a hard chocolate coating?
If the chocolate tempering is proper, the chocolate will set harder. For compound chocolate, use the one with more oil content.
Is compound chocolate better for candy coating?
Yes, compound chocolate is better for candy coating as it sets without tempering.
How do you keep the chocolate coating glossy and smooth?
Focus on chocolate tempering, working at the right temperature, and gentle stirs to avoid trapping air bubbles.
Like This Article?
More Like This

Popular Articles


Trending Web Stories


Curated Recipes