




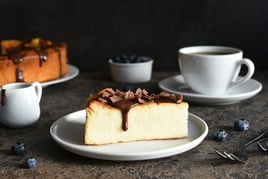





Make a creamy pina colada cheesecake with a crunchy Oreo crust. Follow this easy pina colada cheesecake recipe for a tropical dessert with smooth layers at home.

This piña colada cheesecake is a delicious baked dessert with a satisfying twist that turns a classic cocktail into a tasty treat, combining the tropical flavors of pineapple, coconut, and rum-inspired sweetness.
The cheesecake is creamy and rests on a crunchy Oreo crust, combining bright fruitiness with the soft richness of coconut for a dessert that tastes indulgent but isn’t too heavy. It is a great dessert for a summer gathering, family celebration, or dinner party when you want something just a little different from the traditional cheesecake.
The best part is that you can make it ahead of time so the cheesecake has time to cool and set before serving. And each slice has that little bit of something special, with its creamy filling, crisp chocolate cookie base, and tropical flavor combination. Serve chilled with your favorite garnish, such as toasted coconut, pineapple pieces, or a light drizzle of sauce, for a dessert that adds a refreshing holiday-inspired touch to the table.
Ingredients:
For the crunchy Oreo crust:
- 24 Oreo cookies (with filling)
- 5 tablespoons unsalted butter, melted
- Pinch of salt (optional)
For the pina colada cheesecake filling:
- 450 g cream cheese, softened
- 200 ml full-fat coconut cream
- 150 g crushed pineapple, thoroughly drained
- 120 g granulated sugar
- 3 large eggs, room temperature
- 2 tablespoons cornstarch or flour
- 1 teaspoon vanilla extract
- 2 tablespoons white rum (optional, for authentic pina colada flavor)
For garnish (optional):
- Fresh pineapple wedges or chunks
- Whipped cream
- Lime zest
- Maraschino cherries (for a tropical cocktail aesthetic)
Step 1: Prepare the Pan

Wrap the outside of the springform pan in heavy-duty foil, two layers (not one), before putting it into the water bath. Doubling up on foil provides a meaningful increase in protection against water getting in during the long bake. A single layer of foil is a common point of leakage in a water bath, which can seep in and ruin an otherwise perfect crust.
Step 2: Making the Crust
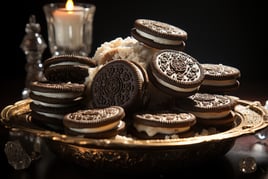
Crush the Oreo cookies into fine crumbs, mix well with the melted butter until the mixture resembles wet sand, and firmly and evenly press the mixture into the base of the prepared pan, working it up the sides if you'd like a taller crust edge.
Step 3: Chill or Pre-Bake the Crust
Chilling the crust in the fridge for 15 minutes or more firms it up a bit before filling or pre-baking at 350°F for about 8 to 10 minutes yields a slightly firmer, more structurally sound base that holds up especially well under a wet water-bath bake.
Step 4: Making the Filling

Beat cream cheese until smooth; add eggs, one at a time, beating well after each addition. Between each addition of eggs, scrape down the sides of the bowl. This step is often missed, which causes unincorporated batter to cling to the edges of the bowl, and if not attended to, results in an uneven texture once baked.
Step 5: Adding Cornstarch
The cornflour is whisked in at the very end of mixing after the eggs are fully incorporated. This helps to stabilise the filling and gives the baked cheesecake a slightly firmer, cleaner-cutting structure once fully chilled.
Step 6: Pouring and Water Bath Setup

Pour the finished filling over the prepared crust. Tap the filled pan a few times on the counter and put it in the water bath. A simple tap releases any air bubbles trapped in the batter that would otherwise rise to the surface during the baking process and result in undesirable cracks or small holes in the final cheesecake.
Step 7: Baking
Bake the cheesecake in its water bath at the specified temperature until the edges are firm but the center still has a slight, definite wobble when the pan is moved gently, a sure sign of doneness that avoids both underbaking and the overbaking that leads to cracking.
Step 8: Cooling
Instead of removing the cheesecake from the air at room temperature, turn off the oven and allow it to cool gradually inside, leaving the oven door a little ajar. This slow, gradual cooling prevents the abrupt temperature change that makes cheesecakes sink in the middle or crack across the top.
Step 9: Chilling
Let the cheesecake cool to room temperature, then refrigerate until completely set, at least 6 hours, but preferably overnight, until the filling is firm but sliceable throughout.
Step 10: Garnishing

To finish the chilled cheesecake, sprinkle with toasted coconut flakes, drizzle with caramel or pineapple sauce, add fresh pineapple chunks, or top with a dollop of whipped cream, mixing and matching as you like depending on whether you want the final presentation to be more tropical or more restrained.
Step 11: Slicing and Serving
Dip a sharp knife in hot water, wipe it completely dry with a towel, and cut for clean slices. Repeat this dip-and-wipe technique after every single slice. Not doing this step and cutting straight through over and over again tends to drag cream cheese filling across each cut and leave streaky, uneven slices rather than the clean presentation a baked cheesecake deserves.
Storage
Cover and refrigerate this cheesecake for up to 5 days, or wrap tightly and freeze for up to 2 months. Defrost in the refrigerator overnight before serving.
Troubleshooting Common Cracks and Issues
Besides the water bath and slow cooling mentioned above, there are a few other things that tend to cause cracked cheesecakes. Overbeating the batter after the eggs are added will incorporate too much air into the batter and cause the cake to rise very high during baking and then to fall and crack as it cools. Opening the oven door too many times while baking causes sudden drops in temperature that stress the delicate structure of the filling as it sets, so it’s worth resisting the urge to keep checking on it. Putting the cheesecake straight from a hot oven into the fridge, or cooling it near an open window, cools it too fast, giving it the same kind of temperature shock that makes visible surface cracks.
Frequently Asked Questions
Can I make this cheesecake without a water bath? 
Yes, but a water bath really cuts the risk of cracking, so if you choose not to use one, you'll need to be even more careful about the slow cooling process and not overbaking.
Why did my cheesecake sink in the middle after baking?
This is usually caused by overbeating the batter after the eggs have been added or by cooling the cheesecake too quickly once it is removed from the oven.
Can I use fresh pineapple instead of canned in this recipe?
Yes, fresh pineapple is great, but make sure to drain well of excess juice so that the filling doesn't get too wet.
How far in advance can I make this cheesecake for a party?
This cheesecake can be prepared up to 2 days in advance, as it has to sit overnight anyway and holds its texture well covered and refrigerated.
Like This Article?
More Like This




Popular Articles


Trending Web Stories



Curated Recipes