


Learn to make creamy Chocolate hazelnut swirl ice cream at home without an ice cream maker. No churning, no fuss, just simple mixing, freezing and scooping.
Let's agree we all love having ice cream, irrespective of any season.
In fact, we love them more during winter and often dare to prepare them at home. The process seems so intimidating and not everyone has an ice cream maker at home. But, but, wait, we have a simple recipe for you to try making ice cream at home, and you don’t even need an ice cream maker for that.
Whether it's the peak of summer or a cool winter evening, ice cream somehow seems to fit every moment. A midnight craving, a lazy weekend, a small celebration at home, kids asking we don’t need an excuse to scoop a spoonful. But, when we think about making it ourselves, many of us stop right there. The word 'churning' feels tiring, and an ice cream maker sounds like luxury. So we end up buying tubs and still not get satisfied.
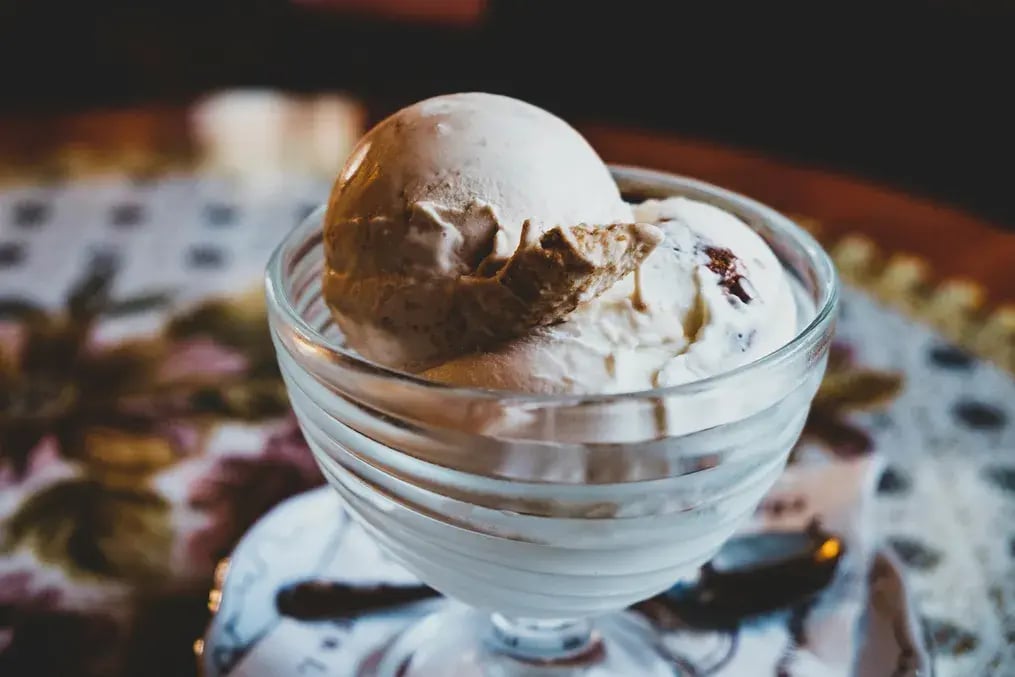
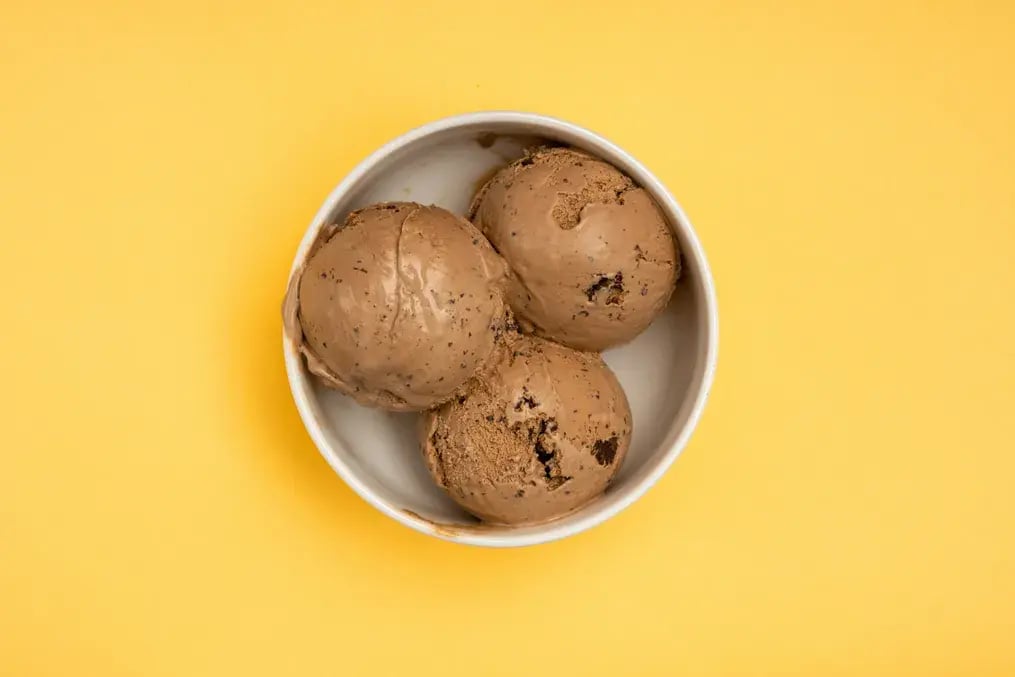
This no-fuss chocolate hazelnut swirl ice cream will change the way you see homemade desserts. With just a handful of ingredients, a freezer, and a little mixing, you’ll get the kind of ice cream that feels both creamy and nutty with every spoon. And yes, no machine required. Let’s make something sweet and stress-free.
Ingredients:
- 2 cups fresh full fat cream
- 1 cup condensed milk
- ½ cup chocolate hazelnut spread
- 100 g dark chocolate
- ½ teaspoon instant coffee (optional)
- 1 teaspoon vanilla essence
- A pinch of sea salt
- A handful of roasted hazelnuts (roughly chopped)
Method:
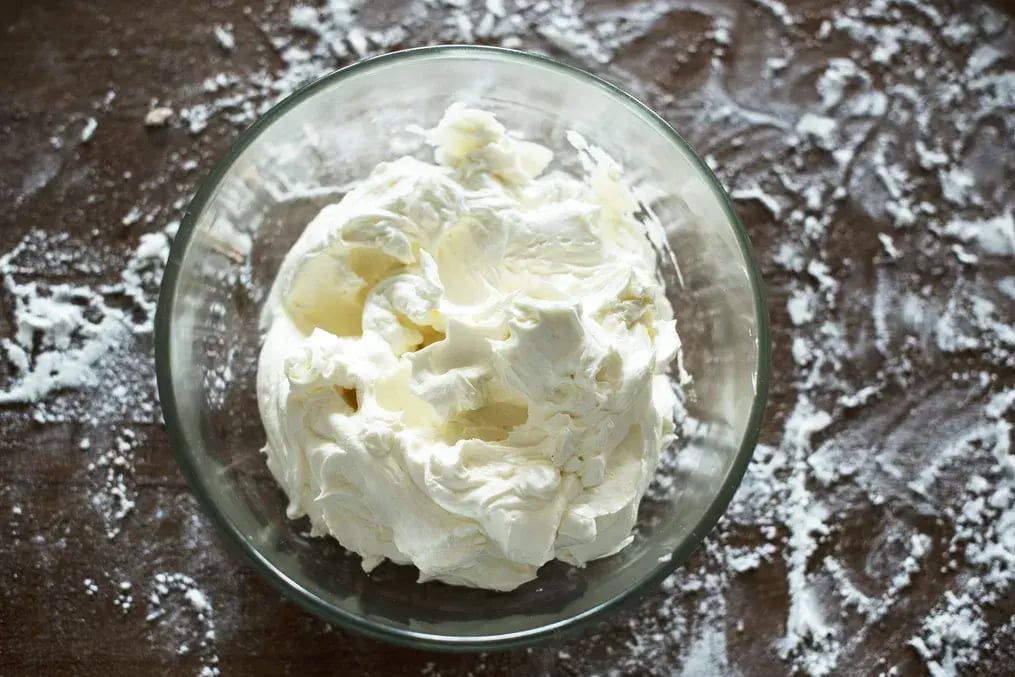
- In a chilled mixing bowl, pour the cream and whip it using a hand whisk or electric beater till soft peaks form.
- This step brings air into the cream, so keep it light and airy.
- Once whipped, fold in the condensed milk.
- Add vanilla essence, instant coffee, and a pinch of salt.
- Now stir in the melted chocolate and mix lightly till everything blends smoothly.
- Take a freezer-safe container, pour half of the ice cream base into it.
- Drop spoonfuls of chocolate hazelnut spread and swirl gently with a fork or toothpick.
- Repeat the process with the remaining ice cream base and spread.
- Sprinkle chopped hazelnuts on top, cover the container, and freeze for at least 8 hours or overnight. Scoop and serve!
7 Tips to Follow
1. Use full-fat cream
The key to a rich and creamy finish lies in the kind of cream you use. Choose only full-fat fresh cream or whipping cream that contains at least 35% fat content. Chilling the cream overnight helps it whip better. And don’t overbeat, just till it turns airy and soft is enough.
2. Don't pour hot chocolate into the mix
The melted chocolate should be slightly cooled before mixing it in. If it’s too hot, it causes the whipped cream to deflate and give a dense result. Let it sit for a few minutes after melting; you want the mixture to blend, dissolve, and melt evenly. Adding a pinch of instant coffee enhances the chocolate flavor, giving a deeper, more rounded taste.
3. Swirl the hazelnut spread gently
This is where the magic lies. Instead of stirring it fully into the base, use a toothpick or the tip of a butter knife and make loose swirls. This creates pretty waves of chocolate hazelnut in every scoop. Mixing it in too hard will turn the entire ice cream into one solid chocolate base. We want streaks and layers, not one single tone.
4. Use a loaf tin or steel dabba to freeze
Avoid glass bowls or fancy tall jars, they slow down the freezing and may not allow even setting. Use a simple loaf tin, metal cont,ainer or even your regular steel dabba. Line it with parchment if you want easier scooping later. Cover the top tightly with cling wrap or a lid to avoid ice crystals forming.
5. Freeze overnight
Freezing time is crucial. While 6 hours may work in a pinch, overnight freezing ensures proper setting. If you try scooping too early, the base may still be soft and slushy. Once fully set, remove it and let it rest for 3-4 minutes before scooping. This makes it easier to serve and brings out the balance of chocolate and hazelnut better.
6. Roast hazelnuts for crunch
Roasting hazelnuts before adding gives a beautiful aroma and enhances the nutty bite. Just roast them dry in a pan or bake them for 5 minutes in a preheated oven. Let them cool, peel off the skin and chop roughly. Sprinkle on top before freezing or mix lightly into the base before pouring into the container. This adds a lovely contrast to the smooth ice cream.
7. Make ahead and store smartly
Once made, this chocolate hazelnut swirl ice cream can be stored for up to two weeks in the freezer. Just make sure the container is tightly sealed. If it’s stored in open containers, it may catch freezer odour or form crystals. Label the date if you like keeping track. When ready to eat, bring it out for a few minutes, scoop and enjoy without guilt.
Like This Article?
More Like This


Popular Articles


Trending Web Stories


Curated Recipes


