


Make fudgy chocolate brownies with that irresistible shiny crust. Want to make it? Read how to make them just right.

Do you ever take a break in the middle of the day and crave a rich, molten piece of chocolate that clings ever so slightly to your spoon? There's something magical about a home-baked brownie – its shiny top, soft middle and that instant when you crack the crust – that makes the world stand still. Particularly now, with World Chocolate Day on 7 July, it's the moment to revisit the magic of fudgy chocolate brownies.
Brownies look easy, but that crackly, glossy top tends to escape home bakers. Too dense? Too cakey? Or lacking that irresistible top? Getting the perfect bake isn't luck; it's about subtle adjustments and noticing a few tidbits in your own kitchen. After learning the fundamentals, the outcome is surprising—a brownie that's nearly gooey in the center, with a light shell that snaps perfectly.
Whether you’re baking for family, a friend’s surprise, or simply indulging in a moment of self-love, making these fudgy chocolate brownies could become your signature. Want to make them with a perfect crust? Read how to make them and learn the secret to that glossy finish.
Fudgy Chocolate Brownies Recipe
Ingredients:
- 200g dark chocolate (70% cocoa)
- 150g unsalted butter
- 200g granulated sugar
- 3 large eggs, at room temperature
- 1 tsp vanilla extract
- 90g all-purpose flour (maida)
- 2 tbsp unsweetened cocoa powder
- A pinch of salt
Method:
- Preheat oven to 180°C.
- Line a 8x8-inch square tin with parchment paper.
- Melt butter and dark chocolate together in a heatproof bowl over a pan of simmering water or in short bursts in the microwave, stirring until smooth.
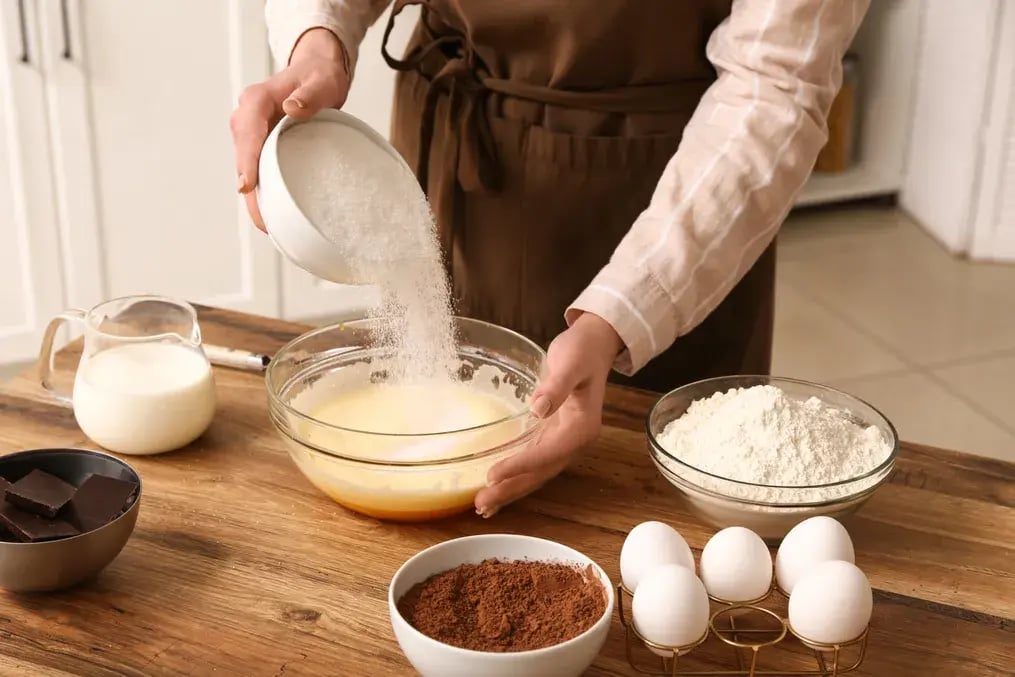
- Remove from heat and whisk in sugar until glossy.
- Add eggs a single one at a time, beating until the mixture is smooth and shiny.
- Beat in vanilla.
- Sift flour, cocoa and salt over wet mixture, folding lightly just until free of streaks.
- Don't over mix.
- Transfer batter into lined tin, smooth surface, and tap gently on work surface to expel air bubbles.
- Bake for 20–25 minutes—only until there is a slight crack at the top and a toothpick with moist crumbs.
- Let cool completely before cutting to make neat cuts.
Use Whole Eggs, Not Egg Whites
Whole eggs with their own natural fats and proteins are needed to create that characteristic shiny crust. The egg whites assist in creating the crispy top crust, but the yolks contribute richness to the center. If you’ve used only egg whites, the top may remain dull or flat. Adding eggs at room temperature means they blend seamlessly. Whisking them into the warm chocolate mixture in a steady rhythm, rather than all at once, encourages that beautiful meringue-like crust. So, resist the urge to separate eggs; the full, rich mix brings out both sheen and gooeyness in your fudgy chocolate brownies.
Whisk Sugar into the Warming Chocolate Mixture
Sugar is commonly added to cold batter, but for top-shine results, whisking sugar into warm chocolate and butter is worth the effort. As the sugar heats up slightly, it produces a thin syrup that during baking floats up and cools as a shiny crust. Stir until you notice the surface shining. This operation doesn't merely sweeten the batter—it invites that much-loved crinkle. If the sugar is added when the mix is cooler, the crackle won’t develop. Whisk gently, but consistently, until the mix is shiny before adding eggs. That shine is your clue you’re on the right path.
Use a Light Dusting of Cocoa Powder, Not Flour
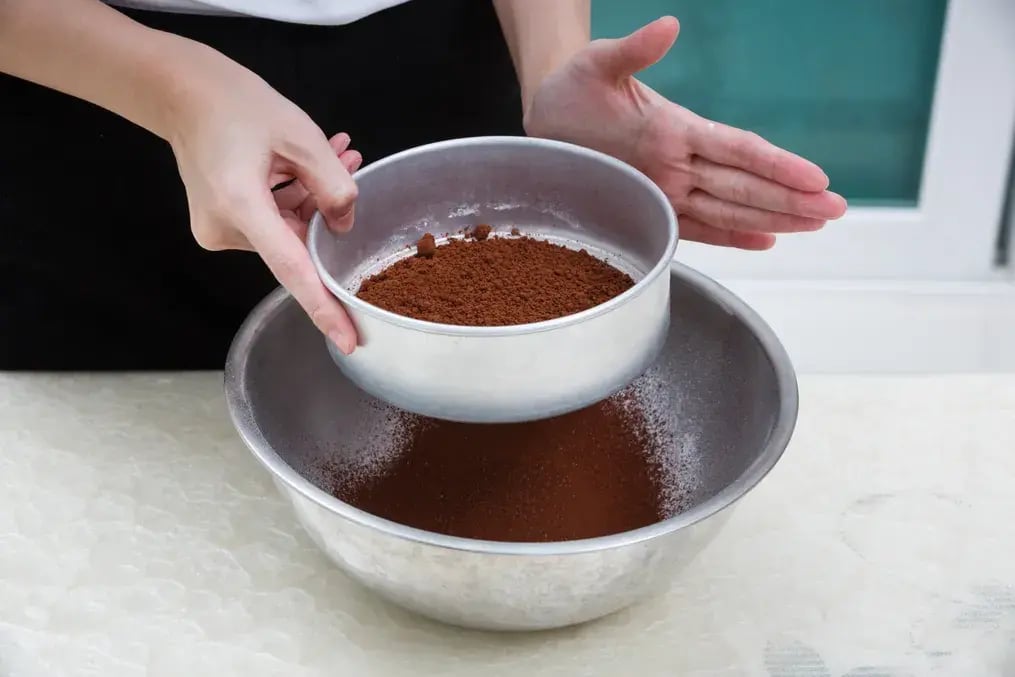
To keep the center fudgy and the crust intact, avoid flouring your tin. Flour on the baking tin will draw moisture from the edge and give rise to browning and dryness. Use parchment paper for clean edges and easy release. If your tin does stick, carefully run a knife around the edges once cooled, but don't push paper into the center. That preserves the center's moistness. Flour must just touch the batter according to the recipe—leave the rest off. The combination of a shiny, crinkled top and soggy center begins with this subtle shift.
Bake at Moderate Heat
Avoid turning the oven to 200°C for quicker results. A moderate oven at 180°C is ideal. Top will gradually rise, developing that crackled crust, while the interior bakes just enough to remain gooey. Too low and the crust will not crisp; too high and the center may dry out before the top sets. Oven hot spots, too—halfway through baking. Rotate the tin to distribute heat evenly. That prevents edges from overbrowning while allowing the center to retain its fudgy core. Even temperatures equal shiny top and juicy middle—that's the essence of these fudgy chocolate brownies.
Check Doneness with Moist Crumbs
You might be tempted to continue the baking until the toothpick is clean, but in fudgy chocolate brownies you desire moist crumbs attached to the pick. The crinkled surface indicates readiness, but there should be a small wobble in the center. Remove the tray after 20 minutes and check with a toothpick. If crumbs are attached, that is perfect. Leave the brownie in the hot tin for a further 5 minutes before taking it out to cool completely on a rack. The heat residual completes the bake without harming anything—overbaking destroys that fudgy center—be in search of moist crumbs, not a dry finish.
Cool Entirely Before Slicing
Slicing too early reduces your fudgy chocolate brownies to a mess. The center requires time to set, and the top shell hardens as the brownies cool. Cool in the tin for about 30 minutes, then lift using the parchment and place on a wire rack. When fully cool, cover the tin with a clean cloth or plastic wrap and chill for an hour or more—the cold helps the center hold together. Use a sharp knife, clean between slices, and you’ll get neat pieces with a gleaming crust on top. Cooling is key—no shortcuts.
Store with Care to Keep Crust
After slicing your brownies, store them to keep that shiny crust in place. Store in airtight containers lined with parchment between layers. In humid weather, include a paper towel at the bottom to suck up excess moisture. Room temperature is okay for short-term storage but refrigerate for more than two days. To serve, warm slices lightly—10 seconds in the microwave—under a light tent of parchment to restore that glossy top.
Like This Article?
More Like This


Popular Articles


Trending Web Stories


Curated Recipes


