



4 mins
Aug 6, 2026
EN
हिं
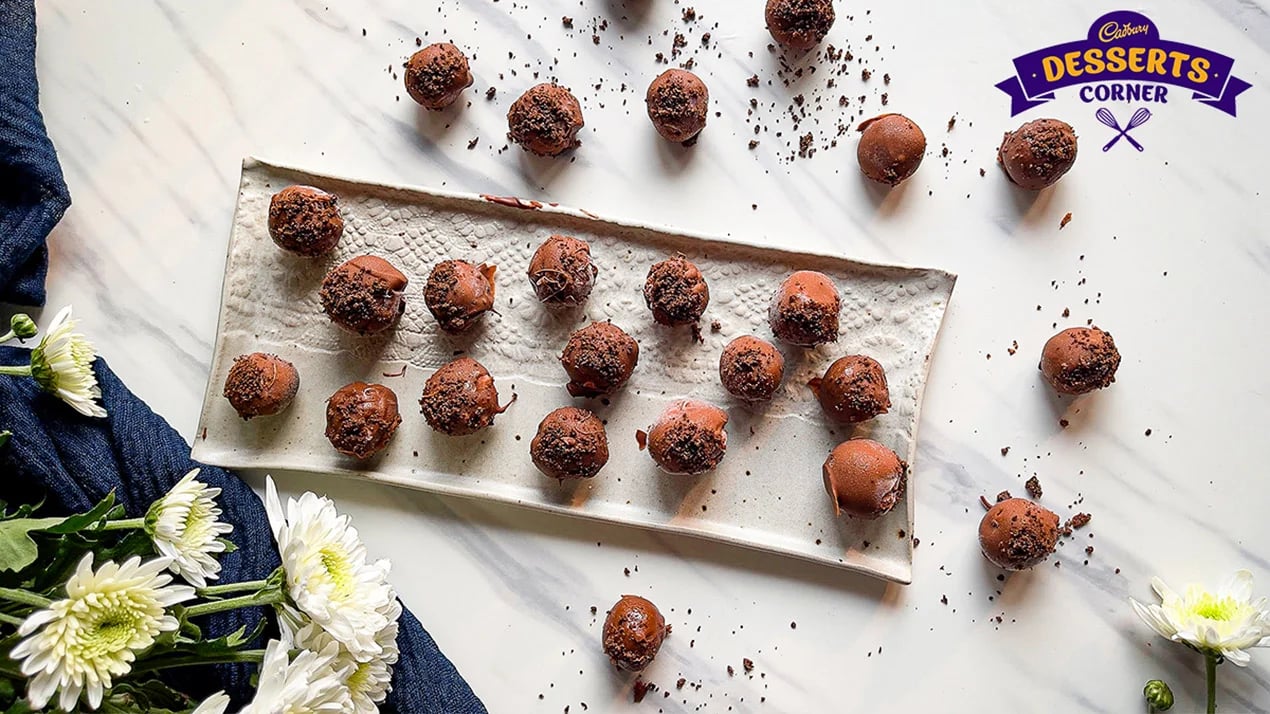
Strawberry Oreo Bon Bons (Chocolate-Coated Bite-Sized Dessert) Recipe
 Rishita Thalluri

Rishita Thalluri
 Published: Dec 27, 2023
Last Updated Date:Jun 12, 2026
Published: Dec 27, 2023
Last Updated Date:Jun 12, 2026


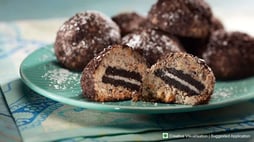
Bite-sized strawberry bonbons combine Oreo crumbs with fruit flavor, coated in chocolate for structured dessert that offers a balanced texture for easy serving.

Difficulty:easy

Serves:5

Time:30 mins

Contains egg: No
Primary Keywords: strawberry bonbons
Strawberry bonbons made with Oreo and a smooth chocolate shell are one of the best no-bake dessert projects for home cooks. They look a lot harder than they are, take less than an hour to make, and are great for giving as gifts, serving at parties, or just satisfying a sweet tooth. A single bite of this dessert has a creamy strawberry center, the familiar biscuit crunch of Oreo, and a snapping chocolate shell. The te......Read More
Ingredients For
Strawberry Oreo
Bonbons
5
Servings
For the Recipe
- Strawberry Ice cream- 200 ml
- Almond Flour- ½ cup
- Cadbury Dairy Milk Silk- 1 Bar
- Oreo Cookies for garnish
Step-by-Step: How To Make Strawberry Oreo Bonbons
Creating The Strawberry Base
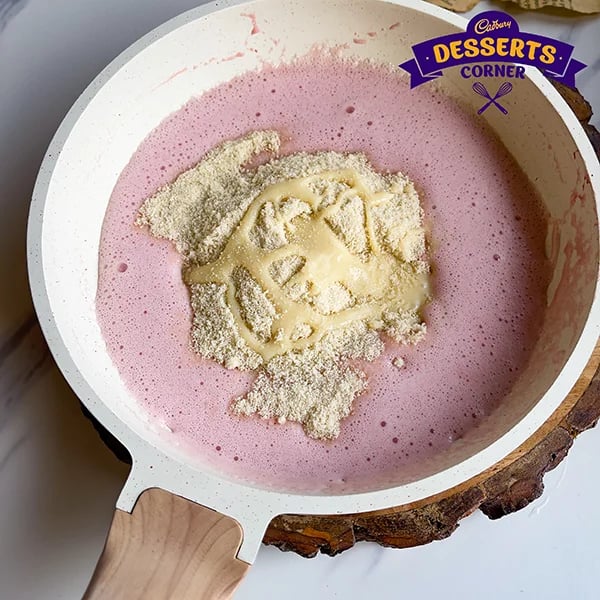
Take the strawberry ice cream out of the freezer and let it sit at room temperature for ten minutes. It should be soft enough to stir but not so liquid that it runs. Put the mixture in a mixing bowl and add the almond flour one tablespoon at a time, mixing well between each addition until the mixture thickens enough to hold its shape when pressed between your fingers. Add the crushed Oreo crumbs to the mixed base and fold them in with 5 or 6 strokes until evenly distributed. The finished base should be the same color all over and feel like a dough that is soft and a little sticky, not like a wet batter.
Shaping Perfect Bite-Sized Balls
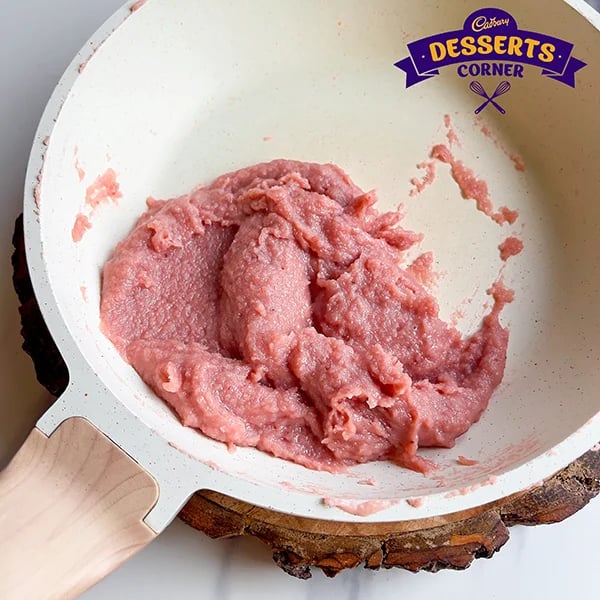
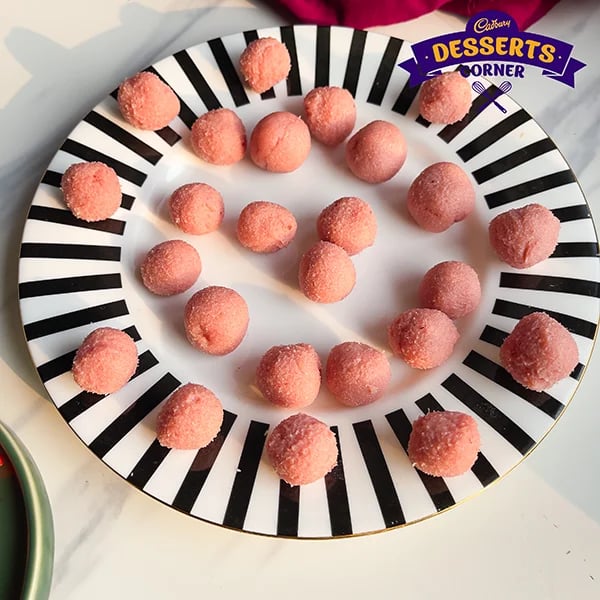
Take about a tablespoon of the base mixture and roll it between your palms into a smooth, even ball with no flat spots or cracks on the surface. Put each shaped ball on a tray lined with parchment paper, ensuring all the balls are the same size. This will help the coating stay the same thickness when you dip it. Before dipping, put the tray of shaped balls in the freezer for at least 45 minutes. The balls need to be completely firm all the way through, not just chilled on the outside. If the center is soft, the ball will change shape when the warm chocolate touches the surface during dipping.
Melting Chocolate For Smooth Coating
Put the finely chopped chocolate in a microwave-safe bowl that is completely dry. Heat it on medium power for 30 seconds at a time, stirring well between each interval, until the chocolate is completely smooth and no solid pieces remain. After the chocolate has fully melted, add the teaspoon of coconut oil and stir until it is fully mixed in. The oil thins the chocolate a little and keeps it fluid longer, making it easier to dip. Before you use the mixture, let it cool to about 32°C. Chocolate that is hotter than this will melt the surface of the frozen bonbon when it touches it, which will change the shape of the ball before the coating sets.
Dipping & Coating The Bonbons
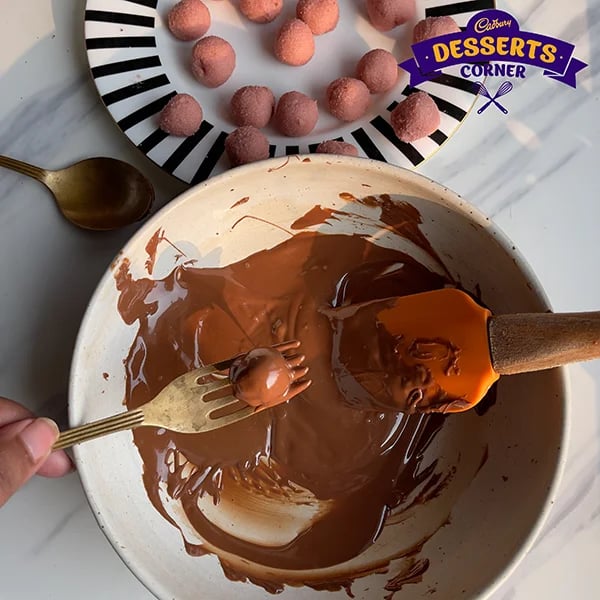
Take out two or three frozen bonbon balls at a time. This way, the other balls stay at the right frozen temperature for dipping. Using a fork, dip each ball into the melted chocolate, completely cover it, lift it out, and let the excess chocolate drain for 3 seconds before placing it on the tray lined with parchment paper. To remove any extra coating that has built up under the ball, slide the fork sideways along the edge of the bowl. This stops a thick chocolate foot from forming at the bottom of the finished strawberry bonbon.
Setting & Final Garnishing
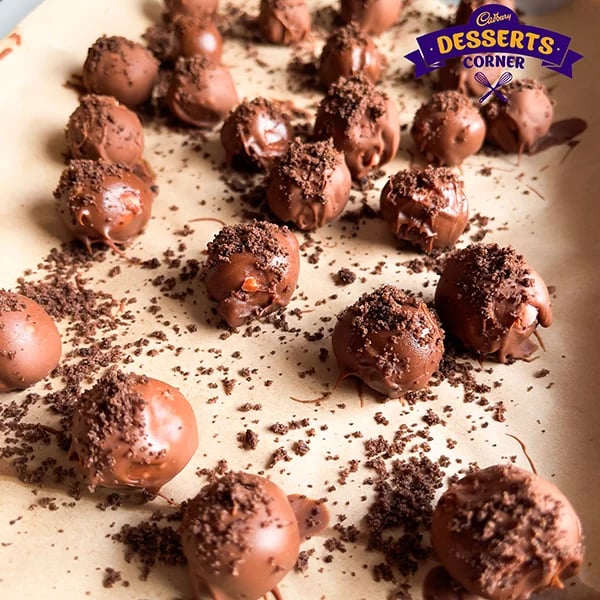
Right after you dip each bonbon and put it on the tray, sprinkle the reserved crushed Oreo crumbs over it. Do this within 60 seconds of dipping, before the chocolate surface starts to set. Before serving, put the finished tray in the fridge for at least 20 minutes to let the chocolate coating hardened completely and the filling set. The coating on the finished Oreo strawberry bonbon should be firm to the touch and either matte or slightly shiny, depending on how it was made. The garnish should also be firmly embedded in the surface.
Common Mistakes When Making Bonbons
Mixture Too Soft To Roll
The mixture is too soft to roll because the ice cream was over-softened before it was mixed or because there wasn't enough almond flour compared to the liquid in the ice cream base. It's easy to fix the problem: put the mixed filling back in the freezer for 20 minutes to harden it to a workable consistency before trying to shape it. In future batches, you can avoid this by softening the ice cream for ten minutes instead of twenty and adding the almond flour right after mixing.
Not Freezing Before Dipping
Not freezing before dipping: If you try to dip bonbon balls that have only been in the fridge rather than being fully frozen, the filling will deform under the weight of the warm chocolate. It will sink into the coating bowl as you dip. The filling must be solid all the way through, not just chilled on the surface, before it can touch warm chocolate. The minimum freeze time of 45 minutes is not up for discussion. The best way to test the balls before you start dipping is to press one of them firmly and see if it feels completely rigid with no soft center.
Chocolate Too Thick
Chocolate that is too thick, either because it has cooled too much before dipping or because it hasn't been thinned with coconut oil, coats in uneven, lumpy layers that pool at the bottom of the bonbon and set with a rough, uneven surface. Keeping the chocolate at 30–32°C during the dipping session by placing the bowl over a larger bowl of warm water between batches prevents it from thickening. If the mixture starts to thicken during a session, adding a second teaspoon of coconut oil and stirring it gently will keep it workable without having to heat it up again.
Uneven Coating
Uneven coating happens when you dip too quickly and don't let the extra chocolate drain completely, or when you dip in a vessel that isn't deep enough to fully submerge the bonbon in one motion. The best way to get an even coating on a whole batch is to use a deep, narrow bowl that lets you fully submerge the food in one motion. Then, let the food drain for three seconds above the bowl before moving it to the tray.
Pro Tips For Perfect Oreo Bonbons
Chill Twice (Before & After Dipping)
Putting the shaped filling balls in the fridge for 20 minutes before the final 45-minute freeze yields a more stable, evenly frozen ball than putting them directly in the freezer. This is because the first refrigerator chill lets the surface harden slowly before the inside freezes. A second 20-minute refrigerator chill after the first room-temperature set makes a coating that is completely hard all the way through, not just on the surface. This two-step process is the only way to make sure that every batch of Oreo strawberry bonbons looks clean and professional.
Use Parchment Paper
Use parchment paper to line every tray used in this recipe. This keeps the bonbons from sticking to the tray at any point in the process, from the first freeze to the final storage in the fridge. If you don't use parchment paper on metal trays, the chocolate coating will freeze to the surface, making it very hard to get off without breaking the shell. When moving the finished bonbons to a serving or storage container, parchment also makes it easy to slide them off the tray.
Work In Small Batches
Work in small batches. During the dipping session, only take out two or three bonbon balls from the freezer at a time. This keeps the other balls at the right frozen temperature for the whole session, no matter how long it takes. A ball that has been at room temperature for more than three minutes becomes soft enough to change shape while it is dipping. Working in small batches completely removes this risk. To keep the right temperature sequence going, put each dipped batch back in the fridge right after you put it on the parchment tray. Take the next batch out of the freezer when you're ready to dip it.
Keep Chocolate Warm But Not Hot
The dipping chocolate should be kept warm but not hot. The target temperature range of 30–32°C is narrower than what most home recipes call for, but it is the range that makes the coating fluid and the setting speed on the frozen bonbon surface the best. If the temperature is above 34°C, the chocolate is too warm and melts the surface of the filling. If it is below 28°C, it is too thick and coats unevenly. Putting the chocolate bowl on top of a slightly larger bowl of warm water kept at about 40–45°C keeps the temperature stable during the dipping session, without the need for repeated microwave intervals that could cause overheating.
Variations To Try With Bonbons
Cream Cheese Version
Instead of the strawberry ice cream base, use 150 grams of softened full-fat cream cheese mixed with two tablespoons of powdered sugar and two tablespoons of strawberry jam. This makes a filling that is tangier, denser, and firmer at refrigerator temperature than the ice cream version. The cream cheese filling needs less almond flour—about two tablespoons instead of four—because it has less water, which makes the base firmer without soaking up more. This version stays stable at room temperature longer than the ice cream base, making it better for serving outdoors or at events where refrigeration isn't always available.
Dark Chocolate Coating
If you use a higher-percentage dark chocolate instead of the regular chocolate coating, the strawberry bonbons will have a much more bitter outer shell that goes well with the sweet strawberry filling. The cocoa bitterness resets the taste buds between bites, which makes the strawberry flavor taste more vibrant and distinct in each bite. At the same coconut oil ratio, dark chocolate makes a thinner, snappier shell than milk chocolate, which gives the finished bonbon a more refined texture.
Stuffed Center (nuts/chocolate)
To make the finished Oreo bonbons more interesting, press a whole toasted hazelnut or a small piece of dark chocolate into the center of each filling ball before shaping it into a smooth round. The filling must completely cover the nut or chocolate piece. If any part of it is exposed, the ball will break when you dip it. This change adds a second layer of flavor and texture, which makes the bonbon more fun to eat than one with only one kind of filling.
Festive Sprinkles
You can change the Oreo crumb topping to seasonal sprinkles, edible glitter, or colored sugar to make the same base recipe work for any time of year. Gold and red sprinkles are great for Diwali and other celebrations, while pastel pink and white are great for Valentine's Day or baby shower gifts. The garnish is always put on within 60 seconds of dipping, while the coating is still wet. The different toppings change the look of the bonbon completely, but the way it is made stays the same.
Storage & Shelf Life
Strawberry bonbons stay fresh for up to five days after they are made if they are stored in the fridge in a single layer in an airtight container lined with parchment paper between layers. The ice cream base keeps getting a little softer while it is in the fridge after the first 24 hours. By the fifth day, the filling is noticeably softer than it was when it was made, but the flavor is still the same. Uncoated shaped balls can be frozen for up to two weeks for longer storage. To make sure the coating is as crisp as possible and the Oreo strawberry bonbon has the best texture contrast, coat them in chocolate on the day you plan to serve them instead of ahead of time.
When To Serve These Bonbons
Oreo bonbons can be served in a lot of different ways because they are small, don't need any cutlery, and look great on any surface without any extra work. A platter of mixed toppings, some with Oreo crumbs, some with sprinkles, and some with freeze-dried strawberry powder, adds visual interest to parties without the need for multiple recipe batches. Six or eight bonbons arranged in a small box lined with tissue paper make a gift look like it was put together on purpose, and most people really appreciate the effort that goes into it. The bonbon format works well for dessert tables at parties because it doesn't take any more time to make a batch of 30 than it does to make a batch of 12. This makes it easy for anyone who is planning a party to make a lot of them.
Frequently Asked Questions
How do you keep bonbons from falling apart? 
The most important step for keeping the structure of the filling balls is to freeze them for at least 45 minutes before dipping them. This is because warm chocolate can change the shape of soft filling. Making sure there is enough almond flour to make a firm, dough-like consistency before shaping also stops it from crumbling.
Can I make Oreo bonbons without almond flour?
Yes, finely ground desiccated coconut in the same amount is the best substitute because it absorbs moisture in the same way and has a neutral flavor that doesn't compete with the strawberry base. You can also use finely crushed digestive biscuit crumbs, but they make the filling a little softer.
How long should bonbons be chilled before dipping?
The filling needs to be in the freezer for at least 45 minutes to become fully solid all the way through, not just on the surface. To make sure that the whole batch is ready, check one ball by pressing down hard with your thumb before you start dipping. If the center feels soft, it's better to freeze it for another 15 minutes than to try to dip it and fix the problem later.
Can I use white chocolate for coating bonbons?
Yes, white chocolate makes a light, ivory-colored coating that looks very different from the pink Oreo crumb topping on a strawberry bonbon. It melts at a lower temperature than dark or milk chocolate, and it needs a little less coconut oil to get to the right consistency for dipping.
How long do chocolate bonbons last in the fridge?
Oreo strawberry bonbons stay fresh for up to five days if you store them in an airtight container in the fridge with parchment paper between the layers. Over time, the filling gets softer, but it stays tasty the whole time. Eating within 48 hours of making it gives you the best texture and flavor.
Like This Recipe?

Thank you for rating the recipe!
Recipe by Categories
Popular Articles
Sweet Celebrations Effortless Office Party ...

Teddy Bear Chocolate Cookies: Perfect Bakes For ...
5 mins
Sep 30, 2026

Bournville Sabudana Kheer Recipe: A Chocolate ...
3 mins
Oct 13, 2026
Next-Gen Rakhi Hampers: Trendsetting Chocolate ...
3 mins
Jul 16, 2026
Rakhi 2026: Designing The Perfect Chocolate Gift ...
3 mins
Jul 19, 2026
Recommended Recipes