


3 mins
May 1, 2026
EN
हिं

Oreo Mug Cake Recipe – How To Make A 1-Minute Oreo Cake In A Mug Recipe

Rishita Thalluri
Oreo mug cake is a fast, one-minute dessert made in a mug, offering a soft texture and convenient preparation without requiring baking equipment.
Difficulty:easy
Serves:1
Time:6 mins
Contains egg: No
Who doesn't love Oreos? The classic chocolate sandwich cookie is a childhood favorite that also appeals to adults. Now, you can enjoy all the delicious flavors of Oreos in an even more indulgent way—as a homemade mug cake! Making mug cakes is a fun and easy way to satisfy a sweet tooth without much fuss. All you need are a few basic ingredients likely already in your pantry and a microwave-safe mug: no need to preheat the oven or dirty extra dishes.
This is the perfect dessert hack......Read More
Ingredients You Need
for an Oreo Mug Cake
1
serving
For the Recipe
- Oreo Cookies- 2 packs
- Baking Powder- 1 tsp
- Vanilla Extract- 1 tsp
How to Make Oreo Mug Cake in the Microwave (Step-by-Step)
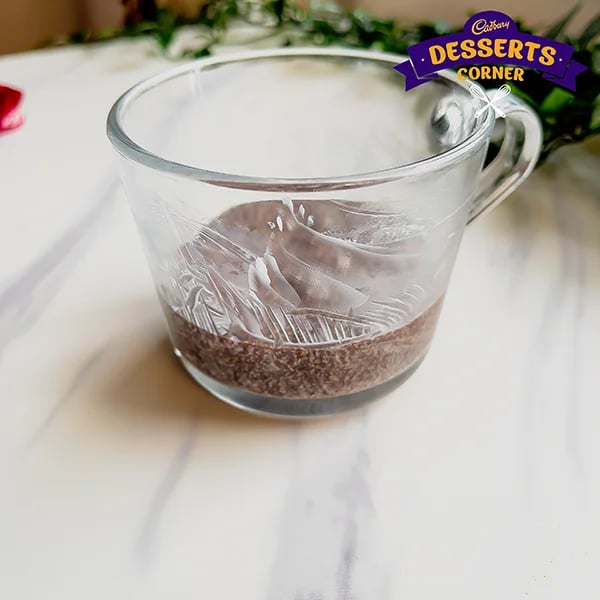
Step 1 — Crush the Oreos
Put the three Oreo cookies in the mug and use the back of a spoon to crush them into small, even crumbs. Press down hard on the bottom and sides of the mug until there are no big pieces of cookie left. The finished how to make an Oreo mug cake has visible pieces of biscuit, which make the cake hard and dry in places that you can feel in every bite. It's important to add the cream filling to the crust. When you microwave it, it melts into the batter and adds both moisture and sweetness that the biscuit crumb doesn't have.
Step 2 — Build the Batter
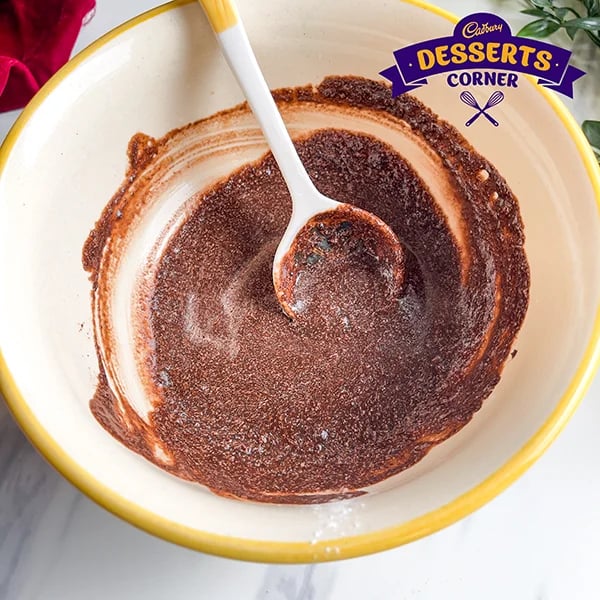
Put the milk, flour, baking powder, sugar, and oil right into the mug with the Oreo crumbs. Use a small fork or thin whisk to mix the batter until there are no more dry flour pockets and it is smooth and evenly mixed. The batter should be pourable but a little thicker than regular pancake batter. If it looks too thick to pour, add half a teaspoon more milk and stir again before moving on.
Step 3 — Check Mug Size
Check to see that the mug can hold at least 300 ml and that the batter only fills it halfway before putting it in the microwave. If the mug is too small, the batter will overflow while it cooks because the Oreo cake mug makes steam expand quickly. This makes a mess and makes the cake smaller. A mug with a wide, straight side and a capacity of 350 to 400 ml is the best choice for getting the same results every time.
Step 4 — Microwave
Put the mug in the middle of the microwave turntable and cook it on high for 60 seconds. At the 60-second mark, look at the surface. It should look set and matte, not wet and shiny in the middle. If the center still looks like it's liquid, microwave it in ten-second intervals until it's just set. A toothpick should come out of the center of the Oreo mug cake with moist crumbs instead of wet batter. If there is any moisture on the pick, that's fine; if the batter is running, that's not.
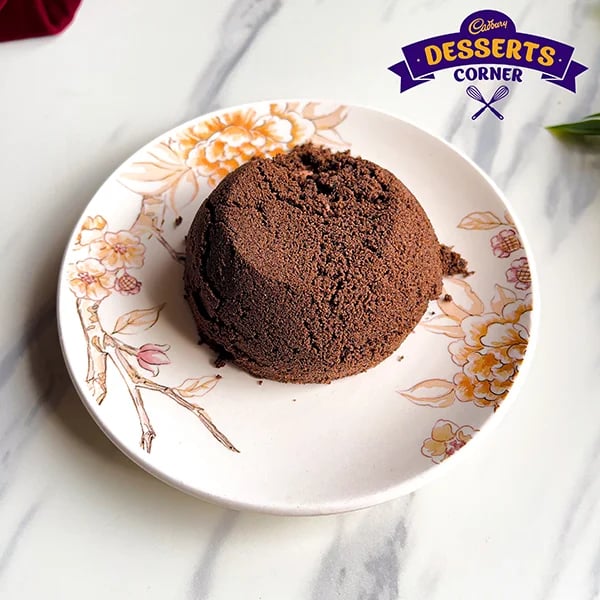
Step 5 — Rest and Top
Let the mug sit on the counter for 60 seconds before eating. The heat from the mug walls and the batter itself keeps cooking the center during this time, which usually fixes any problems with undercooking without having to microwave it again. Before serving straight from the mug, add the optional Cadbury Dairy Milk chocolate topping, a spoonful of whipped cream, or a crushed Oreo crumble to the warm surface. This will keep the heat in while you eat.
How Long To Microwave An Oreo Mug Cake For Perfect Texture
The safest universal approach is to begin at 60 seconds regardless of the microwave's rated wattage, check the surface carefully, then add time in strict ten-second increments only if the center remains visibly unset. Overcooking is the most destructive mistake in mug cake preparation — a rubbery, dry result cannot be corrected after the fact, and ten extra seconds is genuinely sufficient to cross the line between a perfect cake and an unpleasant one. A slightly underdone center that finishes setting during the 60-second resting period is always the preferred outcome over an overcooked exterior.
Pro Tips to Make the Perfect Oreo Mug Cake Every Time
Batter Consistency: The batter should be thick enough to coat the back of a spoon in a smooth, even layer without running off right away. It should be thicker than crêpe batter but thinner than brownie batter. If the batter looks too thick after mixing it for the first time, add milk in half-teaspoon amounts instead of tablespoon amounts. Adding too much liquid will make the cake not set evenly during the short microwave cooking time. A quick and easy way to check the batter's consistency before cooking is to tilt the mug slightly and see how it flows.
Choosing A Mug: A wide, straight-sided cylindrical mug spreads microwave energy more evenly than a narrow or tapered one. This is because straight sides let heat flow in from the outside in a uniform way, rather than concentrating at the curved base. This even heat distribution lowers the chance of having an overcooked outside ring around a raw center, which is the most common texture problem when making mug cakes. Stay away from novelty mugs with very thick ceramic walls. These walls keep the batter from getting hot in the microwave and make it take much longer to reach the right internal temperature.
Microwave Timing: Setting a precise timer instead of guessing by looking at it is the best thing anyone who has ever made overcooked Oreo mug cake can do to make it better. At high wattage, the difference between a perfectly baked cake and a rubbery one can be as little as ten seconds. It takes discipline to take the mug out, check it, and put it back in for measured extra increments. This becomes second nature after two or three successful batches.
Common Mistakes to Avoid When Making Oreo Mug Cake
Overmixing Batter
If you don't mix the dry ingredients enough, the batter will have visible dry pockets. If you mix the flour too much, the gluten structure will become too strong, making the cake a little tough and chewy instead of the soft, tender crumb that the recipe calls for. You only need to mix the batter with a fork 20 to 30 times until it is smooth. After that, there is no point in mixing it more.
Too Much Liquid
If you add more than three tablespoons of milk to the batter in this recipe, the mixture will stay partially liquid in the middle no matter how long you cook it. This is because the extra water needs more heat energy to evaporate than a 60-second microwave cycle can provide. To avoid this, add liquid in small amounts, like half a teaspoon at a time if the batter seems too thick. This keeps the final batter in the right range for reliable setting.
Overcooking
Overcooking is the most common and harmful mistake people make when making Oreo mug cake. It makes the cake dense and rubbery, and no amount of toppings can fix it. When you tilt the mug, the center of the cake should feel just set and a little springy. If it bounces back a little when you press on it with your fingers, it's done. If the center of the cake feels hard and dry when you press on it, it has been overcooked, and the texture will only get worse as the cake cools.
Easy Variations Of Oreo Mug Cake You Can Try
Chocolate Lava Version
Press a square of Cadbury Dairy Milk or a small group of chocolate chips into the center of the batter right before you put it in the microwave. The batter around it will keep the chocolate from melting, so it will turn into a fluid, molten pocket in the center while the batter around it sets completely. The first bite reveals the liquid center, which then flows into the crumb around it. This version gives a very different eating experience than the standard recipe. The effect only works if you put the chocolate piece right in the middle of the batter, not near the edge, where it would be exposed to the mug wall's hotter heat.
With Milk Instead Of Water
The base recipe calls for milk, but some simpler versions suggest water as an alternative. Using full-fat milk consistently makes a richer, softer crumb, so it's best to say that milk is a deliberate choice rather than an optional one. Even though this recipe only calls for three tablespoons of full-fat milk, the fat and protein in it help make the crumb structure soft, just like they do in a regular cake recipe. When you use skimmed milk instead of full-fat milk, the result is a little drier. When you use water, the result is the driest of all. You can really tell the difference in a single-serve preparation, where each ingredient's contribution is more pronounced.
With Additional Toppings
Instead of mixing an extra crushed Oreo into the batter, add it to the top of the batter just before microwaving. This makes a thick layer of biscuits on top of the finished cake that has a stronger Oreo flavor and a slightly different texture than the base crumb below. You don't have to change the batter recipe for this variation, and it only takes a few extra seconds to make. When you microwave the top Oreo layer, it gets a little crunchy, which makes the soft batter underneath it feel different.
Serving Ideas For Oreo Mug Cake
Ice Cream Pairing
Putting a single scoop of vanilla ice cream on the warm surface of the freshly baked Oreo mug cake makes an instant temperature difference. The cold ice cream melts slightly into the warm crumb, making a sauce at the interface that tastes richer than either component alone and makes for a much more satisfying eating experience than the cake served plain.
Chocolate Drizzle
A drizzle of melted Cadbury Dairy Milk over the ice cream and down the sides of the mug adds visual richness and a concentrated chocolate flavor layer that strengthens the Oreo base without copying it. The melted chocolate has a different texture and intensity than the baked biscuit crumb, so the addition is truly complementary rather than redundant.
Nuts / Sprinkles
Two tablespoons of chopped toasted hazelnuts or colorful sprinkles sprinkled over the warm surface add a dry, nutty crunch that goes well with the soft crumb. You don't need to cook or prepare anything else. The toasted quality gives them a roasted flavor that the Oreo and milk chocolate parts don't have, which makes the addition really work.
Can You Make An Oreo Mug Cake Without Baking Powder?
When you add water and heat to baking powder, it makes carbon dioxide bubbles that make the batter rise and give it a cake-like crumb structure while it cooks in the microwave. Without it, the batter still sets and makes something you can eat, but the texture is noticeably denser—more like a baked brownie than a cake—and the center isn't as light as it should be for a properly risen mug cake. If you don't have baking powder, you can make a leavening agent by mixing a small pinch of baking soda with two to three drops of white vinegar. This will cause an acid-base reaction that makes the same amount of carbon dioxide as needed for a single-serve recipe. At these amounts, there isn't much of a difference in taste. Instead of vinegar, you can use a small pinch of cream of tartar as the acidic part. It works just as well and doesn't change the flavor of the finished dish.
How to Store Oreo Mug Cake (If Needed)
An Oreo mug cake is made to be eaten right away. The crumb structure of a microwave-cooked batter is much more fragile and less stable than that of an oven-baked cake, and it gets stale quickly after cooking because the moisture moves from the center to the edges. If you need to store the cake for any reason, wrap the mug tightly in plastic wrap that is pressed directly against the cake surface to keep air out. You can keep it in the fridge for up to 12 hours. Before you eat, reheat it on medium power for 15 seconds. Don't microwave it on full power, though, because the short, intense burst of heat at a small mass always overcooks the outside before the center has time to warm through. After 12 hours in the fridge, the texture gets so bad that reheating it doesn't help much. The crumb gets dense, the Oreo flavor flattens, and the end result is clearly worse than a batch that was just made. It only takes 90 seconds to make this recipe, but it's always better to make it fresh.
FAQs About Oreo Mug Cake 30 words
Can I make an Oreo mug cake without a microwave? 
Yes, pour the batter into a small ramekin that can go in the oven and bake it at 180°C for 12 to 15 minutes. Because it was in the oven for longer, the result has a crumb that is a little drier and more set than the microwave version. Check it after 12 minutes and take it out as soon as the center is just set so it doesn't dry out too much.
How do I make an Oreo mug cake soft and moist?
Using full-fat milk instead of water, refined oil instead of butter, and stopping the microwave at exactly the moment the center is just set are the three most impactful decisions for a soft, moist Oreo mug cake recipe result. Checking at 60 seconds and adding time in strict ten-second increments prevents overcooking, which is the primary cause of dry texture regardless of ingredient quality.
Can I use milk instead of water in an Oreo mug cake?
Yes, and this recipe says to use whole milk instead of water. Plain water can't make the crumb as soft and rich as milk does because of the fat and protein in it. The amount of liquid stays the same: three tablespoons of milk can be used instead of three tablespoons of water without changing the batter ratios.
Why is my Oreo mug cake rubbery?
In most cases, the problem is that the food was cooked too long. Cakes that are cooked in the microwave set from the outside in. The outer layers reach the right temperature before the center, so if you keep cooking after the outer batter has set, you will get a rubbery, overcooked ring around a properly set core. Check every 60 seconds and only add time if you need to.
How many Oreos do I need for a mug cake?
Three standard Oreo biscuits is the correct quantity for a single serving of how to make an Oreo mug cake preparation at this recipe's batter ratio. Fewer than three produces a noticeably less distinct Oreo flavor. More than four, without adjusting the liquid and flour quantities proportionally, creates a batter that is too dense and starchy to cook evenly in the microwave at the standard 60-second duration.
Like This Recipe?

Thank you for rating the recipe!
Recipe by Categories
Popular Articles

Chocolate Idli Recipe: A Fun and Sweet Twist On ...

Chocolate Dosa Fusion Recipe: A Sweet Indian ...
3 mins
May 2, 2026

Chocolate Buttercream Mastery: Fluffy Rich ...
3 mins
May 6, 2026

Chocolate Cupcake Design Ideas: 5 Creative ...
3 mins
May 3, 2026

Is Baking Soda Safe for Health Uses Benefits and ...
4 mins
May 5, 2026
Recommended Recipes


