








4 mins
Aug 6, 2026
EN
हिं

Chocolate Pedas Recipe
 Romi Bhattacharjee

Romi Bhattacharjee
 Published: Dec 19, 2025
Last Updated Date:Oct 29, 2026


Try this chocolate peda recipe which is a perfect amalgamation of the classic peda, rich chocolate, and a hint of cardamom, perfect for snacking or during festive occasions.

Difficulty:easy

Serves:6

Time:20 mins

Contains egg: No
Peda is a traditional Indian milk sweet enjoyed during festivals, family gatherings, and religious celebrations. This chocolate peda with condensed milk gives the classic mithai a modern twist with cocoa powder, ghee, and a hint of cardamom. It is an easy, khoya-free recipe that uses simple ingredients and comes together in a pan without complicated techniques.
These chocolate pedas have a soft, rich texture and a gentle cocoa taste that pairs well with the sweetness of condensed milk.......Read More
Ingredients
6
Servings
For the Recipe
- 1 tsp ghee, plus extra for greasing your palms
- 1/2 cup milk powder
- 1/2 cup condensed milk
- 1/2 tsp cardamom powder (optional)
- 2 tsp Cadbury Cocoa Powder
- 1–2 sheets edible silver warq, for garnish (optional)
Directions
Step 1
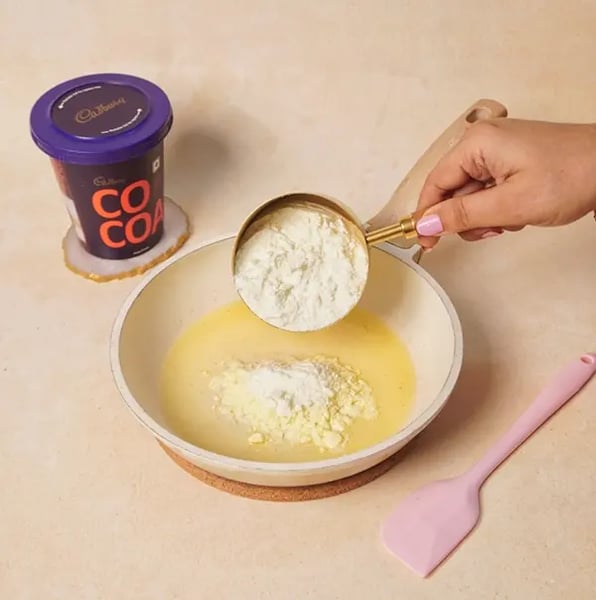
Heat the ghee in a nonstick pan over low heat. Add the milk powder and stir gently to combine. Keep the heat low to prevent the milk powder from browning or sticking.
Step 2
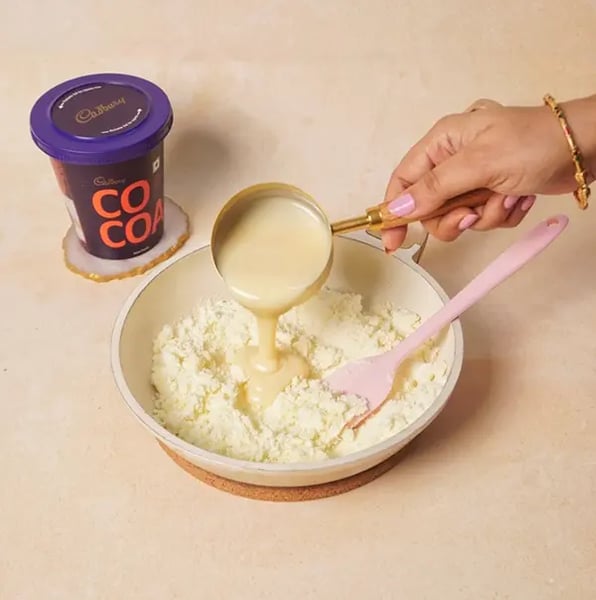
Gradually pour in the condensed milk while stirring continuously. Mix well to prevent lumps from forming and to create a smooth mixture.
Step 3
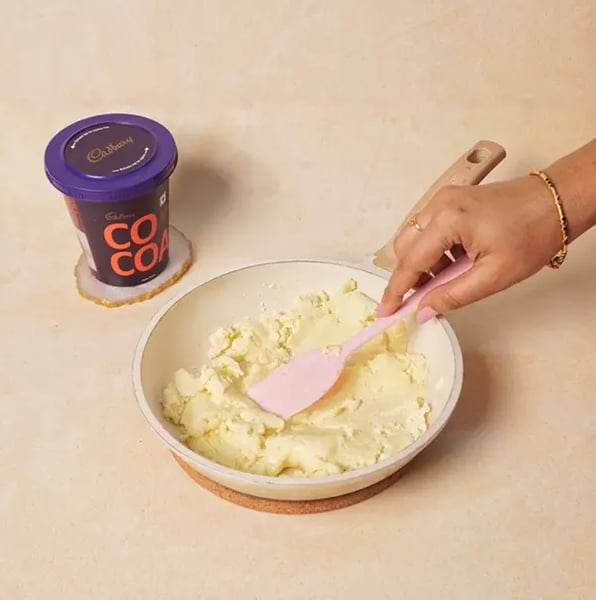
Continue stirring over low heat for approximately 2–3 minutes, until the mixture becomes smooth and begins to thicken slightly. Scrape the sides and bottom of the pan as you stir.
Step 4
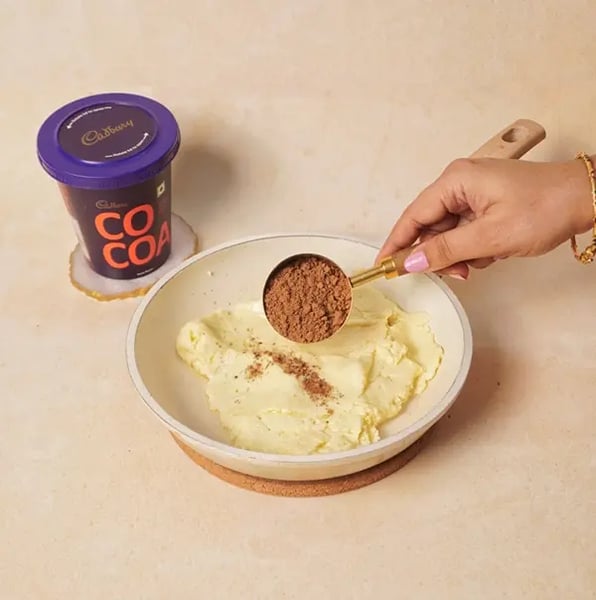
Sift the Cadbury Cocoa Powder into the mixture to help prevent lumps. Stir thoroughly until the cocoa is evenly incorporated and the mixture has a consistent chocolate color.
Step 5
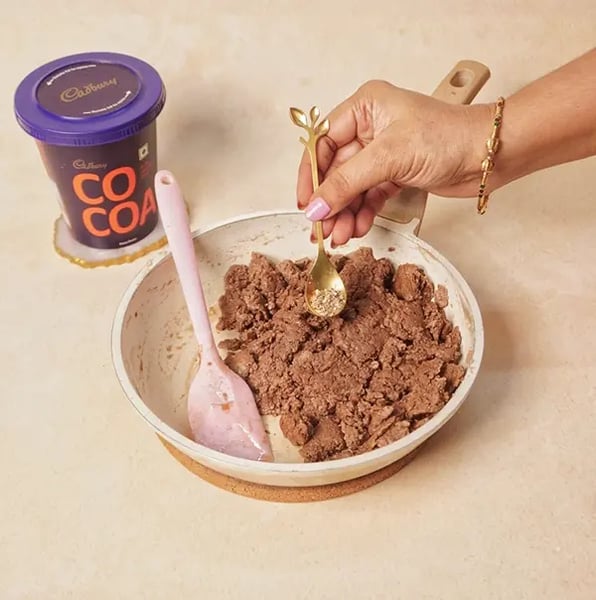
Continue cooking over low heat for approximately 5–7 minutes, stirring constantly. The mixture should thicken, form a soft dough-like mass, and begin to leave the sides of the pan. Add the cardamom powder if using, mix well, and turn off the heat.
Step 6
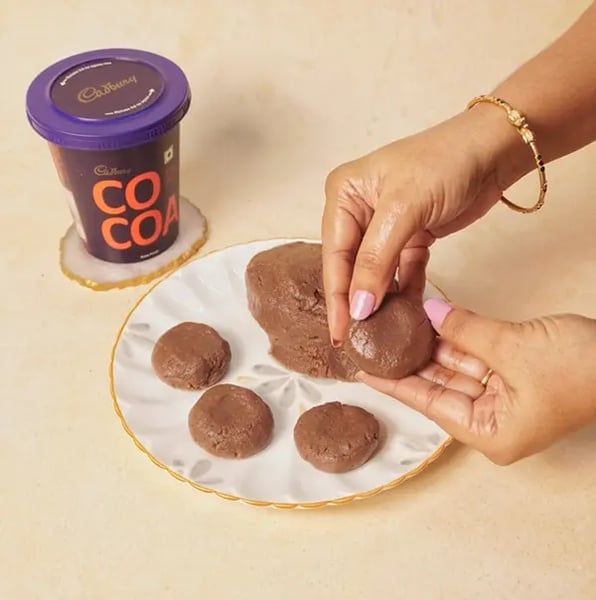
Let the mixture cool for a few minutes until it is warm but comfortable to handle. Grease your palms lightly with ghee. Take a small portion, about 1 tablespoon or 20–25 g, roll it into a ball, and gently flatten it into a peda.Repeat with the remaining mixture. Allow the pedas to cool and set completely before decorating or storing. The listed 20-minute preparation and cooking time excludes this cooling and setting period.
Step 7
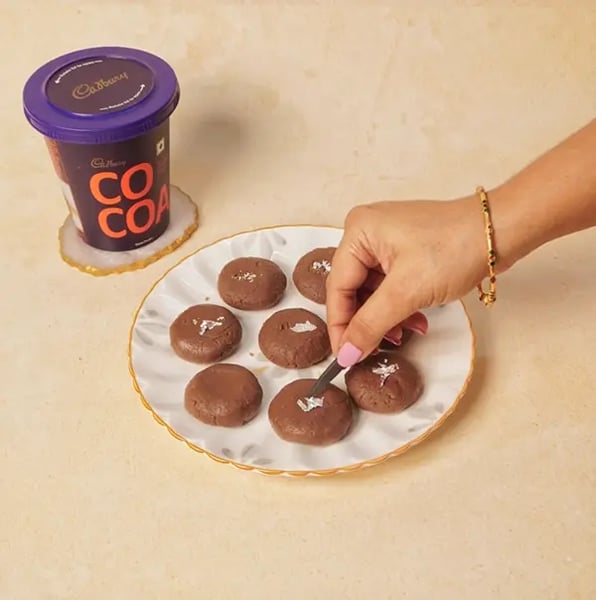
Carefully place small pieces of edible silver warq on the pedas, if desired. Handle the warq gently so it does not tear. Serve the chocolate pedas once they have cooled and set.
Tips & Tricks
Avoiding Lumps in the Peda Mixture
Add the condensed milk gradually while stirring the milk powder and ghee. Sift the cocoa powder before adding it, and mix continuously so it blends evenly. Keep the heat low to prevent the mixture from sticking or cooking unevenly.
Getting the Dough Consistency Right
The mixture is ready when it thickens into a soft mass and begins to leave the sides of the pan. If it remains runny, continue cooking over low heat while stirring. Avoid cooking it for too long, as an overly dry mixture can make the pedas hard or crumbly.
Shaping Smooth, Even Pedas
Let the mixture cool until it is comfortable to handle, but shape it before it becomes completely cold and firm. Grease your palms lightly with ghee and use similar-sized portions for even pedas. Press and flatten each ball gently to avoid cracks.
Variations
- Nut-stuffed chocolate pedas: Place finely chopped almonds, cashews, or pistachios in the center before shaping each peda.
- Cocoa-coated pedas: Roll the finished pedas lightly in cocoa powder for a deeper chocolate finish.
- Coconut-coated pedas: Roll them in desiccated coconut for extra texture.
- Vanilla chocolate pedas: Add a few drops of vanilla extract to complement the cocoa. Avoid adding too much liquid.
- Melted chocolate version: Replace part of the cocoa powder with melted chocolate for a richer variation. Because chocolate changes the sweetness and moisture, adjust the mixture only after testing the quantities.
Storage
Once the pedas have cooled completely, place them in a clean, airtight container. You can store the pedas for 3–4 days in an airtight container. Refrigeration is the safer option for these milk-based sweets, particularly in warm weather. Keep them in an airtight container and return any leftovers to the refrigerator immediately. Freezing may be possible in a freezer-safe container, with parchment paper between layers. It can be stored up to two months.
Frequently Asked Questions
Can I make chocolate peda without milk powder? 
Milk powder gives this recipe its structure and milky flavor. You can try a khoya-based version instead, but the ingredient quantities and cooking method will need to be adjusted.
Can I use melted chocolate instead of cocoa powder?
Yes, but melted chocolate adds fat and sweetness, which can change the texture. Replace only part of the cocoa powder in a tested variation, rather than substituting it in equal amounts without adjustment.
How do I know when chocolate peda dough is ready?
The mixture should be thick and soft, forming a mass that begins to leave the sides of the pan. It should not look runny or feel completely dry.
Why is my chocolate peda dough sticky?
It may need more cooking or more time to cool. Continue stirring over low heat until it thickens, then let it cool until comfortable to handle before shaping.
How long do chocolate pedas last?
These pedas can last up to 3-4 days in an airtight container. Refrigerate them immediately and keep at room temperature for sometime before serving.
Can I make chocolate peda in the microwave?
A microwave version may be possible, but the mixture needs frequent stirring and careful monitoring to prevent hot spots and overcooking.
Like This Recipe?

Thank you for rating the recipe!
Recipe by Categories
Popular Articles
Sweet Celebrations Effortless Office Party ...

Teddy Bear Chocolate Cookies: Perfect Bakes For ...
5 mins
Sep 30, 2026

Does Dark Chocolate Have Benefits? What The ...
3 mins
Aug 3, 2026

Litchi Dessert Recipes: 8 Ways To Use Fresh ...
3 mins
Aug 6, 2026

How To Make Karanji The Modern Way: The ...
2 mins
Aug 5, 2026
Recommended Recipes