






Faqs
Making brownies at home is easy with basic pantry ingredients such as flour, cocoa powder, butter, sugar, milk, baking powder, and chocolate. Mix the batter until smooth, pour it into a greased baking tin, and bake until the centre is just set. Allow the brownies to cool before slicing for the best texture and rich flavor.
A brownie is a baked chocolate dessert with a rich taste and a soft, dense, or chewy texture. It combines the qualities of a cake and a cookie, making it a favorite sweet treat. Brownies can be enjoyed plain or enhanced with nuts, chocolate chips, caramel, or fruit.
Traditional brownie recipes often contain eggs to provide structure and moisture, but eggless brownies are equally popular. Ingredients such as yoghurt, mashed bananas, applesauce, flaxseed meal, or condensed milk can successfully replace eggs while maintaining a delicious texture and chocolate flavor.
For the best brownies, choose high-quality dark chocolate, semi-sweet chocolate, or baking chocolate with a good cocoa percentage. These varieties melt evenly, deliver a deep chocolate flavor, and create a richer taste than ordinary chocolate bars designed for snacking.
To bake brownies without eggs, replace them with yoghurt, condensed milk, mashed bananas, applesauce, or a flaxseed mixture. Combine the ingredients into a smooth batter and bake until the edges are firm while the centre remains slightly soft for perfect results.
Chocolate brownies are made by mixing melted chocolate or cocoa powder with butter, sugar, flour, and baking ingredients. Fold the batter gently to avoid overmixing, then bake until a toothpick comes out with a few moist crumbs for a rich chocolate dessert.
Eggless brownies can be prepared by combining flour, cocoa powder, butter or oil, sugar, milk, and an egg substitute such as yoghurt or condensed milk. Bake until just cooked, then let the brownies cool completely before cutting to achieve clean slices and a soft texture.
The best chocolate for brownies is premium dark or semi-sweet chocolate with at least 60 percent cocoa solids. This type of chocolate provides a balanced sweetness, intense cocoa flavor, and smooth consistency, resulting in brownies with a rich taste and appealing color.
Fudgy brownies are created by using a higher ratio of butter and chocolate than flour. Less baking time, fewer leavening agents, and careful mixing also contribute to their dense texture, moist centre, and rich chocolate flavor that many dessert lovers consider their favorite.
Brownie batter is prepared by combining melted butter and chocolate with sugar before adding flour, cocoa powder, milk, vanilla extract, and other ingredients. Mix everything just until incorporated to avoid developing too much gluten, which helps produce tender, flavorful brownies after baking.
Making ice cream at home is simple with fresh cream, milk, sugar, and your preferred flavoring. Mix the ingredients well, chill the mixture, then freeze it while stirring every few hours. This method creates smooth, creamy homemade ice cream without requiring complicated equipment.
Yes, you can eat ice cream quickly, but it may cause a sudden "brain freeze" due to rapid cooling of the roof of your mouth. Eating slowly helps you enjoy the flavor and texture while reducing discomfort and allowing the ice cream to melt evenly.
To make mango ice cream, blend ripe mango pulp with fresh cream, condensed milk, and a little vanilla extract. Pour the mixture into a freezer-safe container and freeze for 6–8 hours, stirring once or twice for a creamier homemade mango ice cream.
Not all ice cream contains eggs. Traditional French-style ice cream often uses egg yolks to create a rich custard base, while many commercial and homemade recipes are completely egg-free. Always check the ingredient list if you have an egg allergy or dietary preference.
Chocolate ice cream can be made by combining milk, cream, cocoa powder or melted dark chocolate, sugar, and vanilla extract. Chill the mixture before freezing, stirring occasionally if you do not have an ice cream maker, until it becomes smooth and creamy.
Vanilla ice cream is prepared by mixing fresh cream, milk, sugar, and pure vanilla extract or vanilla beans. Chill the mixture, then freeze it while stirring every few hours or churn it in an ice cream maker for a rich and creamy texture.
A sundae is a popular ice cream dessert made by topping one or more scoops of ice cream with sauces such as chocolate, caramel, or strawberry. It is often finished with whipped cream, nuts, sprinkles, cherries, or fresh fruit for extra flavor.
You can make ice cream without an ice cream maker by whipping fresh cream and folding it into sweetened condensed milk with your chosen flavorings. Freeze the mixture for several hours, stirring occasionally, or use the no-churn method for a creamy consistency.
The best chocolate for ice cream is high-quality dark or semi-sweet chocolate containing at least 60% cocoa. It delivers a rich chocolate flavor and smooth texture. Premium chocolate bars generally provide better taste than chocolate chips because they melt more evenly.
Dark chocolate, semi-sweet chocolate, and premium couverture chocolate are excellent choices for making ice cream. These chocolates melt smoothly, blend well into the base, and provide a deep, balanced flavor without making the ice cream overly sweet.
To make Butterscotch ice cream at home, combine fresh cream, milk, condensed milk, butterscotch essence, and crunchy butterscotch praline. Mix everything well, pour into a freezer-safe container, and freeze for 6 to 8 hours until the ice cream becomes creamy and firm.
Yes, Butterscotch ice cream can be made without eggs using fresh cream, condensed milk, milk, butterscotch flavoring, and praline. This eggless recipe delivers a rich, creamy texture while remaining simple to prepare and suitable for vegetarians.
Yes, Butterscotch ice cream does not require an oven. Simply prepare the ice cream mixture, fold in crushed butterscotch praline, transfer it to an airtight container, and freeze until firm. Stirring the mixture once during freezing helps create a smoother texture.
Butterscotch ice cream is typically made with fresh cream, whole milk, condensed milk or sugar, butterscotch essence, butter, brown sugar, and crunchy praline pieces. Some recipes also include vanilla extract for extra flavor and a balanced sweetness.
Store Butterscotch ice cream in an airtight, freezer-safe container to maintain its creamy texture and flavor. Keep it in the coldest section of the freezer and avoid frequent thawing and refreezing, as temperature changes can affect its consistency.
Butterscotch ice cream may become dry or dense if it contains too little fat, is overmixed, or is frozen incorrectly. Using quality dairy ingredients, maintaining proper ingredient ratios, and freezing the mixture evenly will help achieve a creamy texture.
Butterscotch ice cream stands out because of its buttery caramel flavor and crunchy praline pieces. Unlike caramel ice cream, which focuses on caramelised sugar, butterscotch includes butter and brown sugar, giving it a richer taste and distinctive texture.
You can customize Butterscotch ice cream by adding chocolate chips, roasted almonds, cashews, pecans, caramel swirls, cookie crumbs, coffee, or brownie pieces. These simple additions create delicious flavor combinations while enhancing the classic butterscotch taste.
Milk chocolate and high-quality dark chocolate pair beautifully with Butterscotch ice cream. Semi-sweet or couverture chocolate also works well because it balances the buttery sweetness and adds a rich cocoa flavor without overpowering the dessert.
The best Butterscotch ice cream brand depends on your taste preferences and ingredient quality. Choose a brand that uses real dairy ingredients, offers a creamy texture, rich butterscotch flavor, and crunchy praline pieces. Reading customer reviews and checking the ingredient list can help you select a high-quality option.
An easy homemade Chocolate Chip Brownie recipe combines flour, cocoa powder, butter, sugar, milk, vanilla extract, and plenty of chocolate chips. Mix the ingredients into a smooth batter, bake until just set, and allow the brownies to cool before slicing for a rich chocolate flavor and soft texture.
Yes, Chocolate Chip Brownies can be made without eggs by using yogurt, condensed milk, mashed bananas, or a flaxseed mixture as a substitute. These alternatives keep the brownies moist while allowing the chocolate chips to melt beautifully throughout the dessert.
A Chocolate Chip Brownie can be prepared without an oven using a heavy-bottomed pan, pressure cooker without the whistle, or an air fryer. Bake the batter over gentle heat until cooked through, creating a delicious brownie with a rich flavor and attractive color.
Chocolate Chip Brownies typically contain flour, cocoa powder, melted chocolate, butter, sugar, milk, vanilla extract, baking powder, and chocolate chips. Optional ingredients such as walnuts, almonds, sea salt, or coffee powder can add extra flavor and texture to the recipe.
Homemade Chocolate Chip Brownies stay fresh for up to three days at room temperature in an airtight container or up to one week in the refrigerator. Proper storage helps maintain their soft texture, rich chocolate flavor, and overall freshness for longer.
A common mistake is adding too many chocolate chips or overbaking the brownies, which can affect the texture. Overmixing the batter may also produce dense brownies instead of a soft, fudgy dessert with balanced flavor and an even crumb.
Homemade Chocolate Chip Brownies are prepared with fresh ingredients and allow complete control over sweetness, chocolate quantity, and overall flavor. They usually have a softer texture, better aroma, and fewer artificial additives than many commercially produced alternatives.
You can customize Chocolate Chip Brownies by adding peanut butter, caramel swirls, toasted hazelnuts, dried cranberries, orange zest, espresso powder, or marshmallows. These additions create exciting flavor combinations, vibrant color, and a unique dessert that quickly becomes a favorite.
For the best Chocolate Chip Brownie, choose high-quality baking chocolate or chocolate chips with a high cocoa content and smooth melting properties. Premium baking chocolate provides a richer flavor, glossy appearance, and better texture, helping create soft, indulgent homemade brownies.
A good Chocolate Chip Brownie should be made with premium cocoa, plenty of chocolate chips, and carefully selected baking ingredients. Look for a product with a moist crumb, rich flavor, even color, and a soft, chewy texture to enjoy a delicious brownie with every bite.
To make a Dark Chocolate Brownie at home, melt dark chocolate with butter, then mix in sugar, flour, cocoa powder, milk, vanilla extract, and baking ingredients. Bake until the edges are firm while the centre stays slightly soft for a rich chocolate flavor and fudgy texture.
Yes, a Dark Chocolate Brownie can be made eggless by replacing eggs with yogurt, condensed milk, applesauce, or a flaxseed mixture. These alternatives help maintain moisture and structure while allowing the deep cocoa flavor to remain the highlight of the dessert.
A Dark Chocolate Brownie can be prepared without an oven using a heavy-bottomed pan, an air fryer, or a pressure cooker without the whistle. This simple cooking method produces a moist brownie with a rich flavor, attractive color, and satisfying texture.
A Dark Chocolate Brownie is typically made with dark chocolate, cocoa powder, flour, butter, sugar, milk, vanilla extract, and baking powder. Optional ingredients such as walnuts, chocolate chunks, espresso powder, or sea salt can enhance both the flavor and texture.
Store Dark Chocolate Brownies in an airtight container at room temperature for up to three days or refrigerate them for about one week. Wrapping individual pieces helps retain moisture, preserves the rich chocolate flavor, and keeps the brownies soft and fresh.
Dark Chocolate Brownies may become dry or dense because of overbaking, too much flour, or excessive mixing. Measuring ingredients carefully, using quality chocolate, and removing the brownies from the oven at the right time helps achieve a soft and fudgy texture.
A Dark Chocolate Brownie differs from cake-like desserts because it contains more chocolate and less leavening, creating a dense texture and intense cocoa flavor. Its deep color and rich taste make it a favorite choice for serious chocolate lovers.
You can customize a Dark Chocolate Brownie with roasted hazelnuts, almonds, peanut butter swirls, orange zest, espresso powder, dried cherries, sea salt, or white chocolate pieces. These additions introduce new flavor combinations, attractive color, and exciting textures.
For the best Dark Chocolate Brownie, choose premium baking chocolate with a high cocoa percentage and smooth melting quality. Good-quality dark chocolate creates a richer flavor, glossy finish, and soft texture, resulting in a more indulgent homemade brownie.
The best Dark Chocolate Brownie is one that delivers a rich cocoa taste, moist centre, and smooth texture using high-quality ingredients. When comparing different options, consider the ingredient list, cocoa content, freshness, and overall flavor to find a brownie that matches your personal preference.
To make Falooda Ice Cream at home, prepare chilled falooda sev, soaked basil seeds, rose syrup, and sweetened milk. Layer them with creamy vanilla or kulfi-style ice cream in a tall glass. Top with chopped nuts, jelly, and a drizzle of rose syrup for a colourful dessert.
Yes, Falooda Ice Cream can easily be prepared without eggs by using eggless ice cream along with rose syrup, falooda sev, basil seeds, sweetened milk, and dry fruits. This version delivers the same creamy texture and traditional flavor while remaining suitable for vegetarian diets.
Falooda Ice Cream is a completely no-oven dessert that requires only simple assembly. Chill all the ingredients, layer them in serving glasses, and add scoops of ice cream on top. Refrigeration and freezing are all that is needed to create this refreshing treat.
Falooda Ice Cream is made using ice cream, rose syrup, chilled milk, falooda sev, soaked basil seeds, jelly cubes, chopped pistachios, almonds, and sometimes tutti frutti. These ingredients combine to create a creamy dessert with vibrant color, varied textures, and refreshing flavor.
Store the ice cream separately in an airtight container in the freezer, while keeping prepared falooda ingredients refrigerated in separate containers. Assemble the dessert only before serving to maintain the best texture, fresh flavor, and attractive presentation without ingredients becoming soggy.
Falooda Ice Cream may become dry or dense if the ice cream melts and refreezes repeatedly or if the ingredient proportions are not balanced. Using fresh dairy ingredients, serving immediately after assembling, and avoiding temperature fluctuations help maintain a smooth, creamy consistency.
Falooda Ice Cream stands apart from regular frozen desserts because it combines ice cream with basil seeds, falooda sev, rose syrup, milk, jelly, and nuts. This layered dessert offers multiple textures, vibrant color, and traditional Indian flavors in every spoonful.
You can customize Falooda Ice Cream by adding mango puree, strawberry syrup, chocolate sauce, coffee jelly, fresh berries, caramel, coconut flakes, or crunchy cookie crumbs. These creative variations introduce exciting flavors while keeping the dessert refreshing and visually appealing.
If you want to add chocolate to Falooda Ice Cream, choose premium dark, milk, or semi-sweet chocolate with a smooth melting texture. These varieties blend well with the creamy base and complement rose, vanilla, and nutty flavors without overwhelming the dessert.
The best Falooda Ice Cream is made with high-quality dairy ingredients, a rich and creamy consistency, and authentic flavors that complement traditional falooda components. Look for products with natural ingredients, balanced sweetness, and a smooth texture to create a delicious and satisfying dessert experience.
To prepare frozen ice cream desserts, first make or soften your ice cream base. Layer it with ingredients like cookies, fruits, nuts, or chocolate sauce if desired. Freeze until firm, then garnish with whipped cream, sprinkles, or fresh fruit before serving for the best texture and flavor.
You can make frozen ice cream desserts without eggs by using fresh cream, condensed milk, milk, vanilla extract, and your favourite flavorings. Whip the cream until soft peaks form, fold in the remaining ingredients, and freeze for several hours until creamy and set.
A no-oven frozen ice cream dessert is made by layering ice cream with crushed biscuits, brownie pieces, fruits, chocolate, or sauces in a freezer-safe dish. Freeze the assembled dessert until firm, then slice or scoop and serve chilled without any baking required.
The main ingredients used in frozen ice cream desserts include ice cream, fresh cream, condensed milk, milk, chocolate, fresh fruits, cookies, brownie pieces, nuts, caramel, vanilla extract, and flavorings. These ingredients create rich, creamy, and delicious frozen treats for every occasion.
Frozen ice cream desserts generally stay fresh for up to one to two weeks when stored in an airtight, freezer-safe container. Keeping them well covered helps prevent freezer burn and preserves their creamy texture, flavor, and overall quality until serving time.
Frozen ice cream desserts may not turn out well due to incorrect ingredient ratios, insufficient freezing time, overmixing, or frequent temperature changes. Using quality ingredients, following the recipe carefully, and maintaining a consistent freezer temperature will improve the final texture and taste.
Frozen ice cream desserts differ from regular desserts because they are served chilled or frozen, offering a creamy, refreshing texture. They often require freezing instead of baking and are perfect for warm weather, celebrations, and easy make-ahead dessert options.
Serve frozen ice cream desserts in waffle cones, dessert cups, mason jars, or chocolate bowls. Top them with chocolate sauce, caramel, fresh berries, crushed cookies, nuts, colourful sprinkles, or whipped cream to create attractive and delicious desserts for parties or family gatherings.
The best chocolate for frozen ice cream desserts is high-quality dark, semi-sweet, or couverture chocolate with a high cocoa content. These chocolates melt smoothly, provide rich flavor, and blend perfectly into ice cream, sauces, and frozen dessert recipes.
The best brand for frozen ice cream desserts depends on the flavor, texture, and quality you prefer. Look for brands that use premium dairy ingredients, offer a smooth and creamy consistency, and provide a wide variety of flavours. Checking ingredient labels and customer reviews can help you choose the best option for your dessert recipes.
To make a Fudge Brownie at home, combine melted chocolate, butter, sugar, flour, cocoa powder, milk, and vanilla extract into a smooth batter. Bake until the edges are set while the centre remains slightly soft. Cooling before slicing helps develop the signature fudgy texture and rich flavor.
Yes, a Fudge Brownie can be prepared without eggs by using yoghurt, condensed milk, applesauce, or a flaxseed mixture as a substitute. These ingredients provide moisture and structure, resulting in a soft, rich brownie with an indulgent chocolate flavor and satisfying texture.
A Fudge Brownie can be made without an oven by cooking the batter in a heavy-bottomed pan, an air fryer, or a pressure cooker without the whistle. This method produces a moist dessert with a dense centre and delicious homemade flavor.
A Fudge Brownie is made using flour, butter, cocoa powder or melted chocolate, sugar, milk, vanilla extract, and baking ingredients. Optional additions such as chocolate chunks, walnuts, pecans, or chocolate chips enhance the texture, flavor, and visual appeal of the finished dessert.
Store Fudge Brownies in an airtight container at room temperature for up to three days or refrigerate them for up to one week. Wrapping individual pieces helps retain moisture, preserves the rich flavor, and keeps the brownies fresh for longer.
Fudge Brownies may become dry or overly dense if they are overbaked, contain too much flour, or are mixed excessively. Following the recommended baking time, measuring ingredients carefully, and avoiding overmixing help achieve a soft and fudgy consistency.
Fudge Brownies differ from cake-like brownies because they contain a higher proportion of chocolate and fat, creating a denser texture. Their intense chocolate flavor, moist centre, and chewy bite make them a favorite among chocolate lovers seeking a richer dessert.
You can customize Fudge Brownies by adding caramel swirls, peanut butter, crushed cookies, fresh berries, mint, espresso powder, toasted nuts, or white chocolate pieces. These simple variations introduce exciting flavors, attractive color, and different textures without changing the classic brownie base.
Premium dark chocolate with a cocoa content of around 60 to 70 percent is an excellent choice for Fudge Brownies. Semi-sweet or couverture chocolate also delivers a smooth texture, deep chocolate flavor, and glossy finish, making every bite more satisfying.
When choosing a Fudge Brownie, focus on products that use real cocoa, quality chocolate, and carefully selected ingredients for a rich taste and soft texture. A good option should have balanced sweetness, an appealing color, and a deep chocolate flavor that remains enjoyable in every bite.
To prepare a Fusion Brownie, make a classic brownie batter using chocolate, butter, flour, sugar, and your preferred flavourings. Add creative ingredients such as nuts, cookie pieces, spices, caramel, or traditional Indian sweets before baking. Cool completely, slice, and garnish for a unique dessert with rich flavor and attractive color.
A Fusion Brownie can be made without eggs by replacing them with yoghurt, condensed milk, mashed bananas, or a flaxseed mixture. Blend the ingredients into a smooth batter, add your favorite fusion ingredients, and bake until the centre is perfectly moist and tender.
A no-oven Fusion Brownie can be prepared in a heavy-bottomed pan, pressure cooker without the whistle, or an air fryer. Pour the prepared batter into a greased tin and cook until fully set, creating a delicious homemade dessert without using a conventional oven.
Fusion Brownies are typically made with flour, cocoa powder or melted chocolate, butter, sugar, milk, baking powder, and vanilla extract. Additional ingredients such as nuts, dried fruits, caramel, spices, cookies, or traditional sweets create distinctive flavor combinations and vibrant color.
Fusion Brownies remain fresh for two to three days at room temperature in an airtight container or up to one week when refrigerated. Proper storage helps preserve their soft texture, rich flavor, and overall freshness while preventing them from drying out.
A Fusion Brownie may not turn out properly if the batter is overmixed, baked for too long, or contains too many additional ingredients. Measuring accurately, following the recipe carefully, and avoiding overbaking help achieve the ideal texture and balanced flavor.
Fusion Brownies combine classic chocolate brownies with creative ingredients inspired by different cuisines and dessert traditions. Unique flavour pairings, colourful mix-ins, and unexpected textures make them more exciting than standard brownies, creating a memorable dessert for every occasion.
Serve Fusion Brownies warm with vanilla ice cream, drizzle them with chocolate or caramel sauce, or top them with whipped cream, roasted nuts, fresh berries, edible flowers, or fruit compote. These garnishes enhance the flavor, color, and presentation beautifully.
High-quality dark chocolate, semi-sweet chocolate, or couverture chocolate works exceptionally well in Fusion Brownies. These chocolates provide a deep cocoa flavor, smooth melting texture, and balanced sweetness, making them ideal for pairing with a wide variety of fusion ingredients.
The best Fusion Brownie mix or product is one made with premium cocoa, quality baking ingredients, and natural flavours. Look for options that deliver a moist texture, rich chocolate flavor, appealing color, and clear ingredient information for consistently delicious homemade or ready-to-enjoy brownies.
An easy homemade fusion ice cream recipe combines whipped fresh cream, condensed milk, and your favorite fusion flavors, such as mango with cheesecake, chocolate with chilli, or gulab jamun pieces. Freeze the mixture until firm and serve chilled for a creamy, flavor-packed dessert.
Yes, fusion ice cream can easily be made without eggs. Simply use fresh cream, condensed milk, milk, and your preferred ingredients like fruits, chocolates, cookies, or spices. The result is a rich, creamy, eggless frozen dessert suitable for vegetarians and those avoiding eggs.
Fusion ice cream does not require an oven. Prepare a creamy ice cream base, mix in unique ingredients such as brownies, biscuits, fruit purées, or Indian sweets, then freeze the mixture in an airtight container until firm before serving with your favorite toppings.
Fusion ice cream typically includes fresh cream, milk, condensed milk, sugar, vanilla extract, and creative mix-ins such as chocolates, fresh fruits, cookies, brownies, nuts, caramel, spices, or traditional desserts like rasgulla, gulab jamun, or kulfi for unique flavor combinations.
Homemade fusion ice cream stays fresh for about one to two weeks when stored in an airtight container in the freezer. Keeping it tightly covered helps preserve its creamy texture, prevents freezer burn, and maintains the best flavor for longer.
A common mistake when making fusion ice cream is adding too many mix-ins or not freezing the mixture properly. Overloading ingredients can affect the texture, while insufficient freezing may result in a soft, icy dessert instead of a smooth, creamy finish.
Homemade fusion ice cream allows you to customize flavors, sweetness, and ingredients while avoiding unnecessary preservatives. Store-bought varieties offer convenience and consistency, but homemade versions provide fresher ingredients, unique flavor combinations, and complete control over the recipe.
Creative fusion ice cream ideas include brownie and salted caramel, mango cheesecake, coffee and hazelnut, paan, gulkand, chocolate with orange zest, rose pistachio, or gulab jamun ice cream. These combinations transform traditional flavors into exciting and memorable frozen desserts.
High-quality dark chocolate, semi-sweet chocolate, or couverture chocolate works best for fusion ice cream. These varieties melt smoothly, deliver rich cocoa flavor, and pair well with fruits, spices, nuts, and other fusion ingredients without overpowering the overall dessert.
The best Fusion Ice Cream brand is one that offers unique flavor combinations, a rich and creamy texture, and high-quality ingredients. Choose a brand with a wide selection of innovative flavours and minimal artificial additives. Comparing ingredient lists and customer feedback can help you find an option that matches your taste preferences.
An easy homemade Ice Cream Popsicle recipe combines fresh cream, milk, condensed milk, and your favorite flavor, such as chocolate, mango, strawberry, or vanilla. Pour the mixture into popsicle molds, insert sticks, and freeze for 6 to 8 hours before serving.
Yes, Ice Cream Popsicles can be made without eggs using fresh cream, milk, condensed milk, and natural flavorings like fruits, cocoa powder, or vanilla extract. This eggless recipe creates creamy, delicious frozen treats suitable for vegetarians and children.
Ice Cream Popsicles do not require an oven. Prepare the ice cream mixture, pour it into popsicle molds, insert wooden sticks, and freeze until completely firm. Once frozen, briefly dip the molds in warm water to release the popsicles easily.
The main ingredients for Ice Cream Popsicles include fresh cream, milk, condensed milk, sugar if needed, vanilla extract, cocoa powder, chocolate, or fresh fruit puree. Optional additions such as chopped nuts, cookie crumbs, or chocolate chips add extra flavor and texture.
Homemade Ice Cream Popsicles remain fresh for up to two weeks when stored in airtight freezer bags or covered popsicle molds. Proper storage helps preserve their creamy texture, flavor, and freshness while preventing freezer burn and unwanted ice crystals.
A common mistake is using too much water or not enough dairy, which can result in icy rather than creamy popsicles. Not freezing them long enough or overfilling the molds can also affect their texture and make them difficult to remove.
Homemade Ice Cream Popsicles are made with fresh ingredients and allow you to control the sweetness, flavors, and quality. Store-bought versions may contain preservatives, stabilisers, or artificial colours, while homemade popsicles offer a fresher and more natural taste.
You can customize Ice Cream Popsicles by dipping them in melted chocolate, coating them with crushed nuts, adding cookie crumbs, layering fruit purees, swirling caramel, or mixing in brownie pieces. These creative variations make homemade popsicles even more delicious.
High-quality couverture chocolate, dark chocolate, milk chocolate, or semi-sweet chocolate works best for Ice Cream Popsicles. These chocolates melt smoothly, create a crisp coating, and pair beautifully with flavors like vanilla, strawberry, mango, and butterscotch.
The best ice cream popsicle brand depends on the quality of ingredients, flavor options, and overall texture. A good brand should offer creamy popsicles made with real dairy or fruit ingredients, balanced sweetness, and consistent quality. Choosing products with natural flavors and positive customer reviews can help ensure a satisfying frozen treat.
To prepare kulfi ice cream simmer full-fat milk until it reduces and thickens. Add sugar, cardamom, saffron, chopped pistachios, and almonds, then allow the mixture to cool. Pour it into kulfi molds or cups and freeze for 6 to 8 hours before serving.
Kulfi ice cream is traditionally made without eggs. Simply cook full-fat milk with sugar until slightly thickened, then add cardamom, saffron, condensed milk, and chopped nuts. Freeze the mixture in molds until firm for a rich and creamy eggless dessert.
Kulfi Ice Cream is naturally a no-oven dessert. Prepare the milk mixture on the stovetop or use a no-cook recipe with fresh cream and condensed milk. Pour it into molds and freeze until completely set before enjoying this classic frozen treat.
The main ingredients used in kulfi ice cream include full-fat milk, condensed milk, sugar, cardamom, saffron, pistachios, almonds, and sometimes fresh cream. Popular variations may also include mango, rose, chocolate, or other flavorings for a unique twist.
Homemade kulfi ice cream can be stored in an airtight container or covered molds in the freezer for up to two weeks. Proper storage helps maintain its creamy texture, authentic flavor, and freshness while preventing freezer burn and ice crystal formation.
Kulfi ice cream may not turn out well if the milk is not reduced enough, the mixture is overcooked, or it is frozen too quickly. Using quality ingredients and allowing enough freezing time helps create the rich, creamy texture traditional kulfi is known for.
Kulfi ice cream differs from regular ice cream because it is traditionally made by slowly reducing milk instead of incorporating air through churning. This gives kulfi a denser, creamier texture and a richer flavor with aromatic spices and nuts.
Serve kulfi ice cream on wooden sticks, sliced into rounds, or in small dessert bowls. Garnish with chopped pistachios, almonds, saffron strands, rose petals, or a drizzle of rose syrup for an attractive and festive presentation.
If making chocolate-flavored kulfi ice cream, high-quality dark chocolate, milk chocolate, or couverture chocolate works best. These chocolates melt smoothly and blend beautifully with the rich milk base without overpowering the traditional kulfi flavor.
When choosing the best kulfi ice cream brand, focus on products made with quality milk, natural flavorings, and a rich, creamy consistency. A good kulfi should have a dense texture and balanced sweetness without an artificial aftertaste. Comparing ingredients, nutritional information, and customer ratings can help you select the right option.
To prepare Malai Ice Cream, simmer full-fat milk until slightly reduced, then mix in fresh cream, sugar, and cardamom. Allow the mixture to cool completely before freezing it in a covered container. Stir once or twice during freezing to achieve a rich, creamy texture and authentic flavor.
Malai Ice Cream can be made without eggs by combining full-fat milk, fresh cream, condensed milk, and natural flavourings such as cardamom or saffron. Freeze the prepared mixture until firm, creating a smooth and creamy dessert that is ideal for vegetarian preferences.
A no-oven Malai Ice Cream recipe involves preparing a creamy milk mixture on the stovetop or using a no-cook base with fresh cream and condensed milk. Transfer the mixture to a freezer-safe container and freeze until set for an easy homemade frozen dessert.
The primary ingredients in Malai Ice Cream include full-fat milk, fresh cream, sugar or condensed milk, cardamom, saffron, and chopped pistachios or almonds. These ingredients create a naturally rich flavor, smooth consistency, and appealing colour that make this dessert a favorite.
Homemade Malai Ice Cream stays fresh for up to two weeks when stored in a tightly sealed freezer-safe container. Proper storage helps preserve its creamy texture, authentic flavor, and fresh quality while reducing the formation of ice crystals.
Malai Ice Cream may not turn out as expected if the dairy mixture is overcooked, contains too little fat, or is frozen unevenly. Measuring ingredients accurately, cooling the mixture completely, and maintaining a stable freezer temperature produce better results.
Malai Ice Cream is unique because it highlights the richness of reduced milk and cream instead of relying on numerous flavourings. Its dense texture, subtle sweetness, and traditional Indian flavor profile make it different from many standard frozen desserts.
Serve Malai Ice Cream in waffle cones, chilled dessert bowls, or elegant glasses. Garnish with saffron strands, chopped pistachios, rose petals, edible silver leaf, or fresh fruit to enhance its presentation, color, and overall appeal for festive occasions.
When pairing chocolate with Malai Ice Cream, smooth milk chocolate or premium white chocolate creates a balanced combination. These chocolates complement the delicate dairy flavor without overpowering it, while chocolate curls or shavings add texture and visual appeal.
The best Malai Ice Cream comes from a manufacturer that focuses on premium dairy ingredients, a naturally creamy consistency, and authentic flavor. Choose products with a short ingredient list, balanced sweetness, and positive customer feedback for a satisfying dessert experience.
An easy homemade mango ice cream recipe combines ripe mango pulp, fresh cream, condensed milk, and a little vanilla extract. Blend the ingredients until smooth, pour into a freezer-safe container, and freeze for 6 to 8 hours before serving a creamy, refreshing dessert.
Yes, mango ice cream can be made completely eggless using fresh cream, condensed milk, milk, and ripe mango puree. This simple recipe creates a rich, creamy texture without eggs, making it suitable for vegetarians and anyone avoiding egg-based desserts.
You do not need an oven to make mango ice cream. Blend mango pulp with cream, condensed milk, and vanilla extract, then transfer the mixture to an airtight container. Freeze until firm, stirring once or twice for a smoother and creamier texture.
The main ingredients for mango ice cream include ripe mangoes or mango pulp, fresh cream, condensed milk, whole milk, sugar if needed, and vanilla extract. Optional additions such as chopped mango pieces, pistachios, or saffron enhance both flavor and texture.
Homemade mango ice cream stays fresh for up to two weeks when stored in an airtight container in the freezer. Proper storage helps maintain its creamy consistency, prevents freezer burn, and preserves the fresh mango flavor until it is ready to serve.
A common mistake is using unripe or fibrous mangoes, which can affect the flavor and texture. Adding too much liquid or not freezing the mixture long enough may also result in icy Mango Ice Cream instead of a smooth, creamy dessert.
Homemade mango ice cream uses fresh mangoes and allows you to control the sweetness, flavor, and ingredients. Store-bought versions may contain stabilisers, artificial flavors, or preservatives, while homemade ice cream offers a fresher taste and natural fruit flavor.
You can customize mango ice cream by adding coconut flakes, white chocolate chips, pistachios, saffron, cardamom, chilli flakes, passion fruit, or cheesecake pieces. These creative combinations add exciting flavors while complementing the natural sweetness of ripe mangoes.
White chocolate is often the best choice for mango ice cream because its creamy sweetness pairs beautifully with mango. High-quality milk or dark chocolate can also be used in moderation to create a balanced and delicious chocolate-mango flavor combination.
There is no single best brand for Mango ice cream, as the ideal choice depends on individual taste and quality preferences. Look for a brand that uses real mango, fresh dairy ingredients, and minimal artificial additives. A naturally fruity flavor and creamy consistency are good indicators of a high-quality mango ice cream.
To make a Nut Brownie at home, prepare a batter using flour, cocoa powder, melted chocolate, butter, sugar, milk, and vanilla extract. Fold in chopped mixed nuts before baking until just set. Let the brownie cool completely to develop a rich flavor and soft, fudgy texture.
Yes, a Nut Brownie can be made without eggs by using yogurt, condensed milk, mashed bananas, or a flaxseed mixture. These substitutes provide moisture and structure while allowing the chocolate flavor and crunchy nuts to remain the highlight of the dessert.
A Nut Brownie can be prepared without an oven using a heavy-bottomed pan, pressure cooker without the whistle, or an air fryer. This convenient method produces a moist brownie with a beautiful color, crisp nutty texture, and delicious homemade flavor.
Nut Brownies are made with flour, cocoa powder or melted chocolate, butter, sugar, milk, vanilla extract, baking powder, and a selection of nuts such as walnuts, almonds, cashews, or pecans. These ingredients create a balanced combination of flavor and texture.
Store Nut Brownies in an airtight container at room temperature for up to three days or refrigerate them for up to one week. Keeping them properly sealed helps preserve their freshness, nutty flavor, soft texture, and prevents them from drying out.
Nut Brownies may turn out dry or dense if the batter contains too much flour, is overmixed, or remains in the oven for too long. Following the recipe carefully and measuring ingredients accurately helps achieve a moist texture and rich chocolate flavor.
A Nut Brownie stands apart from regular brownies because it includes crunchy nuts that add texture, flavor, and a satisfying bite. The combination of chocolate and roasted nuts creates greater depth, making it a favorite dessert for those who enjoy contrasting textures.
You can customize a Nut Brownie by adding peanut butter swirls, caramel, dried cranberries, espresso powder, orange zest, white chocolate chunks, or cinnamon. These simple additions create exciting flavor combinations, attractive color, and a unique homemade dessert.
Dark chocolate, semi-sweet chocolate, or premium couverture chocolate works exceptionally well in Nut Brownies. These varieties provide a smooth melting texture and deep cocoa flavor that pairs perfectly with roasted nuts while creating a rich and indulgent dessert.
The best Nut Brownie is one prepared with quality cocoa, fresh nuts, and carefully selected baking ingredients. Look for products with a soft texture, balanced sweetness, rich chocolate flavor, natural color, and a high nut content for the most enjoyable brownie experience.
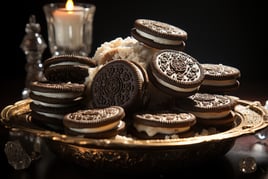
An easy homemade Oreo Brownie recipe combines flour, cocoa powder, melted chocolate, butter, sugar, milk, vanilla extract, and crushed Oreo cookies. Fold the cookies gently into the batter, bake until just set, and cool completely before serving for a rich chocolate flavor with a crunchy cookie texture.
Yes, Oreo Brownies can be made without eggs by using yoghurt, condensed milk, applesauce, or a flaxseed mixture as an alternative. These ingredients help create a moist, soft brownie while preserving the delicious chocolate flavor and the signature Oreo cookie crunch.
You can prepare an Oreo Brownie without an oven by cooking the batter in a heavy-bottomed pan, pressure cooker without the whistle, or an air fryer. This method produces a fudgy brownie with an attractive color and plenty of cookie flavor without conventional baking.
Oreo Brownies are made with flour, cocoa powder or melted chocolate, butter, sugar, milk, vanilla extract, baking powder, and crushed Oreo cookies. Optional additions such as chocolate chips, chopped nuts, or cream cheese can enhance the flavor and texture even further.
Homemade Oreo Brownies stay fresh for two to three days at room temperature in an airtight container or up to one week in the refrigerator. Proper storage helps maintain the soft texture, chocolate flavor, and crisp cookie pieces for the best eating experience.
A common mistake is crushing the Oreo cookies too finely or mixing them excessively into the batter, which reduces their texture. Overbaking can also make the brownie dry instead of soft, affecting both the flavor and overall quality of the dessert.
Homemade Oreo Brownies allow you to control the amount of chocolate, cookie pieces, and sweetness while using fresher ingredients. They often have a richer flavor, softer texture, and fewer preservatives than many packaged versions available in stores.
You can customize Oreo Brownies by adding peanut butter swirls, caramel sauce, white chocolate chunks, marshmallows, fresh berries, mint extract, or colourful sprinkles. These additions introduce exciting flavor combinations, appealing color, and unique textures that make every bite enjoyable.
Oreo Brownies can be used in many creative desserts, including brownie sundaes, layered trifles, milkshakes, cheesecake bases, ice cream sandwiches, parfaits, and dessert jars. Their rich chocolate flavor and crunchy cookie texture make them a favorite ingredient for indulgent homemade treats.
Oreo Brownies can be cut into cubes and layered into parfaits, crumbled over ice cream, mixed into milkshakes, used as a cheesecake base, or served with whipped cream and fresh fruit. Their rich flavor, dark color, and soft texture make them a versatile addition to countless dessert recipes.
To make Rabri Ice Cream at home, simmer full-fat milk until it thickens into rabri, then mix in condensed milk, fresh cream, cardamom, saffron, and chopped pistachios. Allow the mixture to cool before freezing it in an airtight container for 6 to 8 hours.
Yes, Rabri Ice Cream is naturally eggless and can be prepared using full-fat milk, fresh cream, condensed milk, sugar, and traditional flavorings like cardamom, saffron, and nuts. This creates a rich, creamy frozen dessert without the need for eggs.
Yes, Rabri Ice Cream does not require an oven. Simply prepare the rabri by reducing milk on the stovetop, mix it with cream and flavorings, then freeze the mixture until firm. No baking is needed for this traditional Indian frozen dessert.
Rabri Ice Cream is made using full-fat milk, fresh cream, condensed milk, sugar, cardamom, saffron, and chopped nuts such as pistachios and almonds. Some recipes also include rose water or kewra essence for additional aroma and authentic flavor.
Store Rabri Ice Cream in an airtight, freezer-safe container to preserve its creamy texture and rich flavor. Cover the surface before sealing the container to minimise ice crystals and keep the ice cream fresh for up to two weeks.
Rabri Ice Cream may become dry or dense if the milk is over-reduced, the mixture contains too little cream, or it is frozen for too long without proper storage. Maintaining balanced ingredients and freezing correctly helps achieve a smoother texture.
Rabri Ice Cream differs from regular ice cream because it is based on traditional rabri, a slow-cooked thickened milk dessert. It has a denser texture, richer dairy flavor, and aromatic spices such as cardamom and saffron that are not commonly found in standard ice cream.
You can customize Rabri Ice Cream by adding mango puree, rose syrup, gulkand, chocolate chips, crushed cookies, fresh berries, or roasted nuts. These variations complement the creamy rabri base while introducing exciting new flavours and textures.
High-quality milk chocolate or dark chocolate pairs well with Rabri Ice Cream when creating a fusion dessert. Couverture chocolate is an excellent choice because it melts smoothly and adds a rich cocoa flavor without overpowering the traditional rabri taste.
Every brand has a different taste and texture, it is important to observe the ingredients, creamy texture, authentic Indian-inspired flavors, and consistently high-quality frozen desserts. These features make the best rabri ice cream.
An easy homemade Strawberry Ice Cream recipe uses fresh strawberries, fresh cream, condensed milk, and vanilla extract. Blend the strawberries until smooth, fold them into the cream mixture, and freeze for 6 to 8 hours until the ice cream becomes rich, creamy, and delicious.
Yes, Strawberry Ice Cream can be made without eggs using fresh cream, condensed milk, milk, and ripe strawberries. This eggless recipe delivers a smooth, creamy texture and fresh fruit flavor, making it a perfect dessert for vegetarians and families.
Strawberry Ice Cream does not require an oven. Blend strawberries with cream, condensed milk, and vanilla extract, then pour the mixture into a freezer-safe container. Freeze until firm, stirring once or twice during freezing to achieve a softer, creamier consistency.
The main ingredients for Strawberry Ice Cream include fresh strawberries, fresh cream, whole milk, condensed milk or sugar, and vanilla extract. Optional additions such as strawberry pieces, lemon juice, or chopped nuts can enhance both the flavor and texture.
Homemade Strawberry Ice Cream can be stored in an airtight container in the freezer for up to two weeks. Proper storage helps preserve its creamy texture, fresh strawberry flavor, and overall quality while preventing freezer burn and unwanted ice crystals.
A common mistake is using watery or underripe strawberries, which can reduce flavor and create icy textures. Adding too much fruit puree or not freezing the mixture properly may also affect the creaminess and consistency of Strawberry Ice Cream.
Homemade Strawberry Ice Cream contains fresh strawberries and allows you to control the sweetness and ingredients. Store-bought versions often include stabilisers, preservatives, or artificial flavors, while homemade ice cream offers a fresher taste and more natural fruit flavor.
You can customize Strawberry Ice Cream by adding white chocolate chips, crushed biscuits, cheesecake pieces, balsamic glaze, fresh mint, roasted almonds, pistachios, or swirls of strawberry jam. These additions create exciting flavors while complementing the fresh strawberry base.
White chocolate is one of the best choices for Strawberry Ice Cream because its creamy sweetness complements fresh strawberries beautifully. High-quality milk or dark chocolate can also be used to create a balanced combination of fruity and chocolatey flavors.
A good Strawberry Ice Cream brand combines premium ingredients with a rich, fruity flavor and a creamy consistency. Consider brands that use real strawberries or natural fruit flavors and avoid excessive artificial colors or additives. Comparing ingredient quality and consumer reviews can help you choose the best option.
To prepare a sundae, place scoops of your favorite ice cream in a serving glass or bowl. Add chocolate or caramel sauce, fresh fruits, nuts, sprinkles, and whipped cream. Finish with a cherry or cookie before serving immediately for the best taste and presentation.
An eggless sundae is easy to prepare using egg-free ice cream, fresh fruits, chocolate or caramel sauce, whipped cream, nuts, and sprinkles. Layer the ingredients in a serving glass and enjoy a delicious dessert without using eggs in any part of the recipe.
A sundae is naturally a no-oven dessert. Simply layer ice cream with sauces, fruits, crushed cookies, brownies, nuts, and whipped cream in a bowl or tall glass. Garnish with colourful toppings and serve immediately while the ice cream remains perfectly frozen.
The main ingredients in a sundae include ice cream, chocolate or caramel sauce, whipped cream, fresh fruits, chopped nuts, sprinkles, cherries, cookie crumbs, brownies, and wafers. You can customize the toppings to create different flavors and exciting dessert combinations.
A prepared sundae is best enjoyed immediately after assembling because the ice cream melts quickly. If stored in the freezer, the toppings may lose their texture and freshness, making the dessert less appealing. Assemble sundaes just before serving for the best results.
A sundae may not turn out well if the ice cream melts before serving, the toppings become soggy, or the ingredients are not layered properly. Using chilled serving dishes and adding toppings just before serving helps maintain the ideal texture and appearance.
A sundae differs from regular desserts because it combines creamy ice cream with a variety of toppings, sauces, and garnishes. Unlike baked desserts, sundaes are served frozen and can be customised with endless combinations of flavors and textures.
Serve a sundae in waffle bowls, chocolate cups, mason jars, dessert glasses, or mini cones for a creative presentation. Add colourful sprinkles, fresh berries, cookie pieces, brownies, candy, or edible flowers to make the dessert more attractive and enjoyable.
High-quality dark chocolate, milk chocolate, or semi-sweet chocolate works best for sundaes. Couverture chocolate is ideal for making smooth chocolate sauce or shavings, adding rich cocoa flavor that pairs perfectly with vanilla, chocolate, strawberry, and other ice cream flavors.
When selecting ice cream for a sundae, prioritise brands that are known for their rich taste, creamy mouthfeel, and consistent quality. Ice cream with a firm texture holds its shape better and blends perfectly with sauces, fresh fruits, crunchy toppings, and whipped cream, creating a more enjoyable dessert experience.
To prepare a Triple Chocolate Brownie, combine melted dark chocolate, cocoa powder, butter, sugar, flour, milk, and vanilla extract. Fold in milk and white chocolate chunks before baking until the edges are set. Cool completely before slicing to achieve a rich texture and intense chocolate flavor.
A Triple Chocolate Brownie can be made without eggs by replacing them with yogurt, condensed milk, applesauce, or a flaxseed mixture. Blend the ingredients until smooth, add three types of chocolate, and bake until the centre remains soft for a perfectly fudgy dessert.
A no-oven Triple Chocolate Brownie can be prepared in a heavy-bottomed pan, an air fryer, or a pressure cooker without the whistle. Cook the batter over low heat until fully baked, allowing the different chocolates to create a rich flavor and attractive color.
Triple Chocolate Brownies are made using flour, butter, sugar, cocoa powder, melted dark chocolate, milk chocolate, white chocolate, milk, vanilla extract, and baking powder. These ingredients create multiple layers of chocolate flavor and a soft, indulgent texture.
Triple Chocolate Brownies remain fresh for up to three days at room temperature in a sealed container or for about one week when refrigerated. Proper storage helps preserve their moist texture, deep chocolate flavor, and overall freshness without becoming dry.
A Triple Chocolate Brownie may not turn out properly if the batter is overmixed, baked too long, or contains incorrect ingredient proportions. Using accurate measurements and avoiding excessive baking time help maintain a rich texture and balanced chocolate flavor.
Triple Chocolate Brownies stand out because they combine three different types of chocolate, creating greater depth of flavor than traditional brownies. Their rich taste, contrasting textures, and glossy appearance make them a favorite dessert for dedicated chocolate enthusiasts.
Serve Triple Chocolate Brownies warm with ice cream, chocolate sauce, whipped cream, fresh berries, toasted nuts, or a dusting of cocoa powder. These additions enhance the presentation, color, and flavor while creating an impressive dessert for special occasions.
For the best Triple Chocolate Brownie, use high-quality baking chocolate with a smooth texture and rich cocoa content. Choosing premium dark, milk, and white chocolate ensures even melting, deeper flavor, and a more satisfying homemade brownie with excellent consistency.
A well-made Triple Chocolate Brownie should feature premium chocolate, a moist crumb, balanced sweetness, and three distinct chocolate layers. When selecting one, focus on ingredient quality, rich flavor, soft texture, and an appealing color to enjoy a truly satisfying dessert experience.
To make Vanilla Ice Cream at home, combine fresh cream, whole milk, sugar, and pure vanilla extract or vanilla bean paste. Chill the mixture, then freeze it in an ice cream maker or stir it occasionally while freezing to achieve a smooth, creamy texture.
Yes, Vanilla Ice Cream can be made without eggs using fresh cream, condensed milk, milk, sugar, and vanilla extract. This eggless recipe produces a rich, creamy dessert that is easy to prepare and suitable for vegetarians and those avoiding eggs.
Yes, Vanilla Ice Cream can be made without an oven because it only requires mixing and freezing. Blend the ingredients thoroughly, transfer the mixture to a freezer-safe container, and freeze until firm, stirring occasionally for a creamier consistency if needed.
Vanilla Ice Cream is typically made from fresh cream, whole milk, sugar, vanilla extract or vanilla beans, and sometimes condensed milk or egg yolks in custard-style recipes. These ingredients create a smooth, rich, and classic frozen dessert enjoyed by all ages.
Store Vanilla Ice Cream in an airtight, freezer-safe container to prevent freezer burn and ice crystal formation. Keep it in the coldest part of the freezer and cover the surface with parchment paper or plastic wrap for better freshness and texture.
Vanilla Ice Cream may become dry or dense if it contains too little fat, too much air is lost during mixing, or it is frozen incorrectly. Using quality dairy ingredients and maintaining a consistent freezing temperature helps create a creamier texture.
Vanilla Ice Cream differs from desserts like frozen yoghurt, gelato, and frozen custard in its ingredients and texture. It generally contains more cream than gelato, less tanginess than frozen yoghurt, and may not include eggs like traditional frozen custard.
You can customize Vanilla Ice Cream by adding chocolate chips, crushed cookies, caramel sauce, roasted nuts, fresh berries, coffee, cinnamon, or fruit compotes. These simple additions create delicious flavor variations while keeping the classic vanilla base intact.
High-quality dark, milk, or semi-sweet chocolate pairs wonderfully with Vanilla Ice Cream. Couverture chocolate is also an excellent option because it melts smoothly and delivers a rich cocoa flavor, making it perfect for toppings, sauces, or mix-ins.
A high-quality Vanilla Ice Cream should have a rich flavor, a natural vanilla taste, and a silky, creamy texture. When choosing a brand, look for products with simple ingredients, minimal artificial additives, and consistently positive customer feedback for the best overall experience.
An easy homemade Walnut Brownie recipe combines flour, cocoa powder, melted chocolate, butter, sugar, milk, vanilla extract, and chopped walnuts. Mix the batter until smooth, bake until just set, and allow it to cool before slicing for a rich dessert with crunchy texture and delicious flavor.
Yes, Walnut Brownies can be made without eggs by replacing them with yoghurt, condensed milk, applesauce, or a flaxseed mixture. These substitutes help create a moist and tender brownie while allowing the chocolate flavor and crunchy walnuts to stand out beautifully.
A Walnut Brownie can be prepared without an oven by using a heavy-bottomed pan, pressure cooker without the whistle, or an air fryer. Cook the batter over controlled heat until fully baked, then let it cool down before cutting into squares with an appealing color and texture.
Walnut Brownies are made using flour, cocoa powder or melted chocolate, butter, sugar, milk, vanilla extract, baking powder, and chopped walnuts. Optional ingredients such as chocolate chips, coffee powder, or sea salt can enhance the overall flavor and create a more indulgent dessert.
Homemade Walnut Brownies remain fresh for two to three days at room temperature in an airtight container or up to one week when refrigerated. Proper storage preserves their soft texture, nutty flavor, and attractive appearance while preventing them from becoming stale.
A common mistake when making Walnut Brownies is adding too much flour or overbaking the batter, which can produce a dry texture. Overmixing or using stale walnuts may also reduce the overall flavor, freshness, and quality of the finished dessert.
Homemade Walnut Brownies offer fresher ingredients, adjustable sweetness, and generous amounts of walnuts compared to many packaged options. They also allow you to customize the flavor, texture, and quality of chocolate while avoiding unnecessary preservatives and artificial additives.
You can give Walnut Brownies a creative twist by adding caramel swirls, orange zest, espresso powder, dried cherries, cinnamon, white chocolate chunks, or peanut butter. These additions introduce exciting flavor combinations, vibrant color, and unique textures that make every serving memorable.
Dark chocolate with a cocoa content of 60 to 70 percent is an excellent choice for Walnut Brownies because it complements the natural nuttiness of walnuts. Couverture or semi-sweet chocolate also provides a smooth texture, balanced flavor, and glossy finish after baking.
There is no single best Walnut Brownie brand, as the ideal choice depends on ingredient quality and personal preference. Select a product that features generous walnut pieces, real chocolate, a soft and fudgy texture, balanced flavor, and a fresh appearance for the most enjoyable dessert experience.
Mix the flour with the ghee and the yogurt and a pinch of baking soda to make a soft, flaky dough. Make discs with a dent in the middle and deep-fry on low heat. Quickly dip in syrup.
Traditionally, balushahi is made without eggs and is made from flour, ghee, and yogurt or curd that combine to give it its signature flaky layers. No eggs are used in this North Indian traditional dessert.
Balushahi is deep-fried and doesn't need oven for baking The discs are fried gently on low-medium heat till golden and then soaked in syrup on the stovetop.
The ingredients used for Balushahi are refined flour, ghee, curd or yogurt, a pinch of baking soda, and sugar syrup for soaking. Garnish the finished sweet with chopped pistachios . Some recipes add a pinch of cardamom to the dough.
Unlike the milk-based desserts, Balushahi is syrup-coated and fried and can be stored at room temperature in an airtight container for up to a week. Refrigeration will help it last a bit longer but could damage its flaky texture.
Overhandling the dough makes the Balushahi dense and hard instead of flaky, as the layers require minimum handling. Another common mistake is cooking at too high a temperature, which causes the outside to brown before the inside is cooked.
The homemade Balushahi gives you control over the quality, sweetness, and flakiness of ghee, which often results in a more savory and fresh taste. Some store-bought versions use vegetable oil instead of ghee, and this changes the texture and flavor.
Or try stuffing a small piece of dried fruit or nuts inside before frying. Or make mini bite-sized versions for parties, or drizzle melted chocolate over the finished pieces for a modern fusion twist.
The finished Balushahi is coated in syrup and drizzled with a light milk chocolate drizzle that adds a modern touch without overpowering the buttery, flaky flavor. And if you're looking for something richer, dark chocolate is another option.
Drizzling with chocolate is best when made with a good-quality brand of milk chocolate that melts well. The success of Balushahi in the past has been more on the use of pure ghee and proper frying techniques.
On a wide pan, simmer full-fat milk to a low simmer, stirring frequently, until it has reduced by about half and is creamy. Sweeten with sugar before chilling, then season with cardamom, saffron, and chopped nuts.
Basundi, of course, is eggless, and its luxurious, creamy mouthfeel comes from slow reduction of milk and sugar. The classic milk dessert is thickened by simmering alone, without eggs, gelatin, or any other setting agents.
Basundi is entirely stovetop-based, which means the milk needs to simmer slowly and be left uncovered in a heavy-bottom pan to reduce gradually. In its preparation there is no oven or baking involved at any stage.
For making basundi, you will need full-fat milk, sugar, and flavoring agents like saffron strands, cardamom powder, and chopped pistachios or almonds. In some regional variations, a few strands of soaked rice are also added to improve the body and texture of the dish.
Basundi generally lasts for two to three days when kept in a closed container in the fridge. This dessert is made from fresh milk and has no preservatives, so it is best to eat it right away.
If your Basundi is thin and watery, it's likely that you haven't reduced the milk enough on low heat. Boiling too fast or not stirring enough during reduction often results in a grainy texture.
Basundi is a sweet made from milk and has a very rich flavor and thick creamy consistency. It is made by slowly reducing milk instead of using flour, eggs, or gelatin to provide structure like in many desserts.
Basundi can be served warm with puris, or chilled in small glasses topped with slivered pistachios, or as a rich base for falooda layered with vermicelli and ice cream.
Traditionally, basundi is served without any chocolate so that the delicate, milky sweetness of the reduced milk, cardamom, and saffron is the undiluted star of the show. But a little milk chocolate garnish might work.
The quality of basundi is highly dependent on the use of fresh full-fat milk. When using chocolate for a garnish, choose a smooth, reliable milk chocolate to melt down without changing the classic flavor profile of the dessert.
Roast gram flour slowly in ghee on a low flame till golden and fragrant. While warm, add powdered sugar and cardamom and mold by hand to form firm, round balls.
Yes, Besan Laddoo is eggless, as it uses only roasted gram flour, ghee, and powdered sugar for structure and flavor. It's an Indian sweet, and it has no eggs in it.
Yes, Besan Laddoo is fully cooked on the stovetop. The gram flour is slowly roasted in a heavy-bottomed pan on low heat. No baking or oven is required in the process.
Besan Laddoo is a tasty dessert and is usually topped with chopped nuts like almonds or cashews for texture and a slightly more indulgent taste. It is prepared using roasted gram flour, ghee, powdered sugar, and cardamom.
Besan Laddoo will stay fresh for about two to three weeks in an airtight container at room temperature because of the high amount of ghee in it. Moisture can alter its texture. So keep it dry.
Normally a dry texture is caused by underroasting of gram flour or less ghee used in preparation. If you add sugar when the flour is still a little hot, it often leads to dense laddoos.
Boondi Laddu is made by deep-frying balls of batter to give it a grainy texture, while Besan Laddu is made by dry-roasting gram flour to give it a smooth and grainy texture.
You can try adding desiccated coconut to coconut besan laddoo or add cocoa powder to a chocolate one or replace pure besan with a combination of multigrain flours for a slightly healthier option.
The best option is to add good quality cocoa powder to the roasted besan instead of melted chocolate, as the former blends in perfectly without affecting the roundness and texture of the laddoo.
Choosing a brand is not essential. However, the quality of Besan Laddoo depends on the quality of gram flour and ghee used. Always use fresh, good-quality gram flour and pure ghee.
Make small fried droplets (called boondi). Pour gram flour batter through a perforated ladle into hot oil. Soak the boondi in warm syrup for a short time and shape them into balls while still warm. Add nuts and cardamom.
Boondi laddoo is a naturally eggless dessert made of fried gram flour droplets held together by sugar syrup. This traditional Indian sweet is totally dairy- and egg-free, as no eggs are used anywhere.
Boondi Laddoo is an easy no-oven recipe, as the batter is deep-fried in hot oil on the stove. The syrup is also cooked separately on the stove and then mixed with the fried droplets of boondi.
Boondi Laddoo is made with gram flour, oil for frying, sugar syrup, ghee, and flavorings like cardamom powder. Chopped nuts or raisins are also added to give texture and a little richer, more indulgent bite to each laddoo.
Boondi Laddoo will last for a week to ten days if stored in an airtight container at room temperature. Refrigeration can extend this a little, but the texture may firm up when thoroughly chilled.
If the batter is not even, then this will create either too big or too small boondi droplets that won't bind properly. If the syrup has become too cold when the laddoos are formed, the mixture may break up.
You can control the sweetness, the quality of ghee, and the freshness when you make Boondi Laddoo at home, which often gives a more aromatic and richer taste. The store-bought ones are usually mass-produced.
Add cocoa powder to the batter for chocolate boondi laddoo, use dried fruit like tutti-frutti for a colorful twist, or make mini bite-sized laddoos for parties and festive gift boxes.
You can also add a modern twist to the boondi batter with a light drizzle of milk chocolate or cocoa powder. But this is more of a creative version and not a traditional combination.
For experimenting with chocolate, a good quality, smooth cocoa powder or milk chocolate brand is recommended. But the success of Boondi Laddoo has always been the use of fresh besan and properly tempered syrup and not any particular brand.
Shape fresh chenna into oval cylinders and knead into a smooth dough. Simmer them in sugar syrup till they puff up. Once the dish cools, coat with grated coconut or stuff with sweetened khoya for richness.
Cham Cham is a naturally eggless confection made solely from chenna, or curdled milk solids, cooked in sugar syrup and usually decorated with a coating of khoya or coconut. This is a Bengali sweet dish without egg.
Cham Cham does not require an oven . The chenna cylinders are directly cooked in sugar syrup on the stovetop. Also, the khoya filling or coconut coating is made separately on the stove, and there is no need for baking.
Cham Cham is generally made with a khoya-based filling flavored with cardamom and nuts, chenna, and sugar syrup. Some versions come with grated coconut or a little food coloring for their unique pastel appearance.
Cham Cham lasts for about three to four days when stored in the refrigerator in an airtight container. Coated versions can be kept in a sealed container, or pieces can be submerged in syrup to prolong the texture.
Boiling under-kneaded chenna in syrup causes the cylinders to break often, and overcooking results in a dense texture instead of a light and spongy texture. Also, getting the correct consistency of syrup is important for the right texture.
Homemade Cham Cham is made of fresh chenna made on the same day, so you can control the sweetness, stuffing, and freshness. The versions you get at the supermarket are slightly more solid and less fragile because of the preservatives.
You can also try a colorful rainbow Cham Cham platter with natural food colors for festive occasions or mango-flavored Cham Chams with fresh pulp in the khoya filling or chocolate-stuffed Cham Cham with a melted chocolate center.
For the inside of a cham cham, a good option is a smooth milk chocolate that will melt a little. You can also add a bit more of the flavor contrast with dark chocolate.
For the stuffed versions, the best type of chocolate is a high-quality milk or dark chocolate that melts smoothly. The quality of Cham Cham has traditionally been more about the fresh chenna and proper technique than a particular brand of chocolate or dairy.
Make a smooth, crack-free dough by kneading khoya or milk powder with a little flour and milk. Roll the dough into balls and deep-fry on low heat until golden. Dip in cardamom sugar syrup before serving.
Combine milk powder, baking soda, and a little refined flour with enough milk or ghee to make a soft dough. Make round smooth balls. Fry in low temperature and soak in syrup.
Gulab jamun is a classic Indian sweet consisting of soft, deep-fried milk-solid dumplings soaked in fragrant sugar syrup flavored with cardamom and rose. The name comes from Persian words for rose and berry, referring to its scent.
Traditional gulab jamun dough is made with khoya (reduced milk solids), very little flour, and a pinch of baking soda. The syrup is usually made from sugar, water, cardamom, and sometimes rose water.
Dissolve the sugar in the water (two parts sugar to one part water). Bring to a boil and simmer for a few minutes until the mixture is a little sticky but not yet at the hard thread stage.
Gulab jamun goes well with modern fusion creations like jamun cheesecake or a jamun tiramisu or jamun ice cream sandwiches or a warm jamun served with a scoop of vanilla ice cream and drizzled with chocolate sauce.
The dough for Kala Jamun is the same as regular Gulab Jamun but is fried for a longer time on low heat until it turns deep brown, resulting in a slightly caramelized, chewier texture.
To add color and flavor, add a spoon of cocoa powder to the khoya dough and fry and soak as usual. In some variations, each jamun is stuffed with a small piece of chocolate, which melts inside.
A good quality dark or semi-sweet cocoa powder will not alter the texture of the khoya dough when mixed in smoothly. A piece of milk or dark compound chocolate melts without leaking.
A rich dark compound chocolate or ganache is best for a jamun-inspired cake, as it holds its shape and complements the sweetness of the syrup-soaked jamuns that are layered or embedded in the sponge.
Soak urad dal and blend to a smooth batter, pipe into pretzel shapes in hot oil, fry till crisp, and then soak briefly in warm saffron-tinted sugar syrup before serving while still slightly warm.
Imarti is made from all urad dal batter, fried to the desired shape, and soaked in sugar syrup and is naturally eggless. This traditional Indian sweet, which is lentil-based, is never made with eggs.
Imarti does not require baking, as the coiled batter is deep-fried on the stovetop in hot oil. The sugar syrup is also made separately on the stove before soaking the fried coils.
Imarti is prepared by mixing soaked and ground urad dal, oil for frying, sugar for syrup, and a dash of saffron or food coloring to give it's distinct orange-red color and aromatic, slightly earthy flavor.
Imarti will remain fresh for about 2 to 3 days when stored at room temperature or a little more if stored in an airtight container in the fridge. The best way to eat it is straight from the bowl.
Imarti's texture is a function of the under-fermentation or over-fermentation of the urad dal batter, which can be too dense or too runny to hold its coiled shape. If the syrup is not the right consistency, it can lead to sogginess.
Homemade Imarti made with fresh ground dal batter is more crisp, and the sweeter syrup can be controlled better. Pre-frying and reheating can have a dramatic effect on the crispness and general texture of store-bought kinds.
For a fusion twist to the Imarti, you can drizzle melted chocolate over the finished product, serve bite-sized versions at parties, or pair it with a scoop of vanilla or rabri ice cream for a richer and contrasting flavor.
This fusion pairing is unorthodox and works better as a playful topping than as a traditional addition, but a light drizzle of milk chocolate can add an interesting modern counterpoint to the earthy, syrupy flavor of the Imarti.
Any chocolate drizzle is best made with a smooth milk chocolate brand of good quality. But the quality of the Imarti has been dependent upon the quality of its urad dal batter, which is traditionally fermented properly.
Simmer full-fat milk in a wide pan, constantly scraping and folding the cream that forms on the top in, until thick and reduced considerably. Add sugar to the mixture and add cardamom, saffron, and chopped nuts for flavor.
Rabri is naturally eggless, made by reducing milk with sugar and folding in the malai, or cream layer, that forms during the simmering process. This classic dairy dessert is made without eggs.
No oven required. The whole cooking process is done on the stovetop for rabri. The cream is continually returned to the milk, which is simmered in a wide, heavy-bottomed pan until the mixture thickens naturally.
Rabri needs just whole milk, sugar, and flavorings like saffron strands, cardamom powder, and chopped pistachios or almonds. To speed the reduction, some recipes add a little condensed milk or rose water.
Homemade rabri is preservative-free and stays good for two to three days when kept in an airtight container in the refrigerator. Always serve chilled or reheat gently; never leave at room temperature.
If the stirring is not sufficient, the milk will burn at the bottom of the pan and give the Rabri a burnt aftertaste. A grainy, uneven texture usually comes from rushing reduction on high heat.
The store-bought ones usually contain condensed or powdered milk for convenience, which means they are less complex and have a more uniform taste. The homemade rabri has a richer taste, with the sweetness adjustable and no added preservatives.
For a modern and fresh take on this traditional dessert, opt for a layered Rabri falooda with vermicelli, basil seeds, and ice cream; saffron rose Rabri with more floral notes; or mango Rabri with fresh pulp.
A light milk chocolate shaving or drizzle can add to Rabri's creamy sweetness without overwhelming it, but many people prefer to keep this dessert chocolate-free, letting the milk, cardamom, and saffron flavors remain the stars.
A smooth, good-quality milk chocolate brand can be used as garnish. Rabri is generally judged by the quality of the fresh, full-fat milk used and not any packaged brand or ingredient.
Heat milk and curdle it with lemon juice or vinegar. Drain and knead the chenna until it is smooth. Make balls out of the chenna and boil them in a covered pot with sugar syrup until they become spongy.
Rasgulla is naturally eggless. It is made from chenna or curdled milk solids kneaded into a smooth dough and cooked in sugar syrup. This traditional Bengali sweet contains no eggs.
Rasgulla is not baked in an oven, and the chenna balls are made by boiling them in sugar syrup on the stove in a wide, covered pot, which allows the balls to grow evenly and develop their characteristic texture.
The main ingredients are full cream milk, a souring agent like lemon juice or vinegar to curdle the milk, and sugar to make the syrup. Sometimes a little rose water or cardamom is added for the aroma.
Rasgulla generally remains fresh for four to five days if refrigerated in its syrup in an airtight container. It is very important that the balls are completely covered with the syrup so that they do not dry out and harden.
A hard or chewy rasgulla is often caused by a syrup that was not boiled vigorously enough or by underkneaded chenna. If there is too much water in the chenna dough before boiling, the balls may crack.
Most sweets that use syrups are just boiled in syrup, but for rasgulla, there is a special technique that kneads the chenna and then cooks it in a covered pot.
Serve chilled rasgulla with a drizzle of rabri for a fun and easy twist on the classic dessert, or mix it up into a quick fruit trifle, or serve it with fresh fruit and a scoop of ice cream.
The light milk chocolate drizzle and shavings do not overpower the delicate, syrupy sweetness of the Rasgulla. A milder, sweeter chocolate usually works better with this dessert, as dark chocolate can overwhelm the subtle flavor.
Popular Bengali sweet brands make spongy and fresh Rasgullas all the time, but homemade Rasgullas taste much better and are fresher than most of the packaged, store-bought ones.
Roll the fresh chenna into flat discs. Knead into a smooth and crack-free dough and simmer in sugar syrup till doubled in size. Chill and serve after soaking the cooked discs in warm reduced milk with cardamom flavoring.
Traditional rasmalai is naturally eggless. It is made with chenna (curdled milk) and milk syrup. This traditional Bengali sweet never requires an egg to be used.
Rasmalai is definitely a stovetop dessert. The chenna discs are boiled in hot syrup on the stove, and the milk is reduced separately in a pan so there is no need to bake or use an oven.
Rasmalai is a delicacy made from soft chenna discs, which are formed by curdling milk and draining the whey. The discs are simmered in a light sugar syrup and then soaked in sweetened milk flavored with spices and dry fruits.
Store Rasmalai in the refrigerator in an airtight container filled with its milk to prevent the discs from drying out or absorbing other odors. Properly chilled, it will keep its fresh taste for about two to three days.
The chenna becomes dry from over-kneading or having insufficient fat, and the discs are firm instead of spongy. It can be dense if you don't soak it long enough in the milk before serving.
Rasmalai is made by flattening the balls and then soaking them in thickened, creamy milk, whereas Rasgulla is just soaked in sugar syrup. This gives Rasmalai a richer, milkier flavor than the lighter, syrupy flavor of Rasgulla.
For a no-fuss dessert, consider a mango rasmalai with fresh mango pulp stirred into the milk, a chocolate rasmalai with a cocoa-infused base, or a quick rasmalai trifle layered with cream and crushed biscuits.
The delicate milky flavor of Rasmalai may easily be lost if you use something that is too dark, bitter, or has a strong flavor, like dark chocolate. The best garnish is a mild milk chocolate or white chocolate shaving.
For the fusion touch, go for a good-quality milk or white chocolate brand that is smooth and known for its clean melting properties. For the traditional dish itself, though, fresh chenna and milk always beat anything packaged.
Any cake is prepared by combining flour, sugar, butter, eggs, and a leavening agent in order to prepare a smooth batter. The batter is poured into a greased pan and baked in the preheated oven until the edges are golden brown and the center is properly cooked.
Preparing a cake at home involves ingredients like flour, sugar, eggs, butter, milk, and baking powder. The batter is mixed thoroughly, poured in a cake pan, and baked till the cake rises and turns golden.
Imagine a little cake packed inside a box in a manner that it resembles a takeaway pack. A Bento Cake refers to an individual size cake or a mini celebration cake that can be decorated with frosting or a short message.
To bake a cake in a microwave, set it to convection mode while baking. The batter is prepared, and the microwave is preheated, then the cake is cooked until it is ready.
Preparation of a chocolate cake involves the blending of flour, cocoa, sugar, eggs, butter, milk, baking powder, and vanilla to form a smooth batter. The batter is baked till it is completely cooked.
Plum Cake does not include fresh plums; rather, it includes some dried fruits, raisins, and nuts. Before baking, the fruits are marinated in fruit juice or an alcoholic drink.
For preparing a chocolate cake from biscuits, chocolate biscuits are crushed into fine crumbs. Milk, baking powder, and cocoa are blended with the crumbs and baked or steamed to make the cake soft and cooked.
A Truffle Cake refers to a rich chocolate cake that is layered with ganache of chocolate rather than frosting. It includes top quality chocolate which gives it a dense and creamy taste.
Dark or semi-sweet baking chocolate is a good choice for preparing chocolate cake as it is easily melted and provides rich chocolate flavor.
Couverture or baking chocolates having more content of cocoa butter are preferred by professional bakers for their even melting.
In simple words, chocolate is a food product rich in cocoa solids and cocoa butter. It comes from roasted, ground cacao seeds. The rich, indulgent flavor sets it apart from other desserts.
To make chocolate at home, take some melted coconut oil or butter in a heatproof bowl over simmering water. Next, whisk in some powdered sugar, cocoa powder, and milk powder. Pour the mixture into molds and freeze.
Making high-quality chocolate from scratch is an expensive process. It requires fermenting, roasting, and grinding cacao beans into a liquid paste. The next part is sweetening and kneading the mixture well.
Yes. Chocolate can always be refrigerated and frozen, but with special care. To make sure the texture and taste remain the same, it is ideal to place them in an airtight container after wrapping tightly in plastic.
Chocolate is never scientifically labeled as a 'healthy' dessert option, as it contains sugar and is calorie-dense. However, science says that when taken in moderation, dark chocolate can help you with certain health benefits.
To make chocolate without eggs, simply take some melted butter or oil. Whisk in some powdered sugar, unsweetened cocoa powder, and milk powder. Once the mixture is ready, refrigerate it in a mold.
Yes. Chocolate is one of the most suitable and cherished dessert items for parties and celebrations. Known for its universal appeal, it is popular amongst people of all age groups.
To melt chocolate, first chop it nicely. Now, using either a double boiler or a microwave, heat the chocolate gently. Make sure the chocolate does not come in touch with water, as that often causes the chocolate to seize.
Several brands manufacture chocolate across the globe. While all of them have their own specialties, Cadbury is one of the most popular brands known for making high-quality chocolate and cocoa powder.
A simple dessert can be a baked or no-bake recipe. For any dessert, you would just need some pantry staples. If you want a baked dessert, add a leavening agent. Prepare a batter and bake or cook on the stovetop as per your recipe requirements.
While there are countless dessert options based on types and flavors, they are broadly divided into categories like cakes, cookies, pies, pastries, frozen desserts, puddings, candies, and fruit desserts.
Frozen Haute Chocolate is known as the most expensive dessert in the world. Made with some of the most expensive cocoa and edible gold, this New York-based sundae is topped with a La Madeline au Truffle, the world's most expensive chocolate.
To manage high triglycerides, it is always recommended to have desserts made with high-fiber fruits, healthy fats, and whole grains. One may try making mousse, parfait, cakes, and cookies with these ingredients.
Making desserts at home takes some simple ingredients, the right utensils, an oven, and a simple recipe to follow. Mix the ingredients accordingly and bake/chill/set them. Within minutes, your dessert will be ready.
For making desserts, couverture chocolate is often considered the best in the business. With its high cocoa butter content, it melts very smoothly, which is essential for a rich and indulgent chocolate dessert.
Biscuit desserts are amongst some of the easiest ones. Be it a cheesecake or a no-bake biscuit pudding, biscuits make the perfect crunchy base, which can be simply filled with cream, cream cheese, or pudding.
In the world of desserts, the 5C's refer to the five broad categories of flavor profiles, including Chocolate, Citrus, Coffee, Custard or Cheesecake, and Caramel. These are the five main flavors that make desserts so delightful.
When you are in a hurry, 5-minute desserts like a simple vanilla mug cake, chocolate-dipped fruits, chocolate-coated almonds, and dairy-free fruit nice cream can save your day like nothing else.
A chocolate dessert takes some standard ingredients like high-quality chocolate, heavy cream, sugar, and condensed milk. Mix them well, set them in the refrigerator, and within less than 30 minutes, your chocolate dessert will be ready.
Start with a soft chocolate sponge cake prepared using flour, cocoa powder, sugar, butter, eggs and milk. Then add chocolate frosting, cover it all over and garnish with sprinkles or fresh fruits.
Follow a regular cake recipe. Then pour the batter into a greased tin, bake it, and decorate your cake as you prefer after it cools.
Use fresh fruits for making a birthday cake. Prepare vanilla sponge cake and spread whipped cream over it, and add fruits. Then add some more cream and fresh fruits on top.
Yes, Birthday Cake can be kept fresh in the fridge in a tight container for 3-5 days and it can be frozen for up to one month.
Make use of the food grade ink and edible photo sheets for personalizing your Birthday Cake. Paste the photo sheet on smooth frosting and write the birthday name using the piping method.
To make a birthday cake without eggs, use yogurt or condensed milk, in place of eggs. Now prepare the batter and bake the cake until done.
With the help of buttercream, whipped cream, chocolate ganache, sprinkles, fruits and edible flowers, decorating a birthday cake becomes an easy task. Just pipe borders and add some toppings, and you may add some candles too.
To keep a birthday cake fresh, keep it well covered. This prevents it from drying out. Store it for a day or in a fridge.
Best chocolates for Birthday Cakes are premium-quality dark or semi-sweet baking chocolates as these chocolates melt well.
Good quality couverture chocolate or dark chocolate with high cocoa butter content makes birthday cake frosting smooth and glossy.
The recipe for preparing the Black Forest cake involves baking the chocolate sponge, cooling it, and layering with whipped cream and cherries. The cake is then covered in the remaining cream and decorated with chocolate shavings.
To prepare an eggless Black Forest Cake, one can substitute eggs with yoghurt or condensed milk to make chocolate sponge. Then, cool it and layer with whipped cream, cherry filling, and chocolate flakes.
No oven Black Forest Cake preparation uses the method of cooking chocolate sponge using a pressure cooker without the whistle and a thick bottomed pan. Once cooled, it needs to be layered with cream, cherries, and chocolate flakes.
The most common ingredients of the traditional Black Forest Cake include flour, cocoa powder, sugar, butter or oil, eggs, baking powder, whipped cream, cherries, chocolate shavings, and vanilla essence. The cherry syrup also gives the sponge taste and moisture.
Black Forest Cake lasts up to two to three days when kept refrigerated in an airtight container. Since it contains the whipped cream component, one should not keep it at room temperature after serving it.
Dryness and irregular shape are the most common problems of the Black Forest Cake that occur due to its overcooking and uncooled sponge, respectively. Freshly prepared whipped cream, correct soaking syrup, and proper layering help solve these issues.
The unique taste and consistency of the Black Forest Cake are provided by chocolate sponge, whipped cream, cherries, and chocolate flakes combined in the layers of the cake.
One can serve a Black Forest Cake in mini jars, cupcakes, dessert glasses, individual pieces decorated with extra cherries and chocolate curls. Serving the cake with vanilla ice-cream is a good idea too.
Dark quality chocolate with a content of about 55% to 70% of cocoa would be perfect for Black Forest Cake since it produces rich shavings that enhance the taste of the sponge and balance the cream and cherries.
It is better to purchase the Black Forest Cake from the bakery that uses freshly prepared chocolate sponge, whipped cream, and cherry filling.
The cake filling can be prepared using fresh or frozen blueberries. Boil the berries together with sugar, lemon juice, and some cornflour till the mixture thickens,s and then cool the resulting filling.
Preparation of Blueberry Cake requires preparation of a batter using flour, sugar, butter, eggs, milk, and baking powder. Then the blueberries should be folded into the batter and poured into a cake tin.
To cook a Blueberry Cake from scratch, it is necessary to gather flour, sugar, butter, eggs, milk, baking powder, vanilla extract, and fresh or frozen blueberries.
It is possible to store the Blueberry Cake in the fridge for up to five days if the cake is stored in an airtight container. Besides, it is possible to keep the cake in the freezer up to two months.
The dried blueberries become softer after soaking them in water or some fruit juice for several hours. They should be dried thoroughly and sprinkled with flour, then folded into the cake batter.
To make an eggless Blueberry Cake, it is necessary to use yogurt or condensed milk instead of eggs. It is necessary to mix all ingredients and fold the blueberries into the batter.
The Blueberry Cake is perfect for birthdays, tea parties, festivals, housewarming celebrations, or any other family celebration. Serve the cake as it is or sprinkle it with some icing sugar.
Baking Blueberry Cake at home requires mixing all ingredients into the batter and folding in the blueberries carefully. Pour the batter into the greased cake tin and bake in a preheated oven.
It is better to use dark chocolate as it goes well with the Blueberry Cake. The chocolate should be of high quality; it is used for making cakes, frostings, and chocolate decorations.
Use dark or semi-sweet premium baking chocolate for baking a chocolate blueberry cake. Ensure that the chocolate has a cocoa content of 60-70%.
A cheesecake is a smooth dessert with a crunchy base. Cheesecake is prepared with a biscuit base, cream cheese, sugar and other ingredients like fruits or chocolate for the filling which is then baked or chilled.
The first step for making a cream cheese cake is preparing the biscuit base with crushed biscuits and melted butter. This is topped by the filling made out of cream cheese and baked or chilled until the filling solidifies.
Basic ingredients of Cheesecake are cream cheese, sugar, eggs or any other setting agent, vanilla essence and a base of crushed biscuits with melted butter. Other ingredients such as sour cream and fresh cream are also added in some cases.
The shelf life of freshly made Cheesecake is 1-2 days if it is stored in the fridge in a sealed container. Otherwise, the cheesecake should be consumed within a day.
The process of making blueberry cheesecake begins with preparing the biscuit base, followed by applying a layer of cream cheese filling on top of it. After that, add blueberry compote or berries on top of it and bake or chill according to the recipe.
Yes, eggless Cheesecake can be easily made with cream cheese, whipped cream, condensed milk, yogurt, or gelatin substitute.
Cheesecake is served as dessert during meals or birthday celebrations, anniversaries, festive dinners, and family gatherings, and is also enjoyed with tea/coffee in the evenings.
Yes, cream cheese frosting pairs well with chocolate cake because its tanginess balances the cake's rich chocolate flavor.
High-quality dark or semi-sweet baking chocolate is used for the perfect Chocolate Cake as it blends nicely in the filling and adds a balanced amount of chocolate flavor.
It is recommended to use either couverture or high-quality dark chocolate for the perfect cheesecake topping because of its melting properties and shiny texture. You can also use milk chocolate for a milder taste.
Melt chocolate along with butter and mix with sugar, eggs, flour, and little salt in the batter. Pour the batter in greased ramekins and bake until the edges get hard and the center remains soft.
Yes, there is an eggless Choco Lava Cake made using yogurt, condensed milk, and other substitutes of eggs. Baking time should be less to ensure that the center becomes gooey and has the flowing chocolate filling.
To make Choco Lava Cake without an oven, pour the batter in greased molds and keep in the pre-heated steamer or pressure cooker. Remove the the whistle of the cooker to cook the cake until the edges become firm and the center remains gooey.
Preheat the air fryer, fill greased ramekins with the batter, and cook at the recommended temperature for several minutes until the outside sets. Serve immediately so the warm chocolate centre flows when cut.
The Choco Lava Cake tastes best when served immediately after baking. If stored in an airtight box, it can stay fresh for about two days in the fridge and should be reheated before consumption.
Over baking is the biggest mistake that ruins the taste of the cake as the center gets completely cooked. Proper measurement and baking time will ensure the flowing center of chocolate in the cake.
It allows making the chocolate lava cake according to personal preferences in terms of chocolate quality and the amount of sugar added in it.
Peanut butter, salted caramel, coffee, hazelnut spread, raspberry filling or orange zest can be used for preparing the center of the cake. Besides, it can be served with ice cream or nuts.
The chocolate with high cocoa content gives the best results by providing good taste and rich molten center for the cake. It melts perfectly and does not affect the quality of the center.
Better choose a bakery or a café which prepares Choco Lava Cake instead of considering a particular brand as freshly baked cakes taste better.
As the name suggests, chocolate balls are bite-sized, no-bake treats filled with chocolatey goodness. Made with melted chocolate, condensed milk, butter, sugar, and crushed biscuits, these are an absolute delight.
To make chocolate balls at home, all you need is some biscuit crumbs, sweetened condensed milk, cocoa powder, and melted butter. Mix all the ingredients well. Shape them into balls and enjoy.
While there are several variations to explore, chocolate balls are usually made with crushed biscuits, cocoa powder, melted chocolate, butter, and sweetened condensed milk. Sometimes, the balls are rolled into shredded coconut as well.
If they contain solid chocolate inside, the shelf life is usually 6-12 months. A truffle with chocolate ganache can be refrigerated for a few days. However, they should always be refrigerated in airtight containers. How to make chocolate balls? (Repetitive question)
These chocolate balls are usually eggless, as they contain ingredients like biscuit crumbs, condensed milk, butter, cocoa powder, or melted chocolate. Even without eggs, they are simply delicious.
Chocolate balls are often served with evening coffee. However, being extremely versatile in nature, these are perfect for holidays, festive seasons, and special occasions like birthdays and anniversaries as well.
To add the earthy and tropical goodness of coconut to the chocolate balls, you need to add some shredded or desiccated coconut to the sweetened condensed milk and melted chocolate.
Cadbury is often considered one of the best and most popular brands when it comes to chocolate. The desired smoothness, sweetness, and texture of these chocolate balls come from the high-quality of Cadbury chocolates.
To make an Oreo chocolate ball, simply mix some crushed Oreo cookie crumbs with softened cream cheese and condensed milk. Once the mixture is ready, roll it into small balls, coat in melted chocolate, chill, and serve.
To make a simple chocolate cake at home, combine flour, sugar, cocoa powder, baking soda, and a pinch of salt, warm milk, vegetable oil, vinegar, and extract. Pour the batter into a lined pan and bake at 180°C for 40 minutes.
For an eggless chocolate cake, keep the rest of the recipe the same as the regular version. To replace eggs, use a mix of vinegar and baking soda for that fluffy texture and delicious taste.
One may decorate a chocolate cake with rich buttercream frosting, chocolate ganache, edible decoration, crushed cookies, and more. Before the final coat, make sure the cake is chilled well with a crumb coat.
To make a rich and fudgy chocolate brownie cake, start by mixing melted butter, dark chocolate, sugar, eggs, vanilla, flour, cocoa powder, and salt. Pour the batter into a lined cake pan and bake at 180°C until the edges are set but the center is fudgy.
For a perfect chocolate truffle cake, start with baking a moist, rich chocolate sponge cake. Next, layer it with velvety ganache filling and rich chocolate frosting for that glossy, chocolatey look, and let it set.
To make a perfect chocolate piñata cake, simply make a hollow chocolate shell and fill its cavity with chocolate treats. Bake a regular chocolate cake. Place the filled chocolate shell over it and smash it open with a wooden hammer.
Bake a simple chocolate cake, decorate it with buttercream frosting and cute piping designs. Garnish it with some added chocolatey treats and write something thoughtful with the icing using the thin tip of the piping bag.
This is one of the easiest no-bake cake recipes to try. For this, crush biscuits and mix them into a rich chocolate ganache. Let the mixture set in the fridge for an hour.
For homemade cake recipes, it is ideal to use premium-quality dark chocolate or unsweetened cocoa powder. With high cocoa content, both are perfect for the cake and a rich buttercream frosting.
Chocolate candy is a bite-sized, chocolicious treat filled with the rich and intense taste and texture of chocolate. Made with cocoa beans/cocoa powder, sugar, and cocoa butter, these are an absolute delight.
To make chocolate candies at home, whisk some melted coconut oil, cocoa powder, butter, and powdered sugar until smooth. Once the mixture is ready, pour it into molds and freeze for 30 minutes.
The list of main ingredients of a chocolate candy includes cocoa beans, cocoa powder, butter, sugar, and often milk. For some added flavor, one may play around with caramel or coffee.
It entirely depends on the ingredients. If the candies contain solid chocolate inside, the shelf life is usually 6-12 months. However, for a truffle with chocolate ganache, it is just a few days when refrigerated. How to make chocolate candy from cocoa powder? (already mentioned above)
Yes. These chocolate bites are usually eggless. They contain ingredients like condensed milk, butter, cocoa powder, or melted chocolate. Even without eggs, they are simply delicious.
These bite-sized candies are perfect for almost any occasion. Be it a festive season or some special occasion at your home, these no-bake candies are perfect treats for the guests. Moreover, they also save time.
For a low-sugar version of the chocolate candies, it is ideal to make the chocolate candies with 70% to 90% dark chocolate or couverture chocolate. Both are high in cocoa content and low in sugar.
While several chocolate brands produce good-quality chocolate, Cadbury is often considered one of the most popular brands. Be it Cadbury Dairy Milk or Bournville, the high-quality chocolates are ideal for these candies. Which brand makes the best chocolate candy? (Repetitive question)
Chocolate cheesecake adds a perfect chocolatey twist to the regular creamy, cheesy cheesecake that melts in the mouth. It features a chocolate cookie crust, a creamy filling, and a chocolate ganache topping.
To make a chocolate cheesecake, prepare the crushed chocolate cookie crust, prepare a creamy, cheesy, chocolatey filling, and slowly bake it in a water bath. Once ready, top it with a rich chocolate ganache.
A perfectly creamy, cheesy chocolate cheesecake needs some crushed chocolate cookie crumbs, softened butter, cream cheese, sour cream, melted chocolate, eggs, powdered sugar, and some pure vanilla essence to achieve that perfect texture.
Chocolate cheesecake usually lasts for 5 to 7 days in the refrigerator and 1 to 3 months in the freezer. Make sure it is always placed in an airtight container after wrapping tightly in plastic wrap.
This entirely depends on the recipe and size of the cheesecake. However, a standard slice of a store-bought or homemade chocolate cheesecake is likely to contain between 350 and 500 calories.
Yes, Eggless chocolate cheesecake is a popular alternative version of the regular chocolate cheesecake. To maintain the same creamy texture even without eggs, you need to whip some cream cheese, melted chocolate, and whipped cream together and set the cake in the refrigerator.
Chocolate cheesecake is perfect for almost every occasion. Be it a wedding, a birthday, or a graduation ceremony, everyone likes to enjoy some creamy, chocolatey delight that melts in the mouth right away.
To try the no-bake version of the cheesecake, crush the chocolate cookies and mix them with butter to form the crust. Pour the filling made with cream cheese, melted chocolate, sugar, and vanilla on it, and refrigerate.
While there are several brands available in the market for high-quality chocolate and cocoa powder, Cadbury is one of the best brands. One may easily use Cadbury Dairy Milk, Bournville, or cocoa powder for these cheesecakes.
High-quality bittersweet or semi-sweet baking chocolate bars are the best options, as they make the smoothest and silkiest chocolate cheesecake filling. One may also use couverture chocolate, as they contain high amount of cocoa.
To make chocolate chip cookies, you need flour, butter, sugar, eggs, baking soda, vanilla extract, and chocolate chips. These ingredients are mixed to make a soft dough. Once the dough is formed, shape it and place it on the baking tray, then bake in a preheated oven until the edges are lightly golden.
Preparing chocolate chip cookies in a microwave is easy. It involves making the dough with the usual ingredients. Divide the dough into small parts and microwave until the cookies are baked.
Often a great choice, eggless chocolate chip cookies involve substituting eggs with yogurt, milk, or a flaxseed mixture. After that, these ingredients are combined to form the dough, then folded in the chocolate chips and shaped into cookies.
Usually, chocolate chip cookies take around 10-15 minutes of baking time at a temperature of 175-180° C in a preheated oven. During baking, the edges of the cookies will appear lightly golden, while the centers will remain soft.
While the ingredients remain the same, the oven baking is replaced by stove cooking. Preparing chocolate chip cookies without an oven includes preheating a heavy-bottom pan or pressure cooker. Then the cookies have to be placed on a lined plate or tray in the pan and slow-cooked for around 40-60 minutes. Keep checking for doneness and avoid burnt cookies.
Preparing cookie dough needs attention to detail. This forms the base of the recipe, and the flavor and quality depend heavily on the cookie dough. The dough for chocolate chip cookies includes butter, sugar, eggs, vanilla extract, flour, baking soda, and chocolate chips. These ingredients have to be combined to prepare the dough. It could be stored in the fridge to harden before baking.
Healthy chocolate chip cookies could be made with whole-wheat flour, rolled oats, natural sweeteners like dates, figs, and dark chocolate chips. Replacing part of the butter with mashed banana or applesauce will make the cookies lighter.
Milk chocolate chips are generally the best option for kids-friendly chocolate cookies due to their sweet taste. Milk chocolate is easy to melt during baking and has a milder taste than dark chocolate, which makes it more popular among kids.
Preparing peanut butter chocolate chip cookies is quite easy. It includes mixing a good quality peanut butter with regular cookie dough and folding in the chocolate chips. Bake until the edges become lightly golden.
Chocolate oatmeal cookies can be made by mixing rolled oats, flour, butter, sugar, eggs, baking soda, cocoa powder, and chocolate chips. All the ingredients must be combined to form the dough.
To make chocolate sauce for donuts, whisk some powdered sugar, cocoa powder, milk, and vanilla extract. Once the sauce is ready, dip your donuts directly into the bowl and let them set.
To make chocolate-filled donuts, simply mix active dry yeast, milk, flour, butter, and eggs. Once the dough rises, shape it into balls and fry them. Let them cool down. Poke a small hole in each donut and pipe melted chocolate inside.
For a glossy donut glaze, mix confectioners' sugar, unsweetened cocoa powder, milk, and vanilla extract. Mix everything well until the glaze forms, and then dip your donuts into the glaze.
Once the smooth icing is ready and the donuts are at room temperature, simply dip the top half of each of them into the glaze upside down. Twist it slightly to make sure it is covered well, and let it set.
To make the donuts in the microwave, make the dough with flour, sugar, cocoa powder, baking powder, milk, vegetable oil, and vanilla. Place it in a silicone mold and microwave on high for a minute.
To make an Oreo chocolate donut, make a simple chocolate batter, fold in some crushed Cadbury Oreo cookies, and bake them in a donut pan. Once ready, top them with a glossy glaze and serve.
Yes. To make eggless donuts, simply bake them in a donut pan with a substitute like buttermilk or yogurt, or prepare a fried yeast-based dough. Even without eggs, both methods make soft donuts.
If you want a rich, velvety chocolate donut, Dutch-processed cocoa powder is always considered the best choice. With a balanced pH, darker color, and smoother flavor, the result is always excellent.
A chocolate fondue is a classic warm, melted, gooey chocolate with the goodness of chocolate, heavy cream, and butter. Often served in a fondue pot kept over a small flame, this dip is perfect for many sweet and savory treats.
To make chocolate fondue at home, simply mix some good-quality chocolate, 1heavy cream, whole milk, butter, and a pinch of salt. In a saucepan, melt the ingredients together over medium-low heat until smooth.
A classic creamy chocolate fondue needs ingredients like good-quality chocolate, heavy cream, butter, whole milk, and salt. To bring in a flavor variation, one may also try the coffee and caramel flavors that pair well with chocolate.
When refrigerated in an airtight container, homemade chocolate fondue can be stored for 2-3 days. The store-bought ones last for 2 to 4 weeks. However, as they contain dairy products, they should be consumed as soon as possible.
For that perfectly creamy texture and gooey feeling, it is always ideal to use high-quality couverture chocolate. One may also use dark chocolate, melting wafers, or premium baking chocolate bars.
Chocolate fondue is naturally eggless, as the popular recipes only take high-quality chocolate, heavy cream, butter, whole milk, and just a pinch of salt. Eggs are not needed in the recipe for taste or texture.
This lusciously creamy, chocolatey goodness is perfect for occasions like intimate celebrations, movie nights, game nights, anniversaries, Valentine's Day celebrations, or New Year's Eve. It blends with almost any vibe effortlessly.
Yes. Chocolate fondue can be frozen for up to 3 months. To freeze it, you need a freezer-safe, airtight container. Before reusing, thaw overnight in the refrigerator before reheating it gently.
While several chocolate brands manufacture top-grade chocolates, Cadbury chocolates are popularly used for making desserts and fondues. With their high cocoa content and milky sweetness, they are perfect for it.
If you are making a fondue platter, you may include items like fresh fruits, berries, cheese cubes, crackers, pretzels, marshmallows, pound cakes, brownies, and more. All of them pair perfectly with the chocolate fondue.
To make a chocolate lava cake in a mug, simply combine flour, sugar, cocoa powder, baking powder, salt, milk, and melted butter in a microwave-safe mug. Insert a chocolate truffle and microwave on high for a minute. What is an easy homemade chocolate lava cake recipe?(Kind of repetitive question)
The list of main ingredients of choco lava cake includes semisweet chocolate, unsalted butter, eggs, granulated sugar, flour, some salt, and vanilla extract. Mix everything and bake for 20-25 minutes.
If kept at room temperature, chocolate lava cakes stay fresh for up to 1 week. Make sure they are stored in an airtight container to retain moisture. Before reusing, reheat the cake for 15 seconds in the microwave.
To restore the molten, gooey, chocolatey center of a choco lava cake, preheat your oven to 175°C and warm the cake for 5 minutes. Alternatively, microwave in 15-second intervals with a damp paper towel on top
For an eggless chocolate lava cake, whisk some warm milk, oil, melted butter, sugar, vanilla extract, flour, cocoa powder, and baking powder. Insert some chocolate cubes in the center, and bake the batter.
Chocolate lava cake is perfect for almost every occasion. Be it a winter festival, a wedding, a birthday, or a graduation ceremony, everyone likes to enjoy some creamy, chocolatey delight that melts in the mouth right away.
Amongst all the brands available in the market for high-quality chocolate and cocoa powder, Cadbury is one of the best brands. One may easily use Cadbury Dairy Milk, Bournville, or cocoa powder for these lava cakes.
The best chocolate for a no-oven lava cake is a high-quality bittersweet or dark chocolate. One may also opt for Couverture chocolate, as it contains a very high percentage of cocoa.
Preparing chocolate mousse is easy. For making chocolate mousse, you will have to melt the chocolate, add it to whipped cream mixed with sugar and vanilla, and refrigerate till it sets.
If you want to make chocolate mousse without using any cream, just whip egg whites to stiff peaks and fold them into the chocolate. You can use Silken tofu and Greek yogurt to get the creamy consistency.
Eggless chocolate mousse can be made by combining chocolate with whipped cream or whipped coconut cream. Gently fold the mixture, put it in serving bowls, and refrigerate.
Sugar-free chocolate mousse requires unsweetened dark chocolate or unsweetened cocoa powder, along with natural sweeteners like stevia or erythritol. Combine the mixture with whipped cream or Greek yogurt.
Chocolate mousse cake can be prepared by baking a chocolate sponge cake and spreading prepared chocolate mousse on it. Then refrigerate the mousse and decorate before slicing.
To prepare chocolate mousse cake filling, mix chocolate with whipped cream and make it light and fluffy. Refrigerate it for some time until it thickens and becomes stable enough to spread between cake layers.
Chocolate mousse with cocoa powder can be prepared by whisking cocoa powder with milk, sugar, and vanilla in warm milk. Then fold it into whipped cream and refrigerate.
If you want to prepare chocolate mousse with cocoa powder, then mix cocoa powder with sugar and milk to form a paste. Fold it into whipped cream and refrigerate.
The best garnishes for chocolate mousse can include chocolate curls, cocoa powder, fresh fruits, whipped cream, roasted nuts, and mint leaves.
Chocolate mousse cakes can be decorated by adding chocolate curls, cocoa dusting, fresh fruits, whipped cream, or edible flowers on them after the mousse has set completely.
To make chocolate pancakes at home, combine milk, egg, melted butter, flour, cocoa powder, sugar, baking soda, and salt. Next, pour some batter into a hot, greased skillet and cook the pancakes.
For this, you will need flour, cocoa powder, sugar, baking powder, baking soda, milk, egg, and some melted butter. Combine everything to form the batter. Pour some batter into a greased pan and cook it.
To make chocolate pancakes without cocoa powder, one may consider adding melted chocolate chips or some chocolate spread to the batter. Don't forget to melt the chocolate with some butter. The process remains the same.
Once the fluffy pancakes are ready, it is time to add some chocolatey indulgence. Chop the chocolate and melt it with some butter and powdered sugar until it forms a liquid syrup. Now drizzle it over the pancakes.
To make eggless chocolate pancakes, simply replace eggs with substitutes like yogurt or a milk-vinegar mixture. Whisk the other dry and wet ingredients together. Fry the pancakes in a greased and hot skillet.
To make a glossy chocolate sauce for your pancakes, simply whisk cocoa powder, sugar, milk, and butter in a saucepan over medium heat until the mixture thickens slightly, and add some drizzles of the sauce to the pancakes.
To make chocolate chip pancakes, add some good-quality chocolate chips to the other regular ingredients. Mix everything well to form the batter. Cook the pancake batter in a greased pan over medium heat.
The miniature version of the pancakes needs the same ingredients as the regular ones. Once the batter is ready, transfer it to a piping bag and squeeze small dots onto a greased pan, cook for a minute, and flip.
To make sure the pancakes are fluffy, avoid overmixing the batter. Make sure the leavening agent is active. Also, allow the pancake batter to rest for 10 minutes before cooking.
The most popular and best pancake toppings often include options like strawberries, bananas, chocolate spread, peanut butter, whipped cream, chocolate sauce, or a dusting of powdered sugar.
Make a soft chocolate sponge, cut it into layers, and fill with cream or ganache made of chocolate. Put additional cream on top, freeze till it sets, and cut into pieces of the desired size.
Cook milk, mix sugar, cornflour, and egg yolks/egg substitute. Boil till it gets thick, then add butter, vanilla and melted chocolate. Let it cool thoroughly, then use it as pastry filling.
Make the chocolate sponge by steaming in the pressure cooker/pan without a whistle. When cooled, layer with chocolate cream or frosting, let it cool again, and cut into slices of pastry.
Prepare the chocolate sponge by baking or steaming. When cool, put layers of chocolate whipped cream or ganache. Frost the cake, put it in the fridge till it sets, and cut into rectangular pastries.
Make a crust by crushing the cookies and adding butter. Top the crust with either a chocolate mousse or a cream cheese spread, place in the fridge to firm up, then cut into individual pastries and sprinkle with some grated chocolate or cocoa powder. There is no baking involved in this recipe!
Dark chocolate with 50-70% cocoa will be the best choice for rich fillings as it melts and hardens well. The filling made of milk chocolate is a bit sweeter, while couverture chocolate gives a gloss and silkiness.
Chocolate bars and baking chocolate are more preferable than compound chocolate as they melt well and have a richer taste. Dark or semi-sweet chocolate is especially popular because it matches well with pastry.
Press the edge of the pastry with a fork or use a little water. Also, do not overfill the pastries and put them in the fridge for 15-20 min before baking.
It is possible to use chocolate chips, but they have stabilizers that make them retain their shape. Bars are preferable as they melt well, giving a soft and liquid chocolate filling.
Store chocolate pastries in the refrigerator in an airtight container for 3 days if they contain cream. Pastries that don't have a dairy filling can be kept for one day at room temperature.
Chocolate popsicles are frozen, icy, cocoa-based chocolate treats with more sugar and less fat. These are particularly popular during the scorching summer days, as they bring a refreshing feeling.
To make a refreshing, icy, cool chocolate popsicle at home, whisk some skim milk, sugar, cocoa powder, and 1 vanilla extract. Once the mixture is ready, pour it into the popsicle molds and freeze for 8 hours.
To make a classic icy chocolate popsicle, all you need is some skim milk, sugar, cocoa powder, and vanilla extract. Some recipes also use cornstarch to prevent the mixture from becoming too icy.
To store the chocolate popsicles in the freezer, individually wrap them in plastic wrap and place them inside an airtight container or freezer bag. This helps ensure that the texture and taste of the popsicles remain the same.
While it depends on the recipe and size of the popsicles, usually one chocolate popsicle carries around 150-200 calories. While the water-based, icy ones are on the lower end, the creamy popsicles are more calorie-rich.
Yes. And the best part is that the traditional chocolate popsicle recipes don't even contain any eggs. One can easily make them by blending pantry staples like cocoa powder, sugar, and water/skim milk.
Chocolate popsicles are usually more popular during the summer season. To beat the scorching summer heat, these are often served as a refreshing and cool dessert on a hot and humid day.
For a healthy, dark chocolate version, one should ideally use a high-quality dark chocolate bar or unsweetened cacao. These are high in cocoa components and low in sugar and fat.
While there are several brands available in the market for high-quality chocolate and cocoa powder, Cadbury is one of the best brands. One may easily use Cadbury Dairy Milk, Bournville, or cocoa powder.
These chocolate popsicles feature a creamy, dairy base. Made with full-fat milk, heavy cream, sugar, and cocoa powder or melted chocolate, these popsicles carry a fudgy texture instead of an icy texture.
First of all, to make chocolate pudding, you need to mix together milk, cocoa powder, sugar, and cornflour. Then, cook the mixture on medium heat stirring constantly until it thickens and chilling it afterwards.
Chocolate pudding is made with simple ingredients such as milk, cocoa powder or melted chocolate, sugar, cornflour, butter, and vanilla. All these ingredients are mixed together to create a creamy dessert.
To make chocolate pudding pie, you need to start from preparing a baked pie crust and fill it with freshly made chocolate pudding. The next step is to chill the pie until it becomes firm and then top it with whipped cream or chocolate shavings.
First of all, it will not be hard for you to prepare this chocolate biscuit pudding. Just layer biscuits with warm chocolate pudding in a serving dish and chill until layers soften.
First of all, to prepare chocolate bread pudding, you need to soak bread pieces in a mixture of milk, cocoa, sugar, eggs, and vanilla. Then, baking everything until the center sets and the top becomes lightly crisp.
It will not be hard for you to prepare this chocolate chia pudding. You will need to mix chia seeds with milk, cocoa powder, sweetener, and vanilla and refrigerate the mixture overnight to let the seeds thicken.
First of all, to prepare this pudding cake, you need to make a chocolate batter and pour it into the baking dish. Next, you need to add the sugar and cocoa topping with hot water.
If you gave a leftover chocolate pudding, you can use your leftover chocolate pudding to make parfaits, cake fillings, tart fillings, popsicles, or milkshakes. You can also use it as a topping for pancakes, waffles, or fresh fruits.
To prepare this rice pudding, you should start with cooking rice with milk until it becomes soft. Then, you stir in cocoa powder or melted chocolate, sugar, and vanilla and cook until the pudding thickens and becomes creamy.
Homemade chocolate pudding tastes best with high-quality dark or semi-sweet chocolate with high cocoa content. Also, you can use couverture chocolate for best results.
Chocolate waffles bring in a perfect chocolicious twist to the breakfast table. Unlike other desserts, this crispy-on-the-outside and fluffy-on-the-inside sweet delight is a perfect breakfast-cum-dessert option.
To make crispy chocolate waffles, simply whisk flour, cocoa powder, sugar, baking powder, and salt with milk, melted butter, eggs, and vanilla. Pour the smooth batter into a waffle iron, and cook for 5 minutes.
A simple chocolate waffle recipe needs some of the kitchen staples like all-purpose flour, cocoa powder, sugar, baking powder, eggs, and milk. To make it from scratch, mix everything and cook in a waffle iron.
Yes. When kept in airtight containers, chocolate waffles can be easily refrigerated for 2-4 days. Freezing is needed for longer storage duration. To freeze them, wrap each of the waffles tightly with plastic wrap.
While traditional chocolate waffles are not a healthy dessert as they contain flour, sugar, and butter, some health-conscious swaps in the ingredients can be made to make them a healthy dessert.
To achieve the same fluffiness in eggless waffles, simply balance the leavening agents with dairy and fat. To substitute eggs, one may use unsweetened applesauce, mashed banana, or yogurt as well.
Yes. Chocolate waffles are perfect delights for parties and celebrations. This is a classic, easy-to-make alternative to traditional cakes. And the fun part is that they can be decorated with ice creams, spreads, whipped cream, and more.
To garnish chocolate waffles, one may opt for options like fresh fruits, berries, a dollop of whipped cream, a scoop of ice cream, a dusting of powdered sugar, some hot fudge sauce, or peanut butter.
Chocolate waffles need melted chocolate or premium-quality cocoa powder. While several brands are available, Cadbury chocolates and cocoa powders are often considered some of the best brands to go with.
Lemon Cake is a fluffy and soft sponge cake that is flavored with fresh lemon juice and lemon zest. Lemon cake can be enjoyed for its mild citrus flavor with a bit of sweetness and serves as a tea-time cake, birthday cake, or even as an easy homemade dessert.
Making lemon cake is easier than you think. The ingredients such as flour, sugar, baking powder, butter, eggs, lemon juice, lemon zest, and milk need to be mixed together to make the batter and then poured into the greased pan. Bake the lemon cake in a preheated oven at 180 degrees Celsius for 30 minutes until golden brown.
The ingredients required for a classic lemon cake include flour, sugar, butter, eggs, baking powder, milk, fresh lemon juice and lemon zest. Some other ingredients that may enhance the flavor of Lemon Cake are vanilla extract and a pinch of salt, along with the frosting ingredients.
First of all, preheat the oven, prepare the batter, and then pour it into a greased cake tin. Bake the lemon cake until the edges are golden, and the center is cooked completely. Let the lemon cake cool down completely and then remove it from the cake tin.
It is very important that you choose the right kind of frosting for Lemon Cake. There are some options like cream cheese frosting, lemon buttercream, whipped cream frosting, and even simple lemon glaze which you can consider for your lemon cake.
Eggs can be easily replaced with yogurt or condensed milk to make an eggless lemon cake. Other ingredients for preparing an eggless lemon cake include flour, sugar, butter or oil, baking powder, baking soda, lemon juice, and lemon zest.
Lemon cake frosting can be made easily. Beat softened butter till it becomes light and creamy, and then icing sugar is added gradually. Fresh lemon juice and lemon zest are then added, and the mixture is beaten again until the frosting lightens.
You can order Lemon Cake online from many bakeries and cake delivery websites in your area. There are various flavors, frosting and even custom message options available for you according to your celebration or occasion.
White chocolate is best suited for Lemon Cake as it is rich in flavor and creamy. It is best when used in ganache, frosting, decor or even as drizzled chocolate on top of a lemon cake.
Use dark chocolate with high cocoa content for making chocolate lemon cake. This chocolate is not too sweet and complements the lemon cake perfectly. Baking chocolate or couverture chocolate is also suitable.
Make a biscuit base of crushed biscuits and melted butter, refrigerate, cover with an even layer of lemon filling, and cool until firm. Then decorate with lemon zest, fresh berries, or whipped cream.
Use cream cheese, fresh cream, sugar, lemon juice, lemon zest, and a gelatin alternative, such as agar-agar, as a setting agent. Pour the filling on a biscuit base and put it in the fridge to cool thoroughly.
Prepare a cold biscuit crust, pour the lemon filling over it, and refrigerate until completely set.
Traditional Lemon Cheesecake consists of cream cheese, crushed digestive biscuits or cookies, melted butter, sugar, fresh cream, lemon juice, lemon zest, and a setting agent for a no-bake version.
Keep Lemon Cheese Cake in a tightly covered container in the fridge up to four days. Also, you may freeze individual portions of the dessert for a month and defrost them overnight.
Too much moisture, insufficient cooling time, excessive mixing, or incorrect measurements can ruin the cheesecake's texture. You need to use room-temperature ingredients and allow sufficient cooling.
Lemon Cheesecake is made with a creamy cheese filling combined with fresh lemon flavor and a crispy biscuit base. Unlike sponge cakes, it is rich yet light.
It is perfect with fresh berries, blueberry compote, lemon curd, whipped cream, crushed pistachios, or white chocolate shavings. Lemon cheesecake jars and squares will be great for parties.
White chocolate is perfect to pair with Lemon Cheesecake, thanks to its creamy texture, which complements the dessert's sour notes.
Don't just stick to a specific brand; go for a bakery that uses high-quality natural ingredients, like fresh cream cheese and fresh lemons, rather than just a brand name.
It is a tender, fluffy dessert cake flavored with orange juice and zest. Unlike dense cakes with rich flavors such as chocolate and caramel, Orange Cake is a light dessert with a citrus aroma, making it appropriate for regular baking and special events.
To begin with, whisk together wet and dry ingredients to create a smooth batter with orange juice and zest. Put it in a prepared tin, bake, allow to cool, then frost or glaze.
To bake Orange Cake, you will need all-purpose flour, sugar, butter, eggs, baking powder, milk, orange juice, orange zest, vanilla extract, and a little bit of salt. Depending on your frosting choice, you should gather additional ingredients.
Orange Cake should be kept in the refrigerator in a sealed container for a few days. Besides, you can freeze unfrosted pieces or the whole cake, and then thaw them before serving to have a perfect result.
For decoration, you can apply orange buttercream, citrus glaze, candied orange slices, fresh orange zest, or chocolate shavings. In addition, whipped cream, edible flowers, and chopped pistachios can be used to give your cake an attractive look.
Use yogurt or condensed milk instead of eggs, and make the batter from flour, sugar, oil or butter, baking powder, baking soda, orange juice, and zest. Bake until golden brown, then allow it to cool.
Yes, Orange Cake is the right choice for a birthday, celebration, afternoon tea, and family gathering since many people love its fresh citrus taste, and simple or fancy decorations can be easily matched to any event.
Melt dark chocolate or add cocoa powder to an orange cake batter made with fresh orange juice and zest. Then bake the cake and frost it with chocolate ganache or buttercream to achieve a chocolate and citrus taste combination.
Dark chocolate is better for Orange Cake because its slightly bitter taste, pairs well with the cake's citrus flavor. It can be used for ganache, frosting, shavings, and melting into the batter.
Choose dark chocolate with high cocoa content for the best taste. Chocolate, or couverture chocolate, is good for melting and will give your chocolate orange cake the richest taste.
A Pineapple cake is a spongy cake with a Pineapple taste. It may be covered with cream and fresh or dried pineapple pieces. Usually, this cake is served during birthday parties.
Make vanilla sponge batter with flour, sugar, butter, eggs, and baking powder. Bake the sponge, then let it cool. Spread the sponge with cream, cover it with fresh or dried pineapple pieces.
To prepare this cake, you will need flour, sugar, butter, eggs, baking powder, milk, vanilla extract, fresh pineapple, cream, or pineapple syrup.
Keep it in the refrigerator in an airtight container. It lasts from 2 to 3 days because of the freshness of cream and fruits.
Pineapple Cake has some health benefits but also consists of sugar, flour, butter, and cream. Generally, it has 250 to 350 calories per serving.
Yes, Pineapple Cake can be prepared without eggs by using yogurt, condensed milk, or plant-based alternatives. The cake remains soft and moist, especially when layered with whipped cream and juicy pineapple pieces.
This kind of dessert is perfect for such events as birthdays, anniversaries, office parties, family meetings, festive dinners, etc. During hot weather, this cake can be served as a summer party dessert.
There are various online websites and home bakers that deliver cakes across India. You can find different options there concerning size, ingredients, designs, same-day delivery, and others.
The best chocolate for this cake is white chocolate. It has a creamy sweetness and doesn't mask the fruit's flavor. This kind of chocolate can be used as decoration (curls, ganache, drizzle).
Always focus on the cream's freshness and quality ingredients, rather than on the brand name. Look for bakers that are known for providing fresh Pineapple Cake.
Unlike what the name suggests, Plum Cake usually does not include fresh plums as one might think. It is a flavorful cake that includes dried fruits, raisins, nuts, spices, and sometimes even some fruit juice or alcohol to add flavor and moisture.
To bake a delicious plum cake, it is essential to soak the dried fruits in fruit juice or rum a few days before and then mix them into a dough along with flour, butter, sugar, eggs, and spices.
To make a good Plum Cake at home, you should have ingredients such as flour, butter, sugar, eggs, baking powder, mixed dried fruits, nuts, spices, vanilla, and orange juice or rum.
Yes, Plum Cake can be easily stored in an airtight container. To keep the cake as fresh as possible, you can store it in the fridge or freezer for several days or months, respectively.
Plum Cake may become healthier if you make it with wholemeal flour, reduce the amount of sugar and use many dried fruits and nuts. However, moderation is key here.
Baking an eggless Plum Cake is quite easy since eggs can be replaced with yogurt or condensed milk,. Just mix the dough along with soaked fruits and set it for baking in a preheated oven.
Yes, you may make Plum Cake without rum. The dried fruits can be moistened with other types of juice such as orange, apple, grape or cranberry juice.
If you are going to bake Plum Cake with chocolate, use dark baking chocolate since it contains a good amount of cocoa that will complement dried fruits and spices in the cake.
Decorate the Plum Cake with glazed cherries, nuts, dried fruits, orange peel or sprinkle it with some icing sugar.
For an easy homemade Red Velvet Cake recipe, mix flour, cocoa powder, sugar, butter or oil, eggs, buttermilk, baking powder, vanilla extract, vinegar, and red food coloring. Bake in a preheated oven, let cool, then cover with a thick layer of cream cheese frosting.
Yes, there is an eggless version of Red Velvet Cake that uses yogurt, buttermilk, or condensed milk. Such ingredients offer a good sponge that pairs perfectly with cream cheese frosting.
One can make Red Velvet Cake without an oven. You just need to bake the batter in a pressure cooker (previously heated without a whistle) or in a heavy-bottomed pan.
The standard Red Velvet Cake recipe requires all-purpose flour, cocoa powder, sugar, butter or oil, eggs, buttermilk, baking powder, vanilla extract, vinegar, red food coloring, and cream cheese frosting.
In an airtight box in the refrigerator, the Red Velvet Cake keeps well for about 3-4 days. Because of the cream cheese frosting, it should not be left out of the fridge for long.
One of the common mistakes in making Red Velvet Cake is overmixing the batter and using an excessive amount of cocoa. This results in a dense Red Velvet Cake with poor red coloring. Accurate measurement of the ingredients is very important for achieving the desired texture.
Homemade Red Velvet Cake gives more control over ingredient choices, the level of sweetness, and the thickness of the frosting. The store-bought Red Velvet Cake offers great convenience but contains preservatives and other additives to extend shelf life.
Red Velvet Cake is excellent in cupcakes, cake jars, cheesecakes, brownies, Swiss rolls, cake pops, and many other forms. You can also decorate with options like white chocolate, fresh berries, or chocolate chips.
High-quality white chocolate suits Red Velvet Cake best, thanks to the subtle flavors of cocoa and cream cheese frosting. It can also be replaced by dark chocolate for decorative purposes.
Every brand has its uniqueness; no one brand may offer you everything you are looking for. Instead of choosing the best bakery, choose one that uses real cream cheese frosting, high-quality cocoa, and fresh ingredients.
Sponge cake is easy to prepare at home. Just whisk eggs and sugar until light and fluffy, then gently fold in flour, butter, and vanilla extract. In a preheated oven, bake until golden, cool completely, and serve plain or with your favorite frosting.
Yes. Sponge Cake without eggs is possible with the use of yogurt, condensed milk, vinegar, and baking soda. These act as substitutes for eggs, which provide the cake with the fluffy, soft structure.
Yes. A sponge cake that doesn't need an oven can be made in a pressure cooker or on the stovetop. Both must be preheated without the whistle for the best results.
A classic Sponge Cake includes all-purpose flour, eggs, sugar, butter or oil, baking powder, vanilla extract, and a pinch of salt. Milk may also be added to create a softer, lighter crumb.
If the Sponge Cake is kept in an airtight container, it will last up to two or three days. Refrigeration extends the shelf life to up to one week. In frozen conditions, a sponge cake will remain fresh for up to 30 days.
Overmixing the batter or opening the oven door too early is a common mistake. These can cause the cake to lose volume or become dense instead of light and airy.
The main advantage of homemade Sponge Cake includes the fresher taste, softer texture, and control over ingredients used. Bakery products are convenient, however, they contain stabilizers and preservatives to keep them fresh for a long time.
Sponge Cake can be turned into any cake, including layered celebration cake, Swiss roll, trifles, fruit cake, cupcakes, and others. Fresh berries, citrus, coffee, chocolate chips, and different flavored creams may also be used.
High-quality dark, milk, or white chocolate all work well with Sponge Cake. The choice depends on the flavor you want, whether for ganache, buttercream, chocolate curls, or decorative drizzles.
Rather than selecting only by brand, choose a bakery that prepares Sponge Cake with fresh ingredients, real butter, and quality vanilla.
To make strawberry cake at home, combine flour, sugar, butter, eggs, baking powder, milk, and pureed fresh strawberries into a batter. Bake, allow to cool and frost it with whipped cream/strawberry buttercream.
Yes, Strawberry Cake can be made egg-free by using alternative items like yoghurt, condensed milk, or buttermilk in place of eggs. Pureed fresh strawberries keep the sponge moist, and proper baking ensures that the cake remains fluffy.
Use strawberry crush in the cake batter for additional flavor and color or between the sponge layers with whipped cream. Spread it over the cake or swirl it into the frosting.
Bake a vanilla sponge cake in a preheated oven, now layer the sponge cake with strawberry-flavored whipped cream or compote or crush. Let it set and then decoreate as per your likings.
Prepare the batter and follow the recipe as is, for baking replace it by, cooking it in a thick bottomed pan, or a pressure cooker without the whistle, or a steamer over low heat. Allow the cake to cool and add frosting and fresh strawberries.
Excess mixing of the batter, overbaking or using excessive amount of flour is what leads to a dry or dense cake. Careful measuring of ingredients and avoiding overbaking are important.
Put whole or sliced strawberries on top, whip cream on top, and garnish it with mint leaves or chocolate shavings. The cake should have a light glaze.
Strawberry cheesecake cake, strawberry chocolate cake, strawberry vanilla layer cake, strawberry shortcake, and fresh cream strawberry cake are a few good options.
You don't really need chocolate strawberry cake, unless you want to add a twist of chocolate to it. For such a variation, it is best to use white chocolate. It matches well with the fruit due to its creamy nature.
Any brand which makes cakes with real fruits and cream. The most reputed bakery brands in your locality will provide more flavors than the mass-produced brands.
Preparing Vanilla Cake involves blending flour, sugar, butter, eggs, baking powder, milk and vanilla extract into a batter. This is baked until golden, cooled and frosted or served plain along with tea.
Yes. For eggless Vanilla Cake, yoghurt, condensed milk, vinegar and baking soda are used instead of eggs. The inclusion of such ingredients maintains the taste, softness and moistness of Vanilla Cake.
The cooking of Vanilla cake without an oven can be done in pressure cooker without the whistle, heavy bottom pan or a steamer.
The ingredients involved in the preparation of traditional Vanilla Cake include all-purpose flour, sugar, butter, eggs, baking powder, milk, vanilla extract and little salt.
Vanilla Cake stays soft at room temperature for two days in an airtight container. Frosted Vanilla Cakes should be stored in refrigerator while unfrosted sponge layers can be frozen.
There can be several reasons for dry and dense Vanilla Cake. It could be due to over mixing or inaccurate measurement of ingredients or baking for more time. One needs to be very accurate in measuring the ingredients.
The taste of Vanilla Cake depends upon its neutrality, while other desserts depend upon the flavor of fruits or chocolates. It uses vanilla for making the light and fluffy sponge of Vanilla Cake.
The home bakers tend to add fresh berries, chocolate chips, citrus peel, coffee or caramel or colorful sprinkles to the Vanilla Cake. It can also be combined with the fruit compote, whipped cream or flavored buttercream.
High-quality white or dark chocolate can be used with Vanilla Cake. While white chocolate would add creamy sweetness, dark chocolate can create richness in the ganache or decorating or layering filling.
People usually go for those bakeries which bake cakes with real butter and vanilla and not according to the brand.
Chocolate bites are bite-sized chocolate treats that melt in the mouth right away. Unlike large chocolates or plate-served desserts, these chocolate bites are easy-to-make, portable, and perfect for any occasion.
To prepare these chocolate bites at home, simply melt some chocolate chips and butter. Next, add condensed milk and mix-ins like nuts and dried fruits. Scoop small portions of the mixture into a mini muffin tin, and chill in the fridge until set.
To make these chocolate bites from scratch at home, you need ingredients like unsweetened cocoa powder /chocolate chips, condensed milk, butter, nuts, and dried fruits. Mix them well, shape into balls, and chill.
Yes. Chocolate bites can be refrigerated or frozen for later. This extends their shelf life. Make sure they are placed in airtight containers or freezer-safe bags to maintain the same texture and taste.
While chocolate bites are usually not considered healthy. However, if you make them with cocoa powder, maple syrup, and dried fruits instead of the calorie-dense ingredients, then they can be considered healthy.
These chocolate bites are usually eggless, as they contain ingredients like condensed milk, butter, cocoa powder, or melted chocolate. Even without eggs, they are simply delicious.
Yes, chocolate bites are perfect for parties and celebrations. Instead of the complex baked desserts, these no-bake, bite-sized treats are perfect to save you time. Besides, these are highly customizable.
To add the natural sweetness of bananas to chocolate bites, simply slice bananas into round discs, melt some butter and chocolate together until smooth, and dip the banana slices into them. Add some sea salt on top and serve.
While several chocolate brands produce good-quality chocolate, Cadbury is often considered one of the most popular brands. Be it Cadbury Dairy Milk or Bournville, the high-quality chocolates are ideal for these bites.
For a fudgy, chocolatey brownie, start by melting butter and dark chocolate, and slowly adding eggs, sugar, and flour. Bake the batter for 35-40 minutes in an oven at 175°C and let it cool completely before slicing.
For the eggless version, keep the rest of the recipe the same as the regular one. Only replace eggs with yogurt for the right amount of moisture and structure. Bake the batter at 180°C for 25-30 minutes until gooey in the center.
To make a rich and fudgy chocolate brownie cake, start by mixing melted butter, dark chocolate, sugar, eggs, vanilla, flour, cocoa powder, and salt. Pour the batter into a lined cake pan and bake at 180°C until the edges are set but the center is fudgy.
For a perfect chocolate brownie sundae, place a warm brownie in a serving bowl. Now, top it with a scoop of vanilla ice cream and pour some hot fudge sauce on top of it. Add some whipped cream on top.
For a 5-minute mug brownie, mix the standard dry ingredients in a microwave-safe mug. Next, stir in the wet ingredients and chocolate chips. Once the batter is ready, microwave it on high for a minute.
To make an easy, one-bowl chocolate icing for brownies, simply whisk together softened butter, cocoa powder, powdered sugar, vanilla extract, and some hot milk until smooth. Once the icing is ready, spread it over the brownies and let it set.
For a rich and glossy sauce, all you need is some milk, sugar, cocoa powder, vanilla, and some flour or cornstarch. Cook them in a saucepan over medium heat until it thickens. Add some butter for an extra shine.
Yes. One can easily substitute milk chocolate for dark chocolate in brownies. However, it will alter the sweetness and texture. Adjust the sweetness accordingly, as dark chocolate contains less sugar and fat than milk chocolate.
For a smooth, rich brownie batter, it is always recommended to use high-quality dark or bittersweet chocolate bars. Before using, chop them into pieces for smooth melting and a glossy finish. What chocolate to use for brownies? (repetitive question)
To bake cupcakes at home, simply whisk some flour, sugar, cocoa powder, baking soda, salt, egg, milk, vegetable oil, and vinegar. Pour the mixture into cupcake molds and bake at 180°C for 20 minutes.
For a rich and creamy chocolate frosting for cupcakes, mix unsalted butter, powdered sugar, cocoa powder, heavy cream, and some vanilla extract. Beat the butter, mix in the other ingredients, and combine until smooth.
For a perfectly creamy cupcake ganache, just take some chopped high-quality chocolate and heavy cream. Combine them in a 2:1 ratio. Next, heat the cream, pour it over the chocolate, and stir gently.
To make sure your cupcakes are moist, use vegetable oil instead of butter in the recipe. Also include buttermilk for tenderness, and make sure the cocoa is dissolved in boiling water.
To try this eggless version of chocolate cupcakes, whisk some milk with vinegar, add some oil, sugar, and vanilla, flour, cocoa powder, baking soda, and a pinch of salt. Bake the batter at 180°C for 20 minutes.
If there's no oven, bake the cupcakes in an idli steamer with a tight lid. Make the batter with standard ingredients and pour the batter into small aluminum molds or bowls. Cover them with the lid and steam for 15-20 minutes.
For a batch of fluffy chocolate chip cupcakes, all you need are the regular dry and wet ingredients and some chocolate chips. Prepare the batter, fold in the chips, and pour the batter into molds. Bake them at 175°C for 20 minutes.
Homemade chocolate cupcakes can be decorated with rich chocolate ganache, buttercream frosting, cream cheese frosting, chocolate chunks, crushed chocolate Oreo cookies, colorful sprinkles, chopped nuts, or handmade edible chocolate shapes.
Chocolate cupcakes often become dry and chewy due to overbaking, adding excess flour, or cocoa powder. Overmixing the batter is an issue as well, as it often leads to gluten formation.
The best chocolate for chocolate cupcakes is a high-quality dark chocolate with 60% to 70% cocoa content. One may also use Dutch-processed premium-quality cocoa powder for the perfect chocolatey batter.
For this, you need some whipping cream, condensed milk, and unsweetened cocoa powder. Whip the cream, fold in the cocoa powder and condensed milk. Mix well and freeze for 6-8 hours.
For a chocolate chip ice cream, whip some cold heavy whipping cream and then fold in sweetened condensed milk, vanilla extract, and mini chocolate chips. Mix everything well and freeze for 6–8 hours.
This one takes some heavy whipping cream, unsweetened cocoa powder, and sweetened condensed milk. Start by whipping the cream, and then mix the cocoa and condensed milk, and freeze the mixture.
To make a cold coffee with the creaminess of ice cream, blend some chilled milk, instant coffee, sugar, and chocolate ice cream. Add a few ice cubes and blend everything until frothy, and then serve it.
To make mint chocolate ice cream, whip some heavy cream and then fold in sweetened condensed milk, peppermint extract, and chocolate chips. Place the mixture in an airtight container and freeze overnight.
While chocolate ice cream tastes delicious, adding some garnishes like chocolate chips, crushed cookies, sea salt, mint, espresso powder, chopped nuts, berries, or some sprinkles adds more fun to it.
Mix-ins always add a fun twist to chocolate ice cream. The best and most popular options include crumbled Oreo cookies, edible cookie dough, chopped dried fruits, nuts, chocolate chunks, and cherries. What toppings go best with chocolate ice cream? (Repetitive question)
Often, high-quality bittersweet or semisweet chocolate is considered best for homemade no-churn chocolate ice cream. One may also use a dark chocolate or baking chocolate bar for a perfect taste.
To make a no-churn chocolate ice cream at home, all you need is some heavy cream, sweetened condensed milk, cocoa powder, and vanilla. Whip the cream, fold in the other ingredients, and freeze overnight.
To make a chocolate milkshake at home, simply blend chocolate ice cream, cold milk, and chocolate syrup until smooth. Once the mixture is ready, pour it into the serving glass.
To make a chocolate milkshake without ice cream, blend some cold milk, cocoa powder, sugar, vanilla extract, and some ice cubes until perfectly smooth and slushy. Once ready, pour it into the serving glass.
For this rich and creamy milkshake, blend a chocolate candy bar with some cold milk and ice cream. For that smooth texture, it is recommended to melt the chocolate with a little warm milk first.
To make a chocolate milkshake in a high-speed blender, combine chocolate or vanilla ice cream, cold milk, and chocolate syrup. Blend all of them until smooth. Don't overblend to avoid a runny consistency.
For a Dairy Milk chocolate milkshake, blend cold milk, Cadbury Dairy Milk chocolate, a scoop of chocolate or vanilla ice cream, and some ice cubes until frothy. Serve it in a chocolate-drizzle-lined glass.
To add a healthy twist to the chocolate milkshake, one may add frozen bananas, mangoes, berries, or oats. For natural sweetness, replace refined sugar with honey, maple syrup, or dates.
To make a creamy and frothy chocolate milkshake with cocoa powder, mix unsweetened cocoa powder, sugar, and warm milk into a smooth paste. Blend this paste with chilled milk and ice cream.
A chocolate Oreo milkshake is made with Oreo cookies, ice cream, cold milk, and chocolate syrup. To make this, blend everything until smooth. Add some whipped cream and drizzle some chocolate syrup on top before serving.
Yes. Coffee is often added to a chocolate milkshake, as the roasted, slightly bitter flavor perfectly blends with the sweetness of chocolate. To mix coffee with a milkshake, brew a shot of espresso and chill it before blending.
The list of the most popular and delicious chocolate milkshake toppings often includes some freshly whipped cream, chocolate sauce, chocolate chunks, crushed Cadbury Oreo cookies, and rich chocolate ganache drizzle.
Whisk together 2 cups flour, 2 tsp baking powder, and 1/2 tsp salt. Separately, whisk 3/4 cup sugar, 1/2 cup melted butter, 1 cup milk, 2 eggs, and 2 tsp vanilla. Fold wet ingredients into dry, stir in 1 cup chocolate chips, scoop into muffin liners, and bake at 425°F for 5 minutes, then 350°F for 15-18 minutes. How to make a chocolate muffin cake? (Repetitive question)
To make eggless chocolate muffins, take some all-purpose flour, cocoa powder, baking powder, baking soda, oil, yogurt, milk, sugar, and vanilla. Once the batter is ready, scoop it into muffin molds and bake at 180°C for 25 minutes.
For a batch of perfect double chocolate muffins, whisk eggs, milk, oil, vanilla, flour, cocoa powder, sugar, and baking powder separately. Add chocolate chips. Now, bake at 220°C for 5 minutes, followed by 180°C for 15 minutes.
For a rich and creamy chocolate frosting for muffins, mix unsalted butter, powdered sugar, cocoa powder, heavy cream, and some vanilla extract. Beat the butter, mix in the other ingredients, and combine until smooth.
Both can be used based on what texture you want. While cocoa powder creates a classic, cake-like chocolate muffin, melted chocolate is perfect for a richer, fudgier, bakery-style texture.
Chocolate muffins usually sink in the middle when the center is undercooked, the leavening agents are not active or used in the wrong ratio, or the batter was overmixed.
To get a bakery-style domed top on chocolate muffins, you need to preheat the oven to 220°C. Bake the muffins at this high heat for the first 5 minutes for a rapid rise, and then bake them at 180°C for 15 minutes.
Yes, chocolate muffins can be frozen for up to 3 months. To do that, allow them to cool completely, wrap each of them in plastic, and place them into an airtight, heavy-duty freezer bag.
Dense or dry muffins usually happen because of overmixing the batter, overbaking, or using excess flour. Or cocoa powder. All of these reduce the moisture content of the cupcakes and make them dry.
A classic, delicious chocolate mud pie is made by assembling a rich, fudgy brownie layer, a silky chocolate pudding, and a dollop of fluffy whipped cream on a crunchy cookie crust.
To make a chocolate pie crust, mix all-purpose flour, cocoa powder, sugar, salt, some cold butter, and shortening. Also add some ice water to form the dough. Next, chill the dough and blind bake it.
For this, it is essential to bake it at a lower temperature. Remove the pie from the oven when the center is still slightly wet. Cool it slowly while the oven door is still open.
Lining a pie crust with chocolate is a fantastic idea, as it prevents a soggy crust from the creamy fillings. To do this, melt some chocolate, coconut oil, or butter, and then brush a thin layer inside the baked crust and let it chill,
A chocolate cream pie with instant pudding is a simple, no-bake dessert made in minutes. To do this, simply whip up the pudding and place it on a pre-made cookie crust, and chill it well in the refrigerator to set.
To make chili chocolate mince pies, add some chili flakes and melted dark chocolate to a standard jar of fruit mincemeat and mix well. Next, spoon this filling into the pastry cases and bake at 180°C until golden.
For that classic, creamy, silky chocolate pie filling, whisk together sugar, cocoa powder, cornstarch, and salt in a saucepan. Over a low heat, gradually add milk and butter, and egg yolks. Cook over medium-low heat until creamy.
To make a chocolate pie without an oven, simply press a crust made of crushed cookies and melted butter into a pie plate, fill it with a creamy melted chocolate ganache, and let it chill in the refrigerator.
Chocolate pie often becomes runny when the creamy filling wasn't cooked long enough to activate the starch, or it was overcooked, where the starches broke down. Sometimes, inadequate chilling also becomes the reason.
This classic Southern dessert features a rich, gooey fudge brownie baked in a flaky pie crust. It contains a meringue-like top and a dense center made from a simple whisked mixture of cocoa powder, sugar, eggs, melted butter, and milk.
Yes. One can easily freeze a chocolate tart for up to 3 months. To do that, wrap the whole tart tightly in plastic wrap and aluminum foil before freezing. When you are serving it, make sure it is thawed overnight in the refrigerator.
When stored in the fridge in an airtight container, it lasts for 3 to 5 days. For longer storage duration, freezing is the most effective option. It should never be kept at room temperature, as the ganache melts.
To make a chocolate tart crust, blend some cold butter into a mixture of flour, cocoa powder, and sugar. To the rumbly mixture, add an egg yolk and some water. Press the mixture into a tart pan, chill, and blind bake it before filling.
To make a tart filling without cream, replace heavy cream with full-fat coconut milk or melted chocolate blended with milk, butter, and cornstarch. Once ready, pour it into the tart crust and refrigerate.
For an eggless chocolate tart, press some crushed chocolate cookies into a tart pan. Make a ganache with dark chocolate, heavy cream, and butter. Pour it on top of the crust and chill overnight.
Both can be used. While dark chocolate is ideal for a rich, sophisticated profile, milk chocolate makes a sweeter filling. Which one to use entirely depends on the taste profile you prefer.
Yes. One can make a chocolate tart without an oven. For this no-bake tart, simply press a crust made of crushed cookies and melted butter into a tart pan, fill it with a creamy melted chocolate ganache, and let it chill in the refrigerator.
High-quality semisweet or bittersweet couverture chocolate is generally considered the best for tart ganache filling, as it has a higher cocoa butter percentage. It melts into a smooth, silky, and glossy ganache.
Chocolate tart filling often cracks when it is baked at too high a temperature. This often causes the eggs in the tart filling to seize and contract. Another common reason is cooling the tart too quickly.
To get a flawless, shiny top on a chocolate tart, one may opt for a water-based mirror glaze over the tart ganache filling. Alternatively, one may also emulsify a high-quality chocolate ganache with butter.
As fancy as the name sounds, a chocolate truffle is an indulgent chocolate treat. With a rich, creamy chocolate center. Made with melted chocolate, butter, and heavy cream, the bite-sized treat is coated with chocolate as well.
In simple words, a chocolate truffle cake is a rich, dense, chocolatey dessert featuring a moist chocolate sponge that is layered with creamy chocolate ganache. The whole cake is enveloped in a velvety chocolate glaze.
To make a chocolate truffle cake, simply bake a moist chocolate sponge cake, layer it with a rich chocolate ganache, and cover the whole cake with a rich chocolatey frosting.
For this eggless variation, keep the rest of the recipe the same as the regular chocolate truffle cake. Only replace eggs with a mixture of yogurt or milk and vinegar for that fluffy and soft texture.
This can be made at home with just two ingredients: heavy cream and premium-quality chocolate. Gently heat the cream and melt the chopped chocolate in it. Chill the ganache and roll it into balls.
To make a rich chocolate truffle cake at home without an oven, you may bake the cake in a preheated heavy-bottomed pressure cooker. Once the cake is ready, layer and frost it with the ganache.
As chocolate truffles contain dairy-based ingredients, it is essential to place them in an airtight container and refrigerate them if you need them for 2-3 weeks. For even longer storage duration, freeze them in a freezer-safe bag.
For the best chocolate truffles, it is ideal to use couverture chocolate with a cocoa content of 60% to 70%. Make sure you don't use chocolate chips, as they contain stabilizers and don't melt smoothly.
When kept in an airtight container, chocolate truffles stay fresh in the refrigerator for 2 to 3 weeks. However, for best flavor and texture, they should be consumed as quickly as possible.
For homemade fudge, all you need is some basic ingredients like sweetened condensed milk, high-quality chocolate, and butter. Now, simply melt the ingredients together, pour the mixture into a lined pan, and chill well.
A chocolate fudge cake is best defined as an intense chocolatey dessert featuring a soft fudgy cake that has both melted chocolate and cocoa powder in the batter. It is generally covered with a rich chocolate ganache or fudge frosting.
To store the chocolate fudge, it is essential to place it in an airtight container after wrapping each of the blocks with parchment paper. They can be refrigerated for 3 weeks. A freezer can store them for up to 3 months.
For a chocolate fudge cake, all you need is some flour, cocoa, baking soda, baking powder, sugar, eggs, oil, buttermilk, and vanilla. Once the batter is ready, pour the batter into a lined baking pan and bake at 175°C for 25-30 minutes.
To make a chocolate walnut fudge at home, combine some sweetened condensed milk, cocoa powder, butter, and walnuts. Once the mixture is ready, refrigerate it for 1-2 hours, and your rich, fudgy dessert is ready.
To make this no-bake Chocolate fudge at home, simply combine sweetened condensed milk, butter, and some unsweetened cocoa powder. Thicken the mixture on low heat, refrigerate it, and roll into balls.
For a classic glossy fudge frosting, melt some unsalted butter and unsweetened chocolate in a saucepan. Once it cools, add powdered sugar, a pinch of salt, milk, and vanilla extract and mix until smooth.
A no-churn chocolate fudge ice cream can be made by whipping heavy cream with condensed milk and cocoa powder. Also, mix some melted dark chocolate and freeze the mixture overnight in an airtight container.
A hot chocolate fudge can be made with some semi-sweet chocolate chips, condensed milk, butter, and vanilla. Heat the chocolate and condensed milk until melted. Mix in the butter and vanilla and chill it.
It is always ideal to use dark chocolate with a high cocoa percentage for making chocolate fudge, as they contain more cocoa butter. Cadbury Bournville dark chocolate is one of the best choices for this.
An easy homemade dry fruit bread recipe is the one made with flour, sugar, butter or oil, milk, baking powder, and a mix of chopped dry fruits. You need to bake the bread until it turns golden brown and smells wonderfully nutty.
Yes. You can make dry fruit bread without eggs by using yoghurt or condensed milk. These ingredients help give the bread a soft texture, and they also pair well with the richness of dry fruits.
You can make dry fruit bread in a pressure cooker or a heavy-bottomed pan. Place the batter in a greased tin and cook it on low heat until it is cooked through. It is not necessary to have an oven to make dry fruit bread.
To make dry fruit bread, you need ingredients like flour, milk, sugar, butter or oil, baking powder, and dry fruits such as almonds, cashews, pistachios, raisins, and dates. Cardamom or cinnamon can also be added for flavor.
Dry fruit bread can stay longer because of its ingredients. When it is stored in an airtight container, it stays fresh for three to four days at room temperature and longer when refrigerated.
Many people add dry fruits without coating them lightly in flour. This often causes them to sink to the bottom of the loaf. Overbaking is also another mistake that can make the bread dry.
Homemade dry fruit bread is different from store-bought bread, as it gives you the freedom to choose good-quality dry fruits and adjust the sweetness. It tastes fresher and usually has a better texture than packaged versions.
You can make dry fruit bread more festive by adding saffron, orange zest, chopped figs, or a drizzle of honey. Some people also enjoy serving it with a light cream cheese spread.
Dark chocolate is one of the best chocolates to pair with dry fruit bread. The rich cocoa flavor of dark chocolate complements the sweetness of raisins, dates, and nuts very well.
For dry fruit bread, Cadbury Bournville is an excellent choice. Its rich chocolate flavor goes very well with almonds, pistachios, and dried fruits, making every slice more indulgent to taste.
The difference between cookies and biscuits often depends on regional terminology and preparation. Cookies are generally sweeter, softer, or chewier and may contain chocolate chips or nuts, while biscuits are usually crisp and firm. Both are popular baked treats available in many shapes, flavor combinations, and textures.
To make a Biscuit Cake, crush your favorite biscuits into a fine powder and combine them with milk, cocoa powder, sugar if needed, and a leavening agent. Pour the smooth batter into a greased tin and bake or steam until set, creating a soft cake with an appealing color.
Homemade biscuits can be prepared by mixing flour, butter, sugar, milk, and baking powder into a soft dough. Roll it evenly, cut it into desired shapes, and bake until crisp and lightly golden. Add vanilla, spices, or cocoa to customize the flavor.
Digestive biscuits are mildly sweet, crisp biscuits traditionally made with wheat flour and other simple baking ingredients. They have a distinctive grainy texture and light flavor, making them a favorite accompaniment to tea or coffee and a useful base for cheesecakes and other desserts.
Biscuits are made by combining flour with fat, sugar, milk or water, and suitable leavening ingredients. The dough is shaped or cut before being baked until it develops the desired texture and golden color. Different recipes may include chocolate, spices, nuts, or dried fruits.
Biscuits can be baked without an oven using a heavy-bottomed pan or pressure cooker without the whistle. Preheat the cooking vessel, place the shaped dough on a suitable tray, and cook over low heat until the biscuits become crisp and develop an even color.
To make biscuits in a microwave, prepare a simple dough with flour, butter, sugar, and milk, then shape it into small portions. Arrange them on a microwave-safe plate and cook in short intervals, checking frequently to prevent overcooking and maintain the desired flavor and texture.
For a Chocolate Biscuit Cake, grind chocolate biscuits into fine crumbs and mix them with milk until a smooth batter forms. Add cocoa powder for deeper flavor and a suitable leavening agent, then bake, steam, or microwave until the centre is properly cooked.
Couverture chocolate is an excellent choice for coating biscuits because its higher cocoa butter content helps create a smooth, glossy shell when properly tempered. Dark, milk, or white varieties can be selected depending on your preferred flavor and desired finished color.
High-quality dark or semi-sweet baking chocolate is ideal for Chocolate Biscuits because it provides a rich cocoa flavor without excessive sweetness. Cocoa powder can also deepen the color and chocolate intensity, while milk chocolate works well for a sweeter, milder result.
To make Garlic Bread, combine softened butter with minced garlic, herbs, and a little salt. Spread the mixture generously over sliced bread and bake until crisp and golden. Add cheese or chilli flakes for extra flavor and serve warm with your favorite pasta or soup.
Sourdough Bread is prepared using an active sourdough starter, flour, water, and salt. Mix and ferment the dough, shape it carefully, and allow it to proof before baking at a high temperature. Proper fermentation develops its characteristic tangy flavor, chewy texture, and golden color.
To make bread at home, combine flour, yeast, warm water or milk, sugar, salt, and butter or oil. Knead until smooth, allow the dough to rise, shape it into a loaf, proof again, and bake until golden brown and fully cooked.
Homemade bread crumbs can be made by drying leftover bread slices until crisp and grinding them into coarse or fine crumbs. For additional flavor, mix in dried herbs, garlic powder, or spices. Store the finished crumbs in an airtight container for future recipes.
Sourdough Bread can be part of a balanced diet and is produced through a natural fermentation process involving wild yeast and beneficial bacteria. Fermentation may make it easier for some people to digest, although its nutritional value depends on the flour and ingredients used.
Many traditional bread recipes do not contain eggs and are made primarily from flour, water, yeast, and salt. However, enriched varieties such as brioche and certain sweet breads may include eggs for added richness, color, flavor, and a softer texture.
To make Banana Bread, mash ripe bananas and combine them with flour, sugar, butter or oil, milk, and a leavening agent. Pour the batter into a loaf tin and bake until cooked through. Add nuts or chocolate chips to create your favorite variation.
Dark or semi-sweet baking chocolate is an excellent choice for Chocolate Bread because it delivers a rich cocoa flavor without making the loaf overly sweet. Chocolate chips or chopped couverture chocolate also work well, creating delicious melted pockets throughout the bread.
High-quality dark chocolate with approximately 55 to 70 percent cocoa works particularly well in Chocolate Brioche Bread. Its intense flavor balances the buttery, slightly sweet dough, while chocolate batons or chunks maintain their structure and create attractive layers of deep color.
For chocolate-filled French toast bread, choose chocolate that melts smoothly, such as semi-sweet, milk, or dark chocolate. A creamy chocolate filling complements the soft bread and crisp exterior, while the cocoa intensity can be adjusted according to your favorite flavor preference.
Yes, you can make crepes with pancake mix by adding extra milk or water to create a thinner batter than regular pancakes. Pour a small amount into a lightly greased pan, spread evenly, and cook both sides until lightly golden in color.
To make crepes with eggs, whisk eggs with flour, milk, melted butter, sugar, and a pinch of salt until smooth. Rest the batter briefly, then pour thin layers into a heated pan and cook each side until delicate and lightly golden.
Eggless crepes can be prepared by combining flour, milk, melted butter or oil, sugar, and a small amount of cornstarch. Whisk until smooth, rest the batter, and cook thin portions in a non-stick pan for soft crepes with a pleasant flavor.
Dark or semi-sweet chocolate is an excellent choice for a crepe cake because its rich cocoa flavor balances the sweetness of cream and thin crepe layers. Couverture chocolate also works well for preparing smooth ganache with a glossy finish and deep color.
French crepes are made by whisking flour, eggs, milk, melted butter, and a pinch of salt into a thin, smooth batter. Cook small portions in a lightly buttered pan, swirling quickly to create delicate crepes that can hold your favorite sweet or savoury fillings.
To make Buckwheat Crepes, combine buckwheat flour with eggs, water or milk, and a little salt. Rest the batter before spreading it thinly across a hot pan. Cook until the edges become crisp, then fill with cheese, vegetables, or other ingredients.
Dessert Crepes are prepared using a lightly sweetened batter of flour, eggs, milk, butter, sugar, and vanilla. Cook until thin and tender, then fill with fresh fruits, cream, caramel, or your favorite spread before folding and serving with decorative toppings.
Chocolate Crepes are made by adding cocoa powder and sugar to a traditional crepe batter containing flour, milk, eggs, and melted butter. Whisk until lump-free and cook thin layers in a heated pan, creating soft crepes with a rich chocolate flavor.
High-quality dark chocolate with approximately 55 to 70 percent cocoa works particularly well for Chocolate Crepes, providing an intense flavor without excessive sweetness. Milk chocolate offers a milder option, while semi-sweet chocolate creates a balanced taste suitable for various toppings.
The ideal chocolate for crepe filling should melt smoothly and remain creamy when warm. Dark, milk, or semi-sweet chocolate can all work depending on personal preference, while chocolate ganache creates a luxurious filling that pairs beautifully with fruits, nuts, and your favorite sauces.
An easy homemade Almond Biscuits recipe combines flour, almond flour or finely ground almonds, butter, sugar, milk, and baking powder. Mix into a soft dough, shape into biscuits, and bake until they develop a light golden color. Cool completely to enjoy their crisp texture and nutty flavor.
Yes, Almond Biscuits can easily be made without eggs. Use butter, milk, yoghurt, or condensed milk to help bind the ingredients together. The result is a delicious biscuit with a tender bite, rich almond flavor, and satisfying texture suitable for egg-free diets.
To make Almond Biscuits without an oven, preheat a heavy-bottomed pan or pressure cooker without the whistle. Arrange the shaped dough on a suitable tray and cook over low heat until firm and lightly browned. Cool before serving to achieve the desired crispness.
Almond Biscuits typically contain flour, almond flour or ground almonds, butter, powdered sugar, milk, vanilla extract, and a suitable leavening agent. Chopped or sliced almonds can be added on top for extra crunch, attractive color, and a stronger nutty flavor.
Homemade Almond Biscuits generally stay fresh for one to two weeks when kept in an airtight container at room temperature. Store them away from heat and humidity to protect their delicate crunch, fresh flavor, and quality throughout their storage period.
A common mistake when preparing Almond Biscuits is adding too much flour or overworking the dough, which can make them hard. Incorrect baking temperatures may also cause uneven color, while excessive baking can reduce their buttery texture and pleasant almond flavor.
Homemade Almond Biscuits allow you to adjust the amount of almonds, sweetness, and ingredients according to your preferences. They can offer a fresher taste and more pronounced nutty flavor, while packaged alternatives are designed primarily for convenience and a longer storage period.
Give classic Almond Biscuits a creative twist by adding orange zest, cinnamon, cardamom, coconut, dried cranberries, or coffee. You can also decorate them with colorful sprinkles, drizzle them with melted chocolate, or add caramel for an exciting flavor combination.
Dark or semi-sweet chocolate pairs particularly well with Almond Biscuits because its rich cocoa notes complement the natural nuttiness of almonds. Milk chocolate creates a sweeter result, while white chocolate is a favorite option for adding creamy flavor and contrasting color.
Choosing the best Almond Biscuits depends on the quality of ingredients and your preferred taste. Consider options with a noticeable almond content, balanced sweetness, fresh aroma, and crisp bite. A clear ingredient list and consistent texture can help identify a satisfying choice.
To prepare Banana Bread, mash ripe bananas and combine them with melted butter or oil, sugar, milk, flour, and a leavening agent. Pour the batter into a greased loaf tin and bake until golden in color and cooked through. Cool before slicing for the best flavor and texture.
Eggless Banana Bread can be prepared using ripe mashed bananas, yoghurt, milk, or a flaxseed mixture to provide moisture and binding. Combine these with flour, sugar, butter or oil, and baking powder, then bake until the loaf becomes soft, moist, and evenly cooked.
A no-oven Banana Bread can be prepared in a heavy-bottomed pan, pressure cooker without the whistle, or suitable air fryer. Place the filled baking tin inside the preheated cooking vessel and cook over controlled heat until the centre is fully set.
The main ingredients in Banana Bread include ripe bananas, flour, sugar, butter or oil, milk, and baking powder or baking soda. Vanilla, cinnamon, walnuts, or chocolate chips may also be added to enhance the flavor and create your favorite variation.
Homemade Banana Bread generally stays fresh for three to four days when stored in an airtight container at room temperature. Refrigeration can extend its shelf life to about one week, while freezing individual slices allows them to be stored for several months.
Banana Bread may not turn out correctly because of inaccurate ingredient measurements, overmixing, insufficiently ripe bananas, or incorrect baking temperature. Too much moisture can create a gummy centre, while excessive baking may result in a dry and dense loaf.
Banana Bread differs from many traditional desserts because mashed bananas provide natural sweetness, moisture, and a distinctive fruity flavor. Its soft, cake-like texture and loaf shape make it suitable for breakfast or snacks as well as a comforting dessert.
Serve Banana Bread toasted with butter, topped with nut butter, paired with fresh fruit, or accompanied by your favorite beverage. For a dessert-style presentation, add whipped cream, chocolate drizzle, caramel sauce, colorful berries, or a scoop of ice cream.
Dark or semi-sweet chocolate is an excellent choice for Banana Bread because its deep cocoa flavor balances the natural sweetness of ripe bananas. Milk chocolate creates a sweeter result, while chocolate chips or chunks add delicious melted pockets throughout each slice.
There is no single best brand for Banana Bread, as quality depends on freshness, ingredients, and personal preferences. Look for a loaf with real banana, balanced sweetness, an even golden color, a moist crumb, and a natural flavor without an excessive artificial aftertaste.
An easy homemade Banana Crepe recipe combines flour, milk, eggs, melted butter, sugar, and vanilla into a thin batter. Cook small portions in a heated pan until lightly golden in color, then fill with sliced bananas and your favorite sauce before folding and serving.
Yes, Banana Crepes can be made without eggs by combining flour, milk, cornstarch, sugar, vanilla, and melted butter or oil. Cook the batter in thin layers, then add fresh banana slices for natural sweetness, soft texture, and a delicious fruity flavor.
Banana Crepes require no oven and can be prepared entirely on a stovetop. Pour a thin layer of batter into a lightly greased non-stick pan, cook both sides, and fill with sliced bananas before folding or rolling the crepe for serving.
Banana Crepes typically contain flour, milk, eggs, sugar, melted butter, vanilla extract, and fresh bananas. Additional ingredients such as cinnamon, honey, nuts, chocolate, caramel, or whipped cream can be included to enhance the flavor and create interesting textures.
Banana Crepes are best consumed fresh, especially after adding sliced fruit. Plain cooked crepes can generally be refrigerated in an airtight container for up to two days. Add fresh bananas immediately before serving to maintain their texture, color, and overall quality.
A common mistake when making Banana Crepes is using batter that is too thick, resulting in heavy crepes instead of delicate ones. Cooking at excessive heat can cause uneven browning, while overripe banana slices may make the filling overly soft and difficult to handle.
Homemade Banana Crepes allow you to control the sweetness, ripeness of the fruit, thickness of the crepe, and choice of fillings. Compared with ready-made alternatives, they offer greater flexibility to adjust the flavor and ingredients according to personal preferences.
Give classic Banana Crepes a creative twist by adding peanut butter, caramelised bananas, cinnamon, coconut, roasted nuts, or fresh berries. Finish with colorful fruit, chocolate drizzle, or your favorite ice cream to transform a simple crepe into an indulgent dessert.
Dark or semi-sweet chocolate is an excellent choice for Banana Crepes because its intense cocoa flavor balances the natural sweetness of ripe bananas. Milk chocolate creates a creamier combination, while white chocolate offers a sweeter taste and contrasting color.
The best Banana Crepe depends on freshness and preparation rather than a particular brand. Look for crepes made with quality ingredients, fresh bananas, and balanced sweetness. A soft, flexible texture, natural fruit flavor, and appealing golden color are good indicators of quality.
An easy homemade Chocolate Biscuits recipe combines flour, cocoa powder, butter, sugar, milk, and baking powder into a smooth dough. Shape the biscuits, arrange them on a baking tray, and bake until crisp. Allow them to cool completely to develop a rich chocolate flavor and firm texture.
Yes, Chocolate Biscuits can easily be prepared without eggs by using butter, milk, yoghurt, or condensed milk to provide moisture and binding. Eggless versions can be equally crisp and delicious, making them a favorite choice for vegetarians and those avoiding eggs.
Chocolate Biscuits can be made without an oven using a heavy-bottomed pan or pressure cooker without the whistle. Preheat the vessel, place the shaped dough on a suitable baking tray, and cook over low heat until the biscuits develop a crisp texture and deep color.
Chocolate Biscuits typically contain flour, cocoa powder, butter, sugar, milk, vanilla extract, and a suitable leavening agent. Additional ingredients such as chocolate chips, nuts, coffee powder, or cinnamon can be included to enhance the flavor and create interesting textures.
Homemade Chocolate Biscuits generally stay fresh for one to two weeks when stored correctly in an airtight container at room temperature. Keeping them away from moisture, direct sunlight, and heat helps maintain their crunch, flavor, and overall quality for longer.
One common mistake when preparing Chocolate Biscuits is overworking the dough, which may result in a tough texture. Incorrect measurements, excessive baking, or adding too much liquid can also affect the final consistency, color, and crispness of the biscuits.
Homemade Chocolate Biscuits give you greater control over sweetness, cocoa intensity, and ingredient selection. Unlike many commercially packaged options, homemade versions can be customised to your preferred texture and flavor while allowing you to limit unnecessary additives or preservatives.
Give classic Chocolate Biscuits a creative twist by adding orange zest, coconut flakes, roasted hazelnuts, peanut butter, caramel pieces, dried cranberries, or warming spices. You can also decorate them with colorful sprinkles or chocolate drizzle for an attractive finish.
Instead of focusing on a specific brand, select high-quality baking chocolate with a suitable cocoa percentage and good melting properties. Dark or semi-sweet varieties provide an intense flavor, while milk chocolate offers a sweeter profile that works well in homemade biscuits.
The best Chocolate Biscuits depend largely on individual taste and texture preferences rather than a particular brand. Look for options featuring quality cocoa, balanced sweetness, an appealing color, and a satisfying crunch. Checking the ingredient list can also help you select biscuits that match your favorite chocolate profile.
To prepare Chocolate Bread, combine flour, cocoa powder, sugar, yeast or a suitable leavening agent, milk, and butter. Mix into a dough or batter depending on the recipe, then proof if required and bake until fully cooked with a deep chocolate color and rich flavor.
Eggless Chocolate Bread can be made using flour, cocoa powder, sugar, milk, butter or oil, and an appropriate leavening agent. Yoghurt, applesauce, or mashed bananas can provide additional moisture, creating a soft loaf with a delicious chocolate flavor without requiring eggs.
A no-oven Chocolate Bread can be prepared using a heavy-bottomed pan or pressure cooker without the whistle. Place the prepared dough or batter in a suitable tin and cook over low, controlled heat until the centre is completely cooked and the exterior develops an even color.
The main ingredients in Chocolate Bread include flour, cocoa powder or melted chocolate, sugar, milk, butter or oil, and yeast or baking powder, depending on the recipe. Vanilla extract, chocolate chips, nuts, or coffee may be added for extra flavor.
Homemade Chocolate Bread generally stays fresh for two to four days when stored in an airtight container at room temperature. Refrigeration may extend its shelf life to approximately one week, while freezing individual slices is useful for longer-term storage.
Chocolate Bread may not turn out properly because of incorrect ingredient measurements, inactive yeast, excessive cocoa powder, or overmixing. Baking at the wrong temperature can also cause a dry or undercooked texture, while insufficient moisture may produce an overly dense loaf.
Chocolate Bread combines the structure of a traditional loaf with the rich cocoa flavor commonly associated with desserts. Depending on the recipe, it can be mildly sweet or indulgent, making it a favorite choice for breakfast, snacks, or after-meal treats.
Serve Chocolate Bread toasted with butter, topped with fresh fruit, or paired with your favorite hot beverage. For a more indulgent presentation, add whipped cream, chocolate sauce, colorful berries, nut butter, or ice cream, or transform thick slices into French toast.
Rather than choosing chocolate by brand, select a high-quality baking variety with good cocoa content and smooth melting properties. Dark or semi-sweet chocolate provides an intense flavor, while milk chocolate creates a sweeter result that works particularly well in softer loaves.
The best Chocolate Bread depends on individual preferences for sweetness, texture, and cocoa intensity. When comparing different options, consider the freshness, ingredient list, chocolate content, overall flavor, and crumb quality to find a loaf that matches your preferred style.
To prepare Cinnamon Bread, combine flour, yeast, warm milk, sugar, butter, and salt to form a soft dough. Allow it to rise, then add a cinnamon-sugar filling, shape the loaf, and proof again. Bake until it develops a golden color and fragrant cinnamon flavor.
Eggless Cinnamon Bread can be prepared using flour, yeast, milk, butter or oil, sugar, and cinnamon. Knead the ingredients into a smooth dough and allow it to rise before shaping. Bake until soft and fluffy for a delicious bread without requiring eggs.
A no-oven Cinnamon Bread can be prepared in a heavy-bottomed pan or pressure cooker without the whistle. Place the shaped and proofed dough in a suitable baking tin, cook it over controlled low heat, and continue until the centre is completely cooked.
The main ingredients in Cinnamon Bread include flour, yeast, warm milk or water, sugar, butter, salt, and ground cinnamon. Some recipes also include brown sugar, vanilla, raisins, or chopped nuts to enhance the flavor and add interesting texture.
Homemade Cinnamon Bread generally remains fresh for two to three days when stored in an airtight container at room temperature. Refrigeration can extend its shelf life to approximately one week, while freezing properly wrapped slices allows for longer storage.
Cinnamon Bread may not turn out properly if the yeast is inactive, the dough is over-kneaded, or it does not receive enough proofing time. Incorrect liquid temperature and excessive flour can also result in bread that feels dry, heavy, or dense.
Cinnamon Bread stands apart from regular desserts because it combines the soft structure of bread with the warm, aromatic flavor of cinnamon and sugar. It is less rich than many cakes yet sweet enough to become a favorite breakfast, snack, or dessert.
Serve Cinnamon Bread warm or lightly toasted with butter, cream cheese, honey, or fruit preserves. For a creative presentation, drizzle it with vanilla glaze, add colorful fresh berries, transform slices into French toast, or pair them with your favorite hot beverage.
Dark or semi-sweet chocolate works particularly well with Cinnamon Bread because its deep cocoa notes balance the sweetness and warming spice. Milk chocolate offers a milder flavor, while white chocolate creates a creamy contrast when used as chunks, chips, or drizzle.
Choosing the best Cinnamon Bread depends on freshness, texture, and individual taste rather than a particular brand. Look for a loaf with a soft crumb, noticeable cinnamon aroma, balanced sweetness, even color, and quality ingredients that deliver a pleasant homemade-style flavor.
To prepare Coconut Biscuits, combine flour, desiccated coconut, butter, sugar, milk, and baking powder to form a soft dough. Shape into small rounds, place them on a lined tray, and bake until the edges develop a light golden color. Cool completely before serving for the best flavor and crisp texture.
Eggless Coconut Biscuits can be prepared by combining flour, desiccated coconut, butter, powdered sugar, and enough milk to bind the dough. Shape the mixture into biscuits and bake until lightly golden. This simple recipe produces crisp, buttery treats with a delicious coconut flavor.
For a no-oven method, preheat a heavy-bottomed pan or pressure cooker without the whistle. Place the shaped Coconut Biscuits on a suitable tray inside and cook over low heat until crisp. This technique provides an easy alternative when a conventional oven is unavailable.
The main ingredients used in Coconut Biscuits include flour, desiccated or freshly grated coconut, butter, sugar, milk, and a suitable leavening agent. Vanilla, cardamom, or coconut extract may also be added to enhance the overall flavor and aroma.
Homemade Coconut Biscuits usually remain fresh for about one to two weeks when kept in an airtight container at room temperature. Store them in a cool, dry place away from moisture to preserve their crispness, pleasant flavor, and overall quality.
Coconut Biscuits may not turn out correctly if the dough contains too much liquid, the ingredient measurements are inaccurate, or the baking temperature is unsuitable. Overbaking can make them excessively hard, while underbaking may prevent them from developing the desired texture and color.
Coconut Biscuits stand out because desiccated or grated coconut gives them a distinctive tropical flavor, delicate aroma, and slightly chewy or crisp texture. Unlike soft cakes and creamy desserts, they are convenient to store, easy to serve, and perfect for enjoying with beverages.
Serve Coconut Biscuits with tea, coffee, hot chocolate, or your favorite cold beverage. For a creative presentation, dip them partially in melted chocolate, sandwich them with cream, crumble them over desserts, or decorate them with colorful sprinkles for parties and celebrations.
Dark chocolate is an excellent choice for Coconut Biscuits because its slightly bitter cocoa flavor balances the natural sweetness of coconut. Milk chocolate offers a creamier alternative, while white chocolate provides a sweeter contrast and an attractive light color for decorative coatings.
The best Coconut Biscuits depend on personal preferences for sweetness, texture, and coconut intensity rather than a particular brand. Look for options containing quality coconut and simple ingredients, with a fresh aroma, even color, and satisfying crunch that suits your favorite style of biscuit.
An easy homemade Coconut Bread recipe combines flour, desiccated or grated coconut, sugar, milk, butter or oil, and a suitable leavening agent. Mix into a smooth batter, transfer to a loaf tin, and bake until golden in color with a soft texture and delicate coconut flavor.
Yes, Coconut Bread can be made without eggs by using yoghurt, condensed milk, applesauce, or a flaxseed mixture for binding and moisture. Coconut milk can also be included to intensify the flavor while creating a soft, tender eggless loaf.
To make Coconut Bread without an oven, use a heavy-bottomed pan or pressure cooker without the whistle. Preheat the vessel, place the batter-filled tin inside, and cook over low heat until the centre is completely set and the loaf is evenly cooked.
Coconut Bread typically contains flour, desiccated or freshly grated coconut, coconut milk or regular milk, sugar, butter or oil, and baking powder. Vanilla, cardamom, nuts, or dried fruits can also be incorporated to add extra flavor and interesting texture.
Homemade Coconut Bread generally remains fresh for two to three days at room temperature when stored in an airtight container. Refrigeration can extend its shelf life to about one week, while properly wrapped slices can be frozen for longer storage.
A common mistake when making Coconut Bread is using too much coconut or liquid, which can result in a heavy or overly moist loaf. Incorrect measurements, overmixing, and excessive baking may also negatively affect its softness, flavor, and final color.
Homemade Coconut Bread allows greater control over coconut content, sweetness, and ingredient quality. It can deliver a fresher aroma and more noticeable coconut flavor, while commercially prepared versions generally prioritise convenience, consistency, packaging, and a longer shelf life.
Give classic Coconut Bread a creative twist by adding pineapple, lime zest, dried cranberries, roasted nuts, cinnamon, or cardamom. You can also finish the loaf with a coconut glaze, colorful candied fruit, or toasted coconut flakes for an attractive presentation.
Dark chocolate pairs beautifully with Coconut Bread because its intense cocoa notes balance the natural sweetness of coconut. Milk chocolate creates a creamier combination, while white chocolate is a favorite option for adding a sweeter flavor and contrasting color.
When selecting Coconut Bread, consider the freshness and overall ingredient quality rather than relying solely on a brand name. A well-made loaf should have a pleasant coconut aroma, balanced sweetness, tender crumb, natural color, and noticeable coconut flavor without excessive artificial additives.
Here is a simple and easy way to make a Coffee Chocolate Dessert at home, combine melted chocolate with brewed coffee or espresso, cream, milk, and sugar. Depending on your favorite recipe, chill the mixture as a mousse or pudding, or layer it with biscuits for a rich flavor and attractive color.
Yes, Coffee Chocolate Dessert can be prepared without eggs by using ingredients such as fresh cream, condensed milk, cornstarch, cream cheese, or yogurt. These alternatives provide structure and creaminess while preserving the distinctive combination of bold coffee and intense chocolate flavor.
Coffee Chocolate Dessert can easily be made without an oven by preparing a chilled mousse, parfait, pudding, truffle, or no-bake cheesecake. Mix the coffee and chocolate components, assemble as required, and refrigerate until set for a simple yet indulgent dessert.
Coffee Chocolate Dessert typically contains coffee or espresso, chocolate or cocoa powder, sugar, fresh cream, and milk. Depending on the recipe, biscuits, cream cheese, vanilla, nuts, or caramel may also be included to add contrasting flavor and texture.
Store Coffee Chocolate Dessert in a sealed container in the refrigerator, especially when the recipe includes fresh dairy ingredients. Most chilled versions are best consumed within three to four days. Keeping the dessert properly covered helps preserve its aroma, color, flavor, and freshness.
Coffee Chocolate Dessert may become dry or overly dense when too much cocoa powder or flour is added, the mixture is overworked, or a baked variation is cooked too long. Correct ingredient proportions and careful preparation help maintain the desired moisture and consistency.
Coffee Chocolate Dessert features both coffee and chocolate as prominent components, giving it greater depth than desserts focused on only one of these flavors. The combination balances roasted, slightly bitter notes with cocoa richness, making it a favorite choice for those who enjoy complex desserts.
Easy variations include coffee chocolate mousse, layered parfaits, chilled pudding, cheesecake cups, truffles, and dessert jars. You can incorporate hazelnuts, cinnamon, caramel, coconut, or colorful fresh berries to introduce new textures and complementary flavors for different occasions.
Rather than selecting chocolate based on a particular brand, choose a premium baking variety with a cocoa percentage that suits your recipe. Dark chocolate provides an intense flavor, semi-sweet offers balance, and milk chocolate creates a sweeter, creamier finish alongside coffee.
A well-made Coffee Chocolate Dessert should deliver a clear balance between cocoa richness and aromatic coffee without either flavor overpowering the other. When comparing available options, consider freshness, ingredient quality, sweetness, consistency, and presentation to find one that suits your favorite dessert style.
To prepare Coffee Cupcakes at home, dissolve coffee in warm milk and mix it with flour, sugar, melted butter, vanilla, and baking powder. Spoon the mixture into lined cupcake molds and bake until fluffy. Once cooled, decorate with your favorite icing for added flavor.
Coffee Cupcakes can be prepared without eggs by choosing suitable alternatives such as plain yogurt, mashed banana, applesauce, or a mixture of ground flaxseeds and water. These replacements help bind the batter and retain enough moisture for a tender, enjoyable cupcake.
You can cook Coffee Cupcakes without a traditional oven by placing the filled molds inside a preheated, heavy-based covered pan or pressure cooker without pressure. Gentle, consistent heat allows the cupcakes to rise gradually and cook evenly without conventional baking equipment.
A basic Coffee Cupcake contains all-purpose flour, powdered sugar, butter, milk, brewed coffee or instant coffee powder, vanilla, and a raising agent. Depending on the desired flavor, the recipe may also feature walnuts, chocolate pieces, cream frosting, or aromatic spices.
Keep plain Coffee Cupcakes inside a tightly sealed container in a cool place and consume them within two to three days. If decorated with fresh cream, cream cheese, or another perishable topping, refrigerate them promptly and bring them closer to room temperature before serving.
Dry or heavy Coffee Cupcakes often result from baking them longer than necessary, adding excess flour, or stirring the mixture too vigorously. For a softer crumb, measure each ingredient correctly, avoid overworking the batter, and check the cupcakes near the recommended baking time.
Unlike many standard cupcakes where vanilla or cocoa provides the dominant taste, Coffee Cupcakes highlight the distinctive aroma and slightly bitter flavor of brewed coffee or espresso. Their compact size and rich profile make them particularly suitable for afternoon snacks and dessert tables.
Transform Coffee Cupcakes by incorporating caramel centres, toasted almonds, chocolate ganache, cinnamon, coconut, or hazelnut frosting. Another option is to create a mocha-inspired version using cocoa, then finish each cupcake with colorful decorations or your favorite crunchy toppings.
Chocolate containing around 55 to 70 percent cocoa is particularly suitable for Coffee Cupcakes because its deeper cocoa character pairs naturally with roasted coffee notes. Alternatively, creamy milk chocolate can soften stronger coffee flavors, while white chocolate adds sweetness and a contrasting color.
Instead of selecting Coffee Cupcakes solely by brand, compare factors such as freshness, coffee intensity, sweetness, frosting quality, and ingredient composition. A well-prepared cupcake should offer a noticeable coffee flavor, a delicate crumb, consistent color, and a pleasant aroma without tasting excessively artificial.
Start by preparing a coffee-infused liquid using brewed coffee or espresso and let it cool. Separately, combine the dry and wet ingredients, then gently bring them together. Portion the mixture into muffin cups and bake until the tops are lightly browned and the centers are cooked.
Yes, making an eggless Coffee Muffin is possible with several simple ingredient adjustments. Plain yogurt, fruit puree, or soaked chia seeds can provide the binding and moisture normally contributed by eggs, resulting in a flavorful muffin with a pleasantly soft consistency.
A Coffee Muffin does not necessarily require a standard oven. Prepare the batter and divide it among heat-safe molds, then place them in a preheated covered pot with a raised rack. Cook on gentle heat until each muffin is firm and properly cooked inside.
A typical Coffee Muffin recipe uses all-purpose flour, brewed coffee or espresso, sweetener, dairy or plant-based milk, fat, and a rising agent. Ingredients like brown sugar, vanilla, spices, or chopped nuts may be included to develop a deeper flavor and more interesting bite.
Allow Coffee Muffins to reach room temperature before storing them, as sealing warm muffins can trap unwanted moisture. Place them in a tightly closed container and keep them in a cool location for short-term use. For extended preservation, wrap and freeze each muffin separately.
Coffee Muffins often become dry when the recipe lacks sufficient moisture or the baking time is too long. A dense result may occur when the mixture is stirred excessively. Use precise measurements and handle the batter minimally to encourage a tender, evenly risen crumb.
Unlike frosted cupcakes and other highly sweetened baked desserts, Coffee Muffins usually have a more restrained sweetness and a hearty crumb. Their characteristic coffee flavor makes them suitable for morning or midday eating, particularly when paired with your favorite warm drink.
Create different Coffee Muffin variations by incorporating mocha chips, toasted almonds, dried cherries, maple flavor, cinnamon, or a crunchy crumb topping. A drizzle of espresso glaze or a few colorful berries can add extra character without changing the basic preparation significantly.
For Coffee Muffins, choose chocolate based on the strength of the coffee used in the recipe. Bittersweet chocolate complements robust espresso, while semi-sweet varieties provide a balanced flavor. White chocolate offers noticeable sweetness and a lighter color that contrasts beautifully with darker muffin batter.
Rather than looking for one universally best option, consider how recently the Coffee Muffin was prepared and whether its ingredients suit your preferences. A quality muffin should feel tender rather than stale, carry a pleasant roasted aroma, and offer a balanced combination of sweetness and coffee intensity.
An easy homemade Coffee Truffle recipe combines melted chocolate, warm cream, instant coffee or espresso powder, and a little butter. Chill the mixture until firm, shape it into small balls, and coat with cocoa powder or melted chocolate for a rich flavor and elegant color.
Yes, Coffee Truffles can easily be prepared without eggs using chocolate, fresh cream, coffee, and butter. These ingredients create a smooth ganache that sets firmly after chilling, resulting in a creamy, indulgent treat suitable for anyone following an egg-free diet.
Coffee Truffles are naturally a no-oven dessert. Prepare a ganache by combining warm cream with chopped chocolate and coffee, refrigerate until firm, then roll into bite-sized portions. Finish with your favorite coating, such as cocoa powder, chopped nuts, or chocolate.
Coffee Truffles typically contain dark or semi-sweet chocolate, fresh cream, instant coffee or espresso powder, and butter. Vanilla extract, cocoa powder, chopped nuts, or chocolate coatings may also be included to enhance the flavor, texture, and overall presentation.
Homemade Coffee Truffles generally stay fresh for about one to two weeks when kept in an airtight container in the refrigerator. For the best flavor and consistency, protect them from moisture and strong-smelling foods and allow them to soften slightly before serving.
A common mistake when making Coffee Truffles is using an incorrect chocolate-to-cream ratio, which can prevent the ganache from setting properly. Overheating chocolate or adding too much coffee may also affect the smooth texture and create an unbalanced flavor.
Homemade Coffee Truffles allow you to adjust the coffee intensity, chocolate type, sweetness, and coatings according to personal preference. They can offer a fresher taste and customised flavor, while packaged varieties usually focus on consistency, convenience, and extended storage.
Give classic Coffee Truffles a creative twist by adding orange zest, cinnamon, caramel, coconut, hazelnuts, or a touch of chilli. Roll them in colorful sprinkles, crushed nuts, cookie crumbs, or cocoa powder to create different textures and an attractive finish.
Dark chocolate with approximately 60 to 70 percent cocoa is an excellent choice for Coffee Truffles because its deep cocoa notes complement the bold coffee flavor. Semi-sweet chocolate provides a milder option, while milk chocolate creates a sweeter, creamier result.
The best Coffee Truffle depends on ingredient quality and individual taste rather than a particular brand. Look for options with real chocolate, noticeable coffee flavor, balanced sweetness, smooth texture, and an appealing color to find a product that matches your favorite truffle style.
An easy homemade Cold Coffee recipe combines chilled milk, coffee, sugar, and ice cubes in a blender until smooth and frothy. Pour it into a tall glass and serve immediately. Add ice cream, whipped cream, or chocolate syrup for extra flavor and a café-style finish.
Cold Coffee is generally prepared without eggs, making the classic recipe naturally eggless. Simply blend chilled milk with coffee, sugar, and ice until frothy. You can also add your favorite ice cream or flavored syrup for a richer and creamier beverage.
Cold Coffee does not require an oven or any baking. Dissolve coffee in a small amount of warm water, then blend it with chilled milk, sugar, and ice cubes. Serve in a cold glass with cocoa powder or chocolate shavings for an attractive color and presentation.
The main ingredients used in Cold Coffee are chilled milk, instant coffee or brewed coffee, sugar or another sweetener, and ice cubes. Optional additions include vanilla ice cream, chocolate syrup, cocoa powder, whipped cream, or flavored syrups for added richness and variety.
Freshly prepared Cold Coffee is best consumed immediately for optimal taste and froth. If necessary, it can be refrigerated in a tightly sealed container for up to 24 hours, although its texture may change and the ingredients can separate during storage.
A common mistake when making Cold Coffee is using too much coffee, which can create an excessively bitter taste. Adding warm milk or too much ice may also dilute the flavor, while insufficient blending can prevent the drink from developing its signature frothy texture.
Homemade Cold Coffee allows you to adjust the coffee strength, sweetness, milk quantity, and additional ingredients according to your preference. Ready-made versions offer greater convenience and consistency but may contain added flavorings, sweeteners, stabilisers, or preservatives depending on the product.
Give classic Cold Coffee a creative twist by adding caramel, hazelnut, vanilla, cinnamon, coconut milk, or chocolate. You can also blend in banana, top it with colorful sprinkles, or add your favorite ice cream to create an indulgent dessert-style beverage.
Dark or semi-sweet chocolate works particularly well in Cold Coffee because its bold cocoa notes complement the roasted coffee flavor. Milk chocolate provides a sweeter and creamier taste, while chocolate syrup or cocoa powder offers an easy way to add chocolate intensity.
The best Cold Coffee depends on your preferred coffee strength, sweetness, and consistency rather than a specific brand. Look for an option with a noticeable coffee aroma, balanced flavor, smooth mouthfeel, appealing color, and an ingredient list that matches your personal preferences.
To prepare Iced Coffee, brew your favorite coffee slightly stronger than usual and allow it to cool completely. Fill a glass with ice, pour in the coffee, and add chilled milk or cream if desired. Sweeten to taste, stir well, and serve immediately for a refreshing flavor.
Iced Coffee is naturally eggless in most recipes and requires no egg substitutes. Simply combine cooled brewed coffee with ice cubes, milk or a plant-based alternative, and your preferred sweetener. Add vanilla or cinnamon to create additional flavor without changing the basic preparation.
Iced Coffee requires no oven because it is prepared by brewing and chilling rather than baking. Make coffee using your preferred brewing method, cool it thoroughly, and pour it over ice. Finish with milk, cream, syrup, or other additions according to your taste.
The main ingredients in Iced Coffee include brewed coffee or espresso, ice cubes, and optional milk, cream, or sweetener. Additional ingredients such as vanilla, caramel, cocoa, cinnamon, or flavored syrups can be included to customize the drink and enhance its overall flavor.
Plain brewed coffee can generally be refrigerated in a sealed container for several days, although its flavor is best when fresh. Once milk or cream is added, Iced Coffee should be refrigerated promptly and ideally consumed within one to two days for optimal quality.
Iced Coffee may taste weak or watery if hot coffee is poured directly over too much ice, causing rapid dilution. Using coffee that is too bitter, stale beans, or excessive sweetener can also negatively affect the final taste and balance of the beverage.
Iced Coffee is primarily a chilled beverage rather than a traditional dessert, although sweet and creamy variations can feel dessert-like. Its distinctive roasted coffee flavor, refreshing temperature, and customisable sweetness make it a favorite alternative to heavier frozen or baked treats.
Serve Iced Coffee in a tall glass with coffee ice cubes, whipped cream, chocolate curls, or a caramel drizzle. For extra visual appeal, add colorful sprinkles, create layered milk and coffee effects, or pair the drink with your favorite cookies or pastries.
Dark chocolate or unsweetened cocoa pairs beautifully with Iced Coffee because its intense flavor complements the natural bitterness of coffee. Semi-sweet chocolate provides balanced sweetness, while milk chocolate creates a smoother, creamier drink with a lighter cocoa color.
Choosing the best Iced Coffee depends on factors such as coffee quality, roast level, sweetness, and personal taste rather than a particular brand. Look for a product with a clean coffee aroma, smooth finish, balanced flavor, and minimal unnecessary additives for an enjoyable experience.
To prepare Mocha Dessert at home, combine chocolate with brewed coffee or espresso and add cream, milk, sugar, or other ingredients depending on the recipe. Chill or bake as required, then garnish with cocoa powder, chocolate curls, or your favorite toppings for extra flavor.
Yes, a Mocha Dessert can easily be prepared without eggs. Ingredients such as whipped cream, condensed milk, yoghurt, cornstarch, or cream cheese can provide structure and richness while maintaining the signature combination of deep chocolate and aromatic coffee flavor.
A Mocha Dessert can be made without an oven by preparing a chilled mousse, pudding, parfait, cheesecake, or layered dessert. Combine coffee and chocolate with creamy ingredients, refrigerate until properly set, and decorate with toppings that add contrasting texture and color.
Mocha Dessert is generally made with chocolate, coffee or espresso, sugar, cream, milk, and vanilla. Depending on the preparation, additional ingredients may include biscuits, cream cheese, cocoa powder, or nuts, creating a rich combination of coffee and chocolate flavor.
Store Mocha Dessert in a tightly covered container in the refrigerator, particularly when it contains fresh cream, milk, or other perishable ingredients. Most chilled varieties are best enjoyed within three to four days to maintain their freshness, smooth texture, and balanced flavor.
A Mocha Dessert may become dry or dense when too much cocoa or flour is used, ingredients are overmixed, or a baked version is cooked excessively. Maintaining accurate proportions and following the correct preparation time helps achieve the intended consistency and moisture.
Mocha Dessert stands apart because it combines the roasted intensity of coffee with the richness of chocolate as its primary flavor profile. Unlike plain coffee or chocolate desserts, mocha offers a balanced taste that makes it a favorite among lovers of both ingredients.
Easy Mocha Dessert variations include mocha mousse, layered parfaits, chilled cheesecake, coffee-chocolate pudding, brownies, and dessert cups. Add caramel, hazelnuts, orange zest, cinnamon, or colorful berries to introduce contrasting flavors and create a more distinctive presentation.
Dark chocolate with approximately 60 to 70 percent cocoa is an excellent choice for Mocha Dessert because its intense cocoa notes complement strong coffee beautifully. Semi-sweet chocolate offers balanced sweetness, while milk chocolate produces a smoother and milder overall flavor.
The ideal Mocha Dessert depends more on preparation and ingredient quality than on a particular brand. Look for a dessert with a noticeable coffee aroma, genuine cocoa taste, smooth consistency, appealing color, and balanced sweetness that allows both signature flavors to remain distinct.
An easy homemade Orange Bread recipe combines flour, fresh orange juice, orange zest, sugar, butter or oil, milk, and a leavening agent. Mix everything into a smooth batter, transfer it to a loaf tin, and bake until golden in color with a fresh citrus flavor.
Yes, Orange Bread can be prepared without eggs by using yoghurt, applesauce, condensed milk, or a flaxseed mixture for moisture and binding. Fresh orange juice and zest provide a bright flavor, creating a soft and delicious eggless loaf.
Orange Bread can be made without an oven using a heavy-bottomed pan or pressure cooker without the whistle. Place the batter-filled tin inside the preheated vessel and cook over controlled low heat until the centre is fully set and evenly cooked.
Orange Bread typically contains flour, fresh orange juice, grated orange zest, sugar, butter or oil, milk, and baking powder or baking soda. Vanilla, cinnamon, nuts, or dried fruits can also be included to complement the natural citrus flavor.
Homemade Orange Bread generally stays fresh for two to three days when kept in an airtight container at room temperature. Refrigerating the loaf can extend its freshness to approximately one week, while freezing properly wrapped slices allows for longer storage.
A common mistake when preparing Orange Bread is adding too much orange juice, which can make the batter overly wet and produce a dense texture. Overmixing, incorrect measurements, or excessive baking may also affect the loaf's softness, color, and overall quality.
Homemade Orange Bread allows you to use fresh orange juice and zest while adjusting the sweetness according to your preference. Compared with many packaged versions, it can provide a fresher aroma, more natural flavor, and greater control over the ingredients used.
Give classic Orange Bread a creative twist by adding cranberries, walnuts, almonds, cinnamon, cardamom, poppy seeds, or coconut. A chocolate drizzle, citrus glaze, or colorful candied orange peel can also enhance its presentation and make it a favorite dessert.
Dark chocolate is an excellent choice for Orange Bread because its slightly bitter cocoa flavor complements the bright sweetness of citrus. Semi-sweet chocolate also works beautifully, while white chocolate provides a sweeter, creamier contrast when added as chips, chunks, or glaze.
Rather than focusing on a particular brand, choose Orange Bread based on freshness and ingredient quality. A good loaf should have a noticeable citrus aroma, balanced flavor, soft crumb, and natural golden color, with real orange ingredients listed prominently whenever possible.
You can make creme caramel dessert by preparing a layer of caramelised sugar and topping it with a smooth custard mixture. Bake it in a water bath until it is set properly, chill it well, and unmould before serving.
Banana caramel dessert is a simple and delicious treat made with caramel sauce, sliced bananas, cream, or ice cream. Some recipes also include biscuits or nuts in this dessert for extra texture and flavor.
Caramel usually crystallises when sugar crystals stick to the sides of the pan or when the mixture is stirred too much while cooking. If you use clean utensils and cook gently, it helps prevent this.
Caramel cooks quickly, so it is important to keep an eye on it. Cook it over medium or low heat and remove it from the stove as soon as it gets a rich amber colour.
Most caramel desserts should be stored in airtight containers when they are stored in the refrigerator. When they are stored properly, their flavor, texture, and freshness stay intact for a longer period.
Some popular caramel desserts are creme caramel, caramel pudding, caramel custard, banoffee pie, caramel cheesecake, caramel brownies, caramel ice cream, and caramel tarts. You can try making these at home with simple recipes.
Both milk and dark chocolate pair very well with caramel desserts. Dark chocolate balances the sweetness of caramel, while milk chocolate adds a rich and creamy flavor to the desserts.
Caramel desserts are commonly made with sugar, butter, cream, milk, vanilla extract, chocolate, nuts, bananas, and biscuits. Different recipes may also include custard or pastry components to enhance the taste or give it some twists.
The best chocolates for making a chocolate caramel dessert are both Cadbury Dairy Milk and Cadbury Bournville. They melt easily and pair wonderfully with the rich, buttery flavor of caramel.
Cadbury Bournville is the perfect option to make a chocolate caramel tart because it has a rich cocoa flavor that balances the sweetness of the caramel filling. It also gives the dessert a more indulgent taste.
You can make chocolate croissants at home by filling rolled croissant dough with chocolate pieces or chocolate sticks. Later, bake them until they become golden, flaky, and crisp on the outside.
Croissants can be made at home from scratch from a laminated dough prepared with flour, yeast, butter, sugar, and milk. The dough is folded several times with butter layers before it is shaped and baked to get the signature flaky texture.
To make croissant dough at home, you need to mix flour, yeast, sugar, salt, milk, and water to form a soft dough. After resting it, you should fold chilled butter into the dough and refrigerate it between each fold.
Chocolate croissants can be made at home by placing chocolate inside triangular pieces of croissant dough and rolling them into shape. Then bake them until they turn golden brown and serve them warm for the best flavor.
You can make chocolate-filled croissants by adding chocolate chunks or chocolate sticks to the centre of the dough before rolling. The chocolate melts beautifully during baking, and it makes for a rich filling.
You can make butter croissants with laminated dough and generous layers of butter. Then it requires proper folding and chilling to get the light, airy layers that make butter croissants so delicious.
Dark chocolate is one of the best choices for chocolate croissants because it melts well and balances the buttery flavor of the pastry without making it overly sweet. But if you prefer sweet, you can also try normal chocolate.
Good-quality baking chocolate works best for croissant fillings. You can also try chocolate bars that have a rich cocoa flavor, as they hold their shape well while remaining soft after baking.
Chocolate croissants can be made quickly with store-bought puff pastry. All you need to do is cut the pastry into triangles, add chocolate, roll them up, and bake until the pastry is puffed and golden.
Cadbury Bournville is the best chocolate for chocolate almond croissants. It has a rich cocoa flavor that pairs beautifully with toasted almonds and buttery croissant layers, which makes the dessert very indulgent.
You can make blueberry bread step by step by mixing flour, sugar, butter or oil, milk, and baking powder to make the batter. Later, fold in fresh or frozen blueberries, pour it into a loaf tin, and bake until golden and fluffy.
You can easily make eggless blueberry bread with yoghurt or condensed milk. Even without egg, the cake stays moist and soft, and the flavor of the sweet and tangy blueberries shines through it all.
You can make blueberry bread in a pressure cooker or a heavy-bottomed pan. Just make sure you cook it on low heat until it rises well and when you insert a skewer in the centre, it comes out clean.
Blueberry bread can be made with simple ingredients like flour, blueberries, sugar, butter or oil, milk, baking powder, and vanilla extract. Some people also add lemon zest for extra freshness.
Blueberry bread stays fresh for two to three days at room temperature when you store it properly. You can also refrigerate it to extend its shelf life by a few more days.
The blueberry bread will become dense if you have overmixed the batter. If you add too many blueberries or bake it for too little time, it can also affect the final texture.
Blueberry Bread has a soft, loaf-like texture and a mild sweetness, which makes it stand out. This bread is also light enough for breakfast or tea time and feels less rich than many traditional desserts.
You can serve blueberry bread warm with butter, cream cheese, whipped cream, or a light lemon glaze. Toasted slices of blueberry bread also taste delicious with fresh berries and a drizzle of honey.
White chocolate is the best choice for blueberry bread because it balances the slight tartness of blueberries and adds a creamy sweetness to every bite. Blueberry bread feels a little incomplete without chocolate.
Cadbury white chocolate is the best option to go with blueberry bread. It has a creamy flavor that works very well with glazes, toppings, or small chocolate chunks, when mixed into the loaf.
Blueberry crepes can be easily made at home. You need to prepare a smooth crepe batter with flour, milk, and butter, cook thin crepes on a pan, and fill them with fresh blueberries and whipped cream before serving.
Yes, you can make blueberry crepes without eggs by using milk and a little yoghurt or melted butter in the batter. The crepes remain soft and pair beautifully with fresh blueberries.
Yes, blueberry crepes are made entirely on a stovetop and do not require an oven. You can make thin and delicate crepes on a non-stick pan perfectly in just a few minutes.
Blueberry crepes are made with flour, milk, butter, sugar, and fresh or frozen blueberries. Some recipes also include vanilla extract, cream cheese filling, or blueberry compote for extra flavour and texture.
Cooked blueberry crepes can be refrigerated in an airtight container for up to two days. Make sure that you are storing the blueberry filling separately and assembling it when ready to serve to get the best texture.
Blueberry crepes can sometimes become dry if the batter is too thick or if they are cooked over high heat. Overmixing the batter may also affect their light and soft texture.
Blueberry Crepes are lighter than cakes and softer than pastries. Their thin texture and fruity filling make them a versatile dessert that can also be enjoyed as a sweet breakfast or brunch dish.
You can serve blueberry crepes with cream cheese frosting, vanilla ice cream, maple syrup, honey, or toasted nuts. You can also add some warm blueberry sauce to make the crepe extra special.
White chocolate is probably the best pairing for blueberry crepes. The reason behind this is that white chocolate beautifully balances the tartness of blueberries and adds a smooth, creamy sweetness to the dessert.
You can use Cadbury white chocolate to pair with blueberry crepes. It melts beautifully and can be used as a drizzle or filling to complement the fresh blueberry flavour of the crepes!
You can prepare caramel crepes step by step by making a smooth crepe batter with flour, milk, and butter. Then cook thin crepes in a pan and fill them with homemade caramel sauce, whipped cream, or chopped nuts before serving.
Caramel crepes can be made without eggs by using milk and a little yoghurt in the batter. Even without eggs, the crepe remain soft and taste delicious when paired with rich caramel filling.
A simple no-oven method to cook caramel crepe is by making them on a non-stick pan and prepare the caramel sauce separately. They can be made quickly and make a wonderful homemade dessert.
The main ingredients used in caramel crepes are flour, milk, butter, sugar, and caramel sauce. Some recipes also include vanilla extract, fresh cream, sea salt, or toasted nuts for added flavour nad texture.
Caramel crepes taste best when they are freshly prepared. However, you can refrigerate the cooked crepes for up to two days and store the caramel sauce separately till they are ready to serve.
Caramel crepes may not turn out well if the caramel becomes burnt or too thick. Cooking the crepes for too long can also make them dry and difficult to fold.
Caramel crepes are unique because they are a perfect combination of soft, delicate crepes with a rich caramel filling. Their light texture makes them feel less heavy than cakes or pastries.
Some fun ways to serve caramel crepes are by pairing them with vanilla ice cream, roasted almonds, banana slices, or a drizzle of salted caramel sauce. They also pair beautifully with a hot cup of coffee.
Dark chocolate is one of the best choices for caramel crepes because it balances the sweetness of the caramel and also adds the rich cocoa flavour to the beloved dessert.
Caramel crepes can be paired very well with Cadbury Bournville. It has a slightly bitter chocolate flavour which complements beautifully with caramel and works well as a topping or chocolate drizzle.
Chocolate banana crepes can be made at home easily with a thin crepe batter and a filling of sliced bananas and melted chocolate. You need to fold the crepes and serve them warm.
Yes, chocolate banana crepes can be made without eggs by using milk and yoghurt in the batter. Even without eggss the crepes become soft and taste delicious when paired with bananas and chocolate.
Chocolate banana crepes do not require an oven to make. All you need is a simple non-stick pan to cook the crepes on and add the filling once they are ready to serve.
Chocolate banana crepes are made with flour, milk, butter, sugar, bananas, and chocolate. You can also include whipped cream, vanilla extract, or cocoa powder for extra flavor that pair well with chocolate and banana.
It is best to enjoy chocolate banana crepes fresh. But you can refrigerate the cooked crepes for up to two days and prepare the banana and chocolate filling just before serving.
Chocolate banana crepes can sometimes become dry if they are overcooked or if the batter is too thick. Using ripe bananas and not overheating the chocolate filling also improves the texture.
Chocolate banana crepes are lighter than cakes and pastries but taste equally delicious. The combination of soft crepes, sweet bananas, and melted chocolate makes them a popular dessert across all ages.
You can add peanut butter, caramel sauce, chopped nuts, vanilla ice cream, or strawberries to chocolate banana crepes. You can also add a sprinkle of cinnamon, which pairs beautifully with bananas and chocolate.
Cadbury Dairy Milk Silk is one of the best chocolates that pairs well with chocolate banana crepes. It has a creamy texture that melts easily and goes well with the sweetness of ripe bananas.
There is no single brand that makes the best chocolate banana crepe. Homemade versions made with good-quality ingredients and chocolates like Cadbury Dairy Milk or Cadbury Dairy Milk Silk can give the best taste!
An easy homemade coconut crepe is made with a simple batter of flour, milk, butter, and sugar. Then they are filled with freshly grated coconut and mixed with condensed milk or coconut cream for a delicious homemade dessert.
Yes, there is an eggless version of coconut crepe, which can be made using milk and yoghurt in the batter. Eggless crepes also turn out soft, light, and pair beautifully with sweet coconut fillings.
Coconut Crepes do not require an oven. Cook them on a non-stick pan over low to medium heat. They are quick to prepare and perfect for a simple dessert at home.
Coconut crepes are made with flour, milk, butter, sugar, and grated coconut. Many recipes also include coconut milk, condensed milk, vanilla extract, or cardamom powder for added flavour, and some also add texture.
Fresh coconut crepes taste best when they are served immediately. The cooked crepes can be refrigerated for up to two days, while the coconut filling should be stored separately in an airtight container.
One common mistake that people make while making a coconut crepe is using too much filling. Excess moisture from the filling can make the crepes difficult to fold or cause them to tear easily.
Homemade coconut crepes have a fresh flavour, and you can use real coconut and adjust the sweetness according to your preference. They are also softer and more flavourful when freshly prepared.
You can add chopped mangoes, roasted nuts, caramel sauce, or a scoop of vanilla ice cream to homemade coconut crepes. Coconut and chocolate is another delicious combination that many people enjoy.
Milk chocolate will go very well with coconut crepes because its creamy sweetness will suit the natural flavour of coconut. You can also try dark chocolate, but the flavour might overpower coconut.
Cadbury's Dairy Milk is the best choice for coconut crepes. You can melt it into a smooth chocolate sauce or sprinkle small chocolate pieces over the coconut filling. This will give you a richer dessert experience at home.
You can prepare coffee bread by making a batter with flour, sugar, butter or oil, baking powder, milk, and instant coffee. To make the bread, pour the batter into a loaf tin and bake it until the bread becomes soft, moist, and aromatic.
You can make coffee bread without eggs by using yoghurt or condensed milk. These ingredients help keep the bread soft and moist while allowing the coffee flavor to stand out beautifully.
The no-oven method to make coffee bread is simple and convenient. The process is the same; instead of an oven, you can cook it in a pressure cooker or a heavy-bottomed pan with a lid. Cook it on low heat until it is fully baked and fluffy.
The main ingredients used in Coffee Bread are flour, instant coffee powder, sugar, butter or oil, milk, baking powder, and vanilla extract. Some recipes also include cinnamon powder or chocolate chips for extra flavor.
Homemade coffee bread stays fresh for about two to three days at room temperature when stored properly. And if you refrigerate it in an airtight container, it can last for up to a week.
Some common reasons for coffee bread not turning out right are overmixing the batter, using too much coffee powder, or overbaking the bread. These mistakes can make the bread dry, dense, or bitter.
Coffee bread is different from other regular desserts because of its rich coffee flavor and soft, loaf-like texture. It is less sweet than many desserts and makes a wonderful accompaniment to a cup of coffee or tea.
Some fun ways to serve coffee bread are by topping it with whipped cream, chocolate sauce, cream cheese frosting, or toasted nuts. It also tastes delicious when the bread is lightly toasted and served warm.
Dark chocolate is one of the best chocolates to pair with coffee bread. The rich cocoa flavor of dark chocolate complements the slight bitterness of coffee and creates a delicious balance of flavors.
For coffee bread, cadbury bournville is a great choice. You can use it as chocolate chunks in the batter or melt it for a rich chocolate drizzle that will work very well with coffee.
You can prepare coffee crepes step by step by adding a little instant coffee powder to a simple crepe batter made with flour, milk, and butter. Then cook the crepes on a pan and fill them with whipped cream, coffee-flavored cream, or chocolate sauce.
You can make coffee crepes easily without eggs. Substituting eggs with ingredients like yoghurt or melted butter helps create soft and flexible crepes that will pair perfectly with the rich coffee flavor.
You do not need an oven to make coffee crepes at home. Simply cook them on a non-stick pan over medium heat. Since crepes are thin, they take only a few minutes to prepare from start to finish.
The main ingredients used in coffee crepes are flour, milk, sugar, butter, and instant coffee powder. Some recipes also include cocoa powder, vanilla extract, or whipped cream for extra flavor.
Cooked coffee crepes can be stored in the refrigerator for up to two days. Make sure that the filling is prepared fresh before serving, which will give you a soft texture and keep the flavor intact.
Coffee crepes can become rubbery if the batter is overmixed or cooked for too long. Moreover, if you have added too much coffee powder, then your crepes can taste bitter instead of rich.
Coffee crepes are different from other regular desserts because they have a delicate texture and a rich coffee flavor. They make a wonderful choice for people who enjoy coffee-based treats.
You can serve coffee crepes with chocolate ganache, vanilla ice cream, caramel sauce, whipped cream, or dust them lightly with cocoa powder to get a feeling that you are enjoying a crepe in a cafe.
Dark chocolate is the best chocolate for coffee crepes. Dark chocolate has rich cocoa notes that complement the slightly bold flavor of coffee and create a balanced dessert that coffee lovers and chocolate lovers will enjoy.
Cadbury's Bournville is one of the best choices for coffee crepes. You can grate it over the crepes or melt it into a chocolate sauce that will make for a rich coffee and chocolate combination.
You can prepare dessert bread step by step by mixing flour, sugar, butter or oil, milk, and baking powder with your favourite flavorings. Bake the batter until it becomes soft, fluffy, and lightly golden on top.
Yes. Dessert Bread can easily be made without eggs. You need to add ingredients like yoghurt, condensed milk, or mashed banana to create a moist and tender texture without changing its flavor.
You can make dessert bread in a pressure cooker, air fryer, or a heavy-bottomed pan with a lid. All you have to do is cook it slowly on low heat, which gives excellent results even without an oven.
The main ingredients of dessert bread are flour, sugar, milk, butter or oil, and baking powder. Depending on the recipe, you can also add fruits, nuts, chocolate, spices, or vanilla extract.
Homemade dessert bread stays fresh for two to four days when you store it in an airtight container. Refrigerating it can help maintain its flavor and texture for a few extra days.
Dessert Bread may not turn out well if the batter is overmixed or the ingredients are not measured correctly. Baking it for too long can also make it dry and crumbly.
Dessert bread is different from other regular desserts because it has the softness of bread with the sweetness of a cake. It is versatile enough to enjoy as a snack, breakfast, or an after-meal treat.
You can serve dessert bread with whipped cream, fruit compote, chocolate sauce, honey, or ice cream. You can also toast a slice and add your favourite toppings to make it extra delicious.
Milk chocolate is one of the best choices for dessert bread because it pairs well with most flavors. Dark chocolate also works beautifully if you prefer a richer taste.
For dessert bread, Cadbury Dairy Milk is the best option that works well in almost every recipe. Cadbury Bournville is another great choice if you enjoy a more intense chocolate flavor.
An easy homemade lemon bread recipe requires flour, butter, sugar, lemon zest, lemon juice, and baking powder. You need to mix the ingredients, pour the batter into a loaf tin, and bake until golden and fragrant.
Yes, you can make eggless lemon bread too. It also tastes just as soft and moist. You can use yoghurt, buttermilk, or condensed milk as an egg substitute and you will have a light and fluffy loaf.
It is possible to make lemon bread in a pressure cooker or heavy-bottomed pan. You need to pour the batter into a greased tin and cook on low heat until a skewer comes out clean. An oven is not necessary to make lemon bread.
The ingredients needed to make lemon bread are flour, butter or oil, sugar, lemon juice, lemon zest, baking powder, milk, and sometimes yoghurt or eggs for extra moisture and softness.
Homemade lemon bread can stay fresh for about two to three days at room temperature when stored in an airtight container. If you refrigerate it, it will last up to a week.
The most common mistake that people make with lemon bread is overmixing the batter. It can make the bread dense and dry. If you use too much lemon juice, that can also affect the texture and make it heavy.
Homemade lemon bread is different from store-bought bread, as it has a fresher citrus flavor and a softer texture. You can also adjust the sweetness and add your favourite toppings without using preservatives in a homemade version.
To make the lemon bread creative, you can add poppy seeds, blueberries, cream cheese glaze, toasted almonds, or white chocolate chips. A light lemon icing also makes the bread extra delicious for special occasions.
Generally, white chocolate pairs beautifully with lemon flavors. Melted white chocolate or white chocolate chips add sweetness and go very well along with the bright citrus notes in lemon bread.
If you want to give a chocolatey twist, you can try Cadbury Dairy Milk Silk white, which will work with lemon bread. You can also use good-quality baking chocolate or white chocolate chips for glazing and toppings.
Nut bread can be easily made at home with flour, milk, sugar, butter, baking powder, and chopped nuts like almonds, walnuts, and cashews. Bake the batter until it gets a golden crust and a soft centre.
Yes, an eggless version of nut bread also exists, and it tastes just as delicious. Ingredients like yoghurt or mashed banana can be used as egg substitutes and give the bread a soft and moist texture.
If you do not have an oven, you can make nut bread in a pressure cooker or an air fryer. Cook it on low heat and allow enough time so the centre is baked properly. Try inserting a skewer to test it.
Nut bread is usually made with flour, sugar, milk, butter or oil, baking powder, and a mix of chopped nuts. You can also include cinnamon, raisins, or vanilla extract for extra flavor.
Homemade nut bread stays fresh for about three days at room temperature. If you store it in the refrigerator in an airtight container, it can easily last for up to a week.
A common mistake that many people make with nut bread is adding too many nuts to the batter. This can make the bread heavy and prevent it from rising properly. Chopping the nuts too finely can also affect the texture.
Homemade nut bread is different from store-bought; it contains fresh ingredients and lets you control the amount and type of nuts you use. It also tastes richer and does not contain unnecessary preservatives.
To make the classic nut bread more creative, you can add dried fruits, orange zest, honey, maple syrup, or even a cinnamon glaze to the nut bread. Toasted nuts sprinkled on top also add extra crunch and flavor.
Milk chocolate and dark chocolate both pair beautifully with nut bread. Dark chocolate adds richness, while milk chocolate gives the bread a sweeter and creamier flavor. You can use either of the options.
For nut bread, Cadbury Bournville works especially well with walnuts and almonds. If you prefer a sweeter flavor, Cadbury Dairy Milk makes an excellent choice for chocolate chunks or toppings.
Oreo crepes can be easily made at home with a simple crepe batter and crushed oreo cookies. All you need to do is fill the crepes with whipped cream and oreo crumbs, fold them neatly, and serve them chilled or slightly warm.
Yes, there is a version of Oreo crepes without eggs. You can add milk, melted butter, and a little yoghurt in the batter. The crepes turn out soft and taste delicious with an oreo filling, and without eggs.
Oreo Crepes do not need an oven. You need to cook the crepes on a non-stick pan, prepare the filling separately, and assemble them just before serving for the best texture and flavour.
Oreo crepes are made with ingredients like flour, milk, sugar, butter, and crushed oreo cookies. Many recipes also include whipped cream, chocolate sauce, vanilla extract, or cream cheese for extra richness.
You can store cooked crepes in a refrigerator for up to two days. It is best to store the Oreo filling separately and use it only when you are ready to enjoy it. This will keep the texture and flavour intact.
A common mistake with Oreo crepes is adding too much Oreo filling, which can make the crepes difficult to fold. If you overcook the crepes, that will also make them dry and less enjoyable.
Homemade Oreo crepes taste fresh, and you can control the sweetness and filling as per your preference. You can also customise them with your favourite toppings and sauces without having to compromise on anything.
You can add chocolate chips, peanut butter spread, caramel sauce, fresh strawberries, or vanilla ice cream to Oreo crepes. When you layer these ingredients over the crepe, it makes for a delicious dessert dish or breakfast dish.
Some of the best recipes using Oreo crepes are crepe rolls, layered crepe cakes, ice cream wraps, dessert jars, or chocolate-drizzled party desserts. These are easy to prepare and serve.
You can slice Oreo Crepes into bite-sized pieces for dessert platters, layer them with whipped cream and fruits, or serve them with chocolate sauce and ice cream for an indulgent dessert treat.
You can prepare a simple batter for strawberry bread with flour, sugar, butter or oil, and baking powder. You need to fold in chopped strawberries, pour the mixture into a loaf tin, and bake until the bread becomes soft and lightly golden.
Yes. Strawberry bread tastes delicious even without eggs. You can substitute eggs with yoghurt or condensed milk. These ingredients keep the bread moist and tender. This version is good for vegetarian people and those who have an allergy to eggs.
The no-oven method to make strawberry bread is equally simple. You can make strawberry bread in a pressure cooker or a heavy-bottomed pan with a lid. Cook it on low heat until it rises well and is fully baked.
The main ingredients of strawberry bread are fresh strawberries, flour, sugar, butter or oil, milk, baking powder, and vanilla extract. You can also add lemon zest if you need some extra flavor.
If you keep homemade strawberry bread at room temperature, it stays fresh for about two days. If you refrigerate it in an airtight container, it can last for up to five days.
Some reasons for strawberry bread not turning out right are that fresh strawberries release moisture while baking. If you use too many strawberries or overmix the batter, it can make the bread dense or slightly soggy in the centre.
Strawberry bread stands out because it has a soft, cake-like texture and a fresh, fruity flavor. It is lighter than many desserts and works well as a breakfast or tea-time treat.
Some fun ways to serve strawberry bread are to serve it with whipped cream, strawberry compote, cream cheese spread, or toasted with a little butter. It also tastes delicious with a scoop of vanilla ice cream.
White chocolate is one of the best choices that goes well with strawberry bread. Since white chocolate is creamy and sweet, it pairs very well with the natural flavor of fresh strawberries.
For strawberry bread, Cadbury white chocolate pairs well. Some ways to use it are by drizzling over warm slices or adding small chocolate pieces to the batter, which will give a richer flavor.
Strawberry Crepes are easy to make at home with a simple batter of flour, milk, butter, and sugar. Cook thin crepes on a pan and fill them with fresh strawberries, whipped cream, or strawberry compote before serving.
Yes. Strawberry crepes can be made without eggs by using milk and a little melted butter or yoghurt in the batter. Eggless crepes are soft, light, and perfect for a delicious dessert or breakfast.
Yes. Strawberry crepes do not require an oven at all. They are traditionally cooked on a non-stick pan or a flat griddle, making them one of the easiest desserts to prepare at home.
Strawberry crepes are made with ingredients like flour, milk, butter, sugar, and fresh strawberries. Many recipes also include whipped cream, vanilla extract, strawberry sauce, or cream cheese for some extra flavour.
You can refrigerate cooked crepes in an airtight container for up to two days. Store the strawberry filling separately and use it just before serving to keep the crepes fresh and soft.
Strawberry crepes can become dry if the batter is too thick or if they are cooked for too long. You should let the the batter rest before cooking, which will create soft and delicate crepes.
Strawberry crepes are thinner and lighter compared to pancakes and are usually folded or rolled around sweet fillings. The soft texture and fresh fruit filling of strawberry crepe make them simple yet elegant.
You can fill strawberry crepes with Nutella, vanilla ice cream, mascarpone cheese, honey, or toasted almonds. An additional drizzle of strawberry sauce or maple syrup also makes them taste delicious.
White chocolate is one of the best choices for strawberry crepes because the creamy sweetness of white chocolate goes very well with the fresh and slightly tangy flavour of strawberries.
Cadbury white chocolate will go very well with strawberry crepes. You can shave it over warm crepes or melt it into a smooth sauce, which will give you a rich and indulgent dessert experience.
Vanilla crepes are easy to make at home with flour, milk, butter, sugar, and vanilla extract. Cook the batter on a non-stick pan until they are and soft, then serve them with your favourite sweet toppings.
Yes, vanilla crepes can be made without eggs by using yoghurt or a little extra milk in the batter. Even without eggs the crepes become soft, light, and full of vanilla flavour.
You do not need an oven to make vanilla crepe or any crepe for that matter. You can simply cook crepe on a flat pan over medium heat. They are one of the quickest desserts to prepare at home.
Vanilla crepe can be easily made at home with flour, milk, butter, sugar, and vanilla extract. Some recipes also include whipped cream, fresh fruits, or a dusting of icing sugar before serving.
You can store cooked vanilla crepes in an airtight container in the refrigerator for up to two days. Make sure you are separating each crepe with butter paper to prevent them from sticking together.
Vanilla crepes can turn out dry or dense sometimes if the batter is too thick or if they are cooked for too long. Resting the batter for a few minutes before cooking will give you better results.
Vanilla crepes are light, delicate, and versatile. Unlike cakes or pastries, they can be filled or topped in many different ways. This makes them suitable for breakfast, dessert, or an evening snack.
Some easy variations of vanilla crepe are to serve them with fresh berries, caramel sauce, cinnamon sugar, vanilla ice cream, or chopped nuts. They also taste delicious with fruit compote or honey.
Milk chocolate is the best chocolate for vanilla crepe. The reason behind this is its creamy flavour that complements the sweetness of vanilla without overpowering it.
You can use Cadbury's Dairy Milk Silk along with Vanilla Crepes. Its smooth and creamy texture melts beautifully, which makes it a delicious topping or filling for this beloved dessert.
Melt a good quality chocolate and cool it a little. Fold lightly into whipped cream or egg whites to keep the mixture light and airy. Let the mixture sit for some hours until the final state is reached.
Mousse cake is a layered dessert made with a sponge or biscuit base, one or more layers of mousse, and a glaze or decorative topping. The mousse layers are typically set with gelatin before serving the cake in slices.
Chocolate mousse is a light-textured dessert made with melted chocolate combined with whipped cream or egg whites. When refrigerated, it is soft and spoonable but not as dense as ganache or pudding.
Choose a flavor base, such as melted chocolate or fruit puree, and gently fold it into the whipped cream, avoiding the loss of air bubbles. Refrigerate the mixture for a few hours until firm.
Combine the ripe mango pulp with a little sugar and lightly whipped cream. Fold in the softened gelatine very gently to help it set. Pour into serving glasses and chill until set. Garnish with fresh pieces of mango.
Mix the sugar, mascarpone or cream cheese, and strongly brewed coffee or espresso. If you want it lighter, fold in whipped cream. Add, finally, a small amount of softened gelatin. Decorate with cocoa or coffee beans and refrigerate.
For a quick and easy but visually appealing dessert, you could try individual mousse cups with crushed biscuits, mousse-filled tarts with fresh fruit, or a simple parfait with layers of mousse, granola, and berries.
Use whipped Greek yogurt or light cream where you can, natural fruit purees instead of added sugar, and dark chocolate with a higher percentage of cocoa for a richer flavor that doesn't need as much sweetener. what is the best chocolate for chocolate mousse For the best flavor and texture in the mousse, use a good quality dark or semi-sweet chocolate that is about sixty percent cocoa. Such chocolate melts well without seizing and offers a rich flavor that isn't too bitter or too sweet.
Gently melt the Cadbury Dairy Milk chocolate, allow it to cool slightly, and fold it into freshly whipped cream until incorporated. Scoop the mixture into serving glasses and chill for a few hours, until slightly set.
Pudding is a dessert that resembles a custard and is soft, creamy, and spoonable. It is typically prepared by thickening milk with sugar and an ingredient such as cornflour, eggs, or gelatin, and then chilling it until it reaches a smooth, consistent consistency.
Stir continuously over low heat until the mixture thickens, then pour it into serving dishes and chill until it is fully set. In a pan, combine milk, sugar, and a thickener such as cornflour or custard powder.
Directly caramelize sugar in a mold until it turns golden. Pour a custard mixture of milk, sugar, and eggs over the sugar, and then steam or bake in a water bath until it is set. When ready to serve, chill and invert.
To create a smooth paste, whisk custard powder with a small amount of cold milk. Then, stir the paste into simmering sweetened milk until it thickens. Before serving chilled, pour the mixture into molds and refrigerate until it has fully set.
Over low heat, combine milk, sugar, cocoa powder, and cornflour, stirring continuously until the mixture thickens and becomes glossy. Before serving cold, pour the mixture into serving cups and refrigerate for a few hours.
Fold in softened gelatin dissolved in warm water after blending fresh mango pulp with condensed milk and a small amount of cream. Pour the mixture into molds and refrigerate for a period of time until it is fully set and firm.
To prevent lumps, dissolve custard powder in a small quantity of cold milk. Subsequently, stir this mixture into simmering sweetened milk until it thickens. Before serving to guests, pour the mixture into bowls and refrigerate until it has set.
Simmer full-fat milk with sugar and a thickener such as cornflour or agar-agar, stirring frequently, until the mixture becomes creamy and thick. Use cardamom or vanilla to flavor the mixture, and then refrigerate it until it has fully solidified overnight.
The most suitable ingredient for pudding is a high-quality cocoa powder or melted dark chocolate, which imparts a rich, smooth flavor without introducing excessive graininess or altering the dessert's naturally creamy, custard-like texture.
A semi-sweet or dark chocolate ganache layer is particularly effective in trifle pudding, as it provides a rich and complex flavor without overpowering the other layers of the dessert, including the cake, custard, cream, or fresh fruit.
Melt the sugar until it's golden. Carefully whisk in warm cream to make a smooth caramel sauce. Let the sauce cool a little before folding it into the whipped cream with softened gelatin. Keep it aside and wait until cool.
You don't need eggs, as you can use agar-agar or gelatin to set the caramel mousse mixture instead of whipped eggs. This makes the texture light and airy, and the structure is completely dependent on whipped cream.
Caramel Mousse is a dessert that is all made on the stove and in the refrigerator. The caramel is cooked on the stove, and the mousse is set by chilling. No baking, no oven involved from beginning to end.
Caramel-based caramel mousse requires sugar, cream, milk, vanilla, and a setting agent such as gelatin. Add sea salt to give it a little bit of a savory quality to balance out the sweet.
Caramel mousse will keep well in an airtight container in the fridge for a couple of days. It is most enjoyable while in this window, as the texture can get a little less airy after sitting for a longer time.
If the caramel is burnt or too dark, the mousse can taste bitter. If there isn't enough gelatin or if the cream is not whipped enough, the mousse will not set, making it runny.
Unlike baked desserts, caramel mousse is set by chilling, not heat, and gets its flavor from caramelization and its airy texture from whipped cream. It's got a distinctive, spoonable consistency when served.
Serve the caramel mousse in small glass jars and sprinkle with sea salt. Layer with crushed biscuits for a touch of crunch, or serve with fresh apple slices for a simple, elegant dessert.
A light shaving or drizzle of milk chocolate works with the sweetness of the caramel without hiding it. Dark chocolate is also a viable option if you prefer a slightly more intense , less sugary flavor contrast.
Using a good-quality milk or dark chocolate from a reputable brand works well, but the real secret to a great caramel mousse is not in the choice of a particular chocolate brand but in the proper caramelization of the sugar.
Add the grated coconut and condensed milk and cook on low heat, stirring continuously. Cook until the mixture thickens and starts to come away from the pan. Roll into balls and coat with another layer of desiccated coconut.
Coconut laddoo is a natural eggless sweet prepared by cooking the grated coconut with condensed milk or sugar syrup. It is one of the simplest and quickest Indian sweets to make since eggs are not necessary.
This coconut ladoo recipe is made completely on the stovetop in one pan and doesn't require an oven. The coconut mixture is cooked and left to cool a bit before shaping into small, round balls with your hands.
To make coconut laddoo, you need desiccated or fresh grated coconut, condensed milk or sugar, a little bit of ghee, and cardamom powder for flavor. Some varieties also contain chopped nuts or a few drops of rose water.
Store in an airtight container, and the coconut laddoo will remain fresh for about a week at room temperature and up to two weeks in the refrigerator.
Cook too long and it will dry out and become crumbly and unshapable. Cook it too little, and it remains too sticky to hold its form. The trick is to get it to the right consistency before it cools.
Using fresh coconut, you can control the sweetness and richness of homemade coconut laddoo, which often tastes much fresher. Store-bought varieties tend to include preservatives and a standardized sweetness that can change the final taste and texture.
There are ways to add a twist to the chocolate coconut laddoo recipe, like adding cocoa powder, a festive tri-color version using natural food colors, or a modern decadent take by dipping the balls in melted chocolate.
Coconut laddu's natural sweetness is complemented by a smooth milk chocolate coating that doesn't overpower it. If you want a little less sweet, richer contrast, then dark chocolate is also a good choice.
For best results when coating with chocolate, use a good quality milk or dark chocolate brand like Cadbury that melts well. Hence, to get that flavor of coconut laddoo, it is contingent upon the quality of desiccated or grated coconut you use.
Gently fold in softly whipped cream, adding a little softened gelatin to assist with setting. Whisk sugar and mascarpone together with strong-brewed coffee or espresso until smooth. Let cool for a couple of hours before serving.
Yes, it is possible to make coffee mousse without eggs, using gelatin and whipped cream for structure. This maintains a light and airy texture while simultaneously providing a rich, distinctly coffee-forward flavor.
Coffee mousse necessitates no oven, as it is prepared by combining brewed coffee, cream, and a setting agent. The mixture is subsequently chilled in the refrigerator until it solidifies into a light, set dessert.
Coffee mousse is made with strong brewed coffee or espresso, sugar, cream, and either gelatin or eggs to help it set. Sometimes mascarpone is added to make the mousse richer. The presentation is done with cocoa powder.
Coffee mousse typically maintains its freshness for approximately two to three days when stored in an airtight container in the refrigerator. It is most enjoyable when consumed within this timeframe.
A flat, underwhelming flavor is the result of using coffee that is too weak, while excessively strong coffee can impart a bitter taste to the mousse. Another prevalent issue is an insufficient amount of chilling time.
Homemade coffee mousse enables the precise regulation of coffee strength and sweetness, resulting in a balanced and fresher taste. Artificial coffee flavoring may be employed in store-bought versions, which occasionally fails to achieve the same complexity as fresh coffee.
For an additional layer of texture and a visually striking finish, consider a tiramisu-style version that includes coffee-soaked biscuits, a splash of coffee liqueur for depth, or chocolate-covered coffee beans on top of the mousse.
A high-quality dark chocolate is an ideal complement to coffee, as its subtle bitterness complements the natural coffee flavor of the mousse rather than competing with it. This results in a consistent sophisticated flavor profile throughout the dessert.
As a garnish, a Cadbury dark chocolate with a high cocoa content can be an ideal option for the genuine flavor of coffee mousse; significantly influenced by the use of freshly brewed, high-quality coffee or espresso.
Gently melt dark chocolate and allow it to cool slightly. Then fold into whipped cream or beaten egg whites to keep it light. Let the mousse cool for a few hours before serving until it has set completely.
Certainly, you can make dark chocolate mousse without eggs, using whipped cream and gelatin in place of whipped eggs to give it structure. It maintains a delicious, light texture.
Dark chocolate mousse is made without an oven. The chocolate is melted in a saucepan or on the double boiler and then folded into whipped cream and chilled in the refrigerator until set.
When set, the dark chocolate mousse is rich and very chocolatey. It is made by mixing melted dark chocolate with cream, sugar, and whipped eggs or gelatin (depending on the recipe) to help it hold its shape.
Dark chocolate mousse should be stored in the refrigerator and will keep for about two to three days. It has a tight seal to stop it from picking up other flavors in the fridge or drying out.
Typically, a dense, grainy texture is the result of overheated or seized chocolate, not a smooth mousse. Another common culprit is underwhipped cream, which makes the mousse heavier and less delicately textured as not enough air is incorporated.
Dark chocolate mousse is richer and more intense than milk or white chocolate mousse, with a slightly bitter cocoa flavor. It's less sweet overall, but it still has the same light, airy texture.
To make the dessert look even more elegant and well-structured, you can layer the mousse in a tart shell, add a pinch of chili powder for a little heat, or add some orange zest for a citrusy twist.
For best results, choose Cadbury dark chocolate, about sixty to seventy percent cocoa, as this has the right balance of smoothness and richness. It melts well without being too bitter or difficult to work with.
The best results for a dark chocolate mousse are obtained by mixing freshly whipped cream with Cadbury chocolate that has a high cocoa content, as the quality of the ingredients is more important.
Beat fresh cream until it reaches soft peaks. Incorporate melted chocolate or fruit puree. Finally, mix in gelatin or agar-agar that has been softened in warm water to aid in setting. Pour and refrigerate.
Eggless mousse is inherently egg-free, achieving its light, airy structure through whipped cream and a setting agent such as gelatin, rather than traditional beaten eggs. This makes it accessible to individuals who are avoiding eggs entirely.
Eggless mousse is a completely no-bake dessert that is made by melting the flavor base on the stove, folding it into whipped cream, and refrigerating the mixture; there is no need for an oven or baking process.
Eggless mousse is usually made without eggs using fresh cream, sugar, a flavor base like melted chocolate or fruit puree, and gelatin or agar-agar as a setting agent to give it a light and smooth texture.
Eggless mousse typically maintains its freshness for approximately two to three days when stored in an airtight container in the refrigerator. To maintain its light, airy texture and prevent it from becoming watery, consume immediately.
Too little whipping makes a flat, heavy mousse, and if the gelatin is not properly bloomed, the mixture will be runny or unevenly set because it will not hold its shape when properly chilled.
Eggless mousse is suitable for vegetarians and individuals with egg allergies or preferences, as it is entirely composed of whipped cream and a setting agent such as gelatin, rather than beaten eggs, to achieve its light, airy texture.
For parties, serve eggless mousse in small shot glasses, layer it with crushed biscuits for added texture, or top it with fresh fruit and chocolate shavings for a visually appealing, colorful presentation.
It is recommended to use a smooth-melting dark or milk chocolate, as it is capable of blending seamlessly into whipped cream without seizing. This results in a mousse with a consistent texture and a rich flavor, free of any lumps or graininess.
Usually, the most consistent results will come from the Cadbury chocolate that is known for melting cleanly and evenly. The final texture is also significantly influenced by the freshness of the cream used.
Soak and grind yellow moong dal to a coarse paste and cook slowly in copious amounts of ghee over low heat until golden and grainy. Finish with cardamom, sugar, and warm milk. Garnish with nuts.
Moong Dal Halwa is a naturally eggless dessert made with ground lentils, ghee, milk, and sugar. This traditional Rajasthani dessert, which is purely based on slow cooking, is made without the use of eggs at any stage.
The moong dal halwa is prepared on the stovetop itself and should be stirred continuously over a low flame in a heavy-bottomed pan. There is no oven or baking involved, but the process does require patience and time.
You will need yellow moong dal, ghee in generous amounts, milk, sugar, cardamom powder, and for garnish some saffron and some chopped nuts like almonds, cashews, or pistachios to give it a nice texture and a rich look.
Moong Dal Halwa remains fresh for about a week if stored in an airtight container and can be easily reheated with a little warm milk. Also, the amount of ghee in it makes it last longer than most sweets.
Rushing the roasting process results in a raw and gritty flavor of the dal instead of a nutty and golden flavor. Another common mistake is not adding enough ghee. The halwa will not caramelize properly without enough ghee and will not be as flavorful or moist.
Usually homemade moong dal halwa is made with freshly ground dal and a little more ghee, which gives it a softer texture and a more robust aroma. Store versions often skimp on the amount of ghee to save money, which affects both the flavor and the mouthfeel.
Think chocolate moong dal halwa, where Cadbury cocoa is added during the cooking process; halwa tarts filled with the mixture; or a halwa cheesecake fusion that combines the traditional dessert in a modern format.
The halwa's nutty, ghee-laden taste is not diluted by adding good-quality dark cocoa powder during the cooking process; it adds depth without clashing. Melted chocolate is used less often here, as it may interfere with the traditional grainy texture of the dish.
There is no specific brand of moong dal and ghee that makes moong dal halwa a success. Fresh moong dal and pure ghee play a big role in the success of this dish. If you are adding cocoa to make it unique, then you want to buy cocoa powder that is not sweetened.
Combine whipped cream with a setting agent such as gelatin and melted chocolate or fruit puree and gently fold the mixture to retain the airiness. Arrange in serving dishes and chill until set.
Indeed, that is the appeal of no-bake mousse, as it is naturally suited to eggless preparation methods, as it typically relies on whipped cream and gelatin or agar-agar for structure instead of eggs.
No-bake mousse necessitates no oven, as it is established solely through refrigeration and whipping, rather than any form of baking. It's just melting and chilling on the stovetop.
No-Bake Mousse is typically composed of a flavor base, such as melted chocolate or fruit puree, and a setting agent, such as gelatin or agar-agar, to provide structure and body. Additional ingredients may include sugar and whipped cream.
No-bake mousse should be stored in the refrigerator, where it will remain fresh for approximately two to three days. Ensure it is sealed in order to preserve its light, airy texture and prevent the absorption of other odors.
The cream may become dense and grainy instead of light and airy if it is over-whipped. Another prevalent issue is the excessive use of gelatin, which results in a rubbery texture rather than a soft, spoonable consistency.
The structure of no-bake mousse is derived from whipping and chilling rather than baking or heat-setting proteins. This results in a lighter, softer texture than that of baked custards or cakes. The oven is avoided entirely.
For a lighter version, layer no-bake mousse in individual cups with crushed biscuits, fold in fresh fruit puree, or top it with chocolate shavings and nuts to add texture and flavor.
Consistency is of the utmost importance in a chilled, no-bake dessert, where the texture is entirely dependent on the appropriate melting and whipping techniques. Therefore, it is recommended to use a high-quality dark or milk chocolate.
The most consistent outcomes are typically achieved by Cadbury chocolate that is recognized for its smooth, even melting. In comparison to baked desserts, quality is more significant here, as heat does not hide small texture issues.
Melt white chocolate gently over a low flame, being careful not to overheat it. When it has cooled slightly, fold into softly whipped cream. Chill the mixture for a few hours or until firm.
Yes, you can make an eggless white chocolate mousse by substituting the eggs with whipped cream and adding a bit of gelatin for structure. It keeps the texture light yet produces a rich and creamy result.
Of course, white chocolate mousse doesn't require baking. The chocolate is melted gently over the stove or over a double boiler, then folded into whipped cream and chilled in the fridge until set.
White Chocolate Mousse is made of melted white chocolate, whipped cream, sugar and vanilla. Sometimes a little bit of gelatin is added so that the mousse holds its shape and texture after it has completely chilled and set.
White chocolate mousse can be stored in an airtight container in the refrigerator. It will keep fresh for about two to three days. Make sure that it is well covered in order not to absorb more odors from the refrigerator.
Too much heat on white chocolate can cause it to seize and turn grainy, giving it a dense consistency. Another common problem is under-whipped cream. To create a mousse that is light and airy, you need to whip air into the cream.
Creamier and sweeter than dark or milk chocolate mousse, white chocolate mousse has a milder, more delicate flavor. Furthermore, it requires stricter temperature control during the melting process, because white chocolate is more prone to seizing.
For a fruity contrast, try folding in fresh raspberries, or add a touch of matcha for an earthy twist, or layer the mousse with crushed biscuits in individual cups for a quick and elegant dessert.
Using Cadbury white chocolate that contains real cocoa butter (rather than compound chocolate) will melt more smoothly and give the mousse a richer, creamier texture, with no undesirable graininess or waxy aftertaste.
Success depends on the use of smooth, high-quality Cadbury white chocolate and fresh cream that has been whipped properly, as these two things are more important.
You can prepare mango crepes step by step by making a thin batter with flour, milk, butter, and sugar. Cook the crepes in a non-stick pan and fill them with fresh mango slices, whipped cream, or mango puree before folding and serving.
Mango crepes can easily be made without eggs by using milk and yoghurt in the batter. These ingredients give you soft and light crepes that pair perfectly with sweet and juicy mangoes.
Mango crepes do not require an oven. You can simply cook them on a flat pan over medium heat for a few seconds on each side. They are quick to prepare and perfect for homemade desserts.
The main ingredients used in mango crepe are flour, milk, butter, sugar, and ripe mangoes. Many recipes also include vanilla extract, whipped cream, or mango compote to enhance the flavour.
Fresh mango crepes taste best when they are served immediately. However, you can refrigerate the cooked crepes separately for up to two days and add the mango filling just before serving.
Your mango crepe might suffer if the batter is too thick or the pan is too hot. Because of this, mango crepes may tear or become rubbery. Using very watery mango puree can also make the filling messy and difficult to fold.
Mango crepes are light, fruity, and delicate. As opposed to heavier desserts, mango crepes are a refreshing combination of soft crepes and fresh mango flavour, making them perfect for warm weather.
Some fun ways to serve mango crepes are with vanilla ice cream, coconut cream, chopped pistachios, or a drizzle of honey. Adding a few fresh mint leaves also gives them a beautiful presentation.
White chocolate pairs beautifully with mango crepes. White chocolate is creamy and sweet, which goes very well with the tropical flavour of ripe mangoes. The best part is that white chocolate does not overpower the taste of mango.
Cadbury white chocolate is the best brand and chocolate to pair with mango crepes. You can grate it over the crepes or melt it into a smooth sauce that will make for a rich and indulgent dessert.
A cookie is best described as a small, flat, disc-shaped baked dessert made with flour, butter/oil, sugar, eggs, salt, flavorings, leavening agents, and other add-ins like chocolate chips or nuts.
To bake cookies at home, cream softened butter and sugar. Add egg, vanilla, flour, baking soda, and salt. Portion the cookie dough into balls, place them on a baking sheet, and bake at 175°C for 10 minutes.
To make cookies in a microwave, keep the recipe the same. Use the regular microwave mode for a quick 1-minute single-serving cookie. If you are baking a whole batch, use the convection mode.
Prepare the batter with creamed butter and sugar, eggs, vanilla, flour, baking soda, and chocolate chips. Once the dough is ready, scoop it into a lined baking sheet and bake at 175°C for 12 minutes.
A heavy-bottomed pan is turned into a makeshift oven. A wire rack is placed on it, and the rack is covered with a tight lid for preheating. The baking tray with scooped cookie dough is then placed on it and heated for 20 minutes.
Owing to their versatile nature, cookies can be used in several dessert recipes. From a crumbly crust for the pies and cheesecakes to layered desserts like parfaits and mousse, cookies are perfect for almost everything.
For making cookies, it is ideal to use premium-grade chopped baking bars instead of the regular standard chips or chocolate bars. With a high cocoa percentage, the baking bars blend better with the dough.
For making chocolate chip cookies, it is ideal to use chopped high-quality cacao baking bars. These chocolates lend a rich, gourmet flavor, which can never come from the ordinary grocery store chocolate chips.
When it comes to smooth melting into the cookie dough, it is always recommended to use high-grade chopped baking bars or couverture chocolate with high cocoa content instead of regular chocolate chips or bars.
To decorate the cupcakes, prepare a buttercream frosting of any flavor. Fill a piping bag with it and fit a piping tip. Now, squeeze the bag in a circle starting from the outer edge to the center. Garnish it with some sprinkles.
To make cupcakes without a traditional oven, one may follow the standard stovetop method or the pressure cooker method, where the cupcakes are steam-baked. Alternatively, one may opt for a microwave as well.
To make a batch of vanilla cupcakes, combine the standard cake ingredients, such as flour, baking powder, salt, sugar, butter, eggs, and vanilla extract. Pour the batter into liners, and bake at 175°C for 20 minutes.
For a red velvet cupcake batch, whisk together flour, sugar, baking soda, cocoa powder, buttermilk, vegetable oil, egg, vinegar, and some red food coloring. Pour the batter into liners, and bake at 175°C for 20 minutes.
To make some creamy and delicious buttercream frosting for cupcakes, simply whisk some softened unsalted butter with some powdered sugar, vanilla extract, some milk, and a pinch of salt until smooth and creamy.
To make delicious chocolate cupcakes, all you need is some flour, sugar, cocoa powder, baking soda, salt, eggs, oil, buttermilk, and vanilla. Next, pour the batter into lined tins and bake at 175° C for 20 minutes.
A rich chocolate ganache for cupcakes requires heavy cream and premium-quality chocolate in a 1:1 ratio. First, heat the cream. Pour it over the chopped chocolate, and stir until smooth.
Once the cupcake batter is ready, one may simply bake a batch of soft, spongy, and fluffy cupcakes in a microwave using either solo microwave mode or convection mode for 20 minutes.
A high-quality bittersweet chocolate is always considered the best for chocolate cupcakes, as it features a classic deep, rich, and balanced flavor without turning the cupcakes too sweet or bitter.
For that perfect chocolate frosting for cupcakes, always use high-quality bar chocolate or baking chips with high cocoa content. This perfectly balances the flavors without being too bitter or too sweet.
To make hot chocolate at home in just 10 minutes, gently heat some milk in a saucepan and stir in some cocoa powder and sugar. Once it simmers, stir in the chopped dark chocolate, add some vanilla essence, and serve.
To make European-style thick hot chocolate, simply heat some milk in a saucepan. Stir in some cocoa powder and sugar. Once it simmers, add a cornflour slurry and the chopped chocolate and thicken the mixture. How to make hot chocolate with cocoa powder? (Repetitive. The first question has the answer already.)
To make Cadbury hot chocolate, add some Cadbury Drinking Chocolate or Cocoa Powder to a mug, and add some warm milk to make a smooth paste. Pour the hot steamed milk over it, stir well, and serve.
To enjoy this cocoa-coffee combination, whisk milk, cocoa powder, sugar, instant coffee, and vanilla in a saucepan over medium-low heat. Add chopped dark chocolate and stir until smooth, and serve.
To make hot cocoa with a chocolate bar, finely chop the chocolate, heat some milk, and add some heavy cream in a saucepan over medium-low heat. Once it starts steaming, whisk in the chopped chocolate until smooth.
For a rich and intense hot chocolate sauce, whisk sugar and heavy cream in a 1:1 ratio, cocoa powder, some corn syrup, and a pinch of salt. Cook the mixture until it bubbles, remove from the heat, and stir in the vanilla.
For the richest, thickest, and most delicious hot chocolate, it is ideal to use high-quality dark chocolate with very high cocoa content. For an Italian-style thick consistency, add some cornstarch to the mixture.
For a whipped cream hot chocolate, it is ideal to use a finely chopped high-quality bar of semi-sweet or dark chocolate that melts smoothly into warm milk. Top this with a dollop of freshly whipped chocolate cream.
Lassi is best described as a curd/yogurt-based Indian beverage carrying a sweet or spicy taste profile. Made with yogurt/curd, milk, sugar (for sweet lassi), salt, or spices (for spicy lassi), this drink is an absolute delight.
To make creamy lassi at home, simply blend some fresh and chilled curd with some cold milk, sugar, and a pinch of cardamom powder until smooth and frothy. Then pour into a glass and serve chilled.
The popular North Indian drink typically contains yogurt, water, milk, ice, sugar, salt, and spices. However, the presence of sugar and spices entirely depends on what kind of taste you prefer.
To make sure the lassi is thick, it is ideal to use fresh, cold, and non-sour thick yogurt, fresh full-fat milk, or a dollop of fresh cream and blend everything until smooth to achieve that thick consistency.
Yes. One can easily make lassi without sugar. In fact, traditional lassi is salted and always sugar-free. If you still prefer a sweet lassi without sugar, naturally sweeten it with honey or maple syrup.
While it is best to consume lassi as soon as it is made, if you still need to store it, you may refrigerate it in an airtight container and place the bottle in the coldest part of your refrigerator for up to 2 days.
To make a glass of refreshing rose lassi, blend chilled curd, cold milk, rose syrup, sugar, and a pinch of cardamom until frothy. Once ready, pour it into the serving glasses and garnish with crushed pistachios.
To make chocolate lassi at home, blend chilled curd, cocoa powder, milk, powdered sugar, and condensed milk until smooth. Once done, pour it into a glass, garnish with dark chocolate shavings, and serve chilled.
To make a chocolate swirl lassi, it is ideal to go with chocolate syrup or melted compound chocolate, as it melts smoothly and combines well with the chilled yogurt base.
To make the creamiest lassi, it is best to use high-quality dark chocolate or a premium drinking chocolate powder. One may also use liquid chocolate syrup or melted chocolate blends.
To make a badam milkshake in minutes, blend soaked, peeled almonds with chilled milk, sugar, and vanilla or cardamom until frothy. Once ready, pour it into the serving glass, garnish with some saffron, and serve.
To make a creamy banana milkshake, blend some ripe bananas, milk, and scoops of vanilla ice cream. Also add some cinnamon or a teaspoon of vanilla extract for extra flavor. Blend everything for a few seconds until completely smooth.
To add a chocolatey indulgence to the milkshake, blend some cold milk, cocoa powder, chocolate ice cream, and some chocolate syrup in a blender. Once done, pour into a chilled glass and serve.
For a nutty almond milkshake, blend soaked and peeled almonds with chilled milk, sugar, and some vanilla or cardamom. This energy-boosting treat can be served with ice cream or saffron.
To make an apple milkshake at home, blend the apple with sugar, cinnamon, and a cup of milk until smooth. Add another cup of chilled milk and ice, then blend until frothy and serve.
For a creamy oats milkshake, blend oats, banana, cold milk, and honey or dates. Add a pinch of cinnamon or a spoonful of peanut butter for extra flavor, and blend until perfectly smooth.
To add some chocolatey delight to a banana milkshake, blend peeled banana, milk, cocoa powder, honey, and some ice cubes into a blender until it is smooth and creamy, then pour and serve.
For a perfect chocolate milkshake, use a high-quality semi-sweet chocolate bar, unsweetened cocoa powder, or chocolate syrup. All of them are useful in making a thick milkshake.
A high-quality semi-sweet or dark chocolate chip is often considered a chocolate fudge milkshake. These chocolates melt easily and create a dense, fudgy texture.
To make healthy, nutrient-packed shakes at home, take a liquid base, some frozen fruits for creaminess (banana, apples, berries), and some healthy fat ( peanut butter, oats, chia seeds) and blend everything well. What is Grimace Shake? (This is a McDonald's product)
To make a badam milkshake in minutes, blend soaked, peeled almonds with chilled milk, sugar, and vanilla or cardamom until frothy. Once ready, pour it into the serving glass, garnish with some saffron, and serve.
To make a quick protein shake, blend milk, protein powder, some frozen fruits, peanut butter, honey, and some yogurt. Once well blended, pour it into a glass and serve with ice cubes.
Yes. One can easily store a mango shake in the fridge. Make sure the shake is stored in a sealed, airtight jar or glass bottle. Dairy and fruit can separate over time, so give the shake a good stir or shake before drinking it.
For a simple vanilla shake, blend some vanilla ice cream, whole milk, and vanilla extract in a blender until thick and smooth. Pour into a pre-chilled glass, and top with whipped cream before serving.
To add a chocolatey indulgence to the milkshake, blend some cold milk, cocoa powder, and some chocolate syrup in a blender. Once done, pour into a chilled glass and serve.
For a chocolate-ice cream milkshake, blend some cold milk, cocoa powder, chocolate ice cream, and some chocolate syrup in a blender. Once done, pour into a chilled glass and serve.
For a perfect chocolate milkshake, use a high-quality semi-sweet chocolate bar, unsweetened cocoa powder, or chocolate syrup. All of them are useful in making a thick milkshake.
A high-quality semi-sweet or dark chocolate chip is often considered for a chocolate fudge milkshake. These chocolates melt easily and create a dense, fudgy texture.
Many Indian sweets stay fresh at room temperature for a day or two. However, milk-based sweets like rasgulla, rasmalai, and kalakand should be refrigerated to keep them fresh and safe to eat.
Many Indian sweets are gluten-free, including laddoo made with besan, coconut laddoo, sandesh, rasgulla, kheer, shrikhand, and barfi made without wheat flour. You should always check the ingredients before buying.
The shelf life depends on the type of sweet. Dry sweets usually last for 1 to 2 weeks, while milk-based sweets stay fresh for about 2 to 4 days in the refrigerator.
Yes. Many Indian sweets like laddoo, barfi, and kaju katli can be frozen for a few weeks. You need to store them in airtight containers and thaw them in the refrigerator before serving.
You should keep Indian sweets in airtight containers and store them according to their ingredients. You can refrigerate milk-based sweets, while dry sweets can stay in a cool, dry place away from direct sunlight.
Sweets like dry fruit laddoo, sesame laddoo, peanut chikki, dates barfi, and jaggery-based sweets are some of the healthier choices, especially when they are enjoyed in moderation, and as part of a balanced diet.
Healthy Indian sweets include varieties like dry fruit laddoo, ragi laddoo, dates and nut barfi, peanut chikki, roasted sesame laddoo, and fruit-based desserts. They use natural sweeteners and nutrient-rich ingredients.
Indian desserts are traditionally made for festivals and celebrations, where sweetness is linked to happiness and good fortune. Ingredients like sugar, jaggery, milk, and ghee also give these sweets their rich taste.
You can make no-cook Indian sweets easily by mixing dates, nuts, seeds, coconut, or jaggery. Shape the mixture into laddoos or bars, as per your preference, and chill them until firm before serving.
You can make high-protein Indian sweets by using ingredients like paneer, roasted gram, peanut butter, almonds, pistachios, seeds, and protein-rich pulses. You can also use jaggery or dates instead of refined sugar.
To make almond cookies at home, simply combine pantry staples like almond flour, powdered sugar, egg whites, almond extract, and a pinch of salt. Once the dough is ready, roll it into balls and bake until golden.
To replace eggs in almond cookies, one may use options such as full-fat almond-flavored yogurt, unsweetened applesauce, mashed banana, or a milk-vinegar mixture. These alternatives are perfect for moisture and binding.
Yes. For a batch of no-bake cookies, one can follow the stovetop pan method using a heavy-bottomed pot, the pressure cooker method, or a no-bake recipe in which the cookies are set in the fridge.
To bake a fresh batch of delicious homemade almond cookies, all you need is almond flour, softened butter, powdered sugar, eggs, a pinch of salt, and sliced almonds for that added nutty flavor.
The shelf life of an almond cookie entirely depends on the recipe. While store-bought cookies stay fresh for 3 to 6 months, preservative-free homemade cookies typically last 5 to 7 days at room temperature.
When making almond cookies, people often measure the almond flour incorrectly. This entirely changes the whole recipe. Also, an incorrect fat-to-sugar ratio often results in greasy, thin cookies. puddles.
Homemade almond cookies are all about enjoying the freshness of high-quality ingredients. The commercial ones, on the other hand, are designed to have a longer shelf life with cheap ingredients and preservatives.
To add a fun twist to the classic flavor, one may play around with flavors like espresso, matcha, chocolate, and more. Strawberries and citrusy flavors also pair well with this.
For a perfect chocolatey twist to the almond cookies, always pick premium dark chocolate, as the rich cacao percentage comes up with a slightly bitter flavor that cuts through the nutty flavor.
When it comes to making almond cookies, there is no one best brand in the world. Several commercial brands produce high-quality almond cookies. However, the best almond cookies are always those made in your kitchen.
Making almond croissants is very easy. Start by making the dough, which is fluffy and rich with butter. Take flour, yeast, milk, butter, sugar, and salt to prepare this dough. The dough should be folded and chilled. After baking, the croissants need to be filled with almond cream, sprinkled with sliced almonds, and baked again.
Yes. Eggless Almond Croissant is made with egg-free dough and almond filling made of butter, sugar, almond flour, milk, and vanilla. Be careful with milk; too liquid a filling leads to a soggy croissant.
The recipe starts with preparing the croissant dough shape and cooking it in a heavy-bottomed pot in a covered form over low heat. After that, spread the almond filling and sprinkle it with sliced almonds, and cook covered one more time at low heat in order not to burn the bottom of the croissant.
Main ingredients are flour, butter, yeast, milk, sugar, salt, almond flour, vanilla, sliced almonds, and icing sugar. There are some recipes that involve almond extract to flavor the filling; however, you should not use it much since it will overpower the filling.
Homemade Almond Croissant stays fresh for one-two days at room temperature in a sealed box. In a fridge, it can be stored for four days. Do not keep the croissant uncovered, as it will get dry very quickly.
Mostly, people skip the chilling process of the dough after folding. In such a case, all the butter goes inside the dough without forming layers. It is important not to overfill the croissants with almond filling since the filling can drip during baking.
Homemade Almond Croissants are made from fresh ingredients, and you can have better control over the butter, sweetness, and filling in them. Such croissants taste more crispy and fresh compared to store-bought ones. Do not overbake the pastry.
In order to create a unique taste for your pastry, try to add dark chocolate, raspberry jam, pistachio cream, orange zest, cinnamon, or coffee-flavored almond filling to it. As for the decoration, you can sprinkle it with chopped hazelnuts or toasted coconut flakes. Try not to use too many additional ingredients.
Good dark or semi-sweet chocolate works well with Almond Croissants. Couverture chocolate melts easily for filling and drizzling. Avoid using compound chocolate to get a richer taste.
Preparing Almond Croissants at home often gives the freshest flavor and flakiest texture. If buying one, choose bakeries or brands that use real butter and quality almonds. Avoid products with artificial flavors or overly dry pastry.
To prepare Almond Fudge at home, melt chocolate, condensed milk, and butter, then stir in vanilla and chopped almonds. Pour the mixture into the lined tray and chill until it becomes firm, then cut into squares and serve.
Yes, almond fudge is very easy to prepare without eggs. The standard fudge recipe uses condensed milk and chocolate, not eggs. To make very creamy, simple eggless fudge, just mix 1 cup of almond butter, 1/4 cup of melted coconut oil, and 2 tablespoons of maple syrup.
Yes, making almond fudge is very easy without using the oven. Indeed, the classic thick fudge, which is made with chocolate and condensed milk, can be prepared right on the stovetop, whereas the healthier version of vegan fudge does not involve any cooking at all.
The ingredients of Almond Fudge include chocolate, condensed milk, butter, vanilla extract, and chopped almonds. However, some recipes use almond extract, cocoa powder, sea salt, and roasted almonds as optional ingredients.
The prepared Almond Fudge should be stored in the fridge in an airtight container and will keep fresh for up to two weeks. If you need to store it for longer, the frozen pieces can be kept for up to three months.
Dry and dense Almond Fudge can be a result of overheated chocolate, a long cooking process, and excessive quantity of almonds. Accurate measurement of the ingredients is essential for achieving smooth, creamy Almond Fudge.
In comparison with brownies or chocolate bars, Almond Fudge features a creamy texture, which becomes solid due to chilling, and not the baking process. In addition, the crunchy almonds give Almond Fudge a contrasting texture.
The easy variation of Almond Fudge can be made by using pistachios, walnuts, dried cranberries, orange zest, espresso, caramel, sea salt, or white chocolate. They help create new flavor combinations while keeping the fudge's creamy texture.
Dark, milk, or semi-sweet chocolate is excellent for making Almond Fudge. Besides, couverture chocolate provides an even melt and a silky texture. Moreover, Dairy Milk chocolate makes roasted almonds taste even tastier.
Since there isn't a best brand for Almond Fudge, there are many options among confectionery brands. However, homemade Almond Fudge will taste fresher because one can choose premium chocolate and fresh almonds.
Make a classic anniversary cake by mixing flour, cocoa powder (optional), sugar, baking soda, and salt with eggs, milk, oil, and vanilla. Bake two cakes for layering at 175°C for 35 minutes. Layer with rich chocolate ganache.
Absolutely. To try this eggless version, simply replace the eggs with alternatives like yogurt, applesauce, condensed milk, or a milk-vinegar mixture. Even without eggs, the result is always delicious.
Yes. Try the pressure cooker method. Remove the gasket and the whistle. Add some salt to the bottom. Insert a metal stand and preheat the covered cooker. Next, place the cake tin on the stand and cover for 45 minutes.
An anniversary cake is made of a moist sponge base, creamy layers, and a creamy frosting. It ideally contains ingredients like flour, sugar, butter, leavening agent, milk, flavor maker, and whipped cream.
Keep the cake in an airtight container in the refrigerator for 3-5 days. Refrigeration is compulsory as the cake is frosted. For the best taste and texture, it is also recommended to consume the cake as soon as possible.
An anniversary cake can often become dense and heavy due to overmixing the batter, overbaking the cake, using cold ingredients, and baking at the wrong temperatures. All of these often alter the texture.
While a regular frosted cake is for any other day of the year, an anniversary cake celebrates a milestone. It is often custom-made to symbolize the journey and make the celebration special.
To celebrate anniversaries, one may simply play around with flavors like chocolate, butterscotch, strawberry, or coffee caramel to add a celebratory vibe. The other options can be almond, sea salt, and more.
For a chocolate-flavored anniversary cake, the best option is high-quality couverture dark chocolate or Cadbury Dairy Milk chocolate. The premium-quality chocolates make the celebrations even better.
Be it the fancy restaurants or the cozy cafes and reputed confectioneries, anniversary cakes are made by all. There is no specific commercial brand that can be considered the best for this.
Making Banana cake is quite simple.Just blend mashed bananas with butter, sugar, eggs, flour, baking powder, and vanilla extract, and transfer the batter to a gresed loaf pan. Bake until golden brown. Allow it to cool completely, then serve with or without cream cheese frosting.
Yes. Eggless Banana Cake can be easily made with ripe, mashed bananas mixed with yogurt or condensed milk. These ingredients make easily replace the eggs and make a soft, tasty banana-flavored cake.
Banana Cake can be made without an oven. Just bake the batter in a pressure cooker (without the whistle) or a heavy-bottomed pan, keep a check and remove once the edges turn golden and the center is cooked well.
The main ingredients in Banana Cake include ripe bananas, all-purpose flour, sugar, butter or oil, eggs, baking powder, baking soda, vanilla extract, and a pinch of salt. Also, chopped walnuts for a rich topping.
Banana Cake lasts 2 to 3 days when kept in an airtight box in a cool and dry place. Refrigerated Banana Cake is good for one week.
If your Banana Cake didn't turn out well, you might have overmixed it. Also, the bananas may not be ripe enough, or you baked it for too long. All these issues affect the overall results.
Ripe bananas give Banana Cake natural sweetness and moisture. The natural banana flavor adds taste to a sponge cake. It differs from other dessert types due to its softer texture and compatibility with nuts and cream.
Banana Cake pairs perfectly with various toppings like whipped cream, caramel sauce, chocolate ganache, toasted nuts, banana slices, and even ice cream.
Dark chocolate fits perfectly in a Banana Cake. The fruit sweetness requires such a rich flavor. Also, milk chocolate and even white chocolate will work for decorations and frosting.
It's not worth sticking to one specific brand of Banana Cake. What you need to know about a bakery is whether it uses ripe bananas, butter, and high-quality ingredients. Above all its best to bake one at home.
To try making an easy Bento cake at home, start with a few small 4-inch sponge cakes. Once the cakes are ready, stack them and layer with some buttercream frosting. Add some piped borders and write a sweet message on top.
Yes. To try an eggless bento cake, simply replace eggs with yogurt, condensed milk, and a milk-vinegar mixture. All of these ingredients help bind, and the result is always a soft, fluffy cake.
A Bento cake can also be made in a pressure cooker. Simply prepare the batter in a small 4-inch cake tin, and bake it in a preheated pressure cooker with the metal stand in it for 25 to 35 minutes.
A simple bento cake contains standard baking ingredients like flour, sugar, butter, eggs, flavoring agents, and leavening agents. If it is a chocolate bento cake, then it also contains Cadbury cocoa powder or melted chocolate.
A bento cake typically has a shelf life of 2 to 3 days when refrigerated. It is always recommended to store the cake in an airtight bento box or wrap it tightly in the fridge. This is essential to maintain the taste and texture.
When it comes to making a Bento cake, the most common mistake is frosting or assembling the cake while it is still warm. The heat from the sponge cake often melts the buttercream.
When making a Bento cake at home, it is easier to explore more flavors and types. It always brings in a personal touch like nothing else. Store-bought options, on the other hand, are mass-produced with standard designs and themes.
To add some creative twists to these adorable Bento Cakes, one may explore designs like 3D cakes, photo-printed cakes, poster cakes, and much more to make the near and dear ones happy.
For a chocolatey bento cake, it is ideal to go with Cadbury Dairy Milk or Cadbury Bournville. One may also try some bittersweet baking chocolate bars to add the classic chocolatey twist to the cakes.
Several bakeries and cafes across the world make bento cakes of assorted flavors. There is no one specific commercial brand that is considered the best for manufacturing bento cakes.
To make a batch of blueberry cupcakes at home, simply combine flour, baking powder, salt, powdered sugar, softened butter, eggs, milk, and fresh or frozen blueberries. Fill the cupcake liners with the batter and bake at 175°C for 20 minutes.
To replace eggs in these homemade eggless blueberry cupcakes, one may use plain yogurt, mashed banana, applesauce, silken tofu, or a milk-vinegar mixture for moisture and binding the batter.
To make some no-oven blueberry cupcakes, follow the stovetop method using a large pan or a pressure cooker with a tight lid. Pour the batter into the liners, place them on a greased baking plate kept on a wire rack, and cover to cook.
Blueberry cupcakes are typically made with the standard cake batter ingredients such as flour, powdered sugar, softened butter, eggs, and milk, with fresh or freeze-dried blueberries for the tangy flavor.
When stored in an airtight container at room temperature, the blueberry cupcakes stay fresh for 2-3 days. However, frosted cupcakes are always recommended to be refrigerated. It keeps them fresh for 3-4 days.
Blueberry cupcakes often turn dry, flat, dense, or chewy, mostly because of using excess flour or overmixing the batter. Using wet blueberries also causes trouble, as excess moisture often ruins the balance of the recipe.
A blueberry cupcake is a sweet, fruity, tangy dessert featuring a light, fluffy sponge cake base that melts in the mouth in seconds like no other dessert. Flavored with real blueberries, these are an absolute delight.
To add a fun surprise to the cupcakes, try some buttercream frosting with a dual tone. Some blueberry jam can be injected into the center of the cakes. They can be paired with tangy flavors like lemon or cream cheese as well. Which is the best chocolate for a blueberry cupcake If you think of adding chocolate to a blueberry cupcake, make sure it is semisweet or dark chocolate, as the slightly bitter flavor of dark chocolate cuts through the sweet-tangy flavor of blueberries perfectly.
There is no specific best brand for it, as blueberry cupcakes are made almost everywhere in the world. From fancy bakeries and restaurants to home kitchens and local cafes, many places make delicious blueberry cupcakes.
To make a cup of Bournville hot chocolate at home, heat some full-fat milk in a saucepan over medium-low heat. Add cocoa powder and sugar once it simmers. Turn off the heat, add Bournville chocolate, and stir until it melts and gets creamy.
Yes. In fact, the actual Bournville hot chocolate recipe does not include eggs. Made with Cadbury Bournville chocolate or Cadbury cocoa powder, this naturally eggless hot chocolate is an absolute delight.
Yes. Making hot chocolate does not require an oven anyway. All it takes is mixing some full-fat milk, sugar, cocoa powder/hot chocolate powder, and chocolate over a medium heat in a saucepan and allowing it to thicken enough before serving.
A hot cup of Bournville hot chocolate is all about combining some full-fat milk with Cadbury's hot chocolate mix, melted Cadbury Bournville chocolate, and some sugar. And the result is a thick, creamy, and bittersweet beverage.
It is ideal to consume Bournville hot chocolate immediately after it is made. However, if you need to store it, keep it in a cool place in an airtight container. Refrigerate it if you need to store it for 1-2 days.
Bournville hot chocolate often becomes dry or dense if the ingredients are used in the wrong proportions and not dissolved properly. Also, using milk that is too cold or too hot can make the chocolate curdle as well.
While the other hot chocolates are sweet and creamy, a Bournville hot chocolate is all about cherishing a bittersweet, rich, and intense experience that brings comfort with every single sip.
To explore the slightly tweaked variations of Bournville hot chocolate, one may add some try adding some peanut butter, vanilla, espresso, or peppermint extract for a flavor twist. This is enjoyed with some mini marshmallows as well.
Using Bournville hot chocolate, one may try baking some desserts like hot chocolate coffee, hot chocolate cake, hot chocolate brownies, and much more. For a thick and creamy experience, add a dash of cornstarch to the hot chocolate.
Known for its richness and intensity, Bournville hot chocolate can always become a strong ingredient for baking chocolate-based cakes, cookies, brownies, and more. With its cocoa solids, it perfectly boosts the flavor of the desserts.
To make butter cookies at home, cream some softened butter and powdered sugar, and mix in flour. Now, shape the dough into a log, chill it well, slice it into small discs, and bake at 180°C for 15 minutes.
Yes. In fact, the most popular butter cookies don't even need eggs, as they rely largely on butter. To make eggless butter cookies, simply combine some softened butter, sugar, and flour, and bake the dough at 180°C for 15 minutes.
If there's no oven, you may turn a heavy-bottomed pan into a makeshift oven. Place a wire rack on the pan and cover it with a tight lid for preheating. The baking tray with scooped cookie dough is then cooked on it for 20 minutes.
To make some butter cookies, all you need is some unsalted butter, granulated or powdered sugar, all-purpose flour, egg (optional), and vanilla extract. A pinch of salt is also added in many recipes to balance the sweetness.
When stored at room temperature, butter cookies stay fresh for 5-7 days. Refrigeration keeps them fresh for 1-2 weeks. Freezing is required if you need to store them for a few months.
The most common mistake for butter cookies is using the wrong butter temperature. Using melted butter makes a thin and greasy cookie dough, while cold butter prevents even mixing.
While store-bought butter cookies are designed for longer shelf life with preservatives and cheap ingredients, homemade butter cookies are filled with rich ingredients and authentic flavors.
To add a creative twist to the simple and easy butter cookies, one may play around with flavors like chocolate, almond, butterscotch, and more. One may also try swapping vanilla with espresso and serve it with tea/coffee/milk.
For a chocolate butter cookie, the best option would be a high-quality bittersweet or dark chocolate. Alternatively, one may also use Cadbury Dairy Milk chocolate for a sweeter taste.
There is no specific one best brand that manufactures butter cookies. Several commercial brands are available that maintain the industry standard. However, the best ones are often available at several cafes and bakeries.
All that making a flaky butter croissant at home takes is mixing a yeast dough, spreading cold butter inside, laminating the dough by rolling and folding it multiple times, and then shaping, proofing, and baking it.
Eggless butter croissants are quite popular across the world. To try this eggless version, simply replace the egg wash with a mixture of milk and maple syrup. This ensures proper browning during baking.
If there is no oven, bake the butter croissant using the classic stovetop method. Prepare the flaky dough layers, shape the croissants, and cook them in a heavy-bottomed pot with a wire rack over low-to-medium heat.
A classic butter croissant is made with ingredients like flour, water, milk, yeast, sugar, eggs, and salt, and a generous amount of high-quality unsalted butter. For flavor variations, one may also use chocolate.
When kept in an airtight container, the butter croissants remain fresh at room temperature for 2-3 days. It is better to avoid refrigeration, as it often ruins the texture. To keep them in the freezer, wrap them tightly in plastic wrap.
A butter croissant often does not turn out right for reasons like inaccurate temperature control and using warm butter. While laminating the croissants, if the butter is warm, it melts into the dough instead of creating separate flaky layers.
A classic butter croissant is cherished for its light, airy, and flaky texture that melts in the mouth right away. Made with a special dough, it carries a savory flavor profile that relies on steam.
To serve a butter croissant in a fun and creative way, one may turn it into breakfast boats or simply dip it in garlic herb butter, melted cheese, or some ooey-gooey melted chocolate.
For a chocolate butter croissant, it is always best to use premium dark chocolate batons that contain a high cocoa percentage. The extra cocoa butter here helps them melt into a smooth, gooey center.
When it comes to making flaky, airy, buttery croissants, there is no one best brand in the world. In fact, in some places, it is the local bakeries that serve the best butter croissants.
Butterscotch Cake can be made using a vanilla sponge. Bake the sponge cake, let it cool, and layer it with butterscotch whipped cream and sauce. Add the crispy butterscotch pralines, then refrigerate the cake.
Butterscotch Cake without eggs may contain yogurt, condensed milk, or buttermilk instead of eggs. Keep the rest of the recipe the same and bake the cake. Allow it to cool and decorate it.
A no-oven method to make Butterscotch Cake involves baking the sponge in a preheated pressure cooker without a whistle, or in a heavy-bottomed pan.
Ingredients for the classic Butterscotch Cake include all-purpose flour, sugar, butter, eggs, baking powder, milk, vanilla essence or extract, butterscotch essence or sauce, whipped cream, and butterscotch pralines.
Butterscotch Cake will stay fresh for 2 to 3 days when stored in an airtight container in the refrigerator. As the cake contains whipped cream, it shouldn't be left at room temperature.
Possible reasons for the bad taste or texture of your Butterscotch Cake are an overbaked sponge, an overmixed batter, or too much butterscotch essence. Use the correct amounts of ingredients and allow proper cooling before frosting.
Butterscotch Cake combines buttery caramel flavor and crispy pralines with soft sponge and whipped cream. The contrast in cake textures makes the taste richer and more special than that of common celebration cakes.
Butterscotch Cake may be offered as cupcakes, cake jars, small slices, or dessert cups. For decoration, use extra butterscotch sauce, caramel popcorn, crushed nuts, or vanilla ice cream.
To achieve rich flavor, use high-quality milk chocolate in Butterscotch Cake, as its flavor is similar to caramel. Dark chocolate can also be used for contrasting decoration.
Instead of choosing the brand of Butterscotch Cake, choose the bakery that prepares fresh sponges, whipped cream, and fresh butterscotch pralines. However, preparing one at home is always the best option.
To make this at home in just a few minutes, all you need is some Cadbury cocoa powder and some hot milk to create a smooth paste in your mug. Then, pour the rest of your hot milk over the paste, stir well, and serve.
Yes. In fact, most of the hot chocolate recipes do not include eggs. Made with Cadbury cocoa powder, this naturally eggless hot chocolate is an absolute delight when served thick and warm.
Yes. Making hot chocolate does not require an oven anyway. All it takes is mixing some full-fat milk, sugar, Cadbury cocoa hot chocolate powder, and chocolate over a medium heat in a saucepan and allowing it to thicken enough before serving.
A Cadbury hot chocolate consists of the flagship cocoa hot chocolate powder of the brand, some warm milk, sugar, and cocoa powder. When blended perfectly, it comes up with the perfect Cadbury taste.
When refrigerated in an airtight container, a Cadbury hot chocolate drink stays fresh for 3 to 4 days. If left out at room temperature, it is better to consume it within 2-3 hours.
Cadbury cocoa hot chocolate can go wrong for many reasons. The most common reasons include clumped-up cocoa powder, using excess cocoa powder, or following the wrong liquid-to-powder ratio.
Cadbury cocoa hot chocolate is much like a dessert in a cup or glass. With its Cadbury chocolate-like taste profile, unlike any other dessert, it instantly creates a sweet, chocolate drink by simply stirring it into hot milk or water.
To add some more fun to the Cadbury cocoa powder hot chocolate, one may serve it with fun toppings like marshmallows, whipped cream, a dusting of cinnamon, and sprinkles.
Going beyond a simple hot chocolate, one may also try some smooth and decadent iced chocolate, a chocolate mug cake, a hot chocolate brownie, or stir it into the morning coffee to turn it into a mocha latte.
Known for its richness and intensity, Cadbury cocoa hot chocolate can always become a strong ingredient for baking chocolate-based cakes, cookies, brownies, and more. With its cocoa solids, it perfectly boosts the flavor of the desserts.
To make Cadbury Silk hot chocolate at home, heat whole milk in a saucepan over medium-low heat. Once it simmers, add cocoa powder and sugar. Turn off the heat, add Cadbury Silk chocolate, and stir until it melts and gets creamy.
Yes. This Cadbury Silk hot chocolate recipe does not require eggs. Made with Cadbury Silk chocolate or Cadbury cocoa powder, this eggless hot beverage chocolate is an absolute delight that serves comfort like nothing else.
Yes. Making hot chocolate does not require an oven anyway. All it takes is mixing milk, sugar, cocoa powder, and chocolate over a medium heat in a saucepan and allowing it to thicken enough before serving.
Cadbury Silk hot chocolate is made of Cadbury Dairy Milk Silk bar combined with hot milk. Unlike the regular hot chocolate powders, the silky texture of the chocolate gives you an ultra-thick, rich, and creamy experience.
It is ideal to consume a Cadbury Silk hot chocolate immediately after it is made. However, if you need to store it, keep it in a cool, dark place in an airtight container. Refrigerate it if you need to store it for 1-2 days.
A Cadbury Silk Dairy chocolate can become dry or dense if the ingredients are used in excess and not dissolved properly. Also, using liquid milk that is too cold or too hot can make the chocolate curdle as well.
A Cadbury Silk hot chocolate, as the name suggests, is a silky, creamy, thick, and smooth beverage. While the regular hot chocolate cocoa mixes use standard cocoa powder for a thin texture, Cadbury Silk melts into a creamy delight.
To try some of the variations of the Cadbury Silk hot chocolate, one may try it with caramel, coffee, peppermint, or peanut butter for a classic flavor twist. These can be enjoyed with some freshly whipped cream as well.
Using this Cadbury Silk hot chocolate, one may add more intensity to several cakes, brownies, cookies, or other dessert recipes. The creamy and rich texture of the chocolate simply elevates the experience like nothing else.
Cadbury Hot Chocolate powder is often considered a secret weapon in baking desserts. Replace the regular cocoa powder with this for a rich and creamy makeover of your sweet treats.
Caramel Croissants are very easy to make. Prepare laminated dough with flour, butter, yeast, milk, sugar, and salt. Fill it with thick caramel sauce, bake, and don't use runny caramel.
An eggless Caramel Croissant replaces egg wash with milk or cream. Thick homemade caramel adds rich flavor, while avoiding watery caramel helps keep the pastry crisp and flaky.
First, place the shaped croissants into the greased pan, cover them, and cook them over low flame in a heavy-bottom pan or pressure cooker. After adding thick caramel sauce, start rolling and cook over low heat.
Flour, butter, yeast, milk, sugar, salt, and thick caramel sauce are the main ingredients. Sometimes recipes ask for vanilla, sea salt or sliced almonds. Don't use thin caramel because it will soak into the dough.
Caramel Croissant, which is prepared at home, will stay fresh for one-two days if stored at room temperature in a covered airtight container. It can also last a bit longer if refrigerated.
One of the mistakes people can make while preparing Caramel Croissants is using too much filling or not leaving the dough to chill. Excessive filling can leak during baking; warm butter can decrease croissants' flakiness.
Homemade Caramel Croissants give the option to have fresh layers of butter and to adjust the caramel's sweetness. They usually taste lighter than store-bought Caramel Croissants. Don't overbake them since they will become crispy but dry.
Caramel Croissants can be combined with dark chocolate, sliced bananas, toasted pecans, sea salt, cinnamon or even apple slices. Chocolate can be added in form of a drizzle as well. Don't use excessive filling.
Dark or semi-sweet chocolate can be used for Caramel Croissants since they complement each other perfectly. Couverture chocolate is great for filling and for drizzling over Caramel Croissants. Avoid using low-quality compound chocolate.
It is better to make Caramel Croissants at home; however, when you buy one, look for a bakery which uses real butter and caramel. Avoid artificial caramel flavor or overly crispy layers.
To make a fresh batch of caramel cupcakes at home, combine softened butter, brown sugar, white sugar, eggs, vanilla, flour, and milk. Fill the liners and bake the batter at 180°C for 20 minutes.
Yes. To try this eggless version of caramel cupcakes, simply swap eggs with substitutes like yogurt, applesauce, flax egg, or milk-vinegar mixture to add moisture and binding.
Yes. To do that, one may try the stovetop method using a large pan or a pressure cooker with a tight lid. Pour the batter into the liners, place it on a greased baking plate kept on a wire rack, and cover to cook.
A sweet caramel cupcake usually contains familiar ingredients such as flour, softened butter, powdered brown and white sugar, eggs, vanilla, salt, and milk. Some recipes also include a creamy buttercream frosting.
To store them at room temperature for 2-3 days, keep caramel cupcakes in an airtight container. Refrigerating often keeps them fresh for up to 5 days. Freezing is not recommended as it dries out the cakes.
A caramel cupcake often turns out dry or dense due to common baking mistakes like overmixing the batter, overbaking it, adding excess flour, using an expired leavening agent, or adding excess moisture.
While other cakes are sweet or chocolatey, here the flavor comes from the toasty sugar. It pairs perfectly with the buttery, caramelized sponge.
To explore some varieties of the caramel cupcake, one may add a gooey, creamy center. The cupcake can be topped with buttercream frosting and a crunchy praline-like topping.
For a caramel cupcake, a bittersweet dark chocolate is the best option, as it complements the sweet, sugary, toasty flavor of the cupcakes and stops it from becoming too sugary.
Several cafes and restaurants make delicious caramel cupcakes with cream frosting. There is no specific commercial brand that can be considered the best for this.
To make caramel fudge, combine butter, sugar, eggs, flour, caramel sauce, vanilla, and chocolate, and blend it well. Chocolate chips can be added as per your choice, poured into a baking tin, and baked until set. After cooling it, you will get delicious fudge.
Eggless Caramel Fudge requires yogurt, condensed milk, or applesauce instead of eggs in the batter. Mix all the ingredients into a batter, bake until set, then cut into pieces after it has cooled completely.
To make Caramel Fudge without using an oven, the baking batter can be placed in a preheated pressure cooker or in a heavy-bottomed pan with a cover over low flame. Allow the fudge to cool completely before slicing for clean, even pieces.
The main ingredients of Caramel Fudge include flour, butter, sugar, eggs, caramel sauce, chocolate, vanilla extract, baking soda, and salt. In some recipes, you can also use chocolate chips, sea salt,t and nuts.
The shelf life of Caramel Fudge is three to four days when stored in an airtight container at room temperature. Its freshness will last for one week when refrigerated and almost a month if frozen.
Your Caramel Fudge may turn out dry due to overbaking and a high proportion of flour. Thin caramel sauce, improper measurements, and overmixing may ruin the texture of the fudge.
Caramel Fudge differs from other desserts due to its unique caramel flavor and dense, moist texture. As it is neither an airy cake nor a crispy cookie, Caramel Fudge offers a soft bite and a chewy center.
Caramel Fudge can be served with ice cream, caramel sauce, whipped cream, roasted nuts, and fresh fruits. This dessert can be cut into cubes and served on a dessert platter, with melted chocolate drizzled over the top.
Dark, milk, and baking chocolate are best for Caramel Fudge, and couverture chocolate can also be used; it melts easily and evenly in the batter, providing rich flavor and a smooth texture without overpowering the caramel.
Many bakeries and confectionery brands prepare Caramel Fudge, but homemade Caramel Fudge tastes fresh. To make it more delicious, high quality baking chocolate, real butter, and homemade caramel should be used.
Homemade Carrot Cake can be made with grated carrots, flour, sugar, butter or oil, eggs, baking powder, cinnamon, and vanilla extract. Prepare the batter and then bake to perfection. It can be frosted with cream cheese frosting if required.
Yes. In eggless Carrot Cake, eggs can be substituted with yogurt, condensed milk, or a vinegar-and-baking-soda mix to ensure the cake is soft and moist as the egg version.
Yes. Carrot Cake can be made even without an oven, and one can simply cook the batter in a preheated pressure cooker without a whistle or in a heavy-bottomed pan. Keep the rest of the process the same.
The ingredients of a classic Carrot Cake include all-purpose flour, grated carrots, sugar, butter or oil, eggs, baking powder, cinnamon, vanilla extract, and a pinch of salt, along with walnuts, raisins, and cream cheese frosting.
Unfrosted Carrot Cakes can be stored for two days at room temperature in a closed box; however, frosted cakes should be kept refrigerated for 5 days or frozen.
Usually, Carrot Cake becomes dry and dense due to the fact that its batter is overmixed, there is too much flour, and it is baked for too long. Freshly grated carrots will prevent such a problem.
Carrot Cake is different from the rest of dessert options since it has grated carrots, which provide additional moisture and texture to the cake. Also, warm spices like cinnamon and popular cream cheese frosting give Carrot Cake a rich taste.
There are many types of variations of Carrot Cake, such as Carrot Cake prepared with walnuts, pecans, raisins, pineapple, orange zest, and coconut. It can be cooked in the form of cupcakes, loaf cakes, tray bakes, or layer celebration cakes with cream cheese frosting.
It is believed that high-quality white chocolate is the best choice to use when making Carrot Cake since it goes well with the warming spices as well as cream cheese frosting. Milk chocolate and dark chocolate can be used for decorating.
Not all bakeries bake carrot cake. Instead of looking for the best brand, it is recommended to look for the bakery that produces freshly grated Carrot Cake with real cream cheese frosting. However, it is always better to bake one at your home.
Preparing a cheesecake brownie at home is all about making a smooth and fudgy chocolate brownie and a creamy smooth cheesecake. The magic happens when both are swirling together before baking.
To make sure the cheesecake brownie is eggless, replace eggs with yogurt in the brownie and mix it with butter, cocoa, sugar, and flour. Separately, whip softened cream cheese with sugar, vanilla, and cornstarch, and swirl the two batters together.
For a no-oven method, it is best to go with store-bought brownies for the crumbly base and some creamy cheesecake mixture on top made with cream cheese, sugar, and melted chocolate.
A cheesecake brownie contains ingredients like butter, chocolate, sugar, eggs, flour, cocoa powder, salt, and cream cheese. The cheesecake layer is made from cream cheese, sugar, an egg, and vanilla extract.
When refrigerated in an airtight container, the cheesecake brownies stay fresh for 5-7 days. As they contain dairy-based ingredients, it is never recommended to leave them at room temperature.
The perfection in cheesecake brownies comes from balancing two completely different batters. Often, factors like overbaking, using cold cream cheese, or over-mixing the cheesecake layer cause issues like cracking or a dry, crumbly texture.
Like no other dessert, cheesecake brownies are a perfect mixture of two different taste profiles. Here, the creamy, tangy cream cheese meets the soft and fudgy brownies to create a perfect contrast.
To add more fun to them, one may serve this gourmet dessert with some toppings like sea salt, chocolate shavings, or fresh fruit. Alternatively, one may also plate the dessert with berry and chocolate sauce.
A high-quality bittersweet or semi-sweet dark chocolate is often considered the best for cheesecake brownies. The rich cacao content lends a deep, rich chocolate flavor that balances well with the tangy cheesecake.
Several bakeries, cafes, and restaurants across the world bake cheesecake brownies. And given the popularity of the dessert, all of them taste delicious. There is no one specific commercial brand that is considered the best for this.
A chocolate banana bread is filled with the natural sweetness of bananas and the chocolatey indulgence of cocoa powder and chocolate chips. Unlike any other dessert, this one brings a moist and soft comfort to the mouth.
For this, you need to mash bananas and mix them with eggs, sugar, butter, flour, cocoa powder, baking soda, and chocolate chips. Pour the batter into a greased loaf pan and bake at 175°C for an hour.
To make chocolate banana bread at home from scratch, you need some overripe bananas, all-purpose flour, baking soda, unsweetened cocoa powder, butter, sugar, eggs, chocolate chips, a loaf pan, and an oven.
Yes. It can be easily refrigerated for a week. For longer storage, for 3-4 months, freezing is the most effective method. However, make sure the breads are wrapped tightly in plastic wrap and aluminum foil.
The traditional recipe is not exactly healthy, as it contains flour, sugar, and butter. However, if te ingredients are tweaked with healthy, plant-based alternatives, then it can be turned into a healthy dessert.
To make eggless chocolate banana bread, simply replace each egg with ¼ cup of yogurt for moisture and a tender crumb. Keep the rest of the ingredients intact and bake the batter in a preheated oven.
Yes. Chocolate banana breads are often made for parties and celebrations. With the soft and moist texture and the sweet chocolatey taste, it wins everyone's heart. It is perfect for a brunch or a snack party,
A good-quality banana bread is easily available across local bakeries and online grocery platforms. The local bakeries often offer healthier, whole-wheat variations. However, it is always best to bake some at home.
While several commercially available chocolate brands produce high-quality chocolate, chocolate chips, and cocoa powder, Cadbury is indeed one of the most popular options that people love for baking.
For the best quality chocolate chip banana bread, it is often recommended to use semi-sweet or bittersweet chocolate chips to balance the flavors perfectly. It is best to use mini chips, as they are distributed evenly.
To bake a batch of chocolate chip cookies at home, whisk flour, baking soda, salt, softened butter, sugar, brown sugar, eggs, vanilla, and some chocolate chips. Now, bake the cookie dough at 190°C for 10 minutes.
To do this, simply combine butter, sugar, flour, milk, baking soda, and some applesauce or yogurt (to replace eggs). Even without eggs, these cookies will have a gooey center and crispy edges.
To do this, a heavy-bottomed pan is turned into a makeshift oven. A wire rack is placed on it and covered with a tight lid for preheating. The baking tray with scooped cookie dough is then cooked on it for 20 minutes.
The classic chocolate chip cookies simply combine the pantry staples like all-purpose flour, butter, granulated white and brown sugar, eggs, vanilla extract, baking soda, salt, and chocolate chips.
If kept in an airtight container at room temperature, the cookies last for 3 to 5 days. Refrigeration keeps it fresh for up to 2 weeks. Freezing is needed if you want to store them for 2 to 3 months.
Chocolate chip cookies can go wrong for several reasons. The most common mistakes include using melted or overly warm butter, measuring the flour incorrectly, skipping chill time, or overcrowding the baking sheet.
A chocolate chip is cherished for that perfect balance of water, fat, and sugar. With a gooey center and crispy edges, it serves an unmatched level of comfort with every single bite.
Chocolate chip cookies are extremely versatile in nature, which makes it easier to pair them with several desserts. You may serve it as a cookie and ice cream sandwich, a parfait base, a cheesecake base, or some fun topping on cakes.
Cadbury chocolate bars and chocolate chips are widely used in making chocolate chip cookies. Known for a milky sweet taste and smooth texture, Cadbury chocolate lends a perfect balance of taste and texture.
While several commercial brands make chocolate chip cookies, Cadbury Chocobakes Choco Chip Cookies are surely one of the best. Here, the crunchy cookies are packed with milk chocolate chips.
Chocolate cinnamon rolls are simple yet a chocolicious and decadent version of the soft and pillowy regular cinnamon rolls. Made with cocoa powder, semi-sweet chocolate, brown sugar, flour, yeast, and cinnamon, these are simply delicious.
To make chocolate cinnamon rolls at home, simply mix a cocoa-infused yeast dough with melted chocolate, cinnamon, and brown sugar. Roll it out, bake it at 180°C, and top it all with a smooth chocolate glaze.
For these delicious chocolate cinnamon rolls, all you need is some flour, yeast, milk, eggs, sugar, butter, cocoa powder, cinnamon powder, and chocolate chips. Often these are served with a chocolate glaze.
When kept at room temperature, they last for 2 to 3 days. Refrigeration keeps them fresh for a week. For longer storage duration, freezing is the option. Make sure they are always stored in an airtight container.
Regular chocolate cinnamon rolls are not exactly healthy, as they contain chocolate, butter, flour, and sugar. However, they can be turned into a healthy recipe by using healthy and plant-based ingredients.
While it entirely depends on the specific recipe, ingredients, and the size of the cinnamon rolls, one standard chocolate cinnamon roll typically contains anything between 350 and 450 calories.
Yes. Eggless chocolate cinnamon rolls are very easy to make. To maintain the soft, fluffy texture even without eggs, you need to focus on the rich yeast dough enriched with yogurt and butter.
Be it a birthday, a holiday party, a weekend brunch, or winter celebrations, these chocolate cinnamon rolls are perfect for all of them. The rich, soft, and moist texture and the chocolatey taste make them so delicious.
Whether you are storing them at room temperature, in the refrigerator, or in the freezer, make sure they are always placed in an airtight container. For freezing, make sure the rolls are wrapped in plastic and aluminum foil.
While several commercially available chocolate brands produce high-quality chocolate and cocoa powder, Cadbury is indeed one of the most popular options that people love for baking cinnamon rolls.
To make the richest chocolate cinnamon roll filling, it is ideal to use high-quality bittersweet chocolate, couverture chocolate, or premium baling chocolate bars. All of them are perfect for the richest filling.
A chocolate crepe is nothing but a chocolicious twist to the traditional French crepe. With a chocolatey exterior and a creamy, chocolatey filling, these crepes melt in the mouth right away.
To make chocolate crepes from scratch at home, you need some simple ingredients like eggs, milk, water, vanilla, flour, sugar, cocoa powder, and melted butter. Once the batter is ready, let it rest for 15 minutes and then cook in a non-stick pan.
To make chocolate crepes from scratch, you will need a few simple pantry staples like eggs, milk, water, vanilla, flour, sugar, cocoa powder, and melted butter. For a creamy, chocolatey filling, you may use melted chocolate.
Yes. One can easily refrigerate or freeze chocolate crepes for later. IN the refrigerator, they last for 3 to 5 days. Freezing is ideal for long-term storage. However, make sure they are always kept in an airtight container.
The popular chocolate crepe recipe is not ideally healthy, as it contains chocolate, sugar, butter, and flour. However, with plant-based and healthy alternatives to these ingredients, this recipe can be turned into a healthy one.
For an eggless chocolate crepe, replace eggs with yogurt for moisture and binding. One may also use some mashed bananas. To make sure the crepes stay pliable, allow the batter to rest for 10 minutes.
Yes, chocolate crepes are highly suitable for parties and celebrations. Made in just a few minutes, these chocolate crepes make sure you serve delicious desserts without spending much time in the kitchen.
To make chocolate banana crepes, whisk some flour, eggs, milk, water, cocoa powder, sugar, melted butter, and a pinch of salt. Once the batter is rested, cook it in a greased skillet and fill with sliced bananas and melted chocolate.
While several commercially available chocolate brands produce high-quality chocolate and cocoa powder, Cadbury is indeed one of the most popular options that people love for making chocolate crepes.
For that perfect creamy chocolate filling, it is best to use semisweet or bittersweet couverture chocolate. Alternatively, one may also use a premium creamy chocolate-hazelnut spread for a delicious experience.
A chocolate croissant is a modern chocolatey twist on the elegant French 'pain au chocolat'. Made with the same yeast-based buttery, flaky dough, this one also features some chocolatey indulgence at the heart of it.
Start by making the flaky puff pastry and refrigerating it. Next, thaw it and roll it out into a large rectangle. Cut it into smaller triangles, place a few chocolate batons in each, and roll it up. Add the egg wash and bake at 200°C for 15 minutes.
The main ingredients for a perfectly flaky and chocolatey chocolate croissant include flour, butter, semi-sweet or dark chocolate, milk, sugar, yeast, and salt, with an egg wash for a golden, glossy finish.
To store baked chocolate croissants at room temperature for 1-2 days, pack them in an airtight container. Refrigeration keeps them fresh for 5 days. Freezing is the option for longer storage duration.
It entirely depends on the size and type of croissant. However, a standard chocolate croissant typically contains about 250-350 calories. If the ingredients are swapped for plant-based counterparts, the calorie count decreases.
To bake the croissant without the egg wash, simply take a yeast-leavened dough. Make sure it is laminated with butter and wrapped around a chocolate filling. Instead of egg, brush it with dairy-based milk before baking.
To make mini chocolate croissants, simply thaw store-bought puff pastry and roll it out. Cut it into triangles, place a small piece of chocolate, and roll up tightly. Bake them at 200°C until golden. How to make chocolate croissants at home? (repeated question)
Cadbury is one of the most popular chocolate brands for baking desserts. Be it the milk chocolate Cadbury Dairy Milk or the dark chocolate Bournville, both are perfect for the chocolate croissant.
For a perfect chocolate croissant, dark chocolate or semi-sweet chocolate batons are the best options. Designed specifically for baking, they hold their shape without melting completely.
To make some ooey-gooey chocolate-filled cupcakes at home, simply whisk some flour, cocoa powder, powdered sugar, salt, baking powder, softened butter, milk, vanilla essence, and eggs.
Yes. As delicious as the regular ones, these eggless cupcakes replace eggs with alternatives such as yogurt, applesauce, mashed banana, flax egg (flaxseeds and water), or a milk-vinegar mixture.
To opt for the no-oven version, one may try the stovetop method using a large pan or a pressure cooker with a tight lid. Pour the batter into the liners, place it on a greased baking plate kept on a wire rack, and cover to cook.
A chocolate-filled cupcake typically includes standard ingredients such as flour, cocoa powder, powdered sugar, baking powder, salt, softened butter, milk, vanilla essence, and eggs.
When stored in an airtight container at room temperature, these cupcakes stay fresh for 2-3 days. Refrigerating often keeps them fresh for up to 5 days. Freezing is not recommended as it dries out the cakes.
While baking these chocolate-filled cupcakes, the most common mistake is injecting too much filling. This makes the cakes heavy. It causes them to crack and turn soggy.
While the store-bought ones focus on longer shelf life and rely on preservatives, the homemade chocolate cupcakes are filled with quality ingredients and a measured amount of sugar.
To add a creative twist, these cupcakes can be served with some vanilla buttercream frosting. It creates a perfect contrast of colors. One may also top it with some chocolate ganache and choco chips.
For a perfect chocolate-filled cupcake, it is ideal to go with semisweet dark chocolate or couverture chocolate, as the high cocoa content brings in the desired taste, flavor, and texture like nothing else.
A chocolate-filled cupcake is one of the most common and most loved cupcake options in the world of desserts. There is no specific commercial brand that can be considered the best for this.
To make chocolate lassi at home, blend chilled curd, cocoa powder, milk, powdered sugar, and condensed milk until smooth. Once done, pour it into a glass, garnish with dark chocolate shavings, and serve chilled.
Chocolate Lassi is naturally eggless. All you need is the other ingredients, such as chilled curd, cocoa powder, milk, powdered sugar, and condensed milk. Blend them well, garnish with some chocolate syrup or shavings, and serve.
Yes. Making lassi does not involve any kind of oven. It is a chilled, dairy-based, refreshing drink that solely relies on mixing, blending, proper chilling, and garnishing of ingredients before serving.
Chocolate lassi includes ingredients like chilled curd, cocoa powder, milk, powdered sugar, and condensed milk until smooth. Some recipes also include chocolate syrup or dark chocolate shavings.
While it is best to consume chocolate lassi as soon as it is made, if you still need to store it, you may refrigerate it in an airtight container and place the bottle in the coldest part of your refrigerator for up to 2 days.
Chocolate Lassi turns dry or dense if there is no balance between the liquid and other ingredients. At times, cocoa solids and sugar in the chocolate also clump together. The dry and dense texture also comes if the yogurt is too old.
Chocolate lassi perfectly blends the chocolatey indulgence with the North Indian dairy delight. While the other desserts are mostly baked or only chocolate-based, this one is a perfect Indo-Western beverage that helps you stay cool.
A classic lassi can be easily paired with several other flavors like strawberry, mango, coffee, caramel, and more. While it tastes delicious on its own, adding more flavor twists always makes it better.
While there is no specific best chocolate brand for lassi, Cadbury indeed is one of the most popular brands in India. The smooth, creamy, milky Dairy Milk or Bournville dark chocolate is perfect for lassi.
Be it a local lassi shop or a fancy restaurant, several places make delicious chocolate lassi. There is no specific commercial brand that can be considered the best for this.
To make coconut cookies at home, first cream softened butter and sugar. Next, mix in flour, desiccated coconut, a splash of milk, and an egg. Now, scoop the dough onto a baking sheet and bake at 180°C for 15 minutes.
To replace eggs in coconut cookies, one may go with options like full-fat coconut yogurt, unsweetened applesauce, mashed banana, or a milk-vinegar mixture. These alternatives are perfect for moisture and binding.
For this, one may try the pressure cooker method. Add a layer of salt to the bottom, insert a metal stand, and cover it for preheating. Place the baking tin on the stand, cover, and cook for 15 minutes.
To make a perfect batch of homemade coconut cookies, all you need is some pantry staples like desiccated coconut, flour, butter, sugar, baking soda, eggs, milk, vanilla extract, and a pinch of salt.
When stored at room temperature in an airtight container, coconut cookies typically last 3 to 7 days, whereas refrigeration keeps them fresh for 3 weeks. Freezing is needed if you need to store them for 2-3 months.
Flat, greasy, or dry cookies usually come from incorrect measurements, as coconut cookies are sensitive to measurement. The other reasons include the wrong fat-sugar ratio, the wrong butter temperature, and the wrong oven temperature.
Coconut cookies carry a classic tropical flavor like no other dessert. The shredded or desiccated coconut brings in the classic chewy texture and a nutty taste. Moreover, the coconut takes care of the natural fat and moisture levels as well.
These delicious coconut cookies can be served with warm chai, tropical ice cream, or melted dark chocolate. Whether you dip them in melted chocolate or sandwich them with ice cream, they taste simply delicious.
For coconut cookies, it is often recommended to use semi-sweet or dark chocolate, as it perfectly cuts through the sweetness of the coconut and creates a balanced flavor and texture.
It is difficult to highlight only one best brand, as several commercial brands produce high-quality coconut cookies. However, the best coconut cookies are always those made in your kitchen.
An easy homemade Coffee Cake recipe calls for a batter made with flour, sugar, butter, eggs, baking powder, milk, vanilla extract, and either coffee or coffee grounds. Baked at the righ tempreature, served either plain or frosted.
Yes. Eggless Coffee Cake uses yogurt, condensed milk, or vinegar and baking soda instead of eggs. They provide softness, moisture, and a good coffee flavor.
Baking Coffee Cake without an oven involves baking the batter in a preheated pressure cooker without the whistle, or in a heavy-bottomed pan. You can even bake a coffee cake in a steamer.
All-purpose flour, sugar, butter/oil, eggs, baking powder, milk, coffee powder/coffee, vanilla extract, and a little bit of salt are used to make a classic Coffee Cake. Some add crumb topping as well.
Coffee Cake kept in an airtight container has a shelf life of 2 to 3 days at room temperature. It will last one week refrigerated and one month, if frozen.
Using too much coffee powder or mixing the batter excessively is a common mistake when preparing Coffee Cake. Measuring the ingredients properly and gently mixing the batter makes it soft and well-balanced.
Homemade Coffee Cake provides fresh taste and adjustability in sweetness and coffee flavor. Store-bought Coffee Cake offers convenience but contains preservatives and artificial flavors.
Coffee Cake tastes delicious with such add-ons as chocolate chips, walnuts, caramel, cinnamon crumble, hazelnuts, or mocha frosting. It can be baked as cupcakes, a loaf cake, a layer cake, or mini coffee muffins.
Dark chocolate is the best match for Coffee Cake as it complements the strong coffee flavor. Using milk chocolate gives the Coffee Cake a sweeter taste. White chocolate suits best for decorations.
Rather than focusing on the brand, it would be better to consider the bakery that prepares Coffee Cake using real coffee, fresh butter, and high-quality ingredients. However, pre n paring a fresh coffee cake at home is always better than getting from a store.
To make coffee cookies at home in under 30 minutes, simply combine some melted butter, brown sugar, an egg, coffee powder, flour, and some chocolate chips. Scoop the dough into balls, chill for 10 minutes, and bake for 12 minutes
Yes. To try this eggless version of coffee cookie, simply replace unsweetened applesauce or a ground flaxseed and water mixture. These binders always make sure the cookies are incredibly soft and chewy even without an egg.
To make coffee cookies without an oven, one may follow the stovetop method using a large pan with a lid. Make the cookie dough, shape it into small balls, place it on a greased baking plate, and cover to cook.
A coffee cookie dough usually contains ingredients like flour, butter, sugar, egg, coffee powder, and some chocolate chips. To add a subtle chocolatey indulgence, one may also add some melted chocolate.
A coffee cookie typically lasts for 3 to 7 days at room temperature when kept in an airtight container. Refrigeration keeps it fresh for 2 to 3 weeks. To avoid dryness, freezing is not recommended for these cookies.
While baking coffee cookies, people often use liquid brewed coffee instead of dry instant coffee. This turns the dough into a runny cake batter and ruins the intended overall chewy and crunchy texture.
The main difference lies in the quality of ingredients and in controlling their quantities. When made at home, these coffee cookies are richer and fresher. The store-bought ones are often high in preservatives and sugar.
To add a creative and delicious twist to your coffee cookies, add some creamy fillings like mascarpone or cream cheese. To add a crunchy factor, one may consider some toasted pecans.
High-quality dark chocolate is often considered the best for coffee cookies, as the rich and intense chocolate flavor perfectly cuts through the richness of coffee. It also brings in a melty, gooey texture.
When it comes to making delicious coffee cookies, there is no one best brand in the world. Several popular brands make them. However, the best coffee cookies are always those made in your kitchen.
Start by preparing homemade laminated dough with flour, butter, yeast, milk, sugar, and salt. Then spread thick coffee butter inside, form croissants, and bake until crisp to get the required filling thickness, which won't leak during baking.
Yes, there is an option of making an eggless Coffee Croissant using eggless croissant dough and milk glazing instead of egg wash. To achieve the desired taste, use a filling consisting of butter, icing sugar, and instant coffee.
Place the formed croissants in the greased heavy-bottomed pan, cover, and heat gently until the pastry is fully cooked. Do not use high heat since it can brown the crust even though the inside hasn't cooked yet.
The ingredients list of the Coffee Croissant includes flour, butter, yeast, milk, sugar, salt, instant coffee, buttercream or coffee spread, and icing sugar. Sometimes there are additional ingredients like chocolate and nuts.
Store Coffee Croissant in an airtight container at room temperature for no more than two days. Refrigerating will prolong its shelf life but can lead to the softening of the pastry. A humid place should be avoided.
In most cases, dry or dense croissants happen when dough isn't properly proved, baked for too long, or butter melts in the dough. It's necessary to give the dough proper rest and avoid using extra flour when rolling it.
In contrast to cakes and muffins, which use batter, Coffee Croissant consists of a crispy laminated pastry with a filling, creating a lighter mouthfeel and a noticeable coffee aroma.
It's possible to add dark chocolate, caramel, hazelnuts, cinnamon, almond cream, and mocha filling to a coffee croissant. A coating with cocoa powder or icing sugar is another way to enhance the croissant's appearance. Try not to overdo it with different fillings.
The combination of coffee and dark or semi-sweet chocolate works perfectly without making the pastry excessively sweet. Couverture chocolate also works well for making tasty fillings and drizzles. The very sweet chocolate is not recommended.
Homemade Coffee Croissants usually taste better than bakery-bought products. In case of buying one, try to find bakeries using real butter and high-quality coffee. It's important to avoid pastries with artificial coffee essence.
Making Coffee Fudge at home is quite easy. Mix flour, cocoa powder, sugar, baking powder, butter, milk, brewed coffee, and vanilla to make a batter. Add chocolate pieces, pour it in a greased tray, bake, cool, and cut it into pieces.
Yes, there is no need for eggs in making Coffee Fudge. Its ingredients can consist of flour, cocoa powder, butter, milk, brewed coffee, sugar, and baking powder to obtain a soft texture. It is possible to use plant milk and butter for vegans.
It is possible to make coffee Fudge in a thick-bottomed pan or in a pressure cooker without a whistle. Just place the batter in a greased pan and slowly cook until it sets, and then cut it into equal squares.
Its usual ingredients are flour, cocoa powder, sugar, butter, milk, brewed coffee or espresso, vanilla extract, baking powder, and chocolate pieces. There is an option of adding chopped walnuts or chocolate pieces.
Coffee Fudge stays fresh for about 3-4 days on a counter in an airtight box or for up to a week in the fridge. If frozen individually, it can stay fresh for up to 2 months.
One of the frequent mistakes is putting too much coffee or cooking Coffee Fudge longer than needed. It leads to the dessert having a dry texture and a coffee taste that covers the taste of chocolate. An accurate portion of ingredients keeps balance in taste.
Homemade Coffee Fudge offers fresher ingredients, adjustable sweetness, and a stronger coffee flavor. You can also use high-quality chocolate and butter, whereas most packaged ones contain preservatives.
There are many ways to innovate the original recipe of Coffee Fudge by adding chopped walnuts or hazelnuts, caramel pieces, dark chocolate pieces, cinnamon, orange peel, or even peanut butter. A little bit of sea salt will provide a nice sweet-and-salty flavor.
Coffee Fudge works well with dark or semi-sweet baking chocolate as its taste becomes more prominent. Couverture chocolate has good melting properties and rich texture, while milk chocolate provides a sweeter taste.
Homemade coffee fudge always tastes better because you can use your favorite chocolate and coffee. However, if you are using packaged ingredients, you should select trusted baking brands.
To make an easy homemade coffee ice cream, you need to mix fresh cream, condensed milk, and dissolved coffee, and whisk until it becomes smooth. Freeze the mixture for 6–8 hours or till the time it becomes firm, and your homemade coffee ice cream is ready.
Yes, you can make an eggless version of coffee ice cream using fresh cream, condensed milk, milk, and coffee. This version also gets a rich, creamy texture without using eggs.
Coffee Ice Cream does not require an oven. You just need to prepare the mixture, pour it into a freezer-safe container, and freeze until set. Stir it once or twice if needed for a smoother texture.
Coffee Ice Cream is made with fresh cream, milk, condensed milk or sugar, instant coffee or espresso, and vanilla extract. You can also add chocolate chips or nuts if you need some extra flavor.
Homemade Coffee Ice Cream stays fresh in the freezer for about 2–3 weeks when it is stored in an airtight container. Keep the ice cream tightly covered to prevent the formation of ice crystals.
The common mistakes that people make while using coffee ice cream are using too much coffee, not chilling the mixture before freezing, or allowing ice crystals to form. These can affect the flavour and make the ice cream less creamy.
Homemade Coffee Ice Cream is fresher and can be customised as per personal preference. It also has fewer preservatives, and you can decide the sweetness, coffee flavor, and ingredients as per your taste preference.
You can try adding chocolate chips, caramel sauce, crushed cookies, roasted nuts, cinnamon, cocoa powder, or a swirl of chocolate fudge on the coffee ice cream to give some creative twist to it. These simple toppings give classic Coffee Ice Cream a new flavour.
Dark chocolate is a popular choice because it goes well with coffee and adds a rich flavour. Good-quality milk chocolate also works well if you want a sweeter taste in your ice cream.
There is no single best brand for Coffee Ice Cream. The brands differ as per choices, but it is important to use good-quality coffee and chocolate brands, as they give homemade coffee ice cream the best flavour.
Prepare homemade croissant dough and laminate to form butter layers, shape croissants, and bake to be crispy. After cooling, fill them with whipped or pastry cream and top with icing sugar.
Eggless Cream Filled Croissants require eggless laminated dough and an eggless cream filling made with fresh cream, sugar, vanilla, and custard powder made with cornflour. Do not use an egg wash; brush croissants with milk before baking.
To prepare croissants without an oven, use a thick pan with a tight-fitting lid to bake them over low heat until evenly baked. Cool them off and only then add the cream. Putting cream into warm pastries will make them lose their crispy texture.
Common ingredients for a Cream Filled Croissant include flour, butter, yeast, milk, sugar, salt, cream or pastry cream, vanilla, icing sugar, and optionally fresh fruit or chocolate flakes.
Freshly made Cream Filled Croissants can keep well up to two days when stored in the refrigerator in a sealed container. To keep the pastry crispy, fill the croissants just before using them. Exposing pastry filled with cream to warm air may affect their freshness.
The croissants become too soft due to poor lamination and proofing, or if the cream is added to warm croissants. Too much filling will also make the pastry soft.
Unlike traditional pastries such as cakes, the Cream Filled Croissant is made with a crispy pastry and layers of cream. A soft sponge layer is not used in the making of this pastry.
Cut the croissants in half and fill them with strawberries, blueberries, caramel or chocolate sauce, chocolate shavings, or chopped pistachios. You can also use mini croissants to decorate the dessert table.
Couverture chocolate or dark chocolate will create a contrast with the cream filling. Milk chocolate will make the pastry sweeter and creamier. Couverture chocolate can be easily melted.
Usually, homemade Cream Filled Croissants have better taste and texture compared to those sold in stores. Artisanal bakeries run by local bakers who use real butter and cream will provide high-quality croissants.
Heat the milk then whisk in the melted Dairy Milk chocolate until it is fully dissolved and smooth. Simmer for a few minutes, do not boil, then pour into a mug. Serve at once warm for best flavor.
It does contain added sugar and fat from milk chocolate, so in moderation it can fit into a balanced diet. The smart thing to do is to enjoy it once in a while as a treat, not every day.
This is a rich hot chocolate, best enjoyed here and there, not every day if you have hypertension, as the added sugar and saturated fat can affect your overall diet balance over time.
Yes, a spoon of cocoa powder adds to the chocolate flavour and gives a bit more of a serious, less sweet edge, which balances well with the natural creaminess and sugar in the milk chocolate.
Whipped cream, marshmallows or a dusting of cocoa powder all make lovely toppings. A drizzle of caramel or some chocolate shavings on top also makes for a nice finishing touch.
Almond milk does make a good dairy-free base, but it will make a slightly thinner, nuttier hot chocolate than a richer, creamier one that regular milk would provide.
Use less milk and more melted chocolate for a thicker, richer result or add in a spoonful of cream towards the end. And make sure you whisk constantly as you heat for a silky smooth consistency.
Yes, let the hot chocolate cool completely and pour it over ice and stir well. It really feels refreshing to add some chocolate shavings and whipped cream.
Have fresh and warm, just after making, in about twenty to thirty minutes. Hot chocolate can form a skin on top and loose its smooth texture as it cools.
Milk chocolate bars that are smooth and melt easily, such as Dairy Milk, tend to work well as they melt cleanly in warm milk and add a natural sweetness without requiring much extra sugar.
Prepare a soft dough; let it rest if using yeast; shape the donuts; then fry or cook until golden. Coat with sugar or glaze. Avoid overheating the oil, as it cooks the outside too quickly.
A Donut is a dessert that is baked in a ring shape or filled with jam, chocolate, or any other filling. It can be fried or baked. Avoid overcooking; otherwise, it will become dry.
In classic recipes, eggs are added to donuts to make them softer and more consistent; however, there are also many eggless variants. Ingredients vary depending on the recipe. Read the recipe in order to adjust the ingredients to your personal needs.
Classic donuts are fried in order to get a crispy crust and softer core; nevertheless, you can also bake them. Both ways are equally good. Try not to overcrowd the pan while frying donuts.
Mix together flour, milk, sugar, butter, yeast or baking powder, and some vanilla to create a soft dough. Bake donuts till golden. You should be careful with flour, as its overuse will result in hard donuts.
Use baking powder instead of yeast to prepare quick donuts. Mix the dough, shape, and cook until golden before adding your favorite topping. Avoid overmixing, as it creates a tougher texture.
Prepare regular donuts first, then fill them with strawberry, raspberry, mango, blueberry, or apple filling after they are partly cooled. Sprinkle with sugar, if preferred. Do not add too much of the filling to avoid leaking.
Good quality dark, milk, or semi-sweet chocolate melts evenly and forms an even coat. You can use Dairy Milk chocolate for a smooth topping. Add some cream or butter to make the chocolate shine. Avoid using a compound chocolate for better taste.
Dark or semi-sweet chocolate works well with cream and creates a rich filling. You can use milk chocolate in case you prefer a sweeter filling. Do not use chocolate with a low cocoa content, as it may not pair well with the other flavors.
Use couverture, dark, milk, or semi-sweet chocolate from the Dairy Milk range of chocolates in order to have a nice glaze with a smooth texture. Add some cream or butter for even melting. Be careful not to heat the chocolate too much, as it might seize.
To make these, you need to cream softened butter with brown sugar and white sugar. Next, mix in egg, vanilla, flour, cocoa powder, baking soda, salt, and chocolate chips, and bake at 175°C for 10 minutes.
To make eggless double chocolate cookies that taste like regular ones, simply replace eggs with ingredients such as ground flaxseed mixed with water, mashed banana, yogurt, or unsweetened applesauce.
For this, one may try the pressure cooker method. Add a layer of salt to the bottom, insert a metal stand, and cover it for preheating. Place the baking tin on the stand, cover, and cook for 15 minutes.
The standard ingredients for a double chocolate cookie include all-purpose flour, unsweetened or Dutch-process cocoa powder, butter, granulated and brown sugars, eggs, vanilla extract, baking soda, and salt.
When stored in an airtight container at room temperature, double chocolate cookies typically last 3 to 5 days. Refrigeration keeps them fresh for 1 to 2 weeks. For months-long shelf life, you can freeze them for up to 3 months.
Double chocolate cookies often turn out dry, hard, or flat. The most common causes include wrong flour measurement, wrong butter temperature, or an inactive leavening agent.
As the name suggests, these chocolate cookies are filled with chocolatey indulgence. With every bite, it serves an unmatched ooey-gooey comfort that simply wins the hearts of all dessert lovers.
To add some more fun to the double chocolate cookies, serve them as a fudgy pie or cheesecake base. They can be used as a middle layer in a chocolate parfait or as a topping for chocolate chip ice cream.
For the ultimate chocolatey decadence, it is recommended to use premium couverture chocolate or dark/bittersweet chocolate with a very high cocoa content. This perfectly balances the sweetness.
While there are no specific best brands for double chocolate, Cadbury Cookies Double Choc is indeed one of the most popular brands for double chocolate cookies.
To make a batch of dry fruit cookies at home, make a batter with all-purpose flour, butter, sugar, salt, baking powder, and a mix of a generous amount of chopped nuts and dried fruits.
Yes. In fact, the dry fruit cookies are often naturally eggless, as the recipes largely depend on ingredients like milk, custard powder, or other binders to bind the dry fruits and nuts into a dough.
Yes. To make sure the cookies are as crispy, crunchy, and buttery as the oven-baked ones, either try the stovetop method, a microwave, or go with no-bake energy cookies with dried fruits and nuts.
A batch of dry fruit cookies ideally contains ingredients like flour, butter, sugar, and a generous mix of chopped nuts and dried fruits. While the recipes are usually customizable, all of them simply melt in the mouth.
To store dry fruit cookies at room temperature for two weeks, place them in an airtight container. Make sure the container is lined with parchment or wax paper. Refrigeration is not recommended, as the cookies become dry.
Dry and dense dry fruit cookies are often caused by excess flour, overmixing the dough, or baking for too long. Moreover, dry fruits also absorb moisture from the batter.
Dry fruit cookies are enjoyed for a perfect buttery, crumbly base with a mixture of crunchy nuts and chewy dried fruits with every single bite. Here, the mix-ins blend perfectly with the soft texture of the cookies.
To explore more variations, one may go beyond the regular nuts and dried fruits and include cranberries and apricots for a gourmet flavor profile. For a healthier version, swap flour for oats and sugar for honey.
A premium dark or semi-sweet baking chocolate is often considered the best for a dry fruit cookie, as they bring in a complex flavor that perfectly balances the sweetness and buttery flavor.
When it comes to making dry fruit cookies, there is no one best brand in the world. Several popular brands make delicious dry fruit cookies. However, the best coconut cookies are always those made in your kitchen.
Falooda is a popular dessert drink made with milk, falooda sev, basil seeds, rose syrup, ice cream, and dry fruits. It is creamy, colourful, and a beloved refreshing drink, especially during summer.
You can make falooda at home by cooking the falooda sev, soaking the basil seeds, and chilling the milk. Later, layers them with rose syrup, ice cream, and nuts in a tall glass, then serve immediately.
Falooda is made with chilled milk, falooda sev, soaked basil seeds, rose syrup, ice cream, dry fruits, and sometimes jelly or fresh fruits for extra flavor and texture. You can easily make this at home.
Prepare the Falooda mix as directed on the pack. Add chilled milk, cooked falooda sev, soaked basil seeds, and ice cream in a tall glass. Mix gently and layer everything nicely before serving.
You can make a simple Falooda mix by mixing rose syrup, sugar, cardamom, and a little milk powder together. Later, add it to chilled milk along with sev and basil seeds when serving.
It depends on the type of fast you are observing. A fasting-friendly Falooda can be made with milk, sabja seeds, nuts, and ingredients that are allowed during your fast.
There are various ways of decorating falooda like topping it with a scoop of ice cream, chopped pistachios, almonds, rose petals, cherries, chocolate shavings, or a drizzle of rose syrup to make it look more festive.
Layer the falooda dessert by adding the rose syrup at the bottom, then add basil seeds, falooda sev, chilled milk, jelly or fruits if using, and finish with ice cream, nuts, and your favourite toppings.
Cadbury Dairy Milk is a great choice for beginners because it melts easily and has a smooth, creamy taste. You can also grate it over the falooda for extra flavor.
To make chocolate falooda, you need to replace the rose syrup with chocolate syrup and use chilled chocolate milk instead of plain milk. Layer it with falooda sev, basil seeds, and chocolate ice cream, and top with chocolates like Cadbury Dairy Milk or Cadbury Bournville.
The easiest homemade ice cream cake recipe involves assembling a chocolate cake base, softened ice cream, crushed cookies or fudge, and a whipped cream frosting on top. Make sure all the layers are chilled well to ensure perfect layering.
Yes. To try the eggless version, simply replace eggs with yogurt in the chocolate cake. The rest of the process and ingredients remain the same. One may also opt for the milk-vinegar combination.
To make an ice cream cake without an oven, either bake the cake using a pressure cooker or simply use a store-bought cake as the base. Once the cake is in place, layer it with the other ingredients and assemble.
If the cake is baked from scratch, an ice cream cake essentially includes flour, sugar, butter, eggs, milk, salt, leavening agents, flavor makers, crushed cookies, ice cream, and some whipped cream.
If frozen after wrapping it well, an ice cream cake stays intact for 2-3 months without any freezer burn. However, once sliced, it is better to refrigerate it and consume it within 5-7 days.
The most common mistake with ice cream cake is leaving it on the counter for too long. This often softens the cake before serving, turning it into a melted puddle as all the layers mix.
While store-bought ice cream cakes are too high in sugar and preservatives, homemade ones often use higher-quality ingredients. Moreover, one may customize the flavors as needed.
For a creative twist, one may explore flavor profiles such as brownie-bottom, cracker-flavored ice cream, hot fudge, fruity flavors, and more. The entire cake can be topped with some marshmallow fluff instead of traditional frosting.
For a perfect ice cream cake, one may opt for high-quality dark chocolate or couverture chocolate. The high cocoa butter content allows it to melt into a flawlessly smooth, silky consistency.
While several dessert brands make ice cream cakes, Cadbury is one of the most popular. Although not exactly an ice cream cake, the Cadbury Dairy Milk Freddo Party Cake is a delicious frozen dessert cake.
You can make kaju katli at home by grinding cashews into a fine powder and cooking them with sugar syrup until a soft dough forms. Roll the dough between butter paper, let it cool, and cut it into diamond-shaped pieces.
Homemade kaju katli can be made with just a few ingredients like cashews, sugar, and a little water. Cook the mixture until it comes together, roll it out evenly, and slice it after it cools.
Kaju katli can be made with milk powder by mixing milk powder with sugar, milk, and a little ghee to make a quick version of Kaju Katli. Cook until the mixture thickens, then spread it in a tray and cut into pieces.
Milk is an important ingredient of kaju katli. You need to cook finely ground cashews with milk and sugar over low heat until the mixture forms a soft dough. Roll it out, allow it to cool, and cut it into the desired shape.
You can make kaju katli barfi by preparing a cashew and sugar mixture, cook it until smooth, then spread it evenly into a greased tray instead of rolling it thin. Once set, cut it into square or diamond-shaped pieces.
You can make kaju katli like barfi by replacing cashews with almonds, peanuts, melon seeds, or coconut. The flavor changes since the ingredient changes, but the method remains almost the same.
Kaju katli can be used in cheesecakes, milkshakes, ice creams, cakes, trifles, dessert jars, and festive platters. It also makes a delicious topping for Indian fusion desserts. Kaju katli fusion desserts are getting popular.
Cashew powder is important in kaju katli because finely ground cashew powder gives kaju katli its smooth texture and rich taste. It also helps the sweet hold its shape without becoming grainy or crumbly.
Both milk and dark chocolate work well with Kaju Katli. Cadbury Dairy Milk gives a smooth, creamy coating, while Cadbury Bournville will add a richer chocolate flavor to the traditional kaju katli.
Cadbury Bournville is the best option for rose flavor because its rich cocoa taste balances the floral notes. If you prefer a sweeter version, Cadbury Silk is also a delicious choice.
Kalakand is a popular Indian milk sweet made by cooking milk until it becomes thick. It has a soft, grainy texture and is usually flavored with cardamom and topped with chopped nuts.
You can make kalakand at home by cooking milk until it reduces, then add paneer or chenna and sugar. Stir it until the mixture thickens, spread it into a tray, let it cool, and cut it into squares.
Kalakand is made by slowly cooking milk with paneer or chenna until it becomes thick and slightly grainy. Later, sugar and cardamom are added before the mixture is set and sliced.
You can make kalakand with milk by boiling full-fat milk and cooking it until it reduces. Add an acidic ingredient like lemon or vinegar to make soft curds. Then mix in sugar, cook until thick, then spread the mixture into a tray to set.
Kalakand mithai can be prepared by a thick mixture of milk, paneer, and sugar. Then it is flavoured with cardamom, spread evenly in a greased tray, garnished with nuts, and cut into pieces after it cools.
You can make kalakand with milk powder by cooking milk powder with milk, sugar, and ghee until the mixture thickens. Pour it into a tray, smooth the top, let it set, and cut it into bite-sized pieces.
Yes, kalakand can be made without sugar. You can sweeten Kalakand with jaggery, dates, or other natural sweeteners instead of refined sugar. The flavor changes slightly, but the dessert remains rich and delicious.
Kalakand can be hard or dry when you overcook the mixture or cook it on high heat. You should remove it from the heat as soon as it thickens to keep the Kalakand soft and moist.
For Chocolate Kalakand, you can use Cadbury Dairy Milk, as it adds a smooth and creamy flavor, while Cadbury Bournville gives a richer cocoa taste that pairs well with the milk-based sweetness.
Cadbury Bournville is a great choice for fusion Chocolate Kalakand because its deep cocoa flavor balances the sweetness. Cadbury Silk also works well if you prefer a creamier and milder chocolate taste.
Make kulfi at home by boiling and reducing full-fat milk until it becomes thick and creamy. Later, add sugar, cardamom, and chopped nuts, pour the mixture into moulds, and freeze them until they become firm.
Make kulfi at home by simmering full-fat milk until it reduces by almost half. Then mix in sugar, cardamom, and your favourite nuts, then pour it into kulfi moulds and freeze for several hours.
Make malai kulfi at home by cooking full-fat milk slowly until it becomes rich and creamy. Then add sugar, cardamom, and chopped pistachios or almonds, and freeze the mixture in moulds until set.
Kulfi ice cream can be easily made at home. Prepare a thick milk mixture with cream, sugar, and flavorings like cardamom or saffron. Then pour it into moulds or a freezer-safe container and freeze until firm.
Make kesar pista kulfi at home by reducing full-fat milk over low heat, adding sugar, saffron soaked in warm milk, and chopped pistachios. Freeze the mixture in kulfi moulds until completely set.
Yes, kulfi can be made without sugar. You can sweeten Kulfi with dates, jaggery, honey, or other natural sweeteners. The flavor will be slightly different, but the kulfi will still be creamy and delicious.
Make chocolate kulfi by mixing cocoa powder or melted chocolate into the thickened milk along with sugar. Then pour the mixture into kulfi moulds and freeze until firm before serving.
You need to whisk good-quality cocoa powder into warm milk to avoid lumps. Then add it to the reduced milk mixture with sugar, cook briefly, then freeze in kulfi moulds until set, and your chocolate kulfi is ready.
You can use chocolates like Cadbury Dairy Milk, which gives chocolate kulfi a creamy and smooth flavor. If you enjoy a deeper cocoa taste, Cadbury Bournville is another excellent choice.
Cadbury Dairy Milk is a good option to pair with chocolate mango kulfi because of its mild, creamy sweetness. If you prefer a richer flavor, use Cadbury Bournville in a small quantity to balance the fruit without overpowering it.
To make a batch of spongy, citrus-flavored lemon cupcakes at home, whisk flour, baking powder, salt, butter, sugar, eggs, vanilla, fresh lemon zest, and juice. Fill the cupcake liners with batter and bake at 180°C for 20-25 minutes.
To replace eggs in this eggless lemon cupcake recipe, use alternatives like Greek yogurt, applesauce, or flax eggs. All of them are perfect for adding moisture and binding the batter perfectly.
To make some no-oven lemon cupcakes, follow the stovetop method using a large pan or a pressure cooker with a tight lid. Pour the batter into the liners, place the liners on a greased baking sheet on a wire rack, and cover to cook.
A lemon cupcake is typically made with baking essentials such as flour, butter, sugar, salt, eggs, and milk, lemon juice, and lemon zest. One may also add some lemon curd in the center.
When kept at room temperature in an airtight container, a lemon cupcake lasts for 2 to 3 days. Refrigeration keeps them fresh for 5 days. However, if the cakes contain lemon curd filling or cream cheese, they should be consumed early.
While baking, lemon cupcakes often turn dry, dense, or heavy due to certain common mistakes such as excess or expired baking powder, overmixing the batter, or adding extra lemon juice that causes the batter to react too quickly.
While other cupcakes are mostly sweet, lemon cupcakes are loved for their signature tangy, citrusy flavor profile that pairs perfectly with the soft and spongy texture and melts in the mouth right away.
Some of the fun ways to serve lemon cakes include adding a lemon curd center or covering it wth some cream cheese frosting. Also, these can be topped with some tangy buttercream frosting and candied lemon slices.
To make chocolate a part of these lemon cupcakes, one should consider white chocolate, as it pairs perfectly with the recipe without altering the citrus notes. Make sure the white chocolate is of premium quality.
There is no specific best brand for it, as lemon cupcakes are quite popular in the world of desserts. Be it the fancy bakeries and restaurants or home kitchens and local cafes, many places make delicious lemon cupcakes.
An easy homemade mango bread recipe is made with ripe mango pulp, flour, sugar, butter or oil, and baking powder. You need to mix the ingredients, pour the batter into a loaf tin, and bake until soft and golden.
Yes, you can make an eggless version of mango bread with the help of yoghurt or condensed milk. Additionally, ripe mangoes add moisture and sweetness, making the bread soft and flavorful.
You can cook mango bread in a pressure cooker or a heavy-bottomed pan. Bake it on low heat until the centre is fully cooked through and the top of the bread looks set.
Mango bread can be made with the help of mango pulp, flour, sugar, butter or oil, baking powder, milk, and vanilla extract. You can also add nuts or cardamom for extra flavor.
Homemade mango bread stays fresh for two to three days at room temperature in an airtight container. If you refrigerate it, the bread can last for up to a week.
The most common mistake while making mango bread is using mango pulp that is too watery, which can make the bread soggy. Additionally, overmixing the batter or baking it for too long can also affect its texture and flavor.
Homemade mango bread is sweet, and it has the natural aroma of fresh mangoes rather than an additional essence. It is fresher, less processed, and can be customised with your favourite flavors and toppings.
You can make mango bread creative by adding coconut flakes, chopped pistachios, cardamom powder, cream cheese frosting, or white chocolate chips. A drizzle of mango glaze on the top also tastes delicious.
White chocolate goes very well with mango bread because it complements the fruit's sweet and creamy flavor. It also adds richness to the bread without overpowering the taste of mango.
Cadbury white chocolate will pair very well with homemade mango bread. You can use it as a topping, glaze, or mix small chunks into the batter of the mango bread.
Mango Cake can be prepared at home by making a batter from flour, sugar, butter, eggs, baking powder, milk, and fresh mango puree. Bake and allow it to cool down completely. This cake can be decorated with whipped cream and mango pieces.
Yes. Eggless Mango cake can be made using yogurt, condensed milk, or buttermilk. This makes a soft, moist sponge that pairs well with the fresh flavor of ripe mangoes.
Yes. Mango Cake can be baked in a preheated pressure cooker without using a whistle or a heavy-bottom pan. Keep the rest of the recipe as it is and cook your cake over a stop.
To prepare a classic Mango Cake, use all-purpose flour, sugar, butter or oil, eggs, baking powder, milk, fresh mango puree, vanilla extract, and whipped cream. Usually, fresh mango pieces are used to decorate the cake.
If a Mango Cake is kept in an airtight container in the refrigerator, it will stay fresh for 2 to 3 days. Since this cake typically includes whipped cream and fresh fruit, it cannot be left at room temperature for long and is best consumed as soon as possible.
Excessive mixing of the batter, adding too much flour, or using very thick mango puree can ruin the texture of this cake. Proper measuring, mixing, and baking process ensures a moist texture of the cake.
Mango Cake differs from other desserts in that it includes fresh mango puree and pieces, which provide it with fruit flavor, color, and moisture. This cake also tastes better than plain sponge cake due to the fruits used in its preparation.
Besides being made as a layered cake, this dessert can be prepared as a mousse cake, cheesecake, cupcake, Swiss roll, or even a jar dessert. Mango goes well with coconut, passion fruit, white chocolate, and berries.
You can use any chocolate, dark, milk, or white, as per your preference. Milk chocolate goes well with the sweet flavor of mango. Use it for making ganache, curls, or just a drizzle on top of the cake.
Instead of choosing the best brand of this dessert, one should pick the best bakery that makes fresh Mango Cakes with fresh fruit, real cream, and high-quality ingredients. However, preparing it at home is always better.
To make oatmeal cookies at home, simply mix flour, baking soda, salt, cinnamon, butter, sugar, eggs, and vanilla. Next, fold in some old-fashioned oats. Once the dough is ready, bake it at 175°C for 10 minutes.
To make eggless oatmeal cookies, simply replace eggs with ingredients like ground flaxseed mixed with water, mashed banana, yogurt, or unsweetened applesauce to ensure that perfect taste and texture.
One may try it on a stovetop heavy-bottomed pan or in a pressure cooker. Alternatively, a no-bake version can be made by mixing ingredients like melted chocolate and peanut butter with oats and chilling them.
The regular oatmeal cookie recipe usually contains pantry staples like rolled oats, all-purpose flour, butter, sugars, eggs, baking soda, vanilla extract, ground cinnamon, and salt.
When stored in an airtight container at room temperature, the cookies stay fresh for 3 to 5 days. For longer storage, up to 2-3 weeks, one needs to refrigerate it. Freezing is for months-long storage duration.
Baking oatmeal cookies often goes wrong due to factors like the wrong temperature of the butter, the wrong oven temperature, or incorrect flour-to-sugar ratios. It also happens if the oven door is opened early.
Oatmeal cookies are all about enjoying a signature earthy taste and a hearty texture, coming with a high nutritional value. Unlike other desserts, the inclusion of oats here makes the cookies rich in protein and dietary fiber.
While oatmeal cookies are delicious all by themselves, they can be served as ice cream cookies, crunchy toppings, or crumbly parfait bases. For some chocolatey indulgence, they can be dipped into chocolate with some sea salt on top.
If you plan to add chocolate to oatmeal cookies, it is always recommended to use high-quality bittersweet or semi-sweet baking chocolate chunks. It pairs truly well with the chewy and rich cookies
There is no one specific best brand for oatmeal cookies. Several commercial brands produce good-quality oatmeal cookies. However, nothing beats the quality of homemade cookies.
To make a fresh batch of citrusy orange cupcakes at home, whisk flour, baking powder, salt, butter, sugar, eggs, vanilla, fresh orange zest, and juice. Fill the cupcake liners with batter and bake at 180°C for 20-25 minutes.
Yes. To replace eggs in this eggless version of the orange cupcake recipe, use alternatives like Greek yogurt, applesauce, or flax eggs. All of them are perfect for adding moisture and binding the batter perfectly.
Yes. To do that, one may try the stovetop method using a large pan or a pressure cooker with a tight lid. Pour the batter into the liners, place it on a greased baking plate kept on a wire rack, and cover to cook.
A sweet-tangy orange cupcake typically contains essentials such as flour, butter, sugar, salt, eggs, milk, orange juice, and orange zest. One may also add some tangy orange-flavored curd in the center.
When kept at room temperature in an airtight container, an orange cupcake ideally lasts for 2 to 3 days. Refrigeration keeps them fresh for 5 days. However, if the cakes contain curd filling or cream cheese, they should be consumed early.
While baking, orange cupcakes often turn dry, dense, or heavy due to excess or expired baking powder, excess flour, overmixing the batter, overbaking it, or adding extra orange juice that causes the batter to react too quickly.
While other cupcakes are mostly sweet or chocolatey, orange cupcakes are mostly cherished for their signature tangy, citrusy flavor profile that pairs perfectly with the soft and spongy texture that melts in the mouth right away.
To play around with some easy variations of the orange cupcake, one may consider creamy and flavored frostings, fillings, or mix-ins. Chocolate and cozy spices also pair perfectly with orange.
For a perfect orange-chocolate cupcake, it is ideal to include some dark chocolate with a high cocoa content. The dark, rich, intense flavor of dark chocolate perfectly balances the tangy flavor profile.
Whether it's a local bakery or a fancy restaurant, several places make delicious orange cupcakes with cream frosting. There is no specific commercial brand that can be considered the best for this.
It is quite simple to make Oreo Fudge at home. Prepare the batter by adding flour, cocoa powder, butter, sugar, milk, vanilla, and crushed Oreo cookies. Add chocolate pieces, pour it in a lined pan, cook till it sets, let it cool and then cut into squares.
Yes, Oreo Fudge can be made without eggs. Mix flour, cocoa powder, butter, milk, sugar, vanilla, and crushed Oreo cookies to get a smooth texture. The vegan version of it can be made using dairy-free butter and plant-based milk.
Yes, Oreo Fudge can be prepared in a heavy bottom pan or even pressure cooker without the whistle. Pour the batter in a greased pan and cook it over low flame until it becomes solid. Allow it to cool and cut into squares.
Some basic ingredients used in making Oreo Fudge include flour, cocoa powder, butter, sugar, milk, vanilla extract, baking powder, chocolate chips, and crushed Oreos. In some recipes, cream cheese or crushed nuts can be added as well.
Oreo Fudge can stay fresh for 3 to 4 days at room temperature if it is kept in an airtight container or one week if it is refrigerated. Individual pieces of Oreo Fudge can be frozen up to 2 months.
The most common mistake committed while making Oreo Fudge is that they crush Oreos finely or overmix the batter, which affects its texture. Even overcooking Oreo Fudge can make it tough and not soft and rich.
Homemade Oreo Fudge is made of fresh ingredients and allows you to choose a desired ratio of Oreos to chocolate. At the same time, homemade Oreo Fudge is richer and does not contain any preservatives.
Many variations can be made of Oreo Fudge, like peanut butter, caramel, mint extract, white chocolate, marshmallows, hazelnuts, and sprinkles. Oreo Fudge can be made with different flavors of Oreos, including Red Velvet.
Oreo Fudge can be used in recipes like cheesecakes, cookie bars, brownies, dessert jars, trifles, milkshakes, and ice creams. Cubes of it can be used to garnish pancakes, waffles, cupcakes, and other desserts.
Cubes of Oreo Fudge can be used in dessert jars, layered in brownies, topped on ice creams, mixed in milkshakes, and used as cheesecake topping.
To make this, mix some flour, butter, peanut butter, granulated sugar, brown sugar, egg, and vanilla. Next, scoop the dough into balls, place them on a baking sheet, and bake at 175°C for 10 minutes.
To make eggless peanut butter cookies without any compromise on taste and texture, simply replace eggs with ingredients like ground flaxseed mixed with water, mashed banana, yogurt, or unsweetened applesauce.
To try a no-oven method, one may switch to a stovetop heavy-bottomed pan or a pressure cooker. Alternatively, mix ingredients like melted chocolate and peanut butter with oats and just chill them.
A classic peanut butter cookie contains pantry staples like flour, peanut butter, softened butter, brown sugar, white sugar, egg, baking powder, and vanilla. For the 3-ingredient version, you need peanut butter, sugar, and egg.
When stored in an airtight container at room temperature, the peanut butter cookies stay fresh for 3 to 5 days. For longer storage, up to 2-3 weeks, one needs to refrigerate it. Freezing is ideal if you need months-long storage.
Some of the most common reasons that spoil the cookies include using warm butter, overmixing the dough, or overbaking it. These often cause thin, greasy, and dry cookies.
Unlike any other dessert, peanut butter cookies are cherished for that perfect balance of sweet-and-salty flavor and a rich, melt-in-your-mouth texture. The earthy, nutty flavor profile of peanut butter is an absolute delight.
While peanut butter cookies are often served with coffee or milk, some creative ideas like serving peanut butter cookies with ice cream, dipping them into melted chocolate, or adding a sea salt seasoning always make it more fun.
If you wish to include chocolate in a peanut butter cookie recipe, make sure it is a high-quality semisweet or bittersweet chocolate that perfectly cuts through the nutty flavor.
It is difficult to highlight only one best brand, as several commercial brands produce high-quality peanut butter cookies. However, the best peanut butter cookies are always those made in your kitchen.
Begin with fresh fruits, juice, yogurt, or flavored milk. Pour them into popsicle molds and freeze till set. Do not overfill the molds because liquids tend to expand upon freezing.
Mix together preferred fruits, juices, milk, or yogurt to create a uniform mixture. Fill the molds with this mix, insert sticks, and freeze till completely set. Avoid creating runny mixtures as popsicles made from them will turn out icy.
It usually takes about six to eight hours for the popsicles to set completely. Larger molds will need overnight freezing time. Do not remove them too early, as it may cause breakage while unmolding.
Use fresh fruits, Greek yogurt, coconut water, or fruit juices to make popsicles healthier. In case you want to sweeten the mix, use honey in moderate amounts. Do not use too much sugar, artificial syrups, or highly processed ingredients. How To Make Smoothie Popsicles?Prepare a smoothie with fruits, yogurt, milk, oats, or nut butter, then blend. Pour the mixture into the molds and freeze it. Do not use a thin smoothie, as the popsicles made from it will be icy rather than creamy.
Whole milk is usually used to get creamier popsicle ice cream. Alternatively, dairy-free milk such as coconut, almond, or oat may be used. It is best not to use low-fat milk when making creamy popsicles.
Mix milk, cocoa powder, melted dark chocolate, sugar, and a little cream to obtain a smooth mixture. Pour it into the molds and freeze until set. Do not forget to mix the cocoa to avoid lumps.
Whip milk, cream, cocoa powder, melted chocolate, vanilla extract, and sugar to form a smooth mixture. Put into popsicle molds and freeze overnight. Do not heat the chocolate too much; otherwise, it becomes hard to blend.
High-quality dark or semi-sweet chocolate with about 50-70% cocoa content should be used for making popsicles, as this provides rich flavor and texture. Chocolate will make the popsicles sweet. Compound chocolate should not be used.
Making a rasmalai cake is all about preparing a cardamom-infused sponge cake, soaking it well in the flavored milky syrup of store-bought rasmalai, and layering it with rasmalai-flavored whipped cream.
To make an eggless rasmalai cake, simply whisk flour, yogurt, baking soda, baking powder, sugar, oil, cardamom, and a pinch of saffron soaked in warm milk. Once the batter is ready, bake it and layer it as usual.
To make a no-oven rasmalai cake, simply make a sponge cake using a pressure cooker. Once the cake is ready, assemble it with rasmalai, flavored whipped cream, and chopped pistachios.
The main ingredients of a rasmalai cake include flour, baking powder, yogurt, cardamom, saffron, sweet rasmalai milk, whipped cream, and chopped nuts. Here, the eastern and western flavors meet like never before.
When stored properly in the refrigerator in an airtight container, a rasmalai cake lasts about 2 to 3 days. It is not recommended to store it for longer, as it contains dairy-based ingredients.
While blending the Indian and Western flavors, this cake can go wrong due to factors like incorrect measurement, overmixing, overbaking, and baking at the wrong temperature.
Rasmalai cake effortlessly bridges Indian and Western baking by bringing together the sponge cake and sweet rasmalai like never before. With every single bite, it serves a perfect fusion of flavors.
To add a fun twist in serving the rasmalai cake, one may simply layer crumbled sponge, rasmalai pieces, and cardamom whipped cream in individual glass jars for an aesthetic, party-ready, parfait-like presentation.
While chocolate and rasmalai are not really a popular combination, one may still experiment with the recipe with some Cadbury Dairy Milk chocolate, as it carries a sweet and milky taste.
Several confectioneries across India and Asia make rasmalai cake in varied fashion, taste, and texture. There is no one specific commercial brand that is considered the best for manufacturing Rasmalai cakes.
For a red velvet cupcake batch, whisk together flour, sugar, baking soda, cocoa powder, buttermilk, vegetable oil, egg, vinegar, and some red food coloring. Pour the batter into liners, and bake at 175°C for 20 minutes.
Eggless red velvet cupcakes are as delicious as the regular ones. To replace eggs, simply use alternatives like unsweetened applesauce, plain yogurt, or a milk-vinegar mixture for moisture and binding the batter.
To make a batch of no-oven red velvet cupcakes, one may follow the stovetop method using a large pan with a lid. Make the cupcake batter, pour it into the liners, place it on a greased baking plate, and cover to cook.
A classic red velvet cupcake usually contains baking staples such as flour, sugar, baking soda, cocoa powder, vegetable oil, and eggs, along with some buttermilk, vinegar, and red food coloring.
As red velvet cupcakes often contain buttercream frosting, it is always ideal to refrigerate them in an airtight container. It keeps them fresh for 3 to 4 days. Freezing (without frosting) is for long-term storage.
While baking, a red velvet cupcake often turns dry, flat, and dense due to mistakes, like using excess cocoa powder, inactive leavening agents, overmixing the batter, or baking the cupcakes at the wrong oven temperature.
Red velvet cupcakes are enjoyed for their signature velvety texture and the distinct tangy flavor that comes from the buttermilk and vinegar. With every single bite, this soft and spongy cupcake melts in the mouth.
While the cupcakes taste delicious, one may simply play around with the frosting and topping ideas. From vanilla to rich chocolate, all kinds of buttercream frosting go well with it. Add some sprinkles for more fun.
To achieve the desired taste, use semi-sweet or dark chocolate for the frosting and unsweetened cocoa powder for the cake batter. Both of them balance the taste profile perfectly with the tangy buttermilk flavor.
Red velvet cupcakes are popular across the world. From reputed bakeries and restaurants to home kitchens and local cafes, many places make delicious red velvet cupcakes. There is no specific best brand for it.
A dessert sandwich combines sweet fillings like chocolate, ice cream, fruits, cream cheese, whipped cream, or spreads between bread, cookies, waffles, or biscuits. Avoid overly wet fillings, as they can make the sandwich soggy.
Place any chosen sweet filling between two slices of bread, cookies, or waffles, and serve it cold or toasted a little. Add fruits or nuts to make the dish more tasty. Avoid overfilling, or the sandwich becomes difficult to eat.
The examples are chocolate sandwiches, ice cream sandwiches, fruit-and-cream sandwiches, peanut butter-and-banana sandwiches, Nutella-marshmallow sandwiches, and cookie-ice cream sandwiches. Do not choose combinations that could make each bite too sweet.
Put a scoop of the softened ice cream between the two slices of cookies, brownies or pieces of cake, press gently, and freeze till it becomes hard. Do not use the melted ice cream, as it can make a messy dessert.
Put melted chocolate, chocolate hazelnut spread, or cream between slices of bread or cookies. You can add bananas, strawberries or nuts to make it tastier. Do not use hot chocolate as it can soften the base too quickly.
Apply whipped cream or cream cheese to the soft bread, put slices of strawberries, mango, kiwi or grapes, and leave it in the fridge before serving. Take care when choosing fruits, as juicy ones contain too much water, which will spoil the bread.
It is best to use chocolate spread, peanut butter, whipped cream, mascarpone, cream cheese, fruit preserves, fresh fruits, cookie butter, or ice cream as a filling. Do not use the filling with too much water in it.
Use soft milk bread, brioche, or even fresh white bread as it is soft and fluffy. Avoid stale or heavily seeded bread, as it affects sweetness.
Dark, milk, or semi-sweet chocolate that melts well and spreads easily is preferable. The chocolate hazelnut spread can also be used. It is better not to use low-quality compound chocolate.
Add strawberries, cold milk, sugar or honey, and a few ice cubes to a blender, then blend until smooth. Immediately serve it so that its taste remains intact. Avoid using green or unripe strawberries, as their taste may be somewhat tangy.
A smoothie is a thick beverage made by blending fruits, vegetables, yogurt, milk, or plant-based products with seeds or oats. It is recommended that sweeteners be minimized to retain their nutritional value.
Add blueberries, either fresh or frozen, and then add yogurt, milk, banana, and a little bit of honey, and blend to make it creamy. Keep it chilled before serving to have a refreshing drink. Do not use too much liquid because it makes the drink thin.
Mix your desired fruits with milk, yogurt, coconut water, or any type of juice and blend until smooth. Add nuts or seeds for nutritional benefit. Never load your blender full because it will not blend uniformly.
Blend soaked oats with milk, banana, dates, cinnamon, and some nuts to make it creamy. You can chill it before serving if you want to. Do not use dry oats directly because they would give you an uneven texture.
Blend ripe bananas with milk, yogurt, honey, and some ice cubes to make it smooth and creamy. Add peanut butter to make it more creamy. Do not use overripe bananas because they would offer a fermented flavor.
Blend some fruits like mangoes, berries, banana, pineapple, or kiwi along with yogurt, milk, or any type of juice to prepare it smoothly. Serve it immediately after preparation. Be careful not to mix too many flavors, as they can neutralize each other.
Blend your cold milk, banana, cocoa powder, melted dark chocolate, and some honey until it becomes smooth. Add some ice cubes if required. Do not use too much chocolate otherwise, it will overshadow your fruit flavors.
Blend your frozen bananas, cocoa powder, milk, and yogurt until it becomes thick enough to be served in a bowl. Top it with some fruits, granola, nuts, or seeds. Avoid using too much liquid, as it will ruin the bowl's consistency.
Dark chocolate containing 60-70% cocoa or Dairy Milk cocoa powder goes well with your protein powder, making it taste balanced. If you prefer a sweeter drink, then milk chocolate would do fine. Avoid chocolates that are overly sweet.
To prepare a batch of soft and chewy sprinkle cookies, simply combine softened butter with sugar, egg, vanilla, flour, salt, and baking powder. Shape the dough into small balls, coat them in sprinkles, and bake at 175°C for 10 minutes.
To replace eggs, one may opt for substitutes like yogurt, applesauce, or a milk-vinegar or milk-cornstarch combination. All these ingredients are perfect for adding moisture and binding.
For a no-oven method, either consume the dough as cookie dough bites or follow the stovetop or pressure cooker method. Whether using the stovetop or pressure cooker method, preheat the system well, and then cook the dough balls.
To make these sweet, sugary cookies, all you need is all-purpose flour, unsalted butter, egg, granulated sugar, baking powder, vanilla extract, salt, and plenty of colorful rainbow sprinkles.
When stored at room temperature in an airtight container, these sprinkle cookies stay fresh for 3 to 4 days. Refrigeration keeps them fresh for 2 weeks. For long-term storage, you can freeze baked cookies for up to 3 months.
Sprinkle cookies often turn flat and greasy if the dough is too warm. The other reasons are a faulty fat-flour ratio, overmixing the dough, overbaking it, or using an expired leavening agent.
Unlike other cookies, sprinkle cookies are cherished for their crunchy, stiff texture. With low moisture content, these cookies feature a firmer and crispier experience. Moreover, the colorful sprinkles always act as a visual treat.
As colorful as they are, these sprinkle cookies can be used to make ice cream sandwiches. To add a splash of color to your party platter, they can be stacked as well or dipped into melted chocolate.
For chocolate sprinkle cookies, it is always recommended to use premium baking chocolate bars. Chop the bar into chunks to melt smoothly into the soft, chewy dough.
When it comes to making sprinkle cookies, there is no one best brand in the world. Several popular brands make delicious sprinkle cookies. However, the best sprinkle cookies are always those made in your kitchen.
To make a batch of strawberry cupcakes at home, simply combine flour, baking powder, salt, powdered sugar, softened butter, eggs, milk, and chopped strawberries. Fill the cupcake liners with the batter and bake at 175°C for 20 minutes.
Yes. Eggless strawberry cupcakes are quite a popular choice amongst dessert lovers. To replace eggs, one may use applesauce, plain yogurt, mashed banana, or a milk-vinegar mixture for moisture and binding the batter.
To make some no-oven strawberry cupcakes, follow the stovetop method using a large pan or a pressure cooker with a tight lid. Pour the batter into the liners, place it on a greased baking plate kept on a wire rack, and cover to cook.
Strawberry cupcakes are typically made with the standard cake batter ingredients such as flour, powdered sugar, softened butter, eggs, and milk, with fresh or freeze-dried strawberries for flavor.
To keep them fresh for 2-3 days at room temperature, store them in an airtight container. However, frosted cupcakes are always recommended to be refrigerated. This keeps them fresh for 3-4 days.
Strawberry cupcakes often turn dry or dense, mostly because of using excess flour or overmixing the batter. Using wet strawberries is another reason, as excess moisture often throws off the balance of the recipe.
A strawberry cupcake is a sweet, fruity, tangy dessert featuring a light, fluffy sponge cake base that melts in the mouth in seconds. Flavored with real strawberries, unlike any other dessert, these are an absolute delight.
To add some fun, one may inject a center of thick strawberry jam or lemon curd into a strawberry cupcake. They can be topped with a sweet, homemade strawberry whipped cream as well.
If including chocolate in a strawberry cupcake, make sure it is semisweet or dark chocolate, as the slightly bitter flavor of dark chocolate cuts through the sweet-tangy flavor of strawberries perfectly.
There is no specific best brand for it, as strawberry cupcakes are made almost everywhere in the world. From fancy bakeries and restaurants to home kitchens and local cafes, many places make delicious strawberry cupcakes.
Tiramisu is an Italian dessert containing coffee-dipped ladyfingers, layering them with a creamy mascarpone filling. Sometimes, it can also include chocolate or fruits. Don't soak the biscuits for a long time.
The traditional recipes contain coffee liqueur such as Marsala wine, Kahlúa or rum, yet most homemade recipes are completely alcohol-free. Check your recipe before giving it to kids or people with specific diet requirements.
Soak the ladyfingers in coffee and layer them with a creamy mascarpone filling and again do this several times and keep chilled for hours. Dust it with cocoa powder before serving. Do not soak biscuits for too long or else they will become mushy.
Tiramisu cake combines all the flavors of tiramisu together in soft sponge cake with mascarpone filling, coffee and cocoa powder. Some recipes can include chocolate layers. Don't put too much coffee, otherwise, it will cover all the other ingredients' taste.
Make the mascarpone filling from the whipped cream, mascarpone, sugar, and vanilla. Layer it with soaked in coffee ladyfingers and refrigerate before serving. Be careful not to over-whip the cream because it becomes grainy.
For the traditional recipes, you should use Marsala wine, while for others you can use Kahlúa, dark rum, brandy, or coffee liqueur. You can leave out alcohol completely. Don't put too much alcohol, otherwise, it can overshadow the coffee taste.
Add some cocoa powder on top and add some grated chocolate, chocolate shavings, coffee beans or some sprinkled chopped nuts. Don't add too much sweet toppings to cove up the coffee taste.
High-quality dark or semi-sweet chocolate pairs well with the mascarpone filling and coffee. If you use milk chocolate, the result will be sweeter. Low-quality chocolate with artificial flavors is not recommended.
Use couverture, dark, or semi-sweet chocolate because they melt evenly and create a silky cream. Chop the chocolate before melting. Avoid overheating it, as it may become grainy or seize.
Dark or semi-sweet Dairy Milk chocolates pair beautifully with coffee-flavored sponge and mascarpone filling, adding richness without excessive sweetness. Milk chocolate also works. Avoid overly bitter chocolate, which can dominate the delicate flavors.
An easy homemade truffle cake is all about assembling a rich and moist chocolate sponge cake with a creamy filling, soaking it with some chocolate syrup, and layering and covering it with rich chocolate ganache or frosting.
Yes. To try this eggless version of the truffle cake, simply replace eggs with yogurt, condensed milk, or a milk-vinegar mixture for moisture and binding, while keeping the rest of the recipe the same.
If there's no oven, one may try making truffle cake in a pressure cooker as well. The result is still a moist, fluffy, and spongy cake. Once the cake is ready, assemble it with the ganache and frosting.
When made from scratch, a truffle cake contains flour, sugar, butter, cocoa powder, leavening agent, eggs, milk, melted chocolate, and heavy cream. Some recipes also include a chocolate syrup for added chocolatey indulgence.
When stored at room temperature, the shelf life of a standard truffle cake is usually 2-3 days. Refrigeration keeps it fresh for 4 to 5 days. As it is made with melted chocolate and heavy cream, it is ideal to consume it soon.
While making a chocolate truffle cake, people often use boiling cream with the chocolate to make the ganache. This often splits the emulsion, as the fats and liquids separate. The result is an oily, grainy, or greasy texture.
While homemade truffle cakes include premium ingredients, no preservatives, and a measured amount of sugar, the store-bought ones often include unhealthy vegetable fats and preservatives.
To add a creative twist to the regular truffle cake recipes, one may explore some flavors like spicy chili-cinnamon, zesty orange, peanut butter, or crunchy nut pralines. All of them pair perfectly with the cake.
High-quality dark couverture chocolate with a high percentage of cocoa solids is often considered the best option for a rich and chocolatey truffle cake. This one ensures a perfect balance of texture and flavor.
Truffle cake is one of the most popular types of chocolate cakes sold across the world. Filled with chocolatey indulgence, these cakes are an absolute delight. However, there is no one specific brand that is considered best for this.
Yes. In fact, the eggless version of Tutti Frutti cake is quite popular. To make this, you simply need to replace eggs with yogurt and sweetened condensed milk. Even without eggs, the cake tastes incredibly delicious.
It can be baked in a pressure cooker as well. Remove the rubber ring and the whistle. Add some salt to the base and insert the trivet inside. Now, preheat the covered cooker and place the cake tin on the trivet, cover, and bake for 35–45 minutes.
To make a classic tutti frutti cake, you need all-purpose flour, tutti frutti, butter, sugar, milk, baking powder, baking soda, and vanilla essence. Eggs or yogurt act as the binding agent and also lend moisture to the cake.
When kept in an airtight container, a homemade Tutti Frutti cake typically stays fresh for 3 to 4 days at room temperature. If refrigerated, it stays for a week. The commercial ones with preservatives last for 45 days.
While making this, people often forget to coat the crushed fruits in flour before adding them to the batter. This makes them sink to the bottom of the pan while baking.
While the store-bought ones are highly processed and high on preservatives and sugar, the homemade cakes are safer choices. It gives you complete control over the ingredients and overall quality.
To add some creative twists to the recipe, one may try flavors like chocolate, citrus, and almond. For a boozy effect, the fried fruits can be soaked in alcohol. For some added crunch, garnish it with some chopped nuts.
For a perfect Tutti Frutti cake, it is best to use dark, semi-sweet couverture chocolate. The rich and intense flavor profile of the chocolate perfectly balances the intense sweetness of the fried fruits.
Several cafes, cake shops, and restaurants make delicious tutti frutti cakes. It is popular amongst many local bakeries as well. There is no specific commercial brand that can be considered the best for this.
To make vanilla cookies at home, simply combine flour, baking powder, sugar, salt, egg, milk, and vanilla extract. Once the cookie dough is ready, roll it into balls and bake at 180°C, then cool.
Yes. To replace eggs, one may opt for substitutes like yogurt, applesauce, or a milk-vinegar/cornstarch combination. All these ingredients are perfect for adding moisture and binding.
Yes. To make it a no-oven process, one can follow the stovetop pan method using a heavy-bottomed pot, the pressure cooker method, or a no-bake drop cookie recipe in which the cookies are set in the fridge.
A batch of classic vanilla cookies includes ingredients such as butter, sugar, egg, vanilla extract, all-purpose flour, a pinch of salt, and a small amount of baking powder or baking soda.
When stored in an airtight container at room temperature, these cookies stay fresh for 3-5 days. Make sure they are placed in a cool and dry place. Refrigeration is not exactly ideal for these cookies, as they get dry easily.
Vanilla cookies often turn out dry or dense due to common issues such as improper flour measurement, gluten formation from overmixing the dough, or baking them for too long. Expired leavening agents also cause trouble.
Being highly versatile in nature, these vanilla cookies can be tweaked very easily. Be it the toppings, roll-in ingredients, or additional flavor makers, one may play around with varieties like cinnamon cookies, sugar cookies, and more.
If you are planning to add a chocolatey touch to the vanilla cookies, always opt for bittersweet or dark chocolate, as they effectively cut through the sweetness of classic vanilla cookies.
There is no one best brand, as several commercial brands produce high-quality vanilla cookies. However, the best vanilla cookies are always those made in your kitchen.
To make a batch of vanilla cupcakes, combine the standard cake ingredients, such as flour, baking powder, salt, sugar, butter, eggs, and vanilla extract. Pour the batter into liners, and bake at 175°C for 20 minutes.
Yes. Eggless vanilla cupcakes are as delicious as the regular ones. To replace eggs, simply use alternatives like unsweetened applesauce, plain yogurt, or silken tofu. All of them are perfect for adding moisture and binding the batter.
To make a batch of vanilla cupcakes without an oven, one may follow the stovetop method using a large pan with a lid. Make the cupcake batter, pour it into the liners, place it on a greased baking plate, and cover to cook.
Making a batch of soft, fluffy, and spongy vanilla cupcakes uses some of the simplest baking staples like flour, powdered sugar, softened butter, eggs, a pinch of salt, some milk, and pure vanilla extract.
When kept at room temperature, the vanilla cupcakes last for 2-3 days. Refrigeration keeps them fresh for 4-5 days. However, the exact shelf life of a vanilla cupcake largely depends on the ingredients used.
While baking a batch of vanilla cupcakes, the most common mistake that occurs is overmixing the batter, as gluten formation from flour often leads to dense and chewy cupcakes instead of soft and fluffy ones.
The main difference between a homemade vanilla cupcake and a store-bought one lies in the quality of ingredients. While the store-bought ones include preservatives to extend shelf life, the homemade ones have pure ingredients.
To add a fun and creative twist to the vanilla cupcake, one may simply try adding mix-ins like rainbow sprinkles, chocolate chips, buttercream frosting, and more. Also, chocolate spreads are a great option to top them with.
To include chocolate in the cupcake batter, it is ideal to use high-quality baking chocolate, as it features a perfect taste and flavor. Alternatively, one may also use couverture chocolate.
When it comes to making soft, buttery, spongy vanilla cupcakes, there is no one best brand in the world. In fact, in some places, it is the local bakeries that serve the best vanilla cupcakes.
To make vanilla fudge at home, simply mix and melt sugar, white chocolate chips, condensed milk, heavy cream, and butter over low heat until it reaches the soft-ball stage. Next, add vanilla extract and let it set.
Yes. To make an eggless vanilla fudge, replace eggs with applesauce, plain yogurt, or a milk-vinegar mixture. If you need a vegan option, you may also use a flax egg (flaxseed and water mixture).
Yes. To make a creamy vanilla fudge without an oven, melt the white chocolate chips in a double boiler. Next, mix in the other ingredients. Cook them over a low heat and chill the mixture well.
A typical vanilla fudge is made with sugar, butter, milk, condensed milk, heavy cream, and vanilla extract. For some added creamy and sweet indulgence, white chocolate chips are also used.
To store vanilla fudge at room temperature for a few days, make sure it is wrapped individually in plastic wrap or parchment paper and placed inside an airtight container. For longer storage, refrigerate it.
Vanilla fudge gets its signature soft and fudgy texture from the microscopic sugar crystals. A dry and dense vanilla fudge comes from excess water evaporation. Large sugar crystal formation also ruins the texture.
While most of the desserts are either baked or cocoa or flour-based, vanilla fudge is all about enjoying a simple yet smooth, creamy, fudgy sweet dessert that melts in the mouth like nothing else.
To try other variations, one may try adding mix-ins such as toasted nuts, chocolate chips, sea salt, or some caramel sauce on top. For a flavor variation, one may replace vanilla with almond extract as well.
If you wish to include chocolate in vanilla fudge, make sure it is a high-quality, real white chocolate. It can be either premium baking bars or chips that contain real cocoa butter. Cheaper quality ruins the final texture.
Often made at cafes, bakeries, restaurants, and even in home kitchens, vanilla fudge is a popular dessert. There is no one specific commercial brand that is considered best for this dessert.
To make Walnut Fudge at home, melt chocolate, condensed milk, and butter over low heat until smooth. Stir in vanilla and chopped walnuts, pour into a lined tray, chill until firm, then cut into neat squares before serving.
Yes, Walnut Fudge is egg-free in its natural form in most recipes. Chocolate, condensed milk, butter, vanilla, and walnuts combine to form a smooth texture without eggs. You can also use plant condensed milk and chocolate for a totally vegan recipe.
Walnut Fudge doesn't require an oven to prepare. You can simply melt all the ingredients in a pot or microwave, stir thoroughly, pour into a tray, and let it chill. Be careful while melting the chocolate as it tends to be grainy.
The basic ingredients for making Walnut Fudge are chocolate, condensed milk, butter, vanilla extract, and chopped walnuts. Moreover, ingredients such as cocoa powder, sea salt, coffee, or cinnamon can be added to provide a richer taste.
Keep Walnut Fudge in an airtight container in a refrigerator where it will last for about two weeks. It is also possible to freeze Walnut Fudge for three months and defrost it before serving.
If Walnut Fudge turns out dry and dense, it is probably because the chocolate was overheated during melting or the mixture was cooked for a long time. Inaccurate ingredient measurements and excessive stirring may also contribute to that effect.
Walnut Fudge is not baked but chilled to set. The combination of smooth and creamy texture with crunchy nuts gives a unique and rich taste which makes this dessert feel soft and dense in comparison with most other chocolate desserts.
Caramel, peanut butter, espresso, sea salt, dried cranberries, pistachios, almonds, or white chocolate can be added to Walnut Fudge. They will add new flavors and retain the creaminess and crunchiness of the dessert.
Baking with premium dark, milk, or semi-sweet chocolate is preferable for making Walnut Fudge, as it melts well and provides a rich flavor. Besides, Dairy Milk offers a wide range of chocolates to choose from, which makes the texture even silkier due to its ingredients.
There is no single best brand for Walnut Fudge. Many confectionery brands offer good options, but homemade Walnut Fudge often stands out because you can choose quality chocolate, fresh walnuts, and adjust the sweetness to your taste.
You can make apple bread at home by mixing chopped apples with flour, sugar, butter or oil, cinnamon, and baking powder. Bake the batter in a loaf tin until soft, moist, and lightly golden.
Yes, you can make apple bread without eggs by using yoghurt, mashed banana, or condensed milk. Fresh apples help keep the loaf moist and flavorful, and the ingredients mentioned above help too.
Yes, apple bread can be easily made at home without an oven. It can be baked in a pressure cooker, an air fryer, or a heavy-bottomed pan on low heat. Apple bread without an oven also turns out soft and delicious when cooked slowly.
Apple bread can be made with ingredients like apples, flour, sugar, butter or oil, cinnamon powder, baking powder, milk, and nuts such as walnuts or almonds, which will add extra texture.
You can store apple bread in an airtight container at room temperature for up to two days. You can also refrigerate it if you want it to stay fresh for a longer period.
Apple bread can turn out dry or dense when you add too much flour or overbake. Overmixing the batter can also affect its texture and prevent it from becoming light and soft.
Apple bread stands out because it has the texture of a moist loaf cake and is less sweet than many desserts. It works well as a breakfast treat, snack, or tea-time bake.
You can add caramel sauce, raisins, chopped walnuts, oats, cinnamon sugar topping, or chocolate chips while baking apple bread. Some recipes also include a cream cheese glaze for extra richness.
Dark chocolate is the perfect chocolate to go with apple bread, especially with cinnamon. Its rich flavor balances the sweetness of the fruit and adds a delicious contrast to the soft bread.
Cadbury Bournville is an excellent choice for apple bread because its rich cocoa flavor goes very well with apples. If you prefer something creamier, you can try Cadbury Dairy Milk also as chocolate chunks or toppings.
You can make banana ice cream by blending ripe bananas with fresh cream, milk, and condensed milk until it becomes smooth. Later, pour it into a container and freeze for 6–8 hours until it becomes firm and creamy.
Yes, banana ice cream can easily be made eggless. Using fresh cream, milk, condensed milk, and ripe bananas gives it a rich, creamy texture without needing any eggs at all.
Banana ice cream does not need an oven. All you need to do is blend the ingredients, pour the mixture into a freezer-safe container, and freeze until set, stirring once or twice for a smoother texture.
Banana ice cream is made using ripe bananas, fresh cream, milk, and condensed milk. Some recipes also add vanilla extract or a pinch of salt to enhance the natural banana flavour.
Homemade banana ice cream stays fresh in the freezer for about 2 weeks when stored in an airtight container. When you store it properly, the flavor, texture, and creaminess are intact for longer enjoyment.
Banana ice cream can turn dry or dense if the bananas are not ripe enough or if the mixture is not properly whisked. Ice crystals can also form if it is not stored correctly.
Banana ice cream differs from regular desserts because of its natural fruity sweetness and smooth, creamy texture. It is served frozen and makes a light, refreshing treat compared to heavier baked desserts.
You can try easy variations like adding chocolate chips, crushed nuts, caramel swirls, or peanut butter to your banana ice cream. Mixing in cocoa powder also gives it a delicious chocolate-banana twist.
Dark chocolate works best with banana ice cream since its slight bitterness balances the natural sweetness of bananas. Milk chocolate is also a good choice if you prefer a sweeter, softer flavour.
There is no one best brand for banana ice cream. You should use good-quality bananas, fresh cream, and trusted dairy products, which will always give you the best homemade taste and texture, no matter the brand.
You can make kaju katli by grinding cashews into a fine powder and cooking them with sugar syrup until a soft dough is formed. Then roll the mixture, flatten it evenly, let it cool, and cut it into diamond-shaped pieces.
Make coconut barfi by cooking grated coconut with milk and sugar until the mixture thickens. Later, add cardamom, spread it onto a greased plate, allow it to set, and cut it into squares, and enjoy!
Make besan barfi by roasting besan in ghee until it turns golden and aromatic. Mix in sugar and cardamom, spread the mixture into a tray, let it cool completely, and cut it into pieces.
You can make nariyal barfi by cooking fresh grated coconut with sugar and milk until the mixture leaves the sides of the pan. Later, spread it evenly, let it set, and slice it into neat squares or diamonds, and enjoy.
To make mawa barfi, cook mawa with sugar over low heat until the mixture thickens. Add cardamom and chopped nuts, spread the mixture into a greased tray, let it cool completely, and then cut it into pieces.
Doda Barfi is a rich Punjabi sweet made with milk, sugar, wheat flour, ghee, and dry fruits. This barfi has a dense, slightly chewy texture and a deep caramel-like flavour.
Yes. You can sweeten barfi with dates, figs, jaggery, or other natural sweeteners instead of refined sugar. The texture can be a little different, but the taste does not change a lot.
Yes. Crumbled or chopped barfi can be used in cake filling or topping. It also works well in layered desserts and adds a rich Indian twist to the classic cakes.
You can use dark as well as milk chocolate to coat a traditional barfi. Cadbury Bournville gives a rich chocolate coating, while Cadbury Dairy Milk adds a sweeter and creamier finish.
Cadbury Bournville can work well with besan barfi because it has a rich cocoa flavour that goes well with roasted besan and ghee. The taste of this fusion is balanced, and it is not overly sugary.
Start by preparing the brownie batter with butter, sugar, chocolate, flour, and cocoa. Spread half the batter into a baking tin, drizzle caramel sauce over it, cover with the remaining batter, bake until set, and let it cool before slicing.
Replace eggs with yoghurt, condensed milk, mashed banana, or flaxseed mixture. These ingredients keep the brownie soft and moist while allowing the caramel flavour to shine.
You can bake caramel brownies in a pressure cooker or heavy-bottomed pan using salt as the base. Cook on low heat until a toothpick comes out with a few moist crumbs.
Caramel brownies can be made with flour, cocoa powder, butter, sugar, chocolate, caramel sauce, vanilla extract, baking powder, and a pinch of salt. You can also add walnuts or pecans for extra crunch.
Caramel Brownies stay fresh for about 3–4 days at room temperature in an airtight container. You can refrigerate them for up to a week and warm them slightly before serving.
Overbaking is one of the biggest reasons brownies become dry. Too much flour, incorrect measurements, or adding very hot caramel to the batter can also affect the final texture.
Caramel brownies are a mix of rich chocolate with sweet, buttery caramel in every bite. The soft, fudgy centre and gooey caramel layer make them more indulgent than many everyday desserts.
You can enjoy Caramel Brownies warm with vanilla ice cream, fresh strawberries, whipped cream, or a drizzle of salted caramel sauce. They also taste great with a hot cup of coffee.
Dark chocolate gives Caramel Brownies a rich flavour, while milk chocolate creates a sweeter taste. Cadbury Bournville works well for intense chocolate flavour, while Cadbury Dairy Milk is a great choice for a milder brownie.
For homemade Caramel Brownies, many people prefer Cadbury Bournville for baking because it melts well and has a rich cocoa taste. Cadbury Dairy Milk and Cadbury Silk are also good options l if you want a sweeter, creamier brownie.
You can prepare a caramel cookie at home by preparing a cookie dough with butter, sugar, flour, and vanilla. Add caramel pieces or swirl caramel sauce into the dough, shape the cookies, and bake until the edges turn lightly golden.
Yes. You can make eggless caramel cookies by using milk, yoghurt, or condensed milk instead of eggs. Even without eggs, the cookies stay soft inside with crisp edges and a rich caramel flavor.
Yes. You can bake caramel cookies in a preheated pressure cooker or a heavy-bottomed pan over low heat. You do not necessarily need an oven for golden and delicious cookies.
Caramel cookies are made using flour, butter, sugar, caramel pieces or caramel sauce, vanilla extract, baking powder, and a pinch of salt. Some recipes also include chocolate chips or chopped nuts for extra flavor and texture.
You can store caramel cookies in an airtight container after they cool completely. They stay fresh for about a week at room temperature and remain crisp when kept away from moisture.
If you use too much flour, overbake the cookies, or do not use ingredients as per the correct measures, your caramel cookies can turn out dry. Mixing the dough too much can also affect the final texture.
Caramel cookies have a buttery texture and sweet caramel in every bite. Unlike cakes or brownies, they have crisp edges, a slightly chewy centre, and are easy to enjoy as a snack.
You can add chocolate chips, chopped almonds, walnuts, sea salt, cinnamon, or coffee powder to the dough for some extra flavor and texture. These simple additions create new flavors without changing the recipe too much.
Both dark and milk chocolate go well with caramel cookies. Cadbury Bournville chocolate can pair well with caramel cookies. If you want something sweet, you can also try the simple Cadbury Dairy Milk with caramel cookies.
If you are baking at home, Cadbury Bournville, Cadbury Dairy Milk, and Cadbury Silk are all good choices for adding chocolate to Caramel Cookies. They melt well and pair nicely with the rich caramel flavor.
You can prepare caramel by melting sugar, letting it cool slightly, then mixing it with fresh cream, milk, and condensed milk. Freeze the mixture for 6–8 hours until firm, and you have a caramel ice cream ready to scoop and serve.
You can make eggless caramel ice cream by using fresh cream, milk, condensed milk, and homemade caramel. This ice cream turns out smooth, creamy, and rich without the need for eggs.
Caramel Ice Cream does not need an oven. You need to prepare the ice cream mixture, pour it into a freezer-safe container, and freeze until set. You can choose to stir it once or twice while freezing to improve the texture.
The main ingredients for caramel ice cream are sugar for the caramel, fresh cream, milk, condensed milk, and vanilla extract. Some recipes also use a pinch of salt for a salted caramel flavour.
Homemade cramel ice cream will stay fresh in the freezer for about 2–3 weeks, especially when it is stored in an airtight container. Proper storage helps keep its flavour and creamy texture intact.
Overcooking the caramel, using burnt sugar, or not cooling the mixture before freezing can affect the flavour and texture of your caramel ice cream. Ice crystals can also form if you do not store the ice cream properly.
Caramel ice cream stands out from regular desserts because it has a smooth, creamy texture and rich caramel flavour. It is served frozen, and makes for a refreshing dessert that can be enjoyed on its own or with other sweets.
You can serve caramel ice cream with chocolate sauce, roasted nuts, brownies, waffles, apple pie, fresh fruits, or crushed cookies. You can also top it with extra caramel sauce for more flavour.
Dark chocolate pairs especially well with caramel ice cream because it balances the sweetness. Milk chocolate is another good option if you want a softer and sweeter flavour combination.
There is no single best brand for Caramel ice cream. You should use good-quality dairy products, chocolate, and ingredients from trusted brands, which will usually give the best homemade results.
Prepare coconut ice cream step by step by mixing fresh cream, coconut milk, condensed milk, and grated coconut until it becomes smooth. Pour the mixture into a freezer-safe container and freeze for 6–8 hours until it becomes firm. Serve the ice cream chilled.
You can make eggless coconut ice cream at home with the help of coconut milk, fresh cream, condensed milk, and grated coconut. It gets a smooth, creamy texture without using eggs.
Coconut Ice Cream does not need an oven. Prepare the mixture, pour it into a freezer-safe container, and freeze until set. Stir it once or twice while freezing for a creamier texture.
Coconut ice cream is made by using coconut milk, fresh cream, condensed milk, grated coconut, and vanilla extract. You can also add toasted coconut flakes for extra flavour and texture.
Homemade coconut ice cream stays fresh in the freezer for about 2–3 weeks when you store it in an airtight container. Proper storage helps keep it creamy and prevents ice crystals.
Some issues, like too much liquid, not mixing the ingredients well, or freezing the mixture too quickly can affect the texture. Ice crystals can also form if you do not store it properly.
Coconut Ice Cream has a rich coconut flavour and a smooth, creamy texture. It feels light and refreshing, and thus becomes a perfect dessert for warm days or after a heavy meal.
You can add a creative twist to coconut ice cream by adding toasted coconut flakes, chocolate sauce, fresh mango, pineapple, berries, waffles, or crushed biscuits. You can also enjoy it with warm brownies for a tasty dessert.
Dark chocolate goes very well with coconut ice cream because it balances the sweetness. Milk chocolate is also a great choice if you prefer a creamier and sweeter flavour.
There is no single best brand for coconut ice cream. It is important to use good-quality coconut milk, fresh cream, and chocolate from trusted brands, which will give you the best homemade flavour and texture.
Prepare a brownie batter with flour, cocoa powder, butter, sugar, and dissolved instant coffee. Bake until the edges are set and the centre is slightly soft. Let it cool before slicing and serving.
Yes. You can make an eggless coffee brownie by replacing eggs with yoghurt, condensed milk, or a flaxseed mixture. The brownie stays soft, moist, and full of chocolate and coffee flavour.
Yes. Bake the brownie in a pressure cooker or a heavy-bottomed pan on low heat. This method gives you a soft and fudgy coffee brownie without using an oven.
Coffee brownie is made of flour, cocoa powder, butter, sugar, instant coffee or espresso, chocolate, vanilla extract, and baking powder. You can also add walnuts or chocolate chips for extra texture.
Keep Coffee Brownies in an airtight container at room temperature for up to 3 days. For longer storage, refrigerate them for about a week and warm them slightly before serving.
Too much flour, overmixing the batter, or baking for too long can make coffee brownies dry or dense. Measuring the ingredients correctly and avoiding overbaking helps keep them soft.
Coffee brownies has the rich taste of chocolate with the bold flavour of coffee. Unlike regular brownies, they have a deeper aroma and a slightly more intense flavour in every bite.
You can add chocolate chips, chopped walnuts, hazelnuts, caramel sauce, peanut butter, or a mocha frosting. A scoop of vanilla ice cream also pairs beautifully with coffee brownies.
Cadbury Bournville is a great option, while Cadbury Dairy Milk works well for a sweeter brownie. Dark chocolate brings out the coffee flavour beautifully and gives the brownie a rich taste.
For homemade Coffee Brownies, Cadbury Bournville is a favourite because of its rich cocoa flavour. Cadbury Dairy Milk and Cadbury Silk are also good choices if you enjoy a smoother and sweeter chocolate taste.
Make dry fruit ice cream by mixing fresh cream, condensed milk, milk, and chopped dry fruits until everything is mixed well. Pour the mixture into a freezer-safe container and freeze for 6–8 hours until it becomes firm.
You can make eggless dry fruit ice cream by mixing fresh cream, milk, condensed milk, and chopped dry fruits. The ice cream becomes rich, creamy, and full of crunchy bites without using eggs.
Dry Fruit Ice Cream does not need an oven. You need to prepare the mixture, pour it into a freezer-safe container, and freeze until set. Stir it once or twice while freezing and you will have a smoother texture.
Dry Fruit Ice Cream is made with fresh cream, milk, condensed milk, almonds, cashews, pistachios, raisins, and vanilla extract. Some recipes also add saffron or cardamom for extra flavour.
Homemade dry fruit ice cream can be stored in the freezer for about 2–3 weeks in an airtight container. Proper storage helps keep the ice cream creamy and prevents ice crystals.
When you use too much liquid, add large pieces of dry fruits, or do not mix the ingredients well, it can affect the texture. Ice crystals can also form if you do not store it properly.
Dry Fruit Ice Cream is unique because it has creamy texture and a crunchy mix of nuts and dry fruits. It is rich, satisfying, and adds more texture than many other frozen desserts.
You can serve dry fruit ice cream with chopped pistachios, almonds, honey, chocolate sauce, waffles, brownies, or fresh fruits. You can also garnish it with saffron strands for a festive touch.
Dark chocolate pairs well with dry fruit ice cream because it balances the sweetness and complements the nutty flavours. Milk chocolate is a good choice if you prefer a sweeter taste.
If you are buying ready-made ice cream, brands like Amul, Kwality Wall's, Vadilal, Mother Dairy, and Havmor are popular choices. If you are making it at home, use good-quality dairy products and fresh dry fruits for the best flavour.
You can make a fusion cookie at home by preparing a basic cookie dough and mix in your favourite flavors like chocolate, nuts, dried fruits, or spices. Later, shape the dough into cookies and bake until the edges are golden and the centres stay soft.
Yes. You can make fusion cookies without eggs by using yoghurt, milk, or condensed milk. The cookies stay soft and delicious even without using cake and letting the different flavors stand out.
Yes. You can bake fusion cookies in a preheated pressure cooker or a heavy-bottomed pan over low heat. This method also gives you evenly baked fusion cookies without an oven.
Fusion cookies are made using flour, butter, sugar, vanilla extract, baking powder, and a mix of ingredients like chocolate chips, nuts, dried fruits, coffee, caramel, or spices for unique flavors.
To store fusion cookies, let them cool completely before storing. You can also keep them in an airtight container at room temperature, where they will stay fresh for about a week.
If you use too much flour, overmix the dough, or bake the cookies for too long, it can make them dry. It is important to measure the ingredients correctly to make soft and crunchy cookies.
Fusion Cookies have a mix of different flavors from different desserts or cuisines in one recipe. These cookies offer unique taste combinations that make them different from classic chocolate or butter cookies.
You can combine chocolate with orange zest, coffee, peanut butter, coconut, caramel, pistachios, cranberries, or spices like cinnamon. These simple combinations make exciting and new cookie flavors.
Both dark and milk chocolate work well in fusion cookies. Cadbury Bournville adds a rich chocolate flavor, while Cadbury Dairy Milk and Cadbury Silk add a sweet taste and make the cookies creamier.
For homemade fusion cookies, Cadbury Bournville, Cadbury Dairy Milk, and Cadbury Silk are all excellent choices. You can pick the chocolate based on the flavor combination you want to create, whether it is rich, sweet, or creamy.
You have to take two cookies or biscuits and place a generous scoop of ice cream between them. Later, press gently so the filling spreads evenly. Freeze the assembled sandwich for a few hours until it becomes firm and holds its shape well.
Ice cream sandwiches can absolutely be made eggless. Pairing eggless cookies with eggless ice cream gives you the same rich, creamy result without having to compromise on taste or texture.
An oven is not needed if you pick up ready-made cookies or biscuits from the store. All you have to do is assemble the layers and let the freezer do the work until everything is set firm.
An ice cream sandwich is made by cookies or biscuits, which form the outer layer, while a generous scoop of ice cream sits in between as the filling. Many people also add chocolate chips, colourful sprinkles, or a drizzle of sauce for extra flavour.
You can store an ice cream sandwich by wrapping each sandwich individually in cling film, or place them in a single layer inside an airtight container before freezing. This simple step keeps them tasting fresh for close to two weeks without losing their texture.
Overbaked cookies are often the reason behind a dry, dense sandwich, along with ice cream that has melted and refrozen one too many times. Sticking to soft cookies and freezing promptly usually solves this issue.
Unlike most baked desserts, an ice cream sandwich has a crunchy or chewy base with a cold, creamy centre. The contrast in texture and temperature is what sets it apart and makes it difficult to resist.
You can roll the edges in sprinkles or crushed nuts, which makes things more fun, and swapping in flavoured cookies also works well. A layer of chocolate or caramel sauce inside adds a nice, indulgent twist, too.
Cadbury dark chocolate pairs nicely with ice cream sandwiches, since its slight bitterness cuts through the sweetness. If you'd rather keep things sweeter and softer, Cadbury Dairy Milk or Hershey's milk chocolate also works.
Brands like Amul, Kwality Wall's, and Baskin-Robbins are popular choices for the ice cream filling, while any good-quality biscuit brand works for the base. These brands also sell ready-made ice cream sandwiches, which will save you time.
You can make besan laddoo by roasting besan in ghee on low heat until it turns golden and aromatic. Later, let it cool slightly, mix in powdered sugar and cardamom, then shape the mixture into round laddoos.
To make til laddoo, dry roast sesame seeds until they start popping. Later, mix them with melted jaggery syrup, stir well, and shape the mixture into laddoos while it is still warm.
You can make coconut laddoos by cooking grated coconut with condensed milk or sugar until the mixture thickens. Add cardamom, let it cool slightly, then roll it into laddoos and coat them with desiccated coconut.
Make dry fruit laddoos bu blending dates with almonds, cashews, pistachios, walnuts, and seeds until combined. Shape the mixture into laddoos and roll them in chopped nuts or coconut if you like.
Make moong dal laddoo by roasting moong dal flour in ghee until it is fragrant and lightly golden. Add powdered sugar and cardamom after it cools slightly, then shape the mixture into laddoos.
To make rawa laddoo from sheera, you need to prepare sheera with semolina, ghee, sugar, and milk. Let it cool until it is warm enough to handle, then shape it into laddoos before it sets completely.
Roast besan on low heat for about 20–25 minutes, and make sure you are stirring it continuously. It should turn golden, smell nutty, and release ghee. Proper roasting gives besan laddoos their rich flavor.
If a laddoo mixture becomes too try, add a little warm ghee or a few teaspoons of warm milk and mix well. Add only a small amount at a time until the mixture becomes soft enough to shape.
You can use good-quality milk or dark chocolate to make Chocolate Laddoos. Add Cadbury Dairy Milk, as it gives a creamy, sweet flavor, while Cadbury Silk gives a richer and smoother texture.
For gourmet Chocolate Laddoos, you can use Cadbury Bournville, as it has a rich cocoa flavor. Gourmet laddoos pair very well with dry fruits, nuts, coconut, and roasted seeds, for flavor and texture.
Start by preparing a chocolate brownie batter, add a few drops of mint extract, and mix well. Pour the batter into a baking tin, bake until the batter is set perfectly, let it cool completely, and then cut into squares.
You can make an eggless mint brownie by using yoghurt, condensed milk, or a flaxseed mixture instead of eggs. Add mint extract to the batter for a fresh flavour without changing the texture.
Bake the brownie in a preheated pressure cooker or a heavy-bottomed pan over low heat. This method gives you a soft and fudgy mint brownie without having to use an oven.
Mint Brownie is made by using flour, cocoa powder, butter, sugar, chocolate, mint extract, vanilla extract, baking powder, and a pinch of salt. You can also add chocolate chips for extra richness.
Mint brownies stay fresh for about 3–4 days in an airtight container at room temperature. You can refrigerate them for up to a week if you want them to last longer.
Adding too much mint extract can overpower the chocolate flavour. Overbaking or using too much flour can also make the brownies dry instead of soft and fudgy. Make sure the ingredients and baking time is followed as mentioned.
Mint Brownies have the rich chocolate flavor with a cool mint flavour, giving every bite a refreshing twist. The balance of chocolate and mint makes them different from classic brownies and many other desserts.
You can serve mint brownies with mint chocolate ice cream, whipped cream, chocolate sauce, fresh mint leaves, or crushed peppermint candies. They also taste great with a hot cup of coffee.
Cadbury Bournville is a great choice, while Cadbury Dairy Milk gives a sweeter taste if you prefer. Dark chocolate also works best because it pairs well with mint and creates a rich flavour.
For homemade mint brownies, Cadbury Bournville is a popular choice because of its rich cocoa taste. Cadbury Dairy Milk also work well if you prefer a smoother and sweeter chocolate flavour.
Mishti Doi is a traditional Bengali dessert made by fermenting sweetened milk with curd. It has a smooth, creamy texture and a rich caramel flavor that comes from caramelised sugar or jaggery.
To make mishti doi, you have to boil milk, sweeten it with caramelised sugar or jaggery, and let it cool until warm. Mix in a little curd, pour it into bowls, and leave it to set before chilling.
You can make mishti doi with condensed milk by boiling milk with condensed milk and letting it cool until warm. Later, stir in fresh curd, pour the mixture into serving bowls, and allow it to set before refrigerating.
You can make mishti doi in an oven by mixing the warm milk and curd, and placing the bowls in an oven on the lowest warm setting. The gentle warmth is important to let the mishti doi set evenly.
You can make mishti doi with jaggery by boiling the milk and letting it cool slightly before adding melted jaggery. Later, mix in fresh curd once the milk becomes warm, then leave it undisturbed until the mishti doi sets.
Yes. You can use toned milk, but full-fat milk gives a thicker and creamier texture. If you use toned milk, you should simmer it for a little longer to make it richer.
Mishti doi contains milk and sugar, so it is best enjoyed in moderation. Having it occasionally as part of a balanced diet is a better choice than eating large portions regularly.
Mishti Doi usually takes 6–8 hours to set in a warm place. After it sets, refrigerate it for a few hours before serving to get the best flavor and texture.
You need to replace sugar with melted jaggery after the boiled milk cools a little bit. This prevents the milk from curdling and gives the mishti doi a rich and earthy sweetness.
If you want to give Mishti Doi a chocolate twist, Cadbury Bournville is a perfect choice. Its rich cocoa flavor pairs well with the creamy yoghurt and caramel notes without making the dessert very sweet.
Prepare a chocolate brownie batter, spread it into a baking tin, and swirl peanut butter through the top with a knife. Bake until the edges are set, and the centre is slightly fudgy. Cool the tray completely before cutting.
You can make an eggless peanut butter brownie by using yoghurt, condensed milk, or a flaxseed mixture instead of eggs. These ingredients keep the brownies soft, moist, and rich without changing the flavour.
Bake the brownie in a preheated pressure cooker or a heavy-bottomed pan instead of an oven. Cook it over low heat until the top is set, and the brownie remains slightly soft in the centre.
Peanut butter brownies are made with flour, cocoa powder, butter, sugar, peanut butter, chocolate, baking powder, vanilla extract, and a pinch of salt. You can also add chocolate chips for extra richness.
Peanut butter brownies stay fresh for about 3–4 days in an airtight container at room temperature. You can refrigerate them for up to a week or freeze them for a longer shelf life.
If you have used too much flour, overmixed the batter, or baked for too long, then your brownies might become dry. Thick peanut butter that is not spread evenly can also affect the texture.
Peanut butter brownies have rich chocolate with the creamy, nutty flavour of peanut butter. The sweet and salty combination gives them a unique taste that stands out from classic brownies.
Serve peanut butter brownies with vanilla ice cream, sliced bananas, chopped peanuts, chocolate sauce, or whipped cream. They also taste delicious with a glass of cold milk or a hot coffee.
Dark chocolate gives peanut butter brownies a deeper chocolate flavour, while milk chocolate makes them sweeter. Cadbury Bournville is a great choice for rich brownies, while Cadbury Dairy Milk adds a creamier taste.
For homemade peanut butter brownies, Cadbury Bournville is a popular choice because of its rich cocoa flavour. Cadbury Dairy Milk and Cadbury Silk also work well if you prefer a sweeter and creamier brownie.
Add instant coffee of your choice along with sugar and boiling water in a bowl and whisk at high speed for about 2 minutes. Pour it into a glass of milk (your choice); add a few ice cubes, stir well, and enjoy.
Brew coffee by mixing coffee powder with milk in a saucepan. When it's done, add unsweetened cocoa powder and pieces of chocolate. Stir well and let it cool down. Pour into a glass and serve.
Combine boiling water, sugar, instant coffee, and mix them in a bowl; add either Cadbury's dark chocolate or milk chocolate of your choice, whisk well, and serve hot immediately.
In a blender, add cold milk, instant coffee of your choice, sugar, and blend it until thick. Pour it into a glass, take a scoop of chocolate ice cream and add it to the cold coffee, and serve.
You can add chocolate syrup to your cold coffee for extra chocolate flavor or drizzle chocolate syrup inside the glass in circular patterns. This will make your cold coffee look cafe-style and give you the best flavor, right at home.
You can mix any chocolate of your choice into either hot or cold coffee by either adding it inside the coffee mixture or using shavings to decorate your coffee.
Keep your coffee recipe as is, then add cocoa powder and milk chocolate to a hot coffee mix and stir well.
Keep the steps for making coffee the same, and add Cadbury's dark or milk chocolate of your preference to get a chocolaty twist. Add ice cubes and keep it in the refrigerator for a chilled drink.
It depends on the flavor profile that you are looking for; something not so sweet and intense in flavor would use dark chocolate; a sweet and smooth coffee would require milk chocolate.
Cadbury has a wide variety of chocolates that can be selected and put together with any type of coffee.
Start by melting any chocolate of your choice in a saucepan, then add condensed milk and butter. Mix it together to form a thick texture and let it cool down. Divide into pieces and refrigerate for a few hours, and serve.
Add sugar, milk, and heavy cream to a saucepan and stir well. Cook over medium heat until sugar dissolves fully. Remove from heat and add vanilla extract and butter, and mix until it thickens. Let it cool down and refrigerate for 1-2 hours, and serve cold.
It is not purely chocolate, but it can be chocolate flavored. Traditionally, fudge is made with boiling condensed milk, sugar, and butter.
It is a rich and dense variation of a traditional chocolate cake. Chocolate fudge cake has a heavier cake batter and is frosted generously with rich chocolate ganache or a fudge sauce.
In a saucepan, melt white chocolate of your choice, add condensed milk and butter. Then mix it all together until it thickens and let it cool. Cut into pieces, cool down in the refrigerator, and serve chilled.
Whisk 55% dark chocolate, sugar, heavy cream, corn syrup, cocoa powder, and a touch of salt in a saucepan over medium heat. Remove from heat and add butter and vanilla extract, and stir well.
Combine flour, baking powder, salt, and cocoa powder in a bowl and whisk well. In a separate bowl, whisk eggs, vanilla extract, and sugar. In a saucepan, melt butter and sugar over medium heat. Combine the butter and egg mixtures, after which gradually add the dry mixture. Stir until combined, and bake for 30 minutes.
Substitute any chocolate of your choice with peanut butter and follow the same recipe.
Fudge sauce is a thick and rich sauce made from cocoa, butter, cream, or milk. Unlike chocolate syrup, fudge sauce is thick and pourable, not freezing at room temperature.
Cadbury's dark chocolate lineup, or milk chocolate like Dairy Milk Silk, can be taken into consideration when preparing chocolate fudge.
Making Caramel dessert at home is easy. Prepare a cookie base by crushing vanilla cookies with melted butter, pour it into a pan, and refrigerate for 30 minutes. In a saucepan, melt dark chocolate with cream and let it cool down; add it on top of the cookie base. Place it back in the refrigerator to set. In another saucepan, add brown sugar, water, vanilla extract, and a little bit of sea salt to make the caramel sauce. Let it cool down. Pour it on top of the cookie and dark chocolate mix. Cool for 2 hours, then serve.
Yes, it can be made without eggs and doesn't require any addition to the mixture whatsoever. However, you can use cornstarch instead for the dessert to retain its shape, or gelatin powder.
A caramel chocolate dessert can be also made by stovetop cooking, steaming or refrigerating layered desserts.
It is made up of crushed vanilla cookies, butter, dark chocolate, cream, brown sugar, water, vanilla extract, and sea salt.
Store it in the refrigerator within an airtight container so it doesn't harden up, and the layers remain intact without ruining the structure of the dessert. 6. Why does Caramel Chocolate Dessert sometimes turn out dry or dense?It can turn dry due to exposure to the refrigerator's coolant, which tends to dry out food; and it can turn dense if you add too much dark chocolate or cream in the dark chocolate coating for the cake.
It has 2 unique flavors: caramel and chocolate combined together to form a sweet yet savory flavor, balancing each other out to form a perfect harmony and a party inside of your mouth.
Top it off with dry fruits and nuts or mix it in the chocolate mixture, add berries like strawberries and raspberries to the chocolate to further enhance the flavor profile, or just go easy and pair it with classic vanilla ice cream.
Cadbury's Dairy Milk and Bournville chocolate lineups are considered budget and premium options, respectively, and you can choose between them to fulfill your desired preference.
Homemade caramel chocolate dessert beats store-bought desserts by a huge margin, as you can customize the taste to your liking and always make little tweaks and adjustments to suit your taste buds.
Start by popping popcorn kernels on the stove or in a pressure cooker (lid covered but not closed); prepare the caramel sauce on the other burner by mixing butter, sugar, corn syrup, a pinch of salt, and baking soda, whisking it together until it reaches a nice consistency. Coat your popcorn with the caramel sauce, add it to a baking tray, and bake for 45 minutes.
Eggs are typically not used in caramel popcorn preparation.
Instead of an oven, you can use a bowl to coat the popcorn with caramel sauce, drizzling it evenly and carefully so as not to form any lumps and allow it to cool down at room temperature. The sauce must be at a low boiling temperature.
The main ingredients used in making caramel popcorn are: popcorn kernels, sugar, corn syrup, a pinch of salt, and baking soda.
It can last for 2-3 weeks when stored in an airtight container and kept at room temperature. It should not be refrigerated, as cold temperatures can prevent the popcorn from remaining dry, causing it to get mushy and chewy.
It can be caused by a multitude of factors, such as not cooking the popcorn long enough to evaporate any moisture, or caramelizing the caramel sauce at a high temperature, which can turn it bitter and give it a burnt taste.
Crunchy on the outside with the caramel sauce, and soft inside due to the popcorn, it makes up for a unique experience, as you can expect a delightful sweetness as well as an airy feel.
You can combine caramel popcorn with sea salt, chocolate, coffee, dry fruits, nuts, honey, or maple syrup to add another twist to the rich flavor profile.
Dark chocolate is considered to be the best when it comes to making chocolate caramel popcorn, as it gives a hint of cocoa and balances out the sweetness of the caramel sauce. It also adds an extra layer of flavor to be savored.
It varies from person to person and what brands they like; however, homemade caramel popcorn still remains the best choice. You can browse through the list of available Cadbury milk and dark chocolates if you want to give caramel popcorn a fusion twist.
Mix crushed Cadbury Oreo biscuits with melted butter to prepare the crust, and press it down in a baking pan. Prepare the cheesecake filling by mixing instant coffee powder with water, adding it to cream cheese, vanilla extract, and sugar, and whisking it until thick and creamy; pour it on top of the crust. Bake for 50-60 mins. To make the chocolate ganache, use Cadbury dark or milk chocolate as per preference, melt it, and add instant coffee powder; whisk until it thickens and pour it on the cheesecake filling. Refrigerate for a few hours and serve.
Yes, there are no eggs used in the preparation of coffee cheesecake. However, you can blend heavy cream with cream cheese, and settle it in the refrigerator.
Instead of using an oven, follow the exact steps as earlier and refrigerate it, take it out, and add ganache layering. Refrigerate again for a few hours, and serve chilled.
The ingredients for a coffee cheesecake are: Oreo cookies, butter, coffee powder, water, cream cheese, vanilla extract, sugar, Cadbury dark or milk chocolate, and coffee powder.
It is safe to eat for up to 4 days after preparation, provided that it is stored in an airtight container. You can enjoy it for up to 3 months if it is stored in the freezer.
A common mistake that people make is that they add coffee directly to the mixture without dissolving it first, or use too much liquid coffee, which ends up ruining the texture of the cheesecake.
Homemade coffee cheesecake is guaranteed to taste fresher and tastier than store-bought cheesecake, as you can use high-quality ingredients to prepare it and be able to experiment with flavors and its taste.
You can directly add dark chocolate or cocoa powder to the cheesecake filling, and make it espresso-style, or add dry fruits like hazelnuts and almonds to add a nutty texture and flavor to the cheesecake.
Cadbury's range of dark and milk chocolates is extensive, as well as cocoa powder and hot chocolate powder if you want to have a chocolaty twist with your coffee cheesecake.
When you make it at home, it tastes better due to fresher and higher-quality ingredients that are handpicked by the consumer, and it is a good policy generally to make coffee cheesecake at home, however you like it.
Firstly, prepare the cake batter by whisking together sugar, vanilla extract, yogurt, and an egg. Now add baking powder, flour, salt, and whisk until smooth. Pour into a cake mold, set aside. Start making the custard by whisking together egg yolks, sugar, vanilla extract, and milk, and cook it in a saucepan until it thickens. Layer it on top of the cake batter and bake for 45 minutes at 180 C.
Yes, custard cake can be made eggless by using ingredients like custard powder, thick yogurt (curd), or incorporating vinegar in the mix.
A custard cake can be made in a pressure cooker through the steaming process. Keep the rest of the recipe the same.
Store it in the refrigerator for 4-5 days, then serve at room temperature to prevent it from drying out or becoming hard.
Overbaking, or adding too much flour to the cake batter, can cause the custard cake to turn dry, whereas overmixing and setting it at a higher temperature can cause it to turn dense.
A custard cake provides a richer, lusher mouthfeel than typical sponge cakes. Also, custard cake is creamier compared to other desserts.
You can add fresh berries like blueberry, raspberry, or strawberry to give it a fruity twist, or add a chocolate ganache at the top to get a chocolate custard cake.
Chocolate with 50-55% cocoa, like Cadbury Bournville, is the perfect fit if you want to serve it as shavings on top of the cake, or make a ganache frosting.
There is no particular brand that is best for custard cake, as a homemade custard cake will always taste far superior and be made with many customizations or substitutions if the consumer desires.
Firstly, prepare the custard by adding warm milk, eggs, sugar, and vanilla extract together, whisk gently, and pour into a baking mold; then bake it in the oven using the Bain-Marie method.
To make custard pudding without eggs, replace them with custard powder, and keep the rest of the ingredients the same: vanilla extract, sugar, and milk.
Instead of an oven, a steamer can be used to make custard pudding, or a saucepan in which the pudding mixture is formed and then cooled down at room temperature for a while, after which it can be refrigerated and served.
A custard pudding requires whole milk, eggs, sugar and vanilla extract for a baked version, and milk, custard powder, sugar, vanilla extract for a non-baked version.
Homemade custard pudding lasts for around 2-4 days when kept refrigerated in an airtight container, while store-bought pudding lasts for approximately 5-7 days.
If you cook the custard at high temperatures, it has a risk of curdling the eggs present inside, making the consistency appear like scrambled eggs. And if you used custard powder instead, and the mixture wasn't cooked until it reached a boil, it would result in a runny pudding.
It is silky and soft, with a creamy and smooth texture, and it has different variations in different parts of the world, like Creme Caramel, Flan, Japanese Purin etc.
You can adopt a classic caramel custard pudding style, or you can top it off with fresh fruits, maybe give it a little hint of chocolate instead of caramel at the top, or add a nutty twist by mixing it with dry fruits and nuts.
Dark chocolate is the best type of chocolate for a custard pudding, as it brings an intense richness and balances the sweetness of the custard perfectly. It can be used in the topping of the custard pudding.
Generally, homemade custard pudding is the best way to experience its flavor. There are many choices in the market for custard mixes, but Cadbury has its own line of dark chocolates and cocoa powder that can be used to further enhance the flavor of the pudding.
Melt dark chocolate in a saucepan, add condensed milk and butter. Mix it together to form a thick and luscious texture, and let it cool. Cut into any shape that you want and serve cold.
Dark chocolate traditionally does not require the use of any eggs, but instead uses melted dark chocolate, condensed milk, and butter in order to maintain it's shape and texture.
Instead of using an oven, you can divide the fudge batter into different molds and simply refrigerate for at least 3-4 hours, or until completely firm. Take it out and serve chilled.
The main ingredients used in dark chocolate fudge are melted dark chocolate, condensed milk, and butter.
It lasts for a week at room temperature; when properly refrigerated, it can last up to 3 weeks.
Cook it at the right temperature, neither too much heat nor too little; mix the ingredients properly in order for it not to be overly dense or dry.
It melts in your mouth compared to other dark chocolate desserts. It is an easy, quick recipe, as Dark chocolate fudge avoids using any baking flour or soda.
Add some nuts to the mixture, pair with fresh berries like blueberry or strawberry, or put a scoop of vanilla ice cream on top if you really want an indulgent dessert.
Cadbury Bournville can be a reputable choice if you're looking to make dark chocolate fudge.
Homemade dark chocolate fudge tastes the best when it comes to making it the right way.
Add chopped milk chocolate to a saucepan, melt it, and add condensed milk and butter. Stir it to make it thicken, and then let it cool down for a while. Cut it into pieces and refrigerate. Serve chilled.
A Milk Chocolate Fudge recipe is naturally made eggless.
Typically, milk chocolate fudge is made without the use of an oven. Instead, a saucepan is used to melt the chocolate and other ingredients, then it is refrigerated.
The ingredients used in a milk chocolate fudge are melted milk chocolate, condensed milk, and butter.
It can last for a week at room temperature and up to 3 weeks when you refrigerate it.
If you overcooked the fudge, it likely turned grainy and dry. Do not whisk if it's too hot; otherwise, it will result in a crystallized texture.
The smoothness and creaminess of milk chocolate accentuate this dessert to a whole new level, making it sweet yet luscious. It is highly versatile as it can be paired with quite a wide variety of fruits and nuts.
Top it off with or mix with strawberries, serve it with fresh dry fruits and nuts, pair it with vanilla ice cream, or pour some caramel sauce on top of the fudge.
Cadbury's Dairy Milk Silk is a recommended option to use while searching for milk chocolates to use in a milk chocolate fudge recipe.
Homemade milk chocolate fudge tastes the best, as it lets the consumer decide whether to make any changes or new twists, or pairings with the dessert.
Start by preheating your oven to 175°C. Sift salt, baking soda, baking powder, and flour into a bowl. Mash ripe bananas in another bowl, add sugar, melted butter, an egg, and vanilla extract. Combine with the flour mixture. Divide batter among multiple muffin baking molds, and bake for 20 minutes.
It is a small baked food item made from cake batter. Typically, muffins use a similar process to make a simple cake, the only difference being in the shape and size.
A microwave can be used to cook a muffin instead of an oven; just make sure to use microwave- safe baking molds instead of metal ones. The batter should be microwaved for 45 seconds .Keep checking and run for 30 seconds to 1 minute for a 1200w microwave.
Sift flour, baking soda, and salt in a bowl. Heat milk in a saucepan and add cocoa powder. In the cocoa mixture, add sugar, yogurt, egg, and vanilla extract. Combine it with the dry mixture, and gradually add chocolate chips and mix with a spatula. Bake for 25 minutes.
In a large bowl, whisk baking powder, flour, sugar and salt. Mix an egg, milk, and vanilla extract in another bowl. Add the dry mixture to the wet mixture, and stir gently. Add your blueberries carefully. Bake for 20 minutes.
Most standard muffins bake for 15 to 25 minutes at 175°C to 200 °C. The exact time depends heavily on your muffin size and the specific baking method you choose.
There is no muffin cake as such, but you can make cake from the muffin batter. For that, replace the muffin tin with a 6-inch cake pan and pour the batter into it. Place it in a preheated oven and bake for 30 minutes at 180°C.
Mix sugar, water, vanilla, melted chocolate of your choice, and vinegar in a bowl. Separately, whisk baking powder, cocoa, salt, and flour. Combine the mixtures together, fill the muffin molds, and bake for 20 minutes.
For the perfect double chocolate muffin, use unsweetened or Dutch-processed cocoa powder for the batter, paired with semi-sweet or bittersweet chocolate chips.
A 50-70% dark chocolate or dark chocolate chips can be used in a chocolate oat muffin. Cadbury has a wide range of dark chocolates to choose from.
Grind Biscoff cookies with melted butter to make the dessert crust; for the cheesecake filling, whisk cream cheese, sugar, and vanilla extract until smooth; for the caramel sauce, heat brown sugar with a little water until golden brown and caramelized. Assemble in a baking mold by adding the crust, cheesecake filling, and the caramel sauce on top. Refrigerate for 4-6 hours and serve.
Yes, instead of eggs, no bake caramel dessert is typically thickened and set using either agar agar powder or standard custard powder.
You can use the boiling method or steam a gelatin-free or egg-based custard, then cool it in the refrigerator.
Biscoff cookies, melted butter, cream cheese, sugar, vanilla extract, brown sugar, and water are the ingredients used to make a no bake caramel dessert.
It can last up to 5 days when refrigerated in an airtight container. Freezing may extend the shelf life to 1-2 months.
Rushing the cooling process should be avoided to let the cheesecake take shape and settle, and the use of low-fat cream cheese should be avoided to ensure it properly sets in the mold.
The taste, texture, and quality of the dessert are vastly different from store-bought dessert; homemade cheesecake can be easily customized to the consumer's needs.
You can add caramel sauce directly to the cheesecake filling to enhance the caramel flavor, as well as dried fruit and nuts for a nice, crunchy texture.
Dark chocolate is best paired with a caramel cheesecake that brings a unique flavor profile to balance the sweetness and make it taste richer, with hints of cocoa.
The best no-bake caramel cheesecake is best made at home, using high-quality ingredients found in grocery stores, with varying brand names and products.
In a large bowl, sift baking powder, flour, sugar, and salt together. Add milk, an egg, and melted butter in the center; mix until smooth. Heat a pan over medium heat, and pour the pancake batter in small batches. Cook until the edges are dry, about 2-3 minutes. Flip and repeat, and serve hot.
You can easily make soft and fluffy pancakes without the use of eggs by replacing them with a simple binder and leavening agent. Instead of regular flour, use all purpose flour (maida) in order to help the pancake keep its shape intact without the use of eggs.
To make Banana Pancakes, add a mashed ripe banana into the pancake batter along with baking powder, salt, flour, and sugar. Add eggs and melted butter. Mix until smooth, then pour it on a pan. Once one side is done, flip and cook the other side. Serve hot.
A pancake is a flat, round cake made from a starch-based batter (usually containing flour, eggs, milk, and a leavening agent like baking powder) and cooked on a hot frying pan. It is a universally popular dish enjoyed worldwide, with countless regional variations and toppings.
Combine flour, baking soda, sugar, milk, eggs, butter, and vanilla extract. Let the mixture rest for a while before pouring into a hot pan. Overmixing can make your pancakes chewy.
They are made of baking powder, flour, salt, sugar, and fusion pancakes can be made by adding bananas, chocolate, strawberries, etc.
Whisk the wet and dry ingredients separately, and don't overmix the batter. Use ghee to cook the pancakes in the pan and keep them warm so they stay as fluffy as possible.
For classic, fluffy pancakes, all-purpose flour is the best choice. It creates a soft structure without making the pancakes chewy. For an even lighter, more delicate crumb, you can use cake flour or mix all-purpose flour with whole wheat flour.
Mix milk, eggs, and vanilla extract in a bowl. In a separate bowl, add flour, cocoa powder, sugar, and salt; whisk them nicely. Pour the wet batter into the dry batter and mix in the dark chocolate chips. Cook over medium heat. Serve hot.
Add baking powder, baking soda, and a touch of vinegar so the pancakes maintain the same consistency as batter with eggs.
Start off by mixing milk with unflavored gelatin powder in a bowl. Stir until combined, and set aside. Take a saucepan, add heavy cream and sugar, and stir over medium heat. When it comes to a boil, add the gelatin mixture and mix until fully incorporated. Remove from heat and add vanilla extract. Let it cool at room temperature for 20 minutes, and refrigerate. Serve chilled.
Classic panna cotta is a luxurious, silky Italian dessert made from just five staple ingredients: heavy cream, milk, sugar, vanilla, and unflavored gelatin. These components are gently heated, poured into molds, and chilled until set.
Traditional panna cotta can easily be made without gelatin by using alternative setting agents like agar-agar powder or egg whites (for the baked method).
Serve panna cotta either unmolded onto a dessert plate for an elegant presentation, or directly in the glass or jar it was chilled in. Top with a vibrant, tart fruit sauce like raspberry, or a mint sprig for a beautiful contrast in flavor and color.
Panna cotta typically takes 4 to 6 hours to fully set in the refrigerator, though letting it chill overnight will yield the best, most stable texture. If you plan to unmold the dessert rather than serving it directly in a glass, 6 to 8 hours is highly recommended.
Run a thin, sharp knife around the inside edge of your mold to break the seal. Briefly dip the bottom of the mold in warm water for 5 to 10 seconds. Place a serving plate on top, invert it in one swift motion, and gently shake it until it drops out.
Use any dark chocolate of your choice, add it to heavy cream and sugar in a saucepan; mix until completely melted. Add the milk and gelatin powder mixture, stir well, and let it cool down. Set aside in the refrigerator and serve after 4 hours.
Dark chocolate is considered to be the best while making panna cotta, but people with a sweet tooth can substitute it with milk chocolate.
Gelatin should not be added to boiling liquids, as it can lead to panna cotta not setting properly. Putting warm panna cotta into the fridge can cause the top to wrinkle; hence, it must be avoided.
For a shortcake crust pastry, whisk flour, sugar, and salt in a large bowl. Add butter with your fingertips, and gradually add water. Assemble it in the shape of a dome; it is important not to knead. Roll it out into a pie mold and bake at 190° C for 25 minutes covered, and 15 minutes uncovered.
Choux pastry is a light, airy French pastry dough made from water, butter, flour, and eggs. It relies on high moisture content and steam to puff up dramatically when baked, creating a crisp exterior and a hollow center perfect for fillings.
In a large bowl, whisk flour, sugar, and salt. Rub the butter into the flour and combine them. Add water gradually, using your hands and toss the dough. Refrigerate for 2 hours, take it out, and apply the roll and fold technique 6 times. Brush it with an egg wash and bake at 205° C for about 25-28 minutes.
Baklava is made using phyllo (or filo) pastry. This unleavened dough is rolled into paper-thin sheets. To get that signature flaky, crispy texture, stack dozens of these delicate sheets, brushing melted butter or ghee between the layers and sandwiching them with a filling of crushed nuts.
Shortcrust pastry is a classic, crumbly dough used for the bases of pies, tarts, and quiches. It gets its name and its distinct, crumbly melt-in-the-mouth texture from having a high fat-to-flour ratio, which prevents the development of gluten.
Take milk in a saucepan, add vanilla extract and mix them together. In a separate bowl, stir sugar, cornstarch, salt, and egg yolks together. Combine the milk with the egg mixture and whisk constantly. Cook over medium heat until the cream begins to thicken. Take it off the heat, strain the cream through a sieve, and cool for 30 mins. Refrigerate for 2-3 hours and serve.
Follow the steps to make shortcake pastry, and add pastry cream inside. Top it off with fresh fruits like strawberries, mango, raspberries, kiwi, etc and some whipped cream.
Make a soft chocolate sponge cake, fill it with chocolate cream, and coat with chocolate ganache or chocolate shavings. Chill before serving. Do not put together the pastry when the cake is warm.
Add dark chocolate chips to the puff pastry, roll it up, and fold it. Add egg wash on top and bake at 200° C for 20 minutes. Sieve powdered sugar on top and serve.
Use a chocolate with 55-70% cocoa content. Cadbury has a wide variety of dark chocolates to help you choose.
Start by making a shortcrust pastry by whisking flour, salt, and sugar in a bowl. Add butter and water gradually and form a dome. Bake it at 190° C for 25 minutes covered and 15 minutes uncovered. Fill the pastry with any food of your choice, cover it with more shortcrust pastry, and bake for 25 minutes uncovered and 25 minutes covered with foil. Let it cool down and serve.
It is a fruit pie in which the primary filling is made of apples. A classic baked dessert made with a pastry crust.
For the filling: mix mashed pumpkin, milk, sugar, eggs, and cinnamon with an electric mixer. Pour it into a shortcrust pastry and bake for 40-60 minutes. Let it cool for 20 minutes before serving.
It is an English dessert made from bananas, whipped cream, and a thick caramel sauce, combined with either a pastry base or one made from crumbled biscuits and butter.
It is a Floridian dessert made with key lime juice, egg yolks, and condensed milk. Key lime pie can be served with a meringue topping or whipped cream.
In a large bowl, combine sliced apples, sugar, flour, cinnamon, nutmeg, lemon juice, and mix to coat evenly. Take the pie crust (shortcrust pastry) and fill it with the apple mixture. Coat the pie with more shortcrust pastry (lightly baked) and apply egg wash. Bake for 25 minutes at 204° C, turn the oven down to 190 °C and bake for another 35 minutes. Cool at room temperature for a few hours before serving.
To make chocolate pie, melt chocolate and mix with sugar, cornstarch, milk, and egg yolks. Cook until thickened, pour into a baked crust, chill until set, and top with whipped cream before serving.
Add sugar, cornstarch, salt, and milk in a saucepan, along with 4 egg yolks. Stir gently and cook on medium heat. When it reaches a boil, add chopped dark chocolate and vanilla extract to the mix. This is the filling for the pie. Now, add this to a shortcrust pastry and refrigerate for a couple of hours. Serve chilled.
For a chocolate pie, use high-quality, finely chopped semi-sweet or bittersweet baking bars (55% to 70% cocoa). Premium brands deliver a rich, complex flavor that complements the texture of the pie.
For the richest chocolate mud pie, use high-quality bittersweet (60% to 70% cocoa) or semi-sweet baking chocolate bars, like Cadbury Bournville dark chocolate or Cadbury cocoa powder.
Chop up white chocolate of your choice, and melt it in a saucepan. Add condensed milk and butter. Whisk it over medium heat to let it thicken. Let it cool. Divide it into any shape and number of pieces that you like and refrigerate. Serve chilled.
Yes, the recipe above is prepared without the use of eggs. You can use condensed milk and butter to mimic the consistency of eggs.
White chocolate fudge is traditionally made without the help of an oven. A saucepan is used to cook all the ingredients, then the fudge is transferred to a refrigerator to cool down.
Melted white chocolate of your choice, condensed milk, and butter are the ingredients that go into white chocolate fudge.
It can typically last 1 to 2 weeks at room temperature (in an airtight container), 2 to 3 weeks in the refrigerator, and 2 to 3 months in the freezer.
Melt white chocolate slowly, as it has a higher chance of getting burnt when compared to other types of chocolate. Ensure that no water is used, as it causes the chocolate to turn sticky and not spread properly in the mixture.
When white chocolate fudge is prepared at home, the consumer has a lot of variety over products that they want to use; they can alter it to their liking. Besides that, one can also introduce fun ways to serve the fudge.
Add a scoop of chocolate chip ice cream on top, or a caramel and roasted almond sauce drizzle. You can also choose to add Cadbury Oreo cookies into the white chocolate fudge on the side, or sprinkle them on top.
It depends on the preference of the consumer, but ensure that high-quality white chocolate must be used; otherwise, the taste profile may vary significantly.
Homemade white chocolate fudge is preferred over store-bought recipes due to no added preservatives, a fresher taste, use of high-quality ingredients, and the ability to make it as customizable as the consumer wants.
Grind freshly tender coconut in a blender along with sugar, and set it aside. In a saucepan, add agar-agar powder or gelatin, whisk until evenly mixed, bring to a boil, then add the coconut mix. Now pour coconut milk and whisk until it thickens. Transfer to a baking mold and set it aside in the refrigerator for 2-3 hours, and consume.
You can use gelatin or agar agar powder, or even cornstarch in order to make the pudding structure stable, without ever needing to add eggs into the mixture.
Coconut Pudding can be made in a saucepan on low to medium heat, without ever needing to use the oven, or it can also be made with the help of a steamer.
A simple coconut pudding uses fresh coconut milk, sweetened condensed milk and cornstarch. For elaneer pudding, tender coconut flesh and agar agar powder are utilized.
It lasts 3-4 days in the refrigerator when stored in an airtight container, away from dryness or moisture. It should not be left at room temperature for more than 2 hours.
If you use cornstarch, the mixture must come to a low boil for the pudding to set properly. Make sure not to add liquids like coconut water excessively otherwise, the cornstarch will dissolve, and the pudding may turn watery and soupy.
It has a refreshing taste of a tropical fruit like coconut, and makes up for a delightful dessert in the summer. It uses coconut milk instead of regular milk in order to achieve its richness and creamy texture with the help of coconut itself.
You can pair it with fruits like mango or kiwi, and with dry fruits like almonds and cashews, or even with chocolate shavings to give your taste buds something to crave.
It depends on the flavor profile that you are looking for. For example, high-quality dark chocolate can pair well with coconut pudding to balance the sweetness without overpowering the flavor, or milk chocolate for a smoother and creamier texture.
The best approach is to make it yourself using high-quality ingredients that will taste better than store-bought pudding, but if you're searching for high-quality chocolate, you can look towards Cadbury's line of cocoa and chocolate products.
Whisk eggs, sugar, vanilla extract, coffee powder, and a little salt until mixed completely. In a separate pan, heat milk till it comes to a boil and whisk it into the coffee mixture slowly. Preheat the oven to 180 °C and pour the coffee pudding mixture into molds, then bake for 1 hour. After baking, refrigerate for at least 2 hours before serving.
Yes, it can be made eggless by substituting eggs with cornstarch, as it plays the same role as the eggs in helping the pudding hold its shape together without falling apart completely.
An oven is not a necessity in order to make a coffee pudding. You can make it in a saucepan instead, while keeping the mixture on low heat and allowing it to thicken and cool down at room temperature, then refrigerate it for a few hours and serve chilled.
A coffee pudding is made of the following ingredients: eggs, sugar, vanilla extract, coffee powder, a little salt, and whole milk.
It should be kept refrigerated and used within 3-4 days, and kept covered with a lid in order to prevent the top layer from developing a thick, hard layer, and should be stored in an airtight container.
Drying happens due to excess coffee being added to the coffee pudding, which results in the absorption of moisture present inside. Whereas using too much cornstarch can cause it to turn dense, as milk creates a grainy texture.
It differs from dishes like coffee mousse as coffee pudding is smooth and creamy, whereas mousse is light and airy, having completely different characteristics, despite tasting similar to coffee.
Some varieties of coffee pudding include sugar-free coffee pudding, caramel-topped coffee pudding, dry fruit coffee pudding, and dark chocolate coffee pudding.
It depends on what the consumer's preference is; if they want a rich and intense flavor, then dark chocolate is for them, whereas if they want a creamier and savory twist, they can go ahead with milk chocolate as well.
Homemade coffee is usually preferred while making coffee pudding, but in case of unavailability, any brand with good quality can be used in order to make it as authentic as possible.
You can make desserts at home with simple ingredients like milk, fruits, chocolate, cream, or biscuits. Many homemade desserts require only a few steps and are easy enough for beginners to prepare.
Some easy desserts to make at home are brownies, puddings, fruit parfaits, milkshakes, ice creams, crepes, cookies, and chocolate-based items. Most of these recipes require very little preparation time.
Some of the most popular desserts are cakes, brownies, ice creams, cheesecakes, cookies, mousse, falooda, kulfi, chocolate desserts, and other fruit-based items that are loved by people of all ages.
Some quick dessert recipes are chocolate milkshakes, mug cakes, fruit yogurt, no-bake cheesecakes, chocolate-dipped fruits, and ice cream sundaes that can be prepared in just a few minutes at home.
No-bake desserts are recipes that do not require baking in an oven. Some of the no-bake desserts are chocolate mousse, pudding, frozen yogurt, dessert jars, cheesecake cups, and chilled fruit desserts.
Some healthy dessert ideas are fruit salads, Greek yogurt parfaits, dates and nuts laddoos, homemade frozen yogurt, and smoothies made with natural sweeteners and fresh ingredients. Most of these desserts can be easily prepared at home.
Many desserts need only a few ingredients. Chocolate fudge, banana ice cream, yogurt parfaits, milkshakes, cookie truffles, and caramel pudding are some simple examples that are easy to make at home.
You can make desserts without an oven by using a stovetop, refrigerator, freezer, or pressure cooker. Many puddings, crepes, shakes, and no-bake desserts are prepared this way, which taste equally delicious.
Good-quality milk and dark chocolates are some of the best options for homemade desserts. It depends on what flavor you want and how sweet or deep you want the dessert to be.
Cadbury Dairy Milk is great for sweeter desserts, and Cadbury Bournville is good for baking recipes that need a rich chocolate flavor. Both are good options for cakes, brownies, cookies, and other homemade desserts.
Frozen yogurt is a creamy frozen dessert made with yogurt, sugar, and flavorings. It is lighter compared to the traditional yogurt or ice cream and can be served with fruits, nuts, or chocolate toppings.
Greek yogurt is a thick and creamy yogurt that is strained and the excess whey is removed. This yogurt contains more protein than regular yogurt and is used in both sweet and savory recipes.
You can make Greek yogurt at home by straining regular yogurt through a muslin cloth or fine sieve for a few hours. This process gives the yogurt a rich and creamy texture.
You can easily make flavored yogurt at home by make by mixing plain yogurt with fresh fruits, honey, vanilla extract, or a little cinnamon powder. The best part about this is that you can customise it according to your favourite flavors.
Frozen yogurt can be made at home by blending yogurt with sweeteners and fruits or flavorings before freezing it. When you stir the mixture occasionally while freezing, it helps to get a smoother texture.
You can make yogurt dip at home by mixing thick yogurt with herbs, garlic, lemon juice, and spices. Yogurt dip works very well with vegetable sticks, crackers, chips, and grilled snacks.
You can make yogurt sauce at home by mixing yogurt with ingredients like lemon juice, fresh herbs, garlic, and seasonings. You can serve this sauce along with wraps, kebabs, and roasted vegetables.
You can make fruit yogurt at home by mixing plain or Greek yogurt with freshly chopped fruits or homemade fruit puree. Fruits like mangoes, strawberries, blueberries, and bananas are preferred and loved to make homemade fruit yogurt.
Chocolate yogurt can be made at home by mixing yogurt with cocoa powder, melted chocolate, or chocolate syrup. You can sweeten it with honey or sugar and chill it before serving for a delicious dessert.
Cadbury Dairy Milk and Cadbury Bournville are two of the most beloved chocolates to make chocolate yogurt desserts. Dairy Milk gives a sweeter and creamier flavor, and Bournville adds a richer chocolate taste to the dessert.
You can make chomchom by preparing fresh chenna from milk, shaping it into oval pieces, and cooking it in sugar syrup until they become soft and spongy. It is often garnished with coconut, nuts, or mawa before serving.
Chomchom is a traditional Bengali sweet that has a soft and juicy texture. It is made from fresh chenna and soaked in sugar syrup. This Indian sweet is rich, delicate, and delicious.
The main ingredients in chomchom are full-fat milk, lemon juice or vinegar, sugar, water, and cardamom. Many recipes also use grated coconut, mawa, or chopped nuts for garnishing the chomcom.
You can make chomchom by curdling full-fat milk to prepare fresh chenna. After kneading it into a smooth dough, shape the pieces and cook them in sugar syrup until they become soft and fluffy.
Chomchom can become rubbery if the chenna is over-kneaded or if it is cooked for too long. If you use fresh milk and follow the cooking time carefully, then a soft texture can be maintained.
To keep chomchom soft, you should always use fresh chenna and cook it in enough sugar syrup over medium heat. Make sure it is allowed to rest in the syrup after cooking to retain moisture.
Chomchom can be cooked in 15 to 20 minutes in boiling sugar syrup. When it is being cooked, chomchom expands and becomes light, soft, and spongy when it is cooked properly.
Traditional Chomchom is prepared with sugar syrup, as it gives the sweet its signature texture and flavour. However, you can also try jaggery syrup or lightly sweetened versions at home.
Milk chocolate might pair beautifully with the soft and milky flavour of chomchom. Milk chocolate melts easily and adds a smooth, creamy finish to this traditional dessert made with chenna.
Cadbury Dairy Milk is an excellent choice for fusion chocolate malai chomchom because of its creamy sweetness. Cadbury Bournville can also be used for a richer chocolate flavour that will go well with the malai filling.
An easy homemade coffee shake recipe can be made with chilled milk, instant coffee powder, sugar, and ice cubes. You need to blend everything together until the shake becomes frothy and serve it cold for a refreshing drink.
Yes, coffee shake is an eggless drink and requires only a few simple ingredients. You can also add vanilla ice cream or whipped cream to make it richer and creamier.
You do not need an oven to make coffee shake. You can just blend all the ingredients in a mixer or shake them well in a bottle. This is one of the quickest beverages that can be made at home.
Coffee shake is made with simple ingredients like chilled milk, instant coffee powder, sugar, and ice cubes. Many recipes also include vanilla ice cream, chocolate syrup, or whipped cream for extra flavor.
Coffee shake tastes best when served immediately after blending, especially when it is cold. If refrigerated, it can stay fresh for a few hours, but it may lose some of its frothy texture over time.
A common mistake that people make is adding too much coffee powder, which can make the shake taste bitter. Additionally, if they use warm milk instead of chilled milk, that can also also affect its creamy texture and flavor.
With a homemade coffee shake, you can adjust the sweetness, coffee strength, and ingredients according to your preference. The homemade version also contains fewer preservatives and tastes much fresher than the store-bought ones.
You can add caramel sauce, cinnamon powder, chocolate chips, hazelnut spread, or a scoop of vanilla ice cream to give the coffee shake a delicious twist. Cold coffee with chocolate is another popular variation that many people prefer.
The best chocolate for coffee shake is dark chocolate, as it complements the rich flavor of coffee and adds depth to the drink. But if you prefer sweeter versions, opt for normal chocolates.
The best chocolate for coffee shake is Cadbury Bournville. You can grate it over whipped cream or blend it into the shake, which will give a rich chocolate and coffee combination.
Chocolate Fondue is a warm and creamy chocolate dessert that is served with fruits, marshmallows, cookies, and cakes for dipping. It is a popular dessert served in parties and special occasions.
You can make chocolate fondue at home by melting chocolate with fresh cream over low heat until it becomes smooth. Then pour it into a serving bowl and serve immediately with your favorite dipping treats.
The easiest way to melt chocolate for fondue is by heating it gently with cream and using a double boiler or microwave. Make sure you stir it well to get the smooth and silky consistency.
Chocolate fondue tastes delicious with strawberries, bananas, apples, brownies, sponge cake cubes, marshmallows, pretzels, cookies, and waffles. When there are various dipping options, the dessert becomes even more enjoyable.
Fresh strawberries, bananas, pineapple, grapes, kiwi, apples, and mangoes go very well with chocolate fondue. These fruits have natural sweetness, which complements the rich chocolate flavor perfectly while enhancing the taste.
You can dip fruits, biscuits, doughnuts, brownies, sponge cake, churros, marshmallows, and even salted crackers in chocolate fondue. When you mix sweet and salty options, you get some interesting flavor combinations.
You do not necessarily need a fondue pot to enjoy chocolate fondue. A small heatproof bowl or saucepan is also enough to make the fondue. Just make sure you serve it immediately while it is warm and creamy.
Cheese fondue sauce is prepared by melting cheese with milk or cream and seasoning it with garlic and spices. This sauce is commonly served with bread cubes, vegetables, or crackers.
Good-quality milk chocolate and dark chocolate are good choices for chocolate fondue. They melt smoothly and create a rich and creamy texture that works well with various toppings and fruits.
Cadbury Dairy Milk is a great option for a sweeter and creamier fondue fountain, while Cadbury Bournville also works for a richer chocolate flavor. Both chocolates melt well when combined with a little cream or butter.
You can make jelly chocolate at home by pouring melted chocolate into moulds, adding small jelly pieces in the centre, and covering them with more chocolate. Lastly, refrigerate until they become firm before serving.
You can make strawberry jelly by cooking fresh strawberry puree with sugar and mixing it with gelatin or agar-agar. Later, chill the mixture until it sets into a soft and fruity dessert.
Jelly chocolates are made by mixing soft fruit jelly with a chocolate coating. The jelly is first prepared and set, and later it is covered with melted chocolate and chilled until it becomes firm.
You can make fruit jelly at home by using fresh fruit juice or puree, sugar, and gelatin or agar-agar. After mixing and heating the ingredients, refrigerate them until the jelly sets properly.
Orange jelly can be prepared at home with freshly squeezed orange juice, sugar, and gelatin or agar-agar. It has a refreshing citrus flavor, and it tastes best when it is served chilled.
You can make pineapple jelly with pineapple juice or puree and a setting agent like agar-agar. Make sure you are cooking the mixture before chilling, as it helps to get the right texture and flavor.
Pomegranate Jelly is made by combining fresh pomegranate juice with sugar and gelatin or agar-agar. The sweet and slightly tangy flavor of pomegranate makes it a refreshing dessert option.
Milk chocolate works very well in chocolate jelly desserts because it has a smooth and creamy flavor. Dark chocolate is another great option if you want something with a richer chocolate taste.
Jelly can be used to make trifles, parfaits, cheesecakes, dessert cups, puddings, fruit salads, layered desserts, and chocolate-coated jelly treats. It adds both color and texture to many dessert recipes.
Cadbury Dairy Milk works best with fruity jellies because it has creamy sweetness. Cadbury Bournville also works well when you want a richer chocolate layer that balances the fruit flavors.
Kunafa is a popular Middle Eastern dessert made with thin pastry strands, a rich filling, and sugar syrup. Kunafa has a crispy texture on the outside and a soft, delicious filling inside.
Traditional Kunafa is made with shredded pastry dough, butter or ghee, and a filling such as cheese, cream, or nuts. It is usually topped with sugar syrup and crushed pistachios before serving.
To make Kunafa, you need to layer buttered pastry strands with the filling of your choice, cook or bake them until they turn golden, and pour sugar syrup over the top. Kunafa tastes best when it is served warm.
Kunafa is served when it is warm and cut into slices or squares. It can be enjoyed standalone or can be paired with ice cream, fresh cream, or a hot cup of coffee.
You can make Kunafa in a non-stick pan on the stovetop. You need to cook it on low heat until the base becomes golden and crispy, then flip it carefully so that the other side is cooked and then add sugar syrup.
To make kunafa with cream, you need a thick cream filling prepared with milk and cornflour or fresh cream. The creamy centre pairs beautifully with the crisp pastry layers and sweet sugar syrup.
If Kunafa dough is not available, you can use shredded filo pastry or finely shredded vermicelli as an alternative. Both give a similar crispy texture when it is cooked with butter or ghee.
Some popular varieties of Kunafa are cheese Kunafa, cream Kunafa, pistachio Kunafa, chocolate Kunafa, Nutella Kunafa, mango Kunafa, and stuffed Kunafa rolls. Each version has a unique flavor and texture.
Milk chocolate is the best chocolate to use for Kunafa because it melts smoothly and goes well with the buttery pastry. Dark chocolate is another excellent choice if you want a richer flavor.
For a chocolate-stuffed kunafa roll, Cadbury Dairy Milk is a great choice, as it provides a creamy and sweet filling. Cadbury Bournville also works well if you prefer a deeper and more intense chocolate flavor.
No-bake desserts are sweet items that do not require an oven or baking. They are prepared by chilling or freezing the ingredients and are perfect if you need something quick and easy at home.
You can make easy no-bake desserts at home by mixing ingredients like biscuits, chocolate, cream, yogurt, or fruits. Most recipes can be made by only mixing, assembling, and chilling ingredients before serving.
Some easy no-bake dessert recipes are chocolate mousse, cheesecake cups, frozen yogurt, chocolate truffles, dessert jars, biscuit puddings, and fruit parfaits. These desserts require minimal preparation.
The best no-bake desserts for beginners are chocolate biscuit cake, no-bake cheesecake, chocolate fudge, fruit custard, or milkshake desserts. These recipes are simple and do not require special equipment to make.
No-bake desserts usually set when they are chilled in the refrigerator or freezer. Ingredients like cream, condensed milk, gelatin, cream cheese, or chocolate give them structure and texture, and thus baking is not required.
You can make a no-bake cheesecake by making a biscuit base and then top it with a mixture of cream cheese, whipped cream, and sugar. Later, you can refrigerate it for a few hours until it becomes firm.
No-bake desserts will not set properly if there is too much liquid or if they are not chilled for enough time. If you follow the correct ingredient measurements, it usually gives better results.
You can make no-bake brownies by blending ingredients like dates, cocoa powder, nuts, and melted chocolate. You need to press the mixture into a tray and refrigerate it until it becomes firm and fudgy.
Good-quality milk or dark chocolate are the best choices for no-bake desserts because they melt smoothly and add a rich flavor. The choice depends on how sweet or intense you want the dessert to be.
The best chocolate to make a quick 10-minute no-bake chocolate dessert is Cadbury Dairy Milk because it melts easily and has a creamy flavor. Cadbury Bournville is perfect if you want a richer and more intense chocolate taste.
You can make any quick shake at home by blending chilled milk with your favorite fruits, nuts, chocolate, and flavorings. A quick shake takes only a few minutes, and you get a delicious and refreshing drink.
A quick shake recipe can be made with milk, ice cubes, sugar or honey, and your choice of ingredients like fruits, chocolate, coffee, or nuts. You can customize it according to your taste.
Yes, you can make a quick shake without ice cream. You can add frozen fruits, yogurt, or chilled milk, which fit in perfectly in the shake and still give the shake a smooth and creamy texture.
You can make a quick shake thicker by adding bananas, yogurt, soaked nuts, or a scoop of ice cream. Using less milk also helps achieve a richer consistency.
Quick shakes taste best when they are freshly prepared. However, you can refrigerate them for a few hours if needed. Just make sure to give the shake a quick stir before serving if it separates.
You can add your favorite fruits like bananas, mangoes, strawberries, apples, blueberries, chikoo, or dates to your quick shake. These fruits add natural sweetness to the shake and improve the flavor.
You can make a quick shake healthier by reducing added sugar and instead including ingredients like fruits, oats, nuts, seeds, or yogurt. If your shake has wholesome ingredients, it becomes more nutritious and filling.
Both milk chocolate and dark chocolate are perfect for making quick shakes. It depends on whether you prefer a sweeter flavor or a richer chocolate taste. You can also add some coffee-flavor chocolates for the slightly bitter taste.
Cadbury Dairy Milk is the best choice if you want to make creamy chocolate shakes. At the same time, Cadbury Bournville also works well for richer and less sweet shake recipes. Both melt easily and blend well.
Yes, you can use dark chocolate instead of normal chocolate in a quick shake recipe, as it is a great alternative. It gives the drink a deeper chocolate flavor and goes very well with coffee, nuts, and banana-based shakes.
A waffle is a popular breakfast and dessert dish that has a crisp outer layer and a soft centre. It is usually served with fruits, syrups, whipped cream, or chocolate sauce.
Waffle batter is made by mixing flour, milk, butter, sugar, baking powder, and vanilla extract. The waffle batter needs to be smooth and slightly thick for light and fluffy waffles.
You can make waffles without a waffle maker by using a grill pan, sandwich maker, or a non-stick pan. Although the shape may differ, the waffles will still taste delicious.
Eggless waffles are easy to prepare using ingredients like yogurt, milk, or mashed bananas as substitutes. Even without eggs, the waffles remain soft on the inside and crispy on the outside when cooked properly.
Fresh fruits, maple syrup, honey, whipped cream, ice cream, chocolate sauce, caramel sauce, nuts, and cookie crumbs are some of the most popular toppings for waffles. You can add as many as you like.
You can make chocolate waffles by adding cocoa powder or melted chocolate to your ready-made waffle mix. Cook them until they are crisp and serve with chocolate sauce or vanilla ice cream.
You can make chocolate waffles by adding cocoa powder or melted chocolate to the waffle batter. They pair beautifully with strawberries, whipped cream, and a drizzle of warm chocolate sauce.
Dark chocolate is an excellent choice for making Belgian-style chocolate waffles because it adds a rich and intense flavor that complements the light and crispy texture of waffles.
Cadbury Dairy Milk is the best chocolate for sweeter and creamier waffles, while Cadbury Bournville is perfect for rich chocolate waffles with a deeper flavor. Both chocolates blend smoothly into waffle batter and toppings.
To make a Banana Pudding at home, you will need sliced bananas, vanilla wafers, milk, sugar, and pudding mix. Just layer all these ingredients in a dish. Put it in the refrigerator until it is cold. Then you can top it with whipped cream. This Banana Pudding is a dessert for when your family get-togethers or for special occasions.
Yes, you can make Banana Pudding without eggs. You can use pudding mix or cornstarch instead of eggs. If you add whipped cream and condensed milk, your Banana Pudding will be rich and creamy. This way you can still enjoy the classic Banana Pudding taste that kids and adults love.
You can make Banana Pudding without using the oven. Just make the pudding on the stove. Use a mix that does not need baking. Then you can layer it with bananas and vanilla wafers and put it in the refrigerator until it is set. This Banana Pudding is easy to make and really refreshing.
The classic Banana Pudding is made with bananas, vanilla wafers, milk, sugar, pudding mix, and whipped cream. Some people also add eggs, cream cheese, and condensed milk to make it even richer. You can adjust the ingredients to make the Banana Pudding taste the way you like it.
If you make Banana Pudding at home and store it in a container with a lid in the refrigerator it will stay fresh for about three to four days.. It is best to eat it within two days because the bananas might turn brown and the wafers will get soft.
One mistake people make when making Banana Pudding is adding the banana slices early. This makes them turn brown and get soft. To avoid this you can slice the bananas just before you put them in the dish or cover them with pudding so they do not get in contact with air.
The Banana Pudding you make at home tastes fresher because you can choose the ingredients and make it as sweet as you like. The kind you buy in stores is easy to get. It might have things in it that you do not want. When you make it at home you can also change the toppings and flavors to make it your own.
You can make the classic Banana Pudding more interesting by adding toppings like chocolate, peanut butter, caramel, coconut or fresh berries. You can also use variety of cookies instead of vanilla wafers like Oreos or graham crackers. This way you can make a lot of flavors and still have a creamy and delicious dessert.
The best chocolate for Banana Pudding is high-quality dark or milk chocolate. Dark chocolate adds a rich, slightly bitter flavor, while milk chocolate creates a sweeter, creamier taste. You can also use mini chocolate chips or chopped chocolate bars for extra texture and flavor.
There is no single best brand for Banana Pudding, but choosing a high-quality vanilla pudding mix and crisp vanilla wafers usually gives the best results. Fresh, ripe bananas and good-quality dairy ingredients also make a noticeable difference in the flavor and texture.
To make Banana Custard, start by heating milk and sugar. Then mix custard powder with cold milk and stir it into the hot milk until it gets thick. After that, let it cool down, then add sliced bananas and chill before serving.
Yes, Banana Custard is usually made without eggs. , The custard powder thickens the dessert instead of eggs. You can also use cornstarch as a substitute, which makes Banana custard very smooth and creamy. It is perfect for people who avoid eggs.
You do not need an oven to make Banana Custard. Cook the custard on the stovetop until it gets thick, let it cool down, add fresh bananas, and place it in the fridge. Chilling gives the Banana Custard a smooth texture and a refreshing taste.
The main ingredients for Banana Custard are - milk, custard powder, sugar, ripe bananas, and vanilla extract. People also add chopped nuts, fresh cream, or other fruits like apples and grapes to make Banana Custard tastier.
Fresh Banana Custard can be kept in the fridge for about 2 to 3 days if stored in an airtight container. Since bananas get softer over time, Banana custard tastes best when consumed within a day or two after its preparation.
One common mistake people make with Banana Custard is adding bananas to the custard when it is still hot. This makes the bananas soft and watery. You should always let the custard cool down and then add the bananas to get the best texture and flavor.
When you make Banana Custard at home, you get to choose the bananas, adjust the sweetness to your taste and enjoy fresh fruit in every bite. The kind you buy from stores is made to be convenient and to last longer. It often does not taste as fresh and good as homemade Banana Custard.
Banana Custard can be made more exciting by adding ingredients like, toasted coconut, peanut butter, cinnamon, crushed cookies or chopped dark chocolate. You can also layer Banana Custard with cake cubes or vanilla wafers to make it more delicious.
Dark chocolate gives Banana Custard a slightly bitter taste that goes well with the sweetness of the bananas especially if you use dark chocolate with 70% or more cocoa. Milk chocolate makes the custard sweeter, smoother, and creamier, while white chocolate adds a sweet, mild, vanilla-like flavor. Choose the kind of chocolate you like best.
There is no one best brand for Banana Custard because the taste depends a lot on using fresh bananas and preparing it properly. Choosing good-quality, fresh ingredients and a good quality custard powder usually gives the most delicious homemade results.
To make a Caramel Cake, start with a basic vanilla or butter cake sponge. Bake the cake and let it cool down. Now spread the caramel frosting between the layers and on top of the cake. If you want, you can drizzle some caramel sauce over it.
Yes, you can make Caramel Cake without using eggs. Use ingredients like yogurt, applesauce, mashed banana, or a mixture of flaxseed to replace the eggs. These ingredients help keep the cake soft and moist while still giving it a great taste.
Caramel cake can be made without an oven by baking the cake batter in a pot with a lid or in a pressure cooker without the whistle, or even in a steamer. You just need to cook it over heat until a toothpick comes out clean. Then you let it cool down and frost it.
A basic Caramel Cake recipe usually has flour, sugar, butter, eggs, milk, baking powder, vanilla and salt. The caramel frosting is made with sugar, butter, cream or milk and vanilla which gives it a rich and sweet flavor.
A freshly made Caramel Cake will stay good for about two days if you keep it at room temperature and cover it well. If you put it in the fridge it can last for up to five days. It is preferred to let it come to room temperature before serving for best taste.
One mistake people make when making Caramel Cake is rushing the caramel. If the sugar gets too hot and burns it will taste bitter and ruin the cake. You need to watch it closely and use medium heat. Take it off the heat soon as it turns golden brown.
When you make Caramel Cake at home, it usually tastes fresher and lets you adjust the sweetness and ingredients. Store-bought Caramel Cake is convenient and has a longer shelf-life due to preservatives and the frosting is often too sweet and rich.
You can make your Caramel Cake more fun by adding chopped pecans, toasted coconut, chocolate chips, espresso, sea salt or cinnamon. You can also put sauce or sliced bananas between the layers for extra flavor.
There is no single best chocolate for Caramel Cake. Choose one with a flavor you enjoy. Dark chocolate creates a richer taste, while milk chocolate gives a sweeter finish. Good quality chocolate usually melts and blends more smoothly.
There is no best brand for Caramel Cake. What matters most is the recipe you use and how you bake it. Using good ingredients usually makes a bigger difference than the brand you choose.
To make Caramel Cheesecake, first you need to mix biscuits with melted butter. Then, press the mixture into a pan and set the crust. Next, prepare the filling by beating cream cheese, sugar, vanilla and cream until it is smooth. After that, pour the filling over the crust. You can either bake or put it in the refrigerator until it is set. Top with caramel sauce and chill before serving.
You can make Caramel Cheesecake without eggs by using cream cheese, whipped cream, condensed milk, or yogurt. These ingredients give it a creamy texture. If you want to bake the Caramel Cheesecake, you can use cornstarch or custard powder to help the filling set; this way the flavor of the Caramel Cheesecake will not change.
A no-oven Caramel Cheesecake is easy to make. First, make a biscuit base. Then mix cream cheese, sugar, vanilla, and cream with gelatin or agar-agar. After that, pour the filling over the crust and put the Caramel Cheesecake in the refrigerator until it is firm. Finally, finish it with caramel sauce before serving.
The main ingredients for Caramel Cheesecake are cheese, biscuits, butter, sugar, fresh cream, vanilla and caramel sauce. Sometimes people use gelatin, agar-agar, eggs or condensed milk to help the filling set.
Caramel Cheesecake stays fresh in the refrigerator for 4 to 5 days. tore it in an airtight container. To keep the texture and flavor of the Caramel Cheesecake you should keep it chilled. Do not leave the Caramel Cheesecake at room temperature for a longer time.
If your Caramel Cheesecake did not set properly it may be because the filling was overmixed or maybe it was not baked enough. Usually measuring the ingredients carefully and allowing enough cooling time usually solve these common problems.
Caramel Cheesecake is different because it has a creamy cheesecake filling with smooth caramel flavor and a buttery crust. The Caramel Cheesecake has a balance of sweet, creamy, and slightly salty flavors in every bite.This is what makes the Caramel Cheesecake special.
You can serve Caramel Cheesecake with berries or sliced bananas. Some people prefer to add toasted nuts or crushed cookies on top of the Cheesecake. You can also drizzle chocolate sauce. For parties you can cut the Caramel Cheesecake into squares and can decorate each slice with whipped cream and caramel or can even make cheesecake jars.
For Caramel Cheesecake, dark chocolate works well because it has a cocoa taste and a bit of bitterness that balances the sweetness of the caramel. Milk chocolate makes it sweeter and creamier, while white chocolate gives a mild taste. You should use good-quality baking chocolate for best results.
There is no best brand for Caramel Cheesecake. It depends on your taste and the recipe you use for the Caramel Cheesecake. Choose high-quality, fresh ingredients to achieve a rich and consistent caramel cheesecake flavor.
To make Caramel Custard, you need to follow a few simple steps. First, melt some sugar in a pan until it turns brown. Then pour the melted sugar into a mold. Next, mix together milk, eggs, sugar, and vanilla in a bowl. Pour this mixture over the sugar in the mold. After that, you can steam it or bake it in the oven until it is set. Let the Caramel Custard cool completely, then chill it in the refrigerator before serving.
You can still make Caramel Custard even if you do not have eggs. Just use cornstarch, agar-agar, or custard powder instead of eggs. The texture will be slightly different, but it will still be creamy and smooth. This is great for people who do not eat eggs.
Do not have an oven? No worries! Caramel Custard can still be made. You can steam it on the stovetop. Cover the mold with some foil. Steam it over low heat until it is set. Then let it cool down and chill it in the fridge before you serve it.
To make Caramel Custard you only need a few ingredients. Milk, eggs, sugar and vanilla are required to make the custard. You also need some sugar to make the caramel layer at the bottom. These ingredients are easy to find and use.
If you make Caramel Custard at home it will stay fresh in the fridge for three to four days. Just make sure to cover it so it does not dry out or absorb other food smells, and serve it cold for the best flavor.
If your Caramel Custard did not turn out well it might be because the heat was too high or you did not cook it for the right amount of time. Gentle cooking, accurate measurements, and enough chilling time usually make a big difference.
What makes Caramel Custard special is its smooth, creamy texture and glossy caramel topping. Unlike many desserts that are rich or heavy, it feels light, simple, and satisfying without being overly sweet.
You can make Caramel Custard look great by serving it with fruit, whipped cream or chopped nuts. You can also drizzle some caramel sauce on top. Serving it in glasses or jars makes it look great for gatherings.
There is no one chocolate to use with Caramel Custard. If you like bold flavors, you can use dark chocolate. If you like something sweeter and creamier, you can use milk chocolate. Pick the one that matches your taste.
There is no one best brand for Caramel Custard. What matters most is the ingredients that you use. Fresh milk, vanilla, and quality sugar will make your Caramel Custard taste great and give better results than focusing on a specific brand.
An easy Caramel Pudding recipe starts by melting sugar in a pan until it turns golden. Then pour it into a mold. In a separate bowl, mix 2 eggs, 2 cups milk, ¼ cup sugar, and 1 teaspoon vanilla. Strain the mixture for a smooth texture. Pour it into the mold over the melted sugar and steam it for 30 to 35 minutes or bake it for 40 to 50 minutes.
Yes, you can make Caramel Pudding without eggs by using cornstarch or agar-agar as alternatives. Cornstarch makes Caramel Pudding soft and creamy, and agar-agar makes it firmer. Both are great options if you want to enjoy Caramel Pudding without eggs.
No oven? No problem. Steam Caramel Pudding instead by pouring the mixture into a caramel-lined mold and then cover it with foil. Steam on low heat for 30 to 35 minutes. You can also put the mold in a water bath on the stovetop, which helps with cooking. Chill before serving the Caramel Pudding.
A Caramel Pudding recipe needs ingredients like sugar, milk, eggs, and vanilla extract. Eggs give Caramel Pudding its structure, milk adds creaminess and vanilla provides flavor. You'll also need sugar for the caramel layer. For eggless Caramel Pudding, use cornstarch or agar-agar.
Homemade Caramel Pudding lasts in the fridge for 3 to 4 days when kept covered in an airtight container. This keeps Caramel Pudding creamy and fresh, and it's best to consume Caramel Pudding within a couple of days. Freezing Caramel Pudding is not recommended.
A common mistake with Caramel Pudding is overcooking it, which makes it rubbery. Burning the caramel is another issue. Keep the heat low and cook patiently for a smooth Caramel Pudding.
Homemade Caramel Pudding tastes fresher and has a better consistency because it uses ingredients like milk, eggs, and vanilla. Whereas store-bought Caramel Pudding is more convenient, lasts longer, and may contain preservatives that can make the texture of Caramel Pudding firmer. What are creative twists on classic Caramel Pudding Make Caramel Pudding exciting by adding flavors like coffee, chocolate, coconut, or mango. Top Caramel Pudding with fruit, nuts or whipped cream. This gives Caramel Pudding a fun twist.
For chocolate Caramel Pudding, dark chocolate with 50 to 70% cocoa works well. It balances the sweetness of Caramel Pudding. Milk chocolate is better if you prefer a Caramel Pudding. Choose good-quality chocolate for the best flavor.
There is no single best brand for caramel pudding as it depends on your taste and preferences. Choose one with a smooth texture, rich caramel flavor, and quality ingredients. For a chocolate twist, you can also pair it with Cadbury chocolate products for added flavor.
To make a Caramel Tart at home, prepare a tart crust, bake it until it is golden, and then fill it with smooth homemade caramel tart filling. Let it cool completely before slicing. Adding a sprinkle of sea salt or chocolate shavings makes the caramel tart more delicious.
Yes, a Caramel Tart can be made eggless. You can use butter, cream, and sugar for the Caramel tart filling and make an egg-free tart crust. Cornstarch or condensed milk can also help create a smooth, rich Caramel Tart filling without eggs.
Yes, a Caramel Tart can be made without an oven. You can prepare the crust in a pan or by using crushed biscuits mixed with butter. Chill the crust, add the Caramel Tart filling, and refrigerate until firm before serving.
A classic Caramel Tart is made with a tart crust and a rich Caramel Tart filling prepared from sugar, butter and cream. Some recipes also include vanilla, sea salt or chocolate for flavor and texture in the Caramel Tart.
You should store a Caramel Tart in an airtight container in the refrigerator for up to four days. For the best texture, let the Caramel Tart sit at room temperature for about 10 minutes before serving. Avoid leaving it out for long periods.
A Caramel Tart may turn dry or dense if the crust is overbaked or the Caramel is cooked for long. Measuring ingredients carefully and cooking the caramel over gentle heat helps keep the filling smooth and creamy.
A Caramel Tart has a pastry crust with rich Caramel filling while many similar desserts use cake, cookies or pudding as the base. The buttery crust gives the Caramel Tart its texture and balanced flavor.
Easy Caramel Tart variations include salted caramel tart, chocolate caramel tart, banana caramel tart, coffee caramel tart, and nut caramel tart. You can also make mini caramel tarts for parties or individual servings without changing the basic recipe.
For a Caramel Tart you should choose good-quality chocolate with a smooth taste and enough cocoa to balance the sweetness of the Caramel Tart. Dark chocolate gives a richer flavor while milk chocolate creates a creamier sweeter dessert. Pick the one you enjoy most for your Caramel Tart.
There is no best brand for a Caramel Tart because the quality of your homemade ingredients matters most. If you want to add milk chocolate to your Caramel Tart, Cadbury Dairy Milk Silk melts and pairs beautifully with the filling giving the Tart a rich creamy finish.
Coffee custard is made by first mixing the milk and sugar, then heating them. Custard powder is then mixed with a little cold milk, then stirred into the hot milk along with instant coffee. The mixture is cooked until it thickens. For the best texture, Coffee Custard should be refrigerated until it has completely cooled.
Yes, you can make Coffee custard without eggs by using custard powder. In fact, custard powder gives sufficient thickness to the dessert and helps in making the Coffee custard smooth and creamy. Hence, there is no requirement for eggs in this recipe.
Without an oven, Coffee custard can be made by boiling milk, sugar, coffee, and custard powder together. Let it cool and refrigerate until fully set before serving for the best taste.
For Coffee custard, milk, custard powder, sugar, instant coffee, and vanilla extract are the main ingredients. The dessert can further be topped with whipped cream, chocolate shavings, cocoa powder, or nuts to give the dessert extra flavor and texture.
Homemade Coffee custard can stay fresh in the fridge for 2 to 3 days. Keep it in an air-tight container, refrigerate and keep it chilled until serving. Avoid leaving it at room temperature for long as it can tend to lose its flavor and texture.
A common mistake people make is adding custard powder directly to hot milk, which can make the Coffee custard lumpy. Mix the custard powder with cold milk first and then add it to the hot milk. Also, do not add too much coffee powder, as it can make the Coffee custard taste bitter.
Homemade Coffee custard is fresher and tastes better as it lets you control the sweetness and ingredients. Store-bought ones are easier to get and can save time, but they may contain preservatives or artificial flavors that can affect the taste of the Coffee custard.
Creative twists on classic coffee custard can be made by adding chocolate, caramel, hazelnut, cinnamon, or mocha to give it flavor. You can layer it with crushed cookies, add whipped cream on top, or sprinkle toasted nuts for extra crunch.
Dark chocolate gives a bold flavor that goes well with the coffee. Milk chocolate creates a sweeter, creamier taste, while white chocolate adds a smooth, mild sweetness. Choose the chocolate that best matches your personal preference.
There is no single best brand for Coffee custard. Choose a good-quality custard powder that makes the Coffee custard smooth and tasty. The best choice depends on what you like and the ingredients used.
To make Dry Fruit Custard at home, cook custard powder with milk and sugar until it becomes thick. Let it cool, then mix in some chopped almonds, cashews, pistachios, raisins, and fresh fruits. Keep it refrigerated for a few hours before serving.
Yes, Dry Fruit Custard can be made eggless. The custard powder is what makes the dessert thick instead of eggs. If you want the texture to be rich and creamier, add fresh cream or condensed milk after cooling.
Yes, Dry Fruit Custard does not require an oven. Cook the custard on the stovetop until it is smooth and thick, let it cool, and then mix in dry fruits and fresh fruits before chilling and serving.
Dry Fruit Custard is made with milk, custard powder, sugar, chopped almonds, cashews, pistachios, raisins, and fresh fruits like apples, bananas, grapes, or mangoes. Some people also add fresh cream for extra richness.
You should store Dry Fruit Custard in an airtight container in the refrigerator for up to two days. It is better to add fruits like bananas or apples just before you serve because they soften or change color if you store them for long.
Dry Fruit Custard can become dry or dense if you use too much custard powder or if cooked for long. Using the right amount of custard powder and stirring continuously keeps the texture smooth and creamy.
Dry Fruit Custard is different from pudding, mousse and other similar desserts because it has a custard base and crunchy dry fruits and fresh fruits. It is not heavy and has a lot of different flavors and textures.
You can make Dry Fruit Custard in many different ways. Try the classic version, a chocolate version, a mango version, a saffron-flavored version, or a layered version. Each one tastes a little different, so you can pick the one you enjoy most.
Dark chocolate gives Dry Fruit Custard a slightly bitter taste, milk chocolate makes it creamier and sweeter while white chocolate gives it a smooth and buttery taste. Choose the one that you prefer best.
There is no one best brand for Dry Fruit Custard. Choose quality custard powder, fresh milk, and premium dry fruits. Usage of the right ingredients and proper preparations will have the biggest impact on the final taste.
To make macarons, beat egg whites and sugar until thick and fluffy, then gently mix in almond flour and powdered sugar. Next, spoon the mixture into round shapes on a baking tray, bake them, let them cool completely, and then add your favorite filling.
Macarons are French cookies made with almond flour, egg whites and sugar. They have a crisp outside and a soft center, and are filled with buttercream, chocolate filling, or fruit jam in many yummy flavors.
Thoothukudi macaroons can be made without an oven. Cook the mixture in a covered heavy-bottom pan by keeping the flame low, and allow them to cook slowly until they become firm outside while keeping a slightly soft texture inside.
Coconut macaroons are made by combining shredded coconut, egg whites, sugar, and vanilla. Once the mixture comes together, shape it into small portions and bake until golden. Let them cool before consuming to enjoy their chewy texture.
Traditional macaroons usually contain shredded coconut, egg whites, sugar, vanilla extract, and a little salt. Some versions include condensed milk, which adds extra sweetness and gives the macaroons a softer texture that is easier to shape.
Yes, macaroons can be made without an oven. You can use a covered heavy-bottom pan instead. They may have a slightly different texture, but they will still cook well and taste delicious.
The chocolate choice depends on the flavor you want. Dark chocolate creates a rich cocoa taste, milk chocolate makes the filling sweeter and creamier, while white chocolate gives a smooth and mild flavor that pairs well with hazelnut.
For chocolate coconut macaroons, combine shredded coconut, egg whites, sugar, vanilla, and cocoa powder. Shape the mixture into small portions and bake until lightly golden. After cooling, you can dip them in melted chocolate for an extra chocolatey taste. How To Make Dark Chocolate Macaroons Dark chocolate macaroons can be made by adding cocoa powder to the mixture or coating baked macaroons with melted dark chocolate. This gives them a stronger chocolate flavor and adds a slightly bitter taste that balances the sweetness.
The best chocolate depends on personal taste. Dark chocolate works well for a deep cocoa flavor, milk chocolate is better for a sweeter and creamier result, and white chocolate gives a smooth, mild taste. Good-quality baking chocolate gives better results.
To make Mixed Fruit Custard at home, cook custard powder with milk and sugar, cook until it becomes smooth and creamy. Let it cool completely, then add chopped fruits like apples, bananas, grapes, and mangoes. It is best to chill mixed fruit custard before serving; this way, it feels refreshing.
Yes, you can make mixed fruit custard without eggs. Most people use custard powder or cornstarch instead of eggs to create a creamy texture. This makes it a simple dessert option for people who prefer egg-free recipes.
Yes, you do not need an oven to make mixed fruit custard. It can be prepared on the stovetop by cooking the custard mixture, cooling it, adding fruits, and refrigerating it until it reaches the right consistency.
Mixed fruit custard is made with milk, custard powder, sugar, and fresh fruits. Some fruit choices include apples, bananas, grapes, mangoes, and strawberries. Nuts, jelly, or chocolate pieces can also be added for extra texture and flavor.
You should store mixed fruit custard in an airtight container in the refrigerator. It is best to add fruits closer to serving time because some fruits release water and can change the texture. It is usually best enjoyed within 1–2 days.
Mixed Fruit Custard becomes dry when you add too much custard powder or when it is cooked for too long. Using the right amount of milk and allowing it to cool naturally makes the mixed fruit custard stay smooth and creamy.
Mixed Fruit Custard is different from other creamy desserts because it has a combination of milk-based custard and fresh fruit pieces. It has a lighter texture, natural fruity flavors, and a refreshing taste instead of a heavy or baked feel.
You can create variations of Mixed Fruit Custard by adding different fruits, nuts, caramel, chocolate pieces, or flavored custard powders. Mango custard, berry custard, and chocolate fruit custard are easy options that give a different taste while keeping the same creamy base.
There is no single best chocolate for mixed fruit custard. Dark chocolate gives a bold flavor, milk chocolate makes it sweeter, while white chocolate adds more sweetness. So you can choose any chocolate you like.
There is no single best brand for mixed fruit custard because the taste depends on the quality of ingredients and personal preference. Choose a trusted brand that gives flavor, sweetness, and a creamy texture.
To make Strawberry custard, cook custard powder with milk and sugar until it gets thick. Then let it cool down a little, and after that mix in some strawberry puree or chopped strawberries. Place the contents in the refrigerator to chill before serving it.
If you want to make Strawberry Custard without using eggs, you can use cornstarch or some extra custard powder to make the mixture thick. This way, the custard will still be smooth and creamy; it will also be flavorful. The fresh strawberries will add sweetness, and the Strawberry custard will have a really refreshing taste.
You do not need to use an oven to make Strawberry Custard. You can just cook the custard on the stovetop until it gets thick, let it cool down, and mix in some fresh strawberries. After that, put it in the refrigerator until it sets. Chilling the Strawberry custard gives it a texture and a really refreshing flavor that everyone enjoys.
The main ingredients you need to make Strawberry custard are milk, custard powder, sugar, fresh strawberries, and vanilla extract. Some people also prefer to mix in some whipped cream to make it even richer. These simple things come together to make a creamy and fruity dessert like Strawberry Custard.
Strawberry Custard will stay fresh for about 2 to 3 days if you store it in an air-tight container in the refrigerator. It is best to eat it within the first couple of days because the fresh strawberries will release moisture over time.
If your Strawberry custard is too thin, it probably needed more cooking time.If it gets lumpy the heat was probably too high. To make a creamy Strawberry custard you should stir it constantly over medium heat, by doing so, it will give the dessert a smooth texture and better consistency.
Strawberry custard is special because it combines smooth, creamy custard with the fresh and natural sweet flavor of strawberries. It feels lighter than a lot of desserts while still being satisfying. This makes Strawberry custard a great choice for family meals, parties or for regular treats.
You can serve strawberry custard in dessert glasses or can layer it with sponge cake. Some berries can also be added on top or sprinkle some crushed cookies for a crunchy texture. Another idea, is to use Strawberry custard as a filling for tarts, parfaits or fruit trifles.
Dark chocolate is a great choice for Strawberry custard because it balances the sweetness with a rich and slightly bitter flavor. Milk chocolate makes Strawberry custard creamier and sweeter while white chocolate adds a buttery taste that goes well with strawberries.
There is no one best brand for Strawberry custard. The way it tastes depends on using fresh ingredients and making it properly rather than the brand you choose. If you use quality milk, custard powder and ripe strawberries, you will always get the best results.
A simple Salted Caramel Dessert starts with homemade caramel, a bit of sea salt, whipped cream, and crushed cookies or cake pieces. You just need to layer all these things in serving glasses, put them in the fridge for an hour, and you will have a rich dessert that is easy to make.
Yes, you can make a Salted Caramel Dessert without eggs by using whipped cream, cream cheese, pudding, or condensed milk instead. The dessert will still be smooth and creamy, which is great for people who do not eat eggs.
Making a Salted Caramel Dessert without an oven is easy. You just need to prepare the caramel, mix it with cream or pudding, layer it with cookies or cake, and put it in the fridge until it is firm. The refrigerator does all the work, so no oven is needed.
A classic Salted Caramel Dessert usually has sugar, butter, heavy cream, sea salt, vanilla, and a base like cake, cookies or pudding. You can also add whipped cream or chocolate for extra flavor and taste.
A homemade Salted Caramel Dessert will stay fresh in the fridge for three to four days if you keep it in an airtight container. For the best taste and texture, try not to leave it at room temperature for long.
One common mistake that people make with Salted Caramel Dessert is adding too much salt or burning the caramel. If you use a bit of salt and take the caramel off the heat at the right time it will taste balanced and smooth.
A homemade Salted Caramel Dessert tastes fresher because you get to choose how sweet it is and what ingredients to use. Store-bought desserts are convenient but homemade ones usually have a richer flavor and a softer creamier texture.
You can try adding toasted nuts, sliced bananas, espresso, pretzels, popcorn or dark chocolate to your Salted Caramel Dessert. These small additions will create flavors while keeping the sweet and salty taste that everyone enjoys.
The best type of chocolate to use in a Salted Caramel Dessert depends on what you like. Dark chocolate makes it richer, milk chocolate makes it sweeter and white chocolate makes it creamy. Choose a good-quality chocolate that melts smoothly for better results.
There is no single brand that is best for Salted Caramel Dessert. What matters most is using ingredients and products that you like the most, which give you consistent results because the final flavor of your Salted Caramel Dessert will depend on your recipe and how you make it.
Mix cream, sweetened condensed milk, saffron soaked in warm milk, cardamom, and chopped pistachios. Pour the mixture into a container and freeze for 6–8 hours until firm. Scoop and enjoy your creamy homemade Kesar Pista ice cream.
Yes, Kesar Pista Ice Cream can be made without eggs. Instead of eggs, heavy cream and sweetened condensed milk are used to give the ice cream a rich, creamy texture. Some recipes also use cornflour or custard powder as egg substitutes for extra thickness. Saffron, pistachios, and cardamom add the traditional flavor.
Yes, you do not need an oven to make Kesar Pista Ice Cream. The ice cream-making process does not need baking. You just prepare the mixture, pour it into a container that can go in the freezer, and freeze it until it is firm. This way, you can get a creamy homemade Kesar Pista Ice Cream.
Kesar Pista Ice Cream is made with cream, milk or condensed milk, saffron, pistachios, sugar, and cardamom. All these ingredients together make a creamy dessert that looks good and tastes nutty.
You should store Kesar Pista Ice Cream in a freezer-safe container with a lid. This way, ice does not crystalises. The Kesar Pista Ice Cream stays fresh, keep it in the freezer compartment and cover the top before closing the lid so it stays good.
Kesar Pista Ice Cream can turn out dry if it does not have fat, if you mix it too much, or if it freezes too slowly. If you use fresh ingredients and freeze it the right way, Kesar Pista Ice Cream will be smooth and creamy.
Kesar Pista Ice Cream is special because it has a saffron flavor, crunchy pistachios, and a creamy texture. It is lighter and smoother than kulfi or gelato. It has more air in it, so it is softer.
You can try adding almonds or cashews. Rose petals to Kesar Pista Ice Cream for extra flavor and texture. You can also mix in mango, white chocolate, or a little rose water to make simple and delicious versions of Kesar Pista Ice Cream.
White chocolate is the best for Kesar Pista Ice Cream because it is sweet but not too sweet. It goes well with the saffron and pistachio flavors. If you use white chocolate, Kesar Pista Ice Cream will be smoother and richer.
There is no single best brand for Kesar Pista Ice Cream. The right choice depends on your personal taste and preferences. You can also make it at home using good-quality saffron, pistachios, and other ingredients to create a flavor you enjoy.
To make chocolate popcorn, first you need to pop the popcorn and remove any unpopped kernels. Then melt some chocolate, drizzle it over the popcorn, and toss it gently until the popcorn is coated with chocolate. Let it cool down completely so the chocolate hardens before serving.
Yes, chocolate popcorn is naturally egg-free, so no eggs or substitutes are needed. The recipe gets its flavor and texture from the popcorn and melted chocolate, making it a simple dessert that everyone can enjoy.
Yes, you can make chocolate popcorn without an oven. Pop the kernels on the stovetop or in a microwave, then coat them with melted chocolate, and let them cool until the chocolate sets completely.
Chocolate popcorn is usually made with popcorn kernels, chocolate, butter or coconut oil, and salt. Some people also add sprinkles, crushed nuts, cookie crumbs, or mini marshmallows for extra flavor and crunch.
If stored in an airtight container, chocolate popcorn stays fresh for about one week at room temperature. Keep it in a cool, dry place away from heat and moisture so the chocolate stays firm and crisp.
A common mistake with chocolate popcorn is pouring very hot chocolate over warm popcorn. This can make the popcorn soft instead of crunchy. Let the popcorn cool first, then coat it lightly and evenly.
Homemade chocolate popcorn usually tastes fresher because you control the ingredients and chocolate quality. Store-bought versions often last longer, but they may contain extra preservatives, flavorings, or coatings for shelf stability.
You can make chocolate popcorn in many fun ways, including dark chocolate, milk chocolate, white chocolate, caramel chocolate, peanut butter chocolate, mint chocolate, or cookies-and-cream versions to match different tastes and occasions.
For chocolate popcorn, dark chocolate gives a richer flavor, milk chocolate makes it sweeter and creamier, while white chocolate adds a smooth, buttery sweetness. Choose the one that matches your personal taste and the flavor you want.
There is no single best brand for chocolate popcorn because everyone likes different flavors. Some brands focus on rich chocolate, while others are sweeter or crunchier. Try a few and pick the one that suits your taste best.
Sorbet is a frozen dessert made with fruit, water, and sugar instead of milk or cream. Sorbet is light, refreshing, and a popular choice for anyone looking for a dairy-free frozen treat.
To make Sorbet, blend some fruit, water, sugar, and a small amount of lemon juice until smooth. Chill the mixture, then freeze it while stirring occasionally for a smoother texture.
Sorbet is usually made with fruit or frozen fruit, water, sugar, and lemon or lime juice. Some recipes include herbs, fruit puree, or natural sweeteners to add more flavor without changing the texture.
Sorbet can be made without an ice cream maker by freezing the fruit mixture in a shallow container. Stirring it every 30 to 60 minutes with a fork helps create a smoother, easier-to-scoop texture.
Sugar-free Sorbet can be made by replacing regular sugar with a sugar-free sweetener or using naturally sweet fruits like ripe mangoes or berries. This keeps the dessert flavorful while reducing added sugar in the recipe.
Sorbet usually takes around 4 to 6 hours to freeze completely, depending on the recipe and freezer temperature. Stirring the mixture a few times while freezing helps reduce ice crystals and improves the texture.
Dark chocolate gives chocolate Sorbet a rich and deep cocoa flavor. Milk chocolate adds a sweeter, creamier taste, while white chocolate creates a smooth, mild flavor. Choose the chocolate that matches your preferred sweetness.
Dark chocolate is commonly used in Italian chocolate Sorbet for its strong cocoa flavor. Milk chocolate creates a softer and sweeter taste, while white chocolate adds extra sweetness and a creamy texture to the dessert.
Chocolate Sorbet can be made by cooking water, sugar, cocoa powder, and chopped chocolate until smooth. After the mixture has cooled completely, freeze it while stirring occasionally for a smooth-textured Sorbet.
Mango Sorbet can be made by blending ripe mangoes with water, sugar, and fresh lime juice until smooth. The mixture is then chilled and frozen while stirring occasionally to achieve a soft and refreshing texture.
Make a soft dough using flour, yeast, milk, butter, sugar, and salt. Shape into buns and let the dough rise, bake until golden. Use no extra flour in excess because excess flour makes the product harder.
The traditional cream buns can have an egg both in the dough and in the cream stuffing; still, there are non-egg versions. It is important to check the recipe before baking or serving.
Make a soft dough based on yeast, let it rise, form rounds, and bake until golden. Apply butter after baking to make buns softer. Do not over-proof them, otherwise, the buns will get flat.
It is a kind of French bread made from flour, butter, eggs, milk, and yeast. It is soft and slightly sweet. Avoid overmixing the dough.
First, make some buns, cool them, then cut and stuff with whipped or flavored cream. The bun should be cooled before serving. Try not to use warm buns to stuff them, otherwise, the cream will melt quickly.
Prepare soft buns first, allow them to cool completely, then slice and fill with whipped cream or flavoured cream. Chill before serving. Avoid filling warm buns, as the cream melts quickly.
Mix a spiced yeast dough with dried fruits, let it rise, shape into buns, add the signature cross, then cook until golden. Avoid adding too much flour, which makes them dry.
From buns, you could make bread pudding, cream buns, chocolate-filled buns, fruit sandwiches, ice-cream sandwiches, cinnamon bun dessert, and caramel bread. Try not to use stale buns unless the recipe requires them.
Dairy Milk Bounville or milk chocolate produces a smooth glaze that sets beautifully on warm buns. Avoid overheating the chocolate, as it can become thick or grainy.
You should choose dark chocolate with 60-70% cocoa content for a strong taste because the dough is sweet. Couverture chocolate also melts better. Avoid very high cocoa content chocolate.
Cut the kiwi pieces, soak them in sugar syrup, and cook gently until translucent. Before storing, dry kiwi pieces. Beware of overcooking, as it leads to excessive softness in the fruit.
Soak dry strawberries in hot sugar syrup and wait till the coating becomes firm. Do it quickly to get an even coating. Avoid soaking wet strawberries since moisture prevents the coating from sticking.
Heat sugar until it reaches the hard-crack stage, then carefully drizzle thin strands with a whisk over a prepared surface. Collect the strands gently. Avoid overheating the sugar, as it burns easily.
Mix sugar granules with several drops of food coloring and flavor, then leave to dry thoroughly. Take care not to add too much liquid, as it causes clumping of the sugar.
Boil sugar, water, and glucose syrup to the hard-crack stage, then add flavoring and coloring, and distribute into molds with sticks. Avoid stirring after the mixture starts boiling; otherwise, crystallization occurs.
Melt quality chocolate, pour into molds with sticks, mix with nuts or dried fruits if needed, then let the chocolate set. Do not overheat the chocolate to preserve the smoothness of the texture.
Heat sugar till golden, stir in butter and cream, continue heating till thickened, pour into prepared pan. Leave to cool down and cut into pieces. Beware of over-cooking the caramel; it makes it bitter.
Dairy Milk chocolates can be used for peanut butter as they provide a smooth coating and good flavor balance. Avoid the use of low-quality chocolate.
Couverture chocolate is considered ideal for making candies due to its smooth melting, glossy setting and rich taste. Any dark or milk Dairy Milk chocolate can be used. Chocolates with excessive fat content should be avoided.
Dark, milk, semi-sweet or couverture chocolate can be used as a base for candy bark with nuts, dried fruits or sprinkles on it. Beware of overheating the chocolate, which becomes thick and non-spreading.
Cinnamon roll dough is usually made up of flour, milk, butter, sugar, yeast, and salt. Some variations contain eggs to produce softer dough. It is recommended to use little flour to prevent rolls from becoming heavy.
The ingredients for the filling are softened butter, brown sugar, and cinnamon. The filling is evenly distributed on the dough before rolling. There are variations where nuts or raisins are used as fillers. It is recommended not to use melted butter since it may seep through.
The most commonly used icing on cinnamon rolls is cream cheese icing; vanilla or butter icing may also work. Apply to rolls that are still slightly warm. It is not advisable to put icing on rolls that are still hot, as it may melt completely.
Usually, cinnamon rolls need about 20- 30 minutes of cooking, depending on their size and recipe. They should turn light golden brown. It is recommended not to overcook rolls, as they become dry and hard.
The tops should be lightly golden, and the centers should feel set without looking doughy. A thermometer should read about 88- 93°C inside. Avoid relying only on the color of the surface.
Yes. Using baking powder or baking soda allows you to get quick cinnamon rolls with a biscuit-like texture, and there is no rising required. One should be careful not to overmix the dough because of a tough texture.
Yes. Cinnamon rolls can be cooked in a covered pot, a pressure cooker without a whistle, or in a steamer till they are completely ready. It is important not to expose them to high temperatures since it can burn the bottom layer.
Prepare the dough, add the filling (butter, cinnamon, and sugar), roll it tightly, cut the rolls, bake, and serve with icing. Avoid loosely rolled dough.
Dark or semisweet chocolate matches cinnamon well, complementing it with a richer taste. You can use Dairy Milk chocolate for sweeter rolls. It is important not to use chocolates with excessive amounts of vegetable fat, as it affects texture.
Milk or semisweet chocolate goes well with hazelnut spread to produce a filling with a rich taste. It is better to use dark chocolate, as it will give intense flavor. One should not use chocolates with a high content of vegetable fats.
It is a kind of soft, fresh cheese that is known for its smooth, creamy texture and mild, tangy flavor. It can be used in cheesecakes, frostings, dips, sandwiches, etc. Cream cheese shouldn't be left out of the refrigerator for long.
Warm whole milk, add some lemon juice or vinegar to form curds, drain them, and mix to make a smooth and creamy mixture. Chill before use. Don't strain it too much, as it could turn out too dry.
Mix cream cheese, butter, breakfast sugar, cocoa powder, and vanilla until fluffy. Adjust consistency as needed. Don't use warm cream cheese as it will make frosting too liquid.
Mix softened cream cheese with melted chocolate, a bit of sugar, and vanilla. Chill before serving or spreading. Don't mix cream cheese with warm chocolate, as it might change the texture.
Spread cream cheese on bagels or toast and use it for making cheesecakes, frostings, pasta sauces, dips, sandwiches, stuffed vegetables, etc. Don't heat it up, as it might separate the cheese and liquid.
Adding chocolate to cream cheese recipes depends on one's choice. Dairy milk chocolates work well together with cream cheese, providing a good flavor combination. Using too much chocolate can overpower the cream cheese flavors.
Dairy Milk range of chocolates will provide a rich taste without making the frosting overly sweet. There is a possibility to use milk chocolate. .
Cream cheese spread can be used instead of cream cheese in recipes such as sandwiches and dips, but not necessarily in baking because of its softer texture. Substitution isn't recommended in those recipes where firmness is needed.
Yes, you can freeze cream cheese, although the texture may become slightly crumbly while defrosting. It can be used mostly in cooked recipes. Never refreeze the defrosted cream cheese to preserve its quality.
Store cream cheese in the refrigerator, either in original packaging or in a sealed container after opening. Using cling wrap also helps in maintaining the moisture and avoiding air contact when stored in fridge.
A tart is a dessert made from pastry dough with a firm crust, which is stuffed with fruits, custard, chocolate, cream, or savory items. It is usually baked in a shallow pan. One should avoid overfilling to avoid spilling the filling.
Prepare the tart dough, chill it, put it in a tart tin, and bake it until light golden brown. Then add your desired filling and prepare it according to your recipe. Exercise caution and avoid stretching the dough during preparation.
Mix flour, cold butter, sugar, and a little water to make tart dough. Chill the tart dough before rolling it. Avoid overhandling the tart dough as it will make it tough once it is baked.
It is from Cantonese cuisine. Make a crispy tart crust and fill it with the creamy mixture of eggs, milk, sugar, and vanilla. Then bake the egg tart until the custard is just set. Overbaking the custard makes it crack.
Choose your desired filling, for example, fruit compote, pastry cream, chocolate ganache, lemon curd, or custard. Prepare your filling until smooth before adding it to the tart crust. Avoid runny fillings.
It is a buttery tart crust covered with sliced apples, sugar, butter, and warm spices like cinnamon. It can be taken either warm or cold. Avoid using very mushy apples in preparing apple tarts.
Yes, Pop-Tarts can be kept for a long time by freezing in an airtight container or plastic bags. They can either be thawed or warmed before eating. Do not freeze damaged or stale pastries.
Fill the baked tart crust with the chocolate ganache or chocolate cream and place fresh strawberries, raspberries, kiwi, and blueberries on it. Chill it before serving. Ensure you dry the fruits before placing them to avoid moisture contact with the chocolate.
Use dark chocolate with 60–70% cocoa to make a rich chocolate tart, and use semi-sweet chocolate to make a milder chocolate tart. Dairy Milk chocolate can also be used. Avoid low-quality compound chocolate to get a creamy filling.
To make Chocolate Rolls, prepare a soft dough or sponge, spread a chocolate filling evenly, roll it tightly, slice if needed, then steam or bake the Chocolate Rolls until cooked. It is best to let the Chocolate Rolls cool before serving them for the best texture.
Chocolate rolls can be made without eggs by using either yogurt, mashed banana, applesauce, or a flaxseed mixture instead. These help keep the Chocolate rolls soft, moist, and flavorful without changing the recipe too much.
If you do not have an oven, cook chocolate rolls in a covered pan with a heavy bottom or use a steamer over low heat. This way you can make delicious chocolate rolls, though the outside may not brown as much as baked ones.
Most chocolate rolls are made with flour, milk, butter, sugar, yeast, baking powder, cocoa powder or chocolate, and vanilla. Some people also include cream or chocolate spread for a richer filling and softer texture.
Fresh chocolate rolls stay good for about 2 days at room temperature in an airtight container or up to 5 days in the refrigerator. Warm them slightly before serving to bring back their soft texture and chocolate flavor.
If your chocolate rolls turned out dry, dense, or cracked, then the dough may have been overmixed, overbaked, or rolled too tightly. Measuring the ingredients carefully and avoiding overcooking gives softer and better chocolate rolls every time.
Chocolate rolls are special because they combine a soft rolled texture with a rich chocolate filling in every bite. They are easy to slice, share, decorate, and serve for parties, celebrations, or everyday sweet cravings.
Serve chocolate rolls with whipped cream, fresh berries, vanilla ice cream, chocolate sauce, caramel drizzle, chopped nuts, or colorful sprinkles. You can also dust them with powdered sugar to make them attractive.
For chocolate rolls, choose any chocolate based on the flavor you enjoy. Dark chocolate gives a rich cocoa taste, milk chocolate adds sweetness and creaminess, while white chocolate creates a smooth, buttery flavor.
There is no single best brand for chocolate rolls because every brand has its own flavor and texture. Some are rich in chocolate, while others are softer or sweeter, so the best choice depends on your personal taste.
Yes, you can add cocoa powder to your protein shake; it adds a rich chocolate flavor without adding much sugar. Blend it with banana, peanut butter, or oats to make it thicker and more filling.
To make a chocolate shake, blend cocoa powder, cold milk, sugar or honey, vanilla, and ice. Banana or ice cream can be added for a creamier texture. Prepare until smooth and serve cold.
You can make a chocolate shake without cocoa powder by using melted chocolate instead. Blend melted chocolate with cold milk, a little sugar if needed, and ice. Bananas can be added for extra thickness and creaminess.
To make a Cocoa shake, blend cocoa powder, cold milk, sugar or honey, vanilla, and ice. For a thicker shake, banana, yogurt, oats, or ice cream can be added before blending.
Yes, you can mix cocoa with a vanilla shake. Vanilla helps soften cocoa's slightly bitter taste and creates a smoother, more balanced flavor. The amounts can be adjusted to suit personal taste.
A banana chocolate milk shake is made by blending banana, cocoa powder, cold milk, and sugar or honey. Peanut butter or oats can also be added to make the shake thicker and more satisfying.
Cocoa powder shakes can be sweetened with sugar, honey, maple syrup, dates, ripe bananas, or a sugar-free sweetener. Start with a small amount and adjust after tasting to avoid making the shake too sweet.
A cocoa shake can be made without ice cream. Frozen banana, yogurt, oats, or extra cold milk can be used instead. These ingredients keep the shake creamy while making it lighter.
A nutty cocoa shake is made by blending cocoa powder with cold milk and almonds, cashews, or peanut butter. Bananas can be added for extra sweetness and creaminess; blend well and serve chilled.
For a rich cocoa shake, dark chocolate gives a deep, strong chocolate flavor, milk chocolate makes the shake sweeter and creamier, and white chocolate adds a mild, buttery sweetness. Pick the one that suits your taste best.
Traditional Baisakhi sweets include Kada Prasad, Punjabi Pinni, Meethe Chawal, kheer, seviyan, gur-based treats, and various halwas. These festive recipes highlight comforting flavor, rich ingredients, and inviting color, making them a favorite part of family gatherings and harvest celebrations.
Authentic Kada Prasad is prepared by roasting whole wheat flour in ghee until aromatic and golden. Sugar is dissolved in water separately before being combined with the roasted flour. The mixture is cooked until smooth, creating a rich dessert with classic flavor and texture.
Although both desserts use wheat flour, ghee, and sugar, Kada Prasad follows a traditional preparation associated with Sikh religious practices, while atta halwa is commonly prepared as a household sweet. The cooking method, consistency, and cultural significance often distinguish the two recipes.
Punjabi Pinni is made by roasting whole wheat flour in ghee until fragrant, then mixing it with powdered sugar, chopped nuts, seeds, and aromatic spices. The warm mixture is shaped into round balls, producing a delicious festive sweet with rich flavor and appealing color.
Jaggery is commonly used to prepare sweets such as gur pinni, chikki, til laddoos, peanut brittle, sweet rice, and jaggery halwa during Baisakhi. It adds natural sweetness, deep flavor, and a warm golden-brown color that complements many traditional festive recipes.
Popular Punjabi desserts for Baisakhi include Kada Prasad, Pinni, Meethe Chawal, kheer, phirni, gajar halwa, and gur-based sweets. These recipes celebrate the harvest season with comforting flavor, festive color, and authentic ingredients enjoyed across generations.
Meethe Chawal is prepared during Baisakhi because it represents celebration, prosperity, and gratitude for a successful harvest. The fragrant rice, combined with sugar, saffron, nuts, and dried fruits, offers delightful flavor and bright color, making it a favorite festive dish.
Chocolate Pinni can be prepared by combining roasted whole wheat flour, ghee, powdered sugar, cocoa, and finely chopped nuts. Mix everything while warm, shape into small balls, and allow them to cool until firm for a delicious modern variation with rich flavor.
For Punjabi festive desserts, choose a chocolate that melts smoothly, blends easily with traditional ingredients, and provides balanced sweetness. A creamy texture, rich flavor, and attractive color make it suitable for fillings, garnishes, coatings, and festive dessert decorations.
Traditional Baisakhi sweets can be updated by adding chocolate fillings, cocoa-infused mixtures, chocolate drizzles, or decorative chocolate shavings. These additions enhance flavor, deepen the color, and create a contemporary version of favorite festive desserts while preserving their traditional character.
During a Navratri fast, people commonly enjoy sweets prepared with fasting-friendly ingredients such as makhana, sabudana, amaranth flour, water chestnut flour, sweet potato, coconut, milk, dry fruits, and jaggery. These desserts offer satisfying flavor, natural color, and are a favorite part of festive fasting meals.
Popular Navratri dessert recipes include makhana kheer, sabudana kheer, coconut laddoos, sweet potato halwa, rajgira laddoos, fruit cream, and vrat-friendly barfi. These recipes are easy to prepare and provide delicious flavor while following common fasting guidelines during the festival.
Navratri sweets are generally prepared using ingredients such as milk, yogurt, makhana, sabudana, rajgira, singhara flour, coconut, dry fruits, jaggery, cardamom, saffron, and fresh fruits. These ingredients create delightful flavor, attractive color, and are widely used in fasting recipes.
To prepare vrat-friendly desserts at home, select fasting-approved ingredients and combine them using simple cooking methods like roasting, simmering, or chilling. Natural sweeteners, nuts, and aromatic spices can enhance the flavor while keeping the dessert suitable for Navratri fasting.
No-cook Navratri desserts include fruit bowls, yogurt parfaits, coconut-date balls, dry fruit laddoos, chilled shrikhand, and nut-based energy bites. These recipes require minimal preparation while offering refreshing flavor, vibrant color, and convenience during fasting days.
Healthy Navratri desserts can be prepared with fruits, nuts, seeds, makhana, yogurt, and natural sweeteners like dates or jaggery. These ingredients provide satisfying flavor and wholesome nutrition while creating lighter festive treats that fit within many fasting preferences.
Traditional Navratri sweets include makhana kheer, sabudana kheer, rajgira laddoos, coconut barfi, sweet potato halwa, singhara halwa, and fruit-based desserts. These recipes have been enjoyed for generations, bringing festive flavor, beautiful color, and cultural significance to the celebration.
Yes, chocolate-inspired desserts can be prepared for Navratri by combining fasting-friendly ingredients with cocoa or chocolate that fits your personal fasting practices. Makhana, nuts, coconut, and dates pair well with chocolate, creating rich flavor and an attractive festive color.
Choose a chocolate that melts smoothly and blends well with fasting-friendly ingredients such as nuts, coconut, fruits, and milk. A chocolate with balanced sweetness, creamy texture, rich flavor, and glossy color works well for festive dessert recipes and decorations.
You can modernize traditional Navratri sweets by adding cocoa to halwa, drizzling melted chocolate over laddoos, creating chocolate-filled barfi, or decorating desserts with chocolate shavings. These additions enhance flavor, enrich the color, and offer a creative variation while respecting festive traditions.
The best Summer Desserts include ice cream, frozen yogurt, fruit sorbets, popsicles, cheesecakes, puddings, mousse, fruit parfaits, and chilled custards. These refreshing treats feature light flavor, vibrant color, and seasonal fruits, making them a favorite choice for warm weather.
Summer Desserts can be prepared at home using fresh fruits, yogurt, cream, milk, or chilled ingredients that require minimal cooking. Many recipes involve blending, layering, freezing, or refrigerating, resulting in refreshing desserts with excellent flavor and attractive presentation.
Popular Summer Desserts recipes include mango mousse, fruit custard, berry parfait, lemon cheesecake, watermelon granita, coconut pudding, kulfi, frozen yogurt, and no-bake pies. These desserts celebrate seasonal ingredients while offering refreshing flavor and naturally bright color.
Summer Desserts are ideal for warm weather because they are typically served chilled and often feature juicy fruits, creamy textures, and refreshing ingredients. Their light flavor and cooling effect make them enjoyable while adding vibrant color to seasonal meals and celebrations.
Common ingredients used in Summer Desserts include fresh fruits, yogurt, milk, cream, coconut, fruit juices, gelatin, condensed milk, mint, nuts, and vanilla. These ingredients create refreshing flavor, smooth texture, and colorful desserts that are perfect for hot days.
Store Summer Desserts in airtight containers inside the refrigerator or freezer, depending on the recipe. Keep fruit-based and dairy desserts chilled to maintain freshness, preserve their flavor, retain their appealing color, and prevent spoilage during warm temperatures.
Popular flavors for Summer Desserts include mango, strawberry, lemon, orange, watermelon, coconut, pineapple, peach, berry, mint, and vanilla. These refreshing choices complement seasonal ingredients while adding natural sweetness, vibrant color, and a light, cooling taste.
Easy variations of Summer Desserts include adding seasonal fruits, flavored yogurt, crunchy granola, roasted nuts, fruit sauces, or chocolate shavings. These simple additions introduce new flavor combinations, improve texture, and create colorful desserts without making the recipes complicated.
The best chocolate for Summer Desserts should melt smoothly, pair well with chilled ingredients, and provide balanced sweetness. Chocolate with rich flavor, glossy color, and a creamy texture complements fruit-based desserts, frozen treats, puddings, and no-bake recipes beautifully.
Rather than choosing a specific brand, select fresh, high-quality ingredients that suit your recipe. Premium chocolate, dairy products, fruits, and flavorings contribute to better texture, richer flavor, attractive color, and consistently delicious homemade Summer Desserts.
With an egg desserts are recipes in which eggs play an important role in creating structure, texture, or richness. Cakes, custards, puddings, mousses, and soufflés commonly use eggs to achieve a smooth consistency, balanced flavor, and an appealing golden color after cooking or baking.
The preparation method depends on the recipe, but it generally begins by whisking eggs with sugar before combining them with ingredients such as milk, butter, flour, or chocolate. The mixture is then baked, steamed, or gently cooked until it reaches the desired texture and flavor.
Quick With Egg Desserts include chocolate mug cakes, baked custards, bread pudding, pancakes, French toast, simple sponge cakes, and chocolate mousse. These recipes require only a few ingredients and basic techniques while delivering satisfying flavor and attractive color in less time.
Egg Desserts are appreciated for their light texture, rich consistency, and versatility. Eggs help create moist cakes, creamy custards, airy soufflés, and smooth puddings, making these recipes a favorite option for celebrations, family meals, or everyday homemade desserts.
Most With Egg Desserts should be cooled completely before storing in airtight containers. Refrigerate desserts containing dairy or cooked eggs and consume them within a few days to preserve their flavor, texture, freshness, and overall quality.
When eggs cannot be used, common substitutes include mashed bananas, applesauce, yogurt, silken tofu, flaxseed mixtures, chia seeds, or commercial egg replacers. The ideal substitute depends on whether the recipe requires moisture, binding, or leavening while maintaining good flavor.
Egg Desserts often provide a softer crumb, creamier consistency, and better structure than recipes made without eggs. They are suitable for a wide variety of baking and dessert styles, offering reliable texture, balanced flavor, and attractive color across many classic recipes.
Yes, many With Egg Desserts are suitable for beginners, especially recipes such as sponge cakes, simple puddings, bread pudding, or basic custards. Following measurements carefully and controlling the cooking temperature can help produce successful results with excellent flavor and texture.
The best chocolate for With Egg Desserts is one that melts smoothly, has a balanced sweetness, and complements the recipe without overpowering other ingredients. Chocolate with rich flavor, deep color, and a high-quality cocoa taste works well for baking and decorating.
Rather than focusing on a specific brand, choose ingredients that are fresh, consistent, and suited to your recipe. High-quality baking products with good texture, rich flavor, and reliable performance will help create delicious desserts with appealing color and professional-looking results.
Traditional Baisakhi desserts include Meethe Chawal, Pinni, Kada Prasad, kheer, phirni, halwa, and jaggery-based sweets. These festive recipes celebrate the harvest season with comforting flavor, vibrant color, and homemade goodness, making them a favorite during family gatherings and community festivities.
Begin by selecting a traditional Baisakhi dessert or a simple chocolate base, then combine it with melted chocolate or cocoa according to the recipe. Assemble the ingredients, allow the dessert to cool or set if needed, and finish with nuts or festive garnishes for extra flavor and color.
Desserts are a symbol of happiness, gratitude, and abundance during Baisakhi celebrations. Families prepare and share sweets with loved ones and guests, creating joyful memories while celebrating the harvest season through delicious flavor, festive color, and cherished culinary traditions.
Beginner-friendly Baisakhi Chocolate Desserts include chocolate pudding cups, chocolate rice treats, chocolate-coated laddoos, no-bake truffles, and simple layered desserts. These recipes use easy techniques and readily available ingredients to create festive treats with rich flavor and attractive presentation.
Yes, many Baisakhi Chocolate Desserts can be prepared one or two days before serving. Store them in airtight containers in the refrigerator or a cool place, depending on the ingredients, to preserve freshness, flavor, texture, and appealing color until the celebration.
Healthier Baisakhi Chocolate Desserts can be made using dark cocoa, whole grains, dates, nuts, seeds, fresh fruits, and reduced sugar. These ingredient swaps create satisfying treats with balanced flavor while offering a lighter alternative for festive celebrations.
Fusion Baisakhi Chocolate Desserts combine traditional sweets with modern ingredients such as coffee, orange zest, berries, caramel, coconut, or crunchy cookies. These creative additions introduce exciting flavor combinations, contrasting color, and contemporary presentation while respecting festive traditions.
Chocolate dessert boxes, truffle assortments, chocolate-coated festive sweets, layered dessert jars, and decorative chocolate treats make excellent Baisakhi gifts. Attractive packaging, rich flavor, and elegant color combinations help create memorable presents suitable for friends and family.
Choose a chocolate that melts evenly, blends smoothly, and complements festive ingredients without overpowering them. A creamy texture, balanced sweetness, rich flavor, and glossy color make it suitable for decorating, coating, filling, or enhancing a variety of celebration desserts.
You can add a chocolate twist by layering chocolate cream into traditional sweets, using chocolate drizzles, mixing cocoa into dessert fillings, or decorating with chocolate curls. These ideas enrich the flavor, deepen the color, and give festive desserts a modern and indulgent finish.
Traditional Baisakhi desserts include Meethe Chawal, Pinni, Kada Prasad, kheer, phirni, halwa, and jaggery-based sweets. These festive recipes celebrate the harvest season with rich flavor, beautiful color, and homemade goodness, making them a favorite part of family gatherings and community celebrations.
Baisakhi desserts can be prepared at home using simple ingredients such as rice, wheat flour, milk, ghee, jaggery, sugar, nuts, and aromatic spices. Depending on the recipe, roasting, simmering, or slow cooking helps develop authentic flavor while creating delicious festive sweets.
Desserts symbolize gratitude, prosperity, and the joy of a successful harvest during Baisakhi. Families prepare and share traditional sweets with relatives, friends, and neighbors, making celebrations more meaningful through delicious flavor, festive color, and the spirit of togetherness.
Easy Baisakhi dessert recipes include Meethe Chawal, simple kheer, jaggery laddoos, Pinni, and milk-based puddings. These recipes require everyday ingredients and basic cooking techniques, allowing beginners to prepare festive sweets with traditional flavor and attractive presentation.
The storage method depends on the dessert. Dry sweets should be kept in airtight containers in a cool, dry place, while milk-based desserts belong in the refrigerator. Proper storage helps preserve freshness, flavor, texture, and appealing color for a longer period.
Healthier Baisakhi desserts can be made by using jaggery instead of refined sugar, adding whole grains, oats, nuts, seeds, and dried fruits, or reducing the amount of ghee. These changes maintain a satisfying flavor while creating lighter festive treats.
Traditional Baisakhi desserts follow classic family recipes using regional ingredients, while modern versions introduce creative flavors, contemporary presentation, and updated cooking methods. These adaptations offer new color combinations and textures while preserving the festive spirit of the celebration.
You can create easy variations by adding fresh fruits, coconut, cocoa, roasted nuts, flavored cream, or dried berries to traditional recipes. These ingredients introduce exciting flavor combinations, enhance the color, and give classic festive desserts a fresh contemporary appeal.
Choose a chocolate that melts smoothly, blends well with traditional ingredients, and provides balanced sweetness. A creamy texture, rich flavor, and glossy color make it suitable for festive desserts, whether used for fillings, drizzles, coatings, or decorative garnishes.
You can add a chocolate twist by incorporating cocoa into traditional recipes, drizzling melted chocolate over finished desserts, or creating chocolate-filled festive sweets. These simple ideas enhance flavor, enrich the color, and offer a modern take on favorite Baisakhi desserts.
Bread Pudding is a classic baked dessert made by soaking bread in a mixture of milk, eggs, sugar, and flavorings before baking until soft and lightly golden. It is known for its comforting texture, rich flavor, and ability to transform leftover bread into a favorite homemade dessert.
To make Bread Pudding at home, cube stale bread and soak it in a mixture of milk, eggs, sugar, vanilla, and spices. Let the bread absorb the liquid before baking until the pudding is set and lightly browned. Serve warm with your favorite topping if desired.
Popular Bread Pudding recipes include classic vanilla, chocolate, caramel, cinnamon raisin, apple, banana, coconut, and nut-filled versions. Each recipe offers a unique flavor and color while allowing you to customize the dessert with seasonal fruits, spices, or crunchy toppings.
Bread Pudding is a practical dessert because it helps reduce food waste by using leftover bread while creating a delicious treat. It is versatile, easy to customize, and suitable for family meals, celebrations, or casual gatherings with comforting flavor and satisfying texture.
Freshly baked Bread Pudding should be refrigerated after cooling completely and is generally best enjoyed within three to four days. Store it in a tightly sealed container to help maintain its flavor, moisture, texture, and appealing color throughout the storage period.
Bread Pudding is commonly prepared with bread, milk, eggs, sugar, butter, vanilla, and warming spices such as cinnamon or nutmeg. Many recipes also include raisins, chocolate, nuts, fruits, or cream to create different flavor combinations and attractive presentation.
Unlike many traditional desserts that rely primarily on flour-based batters, Bread Pudding uses soaked bread as its foundation. This creates a soft, custard-like texture with rich flavor and makes it a favorite choice for using leftover ingredients in a delicious way.
Common mistakes include using overly fresh bread, skipping the soaking time, baking at an incorrect temperature, or adding too much liquid. Following the recipe carefully helps achieve balanced flavor, proper texture, and an evenly baked pudding with an attractive golden color.
The best chocolate for Bread Pudding should melt smoothly and blend well with the custard mixture without overpowering the other ingredients. Choose chocolate with rich cocoa flavor, balanced sweetness, and deep color to create a more indulgent and satisfying dessert.
Instead of focusing on a particular brand, select fresh baking ingredients that suit your recipe and preferences. Good-quality bread, dairy products, chocolate, and flavorings contribute to better texture, richer flavor, and a beautiful finished color in homemade Bread Pudding.
Begin Cocoa Powder Brownies by blending melted butter or oil with sugar, then add milk and vanilla. Fold in sifted flour, cocoa powder, and other dry ingredients until just combined. Spread the mixture evenly in a lined pan and bake until the edges are set while the center remains slightly moist.
To create eggless Cocoa Powder Brownies, use ingredients such as plain yogurt, applesauce, mashed banana, or ground flaxseed mixed with water in place of eggs. Combine with cocoa, flour, sugar, and fat to produce brownies with a rich flavor and satisfyingly moist consistency.
Cocoa Powder Brownies can be cooked on a stovetop by placing the brownie pan inside a large, preheated, covered pot fitted with a stand or rack. Keep the heat low and cook gradually until the surface appears set and the center reaches the desired fudgy texture.
Cocoa Powder Brownies generally contain unsweetened cocoa, flour, sugar, butter or oil, milk, vanilla, and a small amount of salt. Depending on your favorite recipe, chocolate chunks, walnuts, espresso powder, or caramel may be included for additional flavor and contrasting textures.
Fresh Cocoa Powder Brownies can usually be kept in a tightly sealed container at room temperature for approximately three to four days. Refrigeration may preserve them for about one week, while properly wrapped portions can be frozen for longer periods and thawed before serving.
Cocoa Powder Brownies may become cakey, tough, or crumbly when ingredient ratios are incorrect, or the batter is mixed excessively. Overbaking can remove too much moisture, while cutting them before they have cooled sufficiently may cause the pieces to lose their shape.
Unlike many baked sweets, Cocoa Powder Brownies are known for their concentrated cocoa taste, deep brown color, and dense or fudgy interior. They typically contain less flour than cakes, giving them a distinctive structure that falls between a soft cake and a chewy cookie.
Transform Cocoa Powder Brownies into an exciting dessert by serving them warm with ice cream, fresh strawberries, whipped cream, or fruit sauce. You can also create brownie sandwiches, dessert parfaits, or bite-sized pieces decorated with colorful toppings for parties and celebrations.
For dessert preparation, select an unsweetened cocoa powder with a fine consistency, strong aroma, and dependable cocoa content. A darker variety can provide an intense color and mellow taste, whereas natural cocoa often contributes brighter, sharper notes to brownies and other baked treats.
Cocoa powder is highly suitable for preparing both cakes and brownies because its concentrated nature delivers chocolate flavor without requiring melted chocolate. When incorporated in the correct proportion, it can create everything from light chocolate cakes to intensely fudgy brownies, making it a versatile baking ingredient.
To prepare Cocoa Powder Cakes, sift flour, cocoa powder, sugar, and a leavening agent together. Combine them with milk, butter or oil, and vanilla to form a smooth batter. Transfer to a prepared cake pan and bake until the center is fully cooked and develops a rich chocolate flavor.
Eggless Cocoa Powder Cakes can be prepared by replacing eggs with yogurt, applesauce, mashed banana, condensed milk, or a flaxseed mixture. These substitutes provide moisture and binding, while quality cocoa gives the cake its characteristic dark color and distinctive chocolate taste.
For a no-oven Cocoa Powder Cake, pour the prepared batter into a greased heat-safe pan and place it inside a preheated heavy-bottomed pot or pressure cooker without pressure. Cook over gentle heat until a toothpick inserted into the center comes out mostly clean.
The primary ingredients used in Cocoa Powder Cakes include all-purpose flour, unsweetened cocoa powder, sugar, milk, butter or vegetable oil, vanilla, and baking powder or baking soda. Coffee, chocolate chips, nuts, or spices may be added to deepen the flavor.
Homemade Cocoa Powder Cakes generally remain fresh for two to three days when covered properly at room temperature. Refrigerated cakes can last several days longer, particularly when they contain perishable fillings or frosting. Freezing individual slices is another convenient option for extended storage.
Cocoa Powder Cakes can fail because of inaccurate measurements, expired leavening agents, excessive mixing, or an incorrect baking temperature. Using too much cocoa may also reduce moisture and create a dry result, so maintaining the correct balance between wet and dry ingredients is important.
Cocoa Powder Cakes get their signature chocolate taste directly from cocoa rather than relying entirely on melted chocolate. This provides a deep flavor and characteristic brown color while allowing the cake to remain versatile enough for different frostings, fillings, and decorative finishes.
Serve Cocoa Powder Cakes with fresh berries, whipped cream, chocolate ganache, fruit compote, caramel drizzle, or your favorite ice cream. For special occasions, decorate individual slices with colorful sprinkles, toasted nuts, chocolate curls, or fresh fruit for an attractive presentation.
For preparing Cocoa Powder Cakes and other desserts, choose a high-quality unsweetened cocoa powder with a fine texture and pronounced cocoa aroma. Natural cocoa provides a brighter flavor, while Dutch-processed cocoa generally offers a smoother taste and deeper color, depending on the recipe.
Yes, cocoa powder is an excellent ingredient for baking cakes and brownies because it adds concentrated chocolate flavor without introducing significant extra moisture. It works especially well in your favorite chocolate recipes, providing rich color and allowing greater control over sweetness and fat content.
Start by creaming softened butter with sugar until well combined, then stir in vanilla and milk. Add flour, cocoa powder, and a leavening agent to form a workable dough. Shape into small portions, arrange on a baking sheet, and bake until the edges become firm while the centers remain tender.
Eggless Cocoa Powder Cookies can be made by using milk, yogurt, or a small amount of cornstarch mixture to help bind the dough. Combine the chosen substitute with butter, sugar, flour, and cocoa, then shape and bake for cookies with a satisfying chocolate flavor and crisp finish.
To prepare Cocoa Powder Cookies without an oven, arrange the shaped dough on a heat-safe plate and place it inside a covered, thick-bottomed pan. Cook over very low heat until the cookies become firm. Let them cool completely, as their texture will become crisper after cooling.
A typical Cocoa Powder Cookie recipe includes all-purpose flour, unsweetened cocoa powder, butter, granulated or brown sugar, milk, vanilla, and baking soda or baking powder. Your favorite additions might include chocolate chips, roasted nuts, dried fruit, coconut, or a pinch of sea salt.
Cocoa Powder Cookies can remain enjoyable for approximately one to two weeks when placed in an airtight jar and stored in a dry area. Protecting them from humidity is particularly important because exposure to moisture can soften their texture and reduce their fresh chocolate flavor.
Several factors can affect Cocoa Powder Cookies, including butter that is too warm, incorrect flour quantities, or unsuitable cooking temperatures. Cookies may spread excessively when the dough is too soft, while an overly dry mixture can result in hard, crumbly cookies with uneven color.
Cocoa Powder Cookies offer a concentrated chocolate experience in a convenient, handheld form, setting them apart from creamy puddings or soft cakes. Their defining qualities include a pronounced cocoa flavor, dark color, and a texture that can range from crunchy to pleasantly chewy.
Enjoy Cocoa Powder Cookies alongside your favorite coffee, cold milk, or hot chocolate, or turn them into creative treats by sandwiching them with cream or ice cream. For extra color and visual appeal, decorate them with fruit, icing, sprinkles, or contrasting chocolate drizzle.
When choosing cocoa powder for cookies and other desserts, consider the desired taste and appearance of the final recipe. Unsweetened natural cocoa provides noticeable acidity and bold flavor, while Dutch-processed varieties typically produce a smoother profile and darker color in baked preparations.
Cocoa powder can be an effective choice for cakes and brownies, provided it matches the recipe's leavening requirements. A good baking cocoa adds dependable chocolate flavor, enhances color, and works across numerous favorite recipes without requiring solid chocolate.
To make Cocoa Powder Hot Chocolate at home, combine unsweetened cocoa with sugar and a splash of warm milk to create a smooth paste. Gradually stir in additional milk and heat gently until steaming. Add vanilla or your favorite spice for extra flavor before serving.
Yes, Cocoa Powder Hot Chocolate is typically eggless and requires no egg substitute. A basic version uses cocoa powder, milk, sugar, and optional vanilla. Plant-based milk can also be used, making the beverage easy to adapt according to different dietary preferences.
Cocoa Powder Hot Chocolate does not need an oven because it can be prepared quickly on a stovetop or in a microwave. Heat the milk carefully, whisk in cocoa and sweetener until completely dissolved, and serve once the drink reaches your preferred temperature.
Cocoa Powder Hot Chocolate usually contains unsweetened cocoa powder, dairy or plant-based milk, sugar, and a small amount of vanilla. Ingredients such as cinnamon, cream, coffee, marshmallows, or nutmeg may be included to create a richer flavor and more indulgent experience.
Prepared Cocoa Powder Hot Chocolate is best enjoyed immediately, but leftovers can be cooled and transferred to a sealed container before refrigeration. Consume within two to three days and reheat gently while stirring to restore an even consistency without scorching the milk.
Cocoa Powder Hot Chocolate may taste overly thick, chalky, or heavy when excessive cocoa or thickening ingredients are added. Cocoa can also form lumps if mixed directly into hot liquid, so blending it with a small amount of liquid first creates smoother results.
Cocoa Powder Hot Chocolate is primarily a warm beverage rather than a solid or spoonable dessert. Compared with chocolate pudding or mousse, it has a thinner consistency and is designed for drinking, while still delivering a comforting cocoa flavor and inviting dark color.
Try adding peppermint, cinnamon, orange zest, caramel, espresso, chilli, or coconut milk to create different Hot Chocolate variations. Top your favorite version with whipped cream, marshmallows, colorful sprinkles, or grated chocolate for extra sweetness, texture, and visual appeal.
For dessert recipes, select an unsweetened cocoa powder rather than a pre-sweetened Hot Chocolate mix, as it provides better control over sugar and other ingredients. A finely ground cocoa with a strong aroma, rich color, and pronounced flavor works across many preparations.
Cocoa powder can be an effective choice for cakes and brownies, provided it matches the recipe's leavening requirements. Unsweetened baking cocoa is usually more suitable, as it provides concentrated chocolate flavor and predictable results in baked recipes.
To make Cocoa Powder Milkshakes at home, blend chilled milk with unsweetened cocoa powder, sugar, and ice until creamy and frothy. For a thicker consistency, add your favorite ice cream or frozen banana, then serve immediately with a dusting of cocoa for extra flavor.
Yes, Cocoa Powder Milkshakes are generally prepared without eggs. A simple eggless recipe combines cold milk, cocoa powder, sweetener, and ice in a blender. Ingredients such as ice cream, banana, or nut butter can be included for additional richness and body.
Cocoa Powder Milkshakes require no oven, stovetop, or cooking process. Simply place all the ingredients in a blender and process until smooth. Pour into a chilled glass, add your preferred toppings, and enjoy immediately for the freshest taste and best texture.
Cocoa Powder Milkshakes are usually made from chilled milk, unsweetened cocoa, sugar or another sweetener, and ice. Depending on the desired consistency and flavor, you can incorporate ice cream, frozen fruit, vanilla, cream, or peanut butter into the mixture.
Fresh Cocoa Powder Milkshakes should ideally be consumed soon after blending because their frothy consistency gradually disappears during storage. If necessary, refrigerate leftovers in a tightly closed container for up to 24 hours and stir or blend again before drinking.
A Cocoa Powder Milkshake may develop an unpleasantly thick or powdery consistency when too much cocoa is added or insufficient liquid is used. Properly measuring ingredients and blending thoroughly helps distribute the cocoa evenly, resulting in a smoother and more enjoyable drink.
Unlike chocolate mousse, pudding, or ice cream, Cocoa Powder Milkshakes have a drinkable consistency and are served as chilled beverages. Their cocoa flavor can be adjusted easily, while milk and optional ice cream provide a creamy texture that distinguishes them from thicker desserts.
Create exciting Cocoa Powder Milkshake variations by blending in strawberries, bananas, coffee, coconut, mint, caramel, or nut butter. Add your favorite toppings, such as whipped cream, colorful sprinkles, chopped nuts, or fresh fruit, to introduce different flavors, textures, and visual appeal.
For preparing milkshakes and versatile dessert recipes, choose finely textured, unsweetened cocoa powder that dissolves easily and provides a pronounced chocolate taste. A quality option should offer consistent color and aroma without unnecessary added sweeteners, allowing better control over the finished recipe.
The milkshake itself is generally unsuitable as a direct substitute for cocoa in cakes or brownies because its additional liquid and sugar can alter the recipe. However, the unsweetened cocoa powder used to prepare it is a favorite baking ingredient for adding rich flavor and deep color.
To make Cocoa Powder Mousse at home, whip chilled cream until soft peaks form, then gently incorporate sifted cocoa powder, powdered sugar, and vanilla. Refrigerate the mixture until properly chilled and set. Serve in individual glasses for a smooth dessert with a rich flavor and deep chocolate color.
Yes, Cocoa Powder Mousse can be made entirely without eggs by using whipped cream, cocoa powder, powdered sugar, and vanilla. For additional richness, condensed milk or melted chocolate may be incorporated, creating an airy yet creamy dessert suitable for those who prefer egg-free recipes.
Cocoa Powder Mousse requires no oven because its texture develops through whipping and chilling rather than baking. Combine the prepared ingredients carefully, portion the mousse into serving dishes, and refrigerate for several hours until it becomes light, stable, and ready to enjoy.
Cocoa Powder Mousse commonly contains unsweetened cocoa powder, whipping cream, powdered sugar, and vanilla extract. Certain recipes may use cream cheese, condensed milk, or gelatin for additional stability. These components work together to provide a silky consistency and pronounced cocoa flavor.
Keep Cocoa Powder Mousse refrigerated in covered individual cups or a tightly sealed container to protect its delicate consistency and prevent it from absorbing surrounding food odors. For optimal freshness, consume homemade mousse within two to three days and avoid leaving it at room temperature for extended periods.
Cocoa Powder Mousse can become dense when the cream is whipped excessively or the ingredients are folded together too vigorously, causing the mixture to lose air. Too much cocoa may also create a dry mouthfeel, so careful measurements are essential for maintaining a light consistency.
Cocoa Powder Mousse is distinguished by its aerated, creamy structure, which is lighter than pudding and less firm than custard. Its chocolate flavor comes primarily from cocoa, while the whipped base provides a delicate texture that makes mousse a favorite chilled dessert.
Create different Cocoa Powder Mousse variations by incorporating espresso, orange zest, peppermint, cinnamon, caramel, or peanut butter. Layer the mousse with colorful berries, crushed cookies, toasted coconut, or your favorite nuts to introduce contrasting textures and make each serving more visually appealing.
For mousse and other creamy desserts, select finely milled, unsweetened cocoa powder that blends easily without leaving noticeable lumps. A cocoa with a balanced taste and strong aroma will provide sufficient chocolate intensity, while the preferred type can vary depending on the desired color and flavor.
The cocoa powder used to prepare mousse can also work effectively in cakes and brownies when it is suitable for baking. Because different cocoa varieties interact differently with leavening agents, always follow the specific recipe requirements to achieve the intended rise, texture, color, and chocolate flavor.
To prepare Cocoa Powder No Bake Desserts, mix cocoa powder with ingredients such as crushed cookies, cream, condensed milk, or melted butter, depending on the recipe. Shape or layer the mixture, then refrigerate until firm. Finish with your favorite toppings for added flavor and color.
Eggless Cocoa Powder No Bake Desserts are simple because many recipes naturally require no eggs. Combine cocoa with ingredients such as cream cheese, whipped cream, biscuit crumbs, coconut, or condensed milk, then chill until the mixture develops the desired consistency before serving.
A simple no-oven method involves combining cocoa powder with a suitable creamy or crumb-based mixture and allowing refrigeration to set the dessert. Options include chocolate truffles, chilled cheesecakes, dessert bars, mousse cups, and biscuit cakes, all prepared without conventional baking.
Common ingredients in Cocoa Powder No Bake Desserts include unsweetened cocoa, crushed biscuits, cream, condensed milk, butter, cream cheese, oats, nuts, and coconut. Vanilla, coffee, fruit, or caramel may also be incorporated to create additional layers of flavor.
The storage period for Cocoa Powder No Bake Desserts varies according to their ingredients. Recipes containing fresh dairy are generally best refrigerated and consumed within three to four days, while certain truffles or bars may remain suitable for longer when properly covered and chilled.
Cocoa Powder No Bake Desserts may fail to set when the recipe contains too much liquid or insufficient binding ingredients. Incorrect chilling time can also affect firmness, while adding excessive cocoa may produce an overly bitter taste or a dry, powdery mouthfeel.
Cocoa Powder No Bake Desserts rely primarily on chilling, mixing, or freezing instead of oven heat to achieve their final structure. This preparation style makes them convenient for warmer weather while still delivering an indulgent chocolate flavor and an appealing dark color.
Present Cocoa Powder No Bake Desserts in individual jars, small glasses, decorative cups, or bite-sized portions. Layer them with colorful berries, fruit puree, cookie crumbs, or your favorite cream, then garnish with toasted nuts, coconut flakes, or chocolate shavings.
The ideal cocoa powder for no-bake recipes should have a fine consistency that incorporates smoothly into cold mixtures. Choose an unsweetened option with a pleasant aroma and full-bodied cocoa flavor, allowing you to control sweetness while achieving the desired chocolate intensity.
No-bake dessert mixtures are generally formulated for chilling rather than baking, so they should not automatically replace standard cake or brownie batter. However, the cocoa powder used in these recipes may be suitable for baking when its type and properties match the specific recipe requirements.
To prepare Cocoa Powder Pudding, whisk cocoa powder, sugar, cornstarch, and a small amount of milk until lump-free. Gradually add the remaining milk and cook over medium heat while stirring continuously. Once thickened, add vanilla, transfer to serving bowls, and chill for a smooth texture and deep chocolate flavor.
Eggless Cocoa Powder Pudding can be prepared using cornstarch as the primary thickening ingredient. Cook it with milk, sugar, cocoa powder, and vanilla until the mixture reaches a creamy consistency. Refrigerate before serving to create a simple chocolate dessert without requiring eggs or complicated preparation.
Cocoa Powder Pudding can be made entirely on the stovetop, so no oven is necessary. Gently heat milk, cocoa, sugar, and cornstarch while whisking regularly until thick and glossy. Pour into individual dishes and allow the pudding to cool before refrigerating until properly chilled.
The essential ingredients for Cocoa Powder Pudding are unsweetened cocoa powder, milk, sugar, cornstarch, vanilla, and a small pinch of salt. Butter may be stirred in at the end for added richness, while coffee can intensify the overall cocoa flavor.
Freshly prepared Cocoa Powder Pudding can usually be refrigerated for approximately three to four days when stored in a clean, tightly covered container. Keeping the surface protected reduces skin formation and helps maintain its creamy consistency, fresh taste, and appetizing color during storage.
Cocoa Powder Pudding may remain runny if insufficient cornstarch is used or the mixture is not heated long enough to activate the thickener. A grainy result can develop from overheating or poor mixing, while excessive starch may create an unpleasantly firm or gummy consistency.
Cocoa Powder Pudding is a spoonable dessert characterized by its smooth, thick consistency and pronounced chocolate taste. Unlike cakes or cookies, it does not depend on flour-based baking for structure, giving it a softer texture and making it a favorite choice for chilled desserts.
Present Cocoa Powder Pudding in small glasses layered with whipped cream, banana slices, cookie crumbs, or your favorite fresh fruits. Garnish the top with colorful berries, toasted coconut, chopped nuts, or chocolate curls to add visual interest and contrasting textures.
When selecting cocoa powder for pudding and similar desserts, choose an unsweetened variety with a smooth consistency and pleasant cocoa aroma. Dutch-processed options can contribute a darker color and mellow taste, whereas natural cocoa generally provides a sharper and more pronounced chocolate flavor.
Yes, cocoa powder is an excellent ingredient for baking cakes and brownies because it adds concentrated chocolate flavor without introducing significant extra moisture. It works especially well in your favorite chocolate recipes, providing rich color and allowing greater control over sweetness and fat content.
Crème Brûlée Desserts are recognized by their silky baked custard base topped with a thin layer of caramelized sugar. The combination of a creamy interior and crisp topping creates a unique texture, rich flavor, and elegant golden color that distinguishes them from many other desserts.
To prepare Crème Brûlée Desserts, heat cream with vanilla, whisk egg yolks with sugar, and slowly combine the mixtures. Pour into ramekins and bake in a water bath until just set. Chill thoroughly before sprinkling sugar on top and caramelizing it until crisp.
Quick Crème Brûlée-inspired recipes include no-bake custard cups, vanilla pudding with a caramelized sugar topping, dessert jars, and mousse served with crunchy caramel shards. These simplified versions capture the signature flavor and texture while requiring less preparation time.
Crème Brûlée Desserts are a favorite because they combine a smooth, creamy custard with a crisp caramelized topping in every bite. Their balanced flavor, elegant appearance, and beautiful golden color make them suitable for both casual meals and special occasions.
Store Crème Brûlée Desserts in the refrigerator, covered with plastic wrap or a fitted lid to prevent them from absorbing odors. For the best texture, caramelize the sugar just before serving so the topping remains crisp while the custard stays creamy.
Some recipes replace heavy cream with half-and-half, coconut cream, or dairy-free alternatives. Vanilla bean may be substituted with vanilla extract, while natural sweeteners can replace refined sugar, depending on the desired flavor, texture, and dietary preferences.
Crème Brûlée Desserts offer a distinctive contrast between a delicate custard and a crackly caramel surface that many desserts do not provide. This combination delivers rich flavor, refined presentation, and a memorable dining experience that appeals to many dessert lovers.
Although Crème Brûlée Desserts require attention to detail, beginners can prepare them successfully by following each step carefully. Gentle baking, proper chilling, and even caramelization help achieve a creamy custard, crisp topping, and an attractive golden color.
A high-quality chocolate with a smooth texture and balanced cocoa intensity pairs well with Crème Brûlée Desserts. Whether used in the custard or as a garnish, it should complement the creamy flavor while adding richness, appealing color, and elegant presentation.
The best choice depends on ingredient quality rather than a particular brand. Select fresh dairy products, premium vanilla, and good-quality chocolate or baking ingredients that deliver consistent texture, rich flavor, and attractive color for reliable results in homemade Crème Brûlée Desserts.
Popular Eid chocolate desserts include chocolate mousse, brownies, chocolate truffles, pudding, lava cakes, chocolate-covered dates, cheesecakes, and layered dessert cups. These festive treats combine rich flavor, appealing color, and elegant presentation, making them a favorite addition to Eid celebrations.
An easy Eid chocolate dessert can be prepared by layering crushed biscuits, chocolate cream, whipped topping, and chopped nuts in serving glasses. Chill until set before serving. This simple recipe delivers rich flavor and an attractive appearance with very little preparation time.
Serving sweets during Eid reflects the joy of completing a meaningful occasion and welcoming family and guests with warmth. Desserts encourage sharing, strengthen traditions, and add festive flavor and vibrant color to gatherings, making every celebration feel more memorable and complete.
Quick Eid chocolate desserts include chocolate parfaits, no-bake cheesecakes, chocolate-dipped fruits, mousse cups, cookie truffles, and chilled pudding. These recipes require minimal effort while providing impressive flavor, attractive color, and elegant presentation suitable for festive entertaining.
Most Eid chocolate desserts stay fresh for two to five days when refrigerated in airtight containers, depending on the ingredients used. Desserts made with fresh cream or dairy should be consumed sooner to preserve their flavor, texture, and overall quality.
Yes, low-sugar Eid chocolate desserts can be made by reducing added sugar and using naturally sweet ingredients such as bananas, dates, or berries. Dark cocoa ingredients also contribute rich flavor, while nuts provide texture and make the dessert more satisfying.
Eid chocolate desserts have expanded from simple homemade treats to creative recipes inspired by international cuisines. Modern versions feature layered presentations, innovative flavor pairings, healthier ingredients, and eye-catching color combinations while continuing to celebrate festive traditions.
Classic Eid chocolate desserts can be transformed by adding coffee, orange zest, roasted nuts, sea salt, fruit compotes, or crunchy biscuit layers. These creative touches enhance flavor, introduce contrasting textures, and bring fresh color and style to traditional dessert tables.
Choose a chocolate that melts evenly, blends smoothly, and delivers a balanced sweetness for festive dessert recipes. A versatile option with rich flavor, glossy color, and a creamy finish works well for fillings, coatings, decorations, and layered chocolate creations.
You can create a richer chocolate experience by adding chocolate ganache, cocoa dusting, chocolate curls, filled centers, or decorative chocolate drizzle to festive desserts. These simple additions improve flavor, deepen the color, and give traditional recipes a modern and indulgent finish.
Traditional Eid desserts include favorites such as sheer khurma, seviyan, phirni, kheer, halwa, shahi tukda, laddoos, and barfi. These festive sweets are prepared to welcome guests, celebrate togetherness, and bring rich flavor, beautiful color, and cherished family traditions to the occasion.
To prepare Eid Fusion Desserts, begin with a traditional sweet base, then introduce modern ingredients such as fruits, chocolate, coffee, or cookies. Assemble or layer the components carefully, garnish attractively, and chill or serve fresh to create balanced flavor and appealing presentation.
Desserts help make Eid celebrations more joyful by bringing families and friends together around shared meals. They express hospitality, appreciation, and generosity while adding festive flavor, vibrant color, and meaningful traditions that make the occasion feel complete and memorable.
Beginner-friendly Eid Fusion Desserts include layered dessert cups, fruit parfaits, chocolate dates, no-bake cheesecakes, and flavored puddings inspired by traditional sweets. These recipes use simple techniques, everyday ingredients, and attractive presentation to create delicious results with minimal effort.
Yes, many Eid Fusion Desserts can be prepared a day or two before serving. Store them in airtight containers under refrigeration to preserve freshness, flavor, texture, and color. Add crunchy toppings or delicate garnishes just before serving for the best presentation.
Healthier Eid Fusion Desserts can be created by using fresh fruits, yogurt, oats, nuts, seeds, and reduced amounts of sugar. Baking instead of frying and choosing lighter ingredients helps maintain satisfying flavor while offering a more balanced festive dessert option.
Fusion versions of Eid desserts may combine traditional recipes with ingredients such as matcha, tropical fruits, coffee, caramel, citrus, or crunchy granola. These creative combinations introduce exciting flavor profiles, fresh color contrasts, and contemporary serving styles without losing festive appeal.
Elegant dessert jars, assorted truffle boxes, layered puddings, gourmet cookies, and beautifully packaged sweet assortments make excellent Eid Fusion Dessert gifts. Attractive packaging, balanced flavor, and appealing color help create thoughtful presents suitable for family, friends, and festive gatherings.
For fusion desserts, choose a chocolate that melts smoothly and pairs well with both traditional and modern ingredients. A chocolate offering creamy texture, balanced sweetness, rich flavor, and an attractive finish is suitable for fillings, toppings, and decorative elements.
Introduce chocolate by creating layered fillings, decorative drizzles, chocolate-coated garnishes, or cocoa-infused creams within traditional recipes. These additions provide richer flavor, deeper color, and a contemporary touch while complementing the classic ingredients commonly enjoyed during Eid celebrations.
Some of the most popular Eid sweets include sheer khurma, seviyan, kheer, phirni, shahi tukda, halwa, laddoos, and barfi. These traditional desserts are enjoyed across many regions, offering unique flavor, appealing color, and a special place in festive family celebrations.
An easy Eid sweet can be made using vermicelli, milk, sugar, and cardamom cooked together until creamy. Garnish with chopped nuts and dried fruits before serving. This simple recipe delivers comforting flavor while requiring only a few everyday ingredients and minimal preparation.
Sweets represent happiness, gratitude, and generosity during Eid. They are served to welcome guests, shared among loved ones, and exchanged as thoughtful gifts. Their delicious flavor and festive color help create memorable celebrations that strengthen family traditions and community connections.
Quick Eid sweets include fruit custards, no-cook truffles, instant kheer, chilled pudding cups, coconut laddoos, and simple milk-based desserts. These recipes can be prepared in less time while still providing attractive color, delicious flavor, and an impressive presentation for festive occasions.
The shelf life of Eid sweets depends on their ingredients and storage conditions. Fresh dairy-based desserts usually remain suitable for two to four days under refrigeration, while dry sweets may last longer when stored in airtight containers away from moisture and direct sunlight.
Yes, many Eid sweets can be prepared with reduced sugar or natural sweetening alternatives while maintaining enjoyable flavor. Ingredients such as fresh fruit, dates, nuts, and low-fat milk help create lighter desserts without sacrificing taste, texture, or visual color.
Eid sweets have gradually evolved by combining traditional recipes with modern cooking styles and global influences. Contemporary versions often feature new ingredients, creative serving methods, and updated flavor combinations while preserving the festive spirit and cultural importance of classic desserts.
Classic Eid sweets can be reinvented by incorporating ingredients such as fresh berries, coffee, caramel, citrus zest, nuts, or layered dessert presentations. These creative ideas introduce exciting flavor combinations, vibrant color contrasts, and modern appeal while respecting traditional recipes.
For Eid sweets, select a chocolate that melts smoothly, blends easily into recipes, and complements traditional ingredients without overpowering them. A good-quality chocolate with balanced sweetness, rich flavor, and an attractive finish works well for fillings, coatings, and decorative garnishes.
A chocolate twist can be added to Eid sweets by drizzling melted chocolate over finished desserts, mixing cocoa into milk-based recipes, or creating chocolate-filled variations of traditional favorites. This simple addition enhances flavor, enriches the color, and offers a fresh festive experience.
Traditional Baisakhi desserts include Meethe Chawal, Kada Prasad, Punjabi Pinni, kheer, phirni, halwa, and jaggery-based sweets. These festive recipes celebrate the harvest season with comforting flavor, vibrant color, and homemade goodness that families enjoy together during the festival.
To prepare Meethe Chawal, cook basmati rice until tender, then combine it with sugar, ghee, saffron, and aromatic spices. Stir in chopped nuts and dried fruits before allowing the rice to absorb the sweet mixture completely, creating a fragrant dessert with beautiful golden color.
Desserts add warmth and joy to Baisakhi celebrations by bringing families and communities together after the harvest season. They symbolize gratitude, abundance, and sharing, while their delicious flavor and festive color help make every meal feel more meaningful and memorable.
A beginner-friendly Meethe Chawal recipe uses cooked basmati rice, sugar, ghee, cardamom, and a handful of nuts or raisins. The simple cooking process requires only basic ingredients, making it easy to prepare a flavorful festive dessert with attractive presentation.
Yes, Meethe Chawal can be prepared ahead of time and refrigerated in a sealed container for up to two or three days. Reheat gently before serving and add fresh nuts or garnishes afterward to preserve the flavor, texture, and bright color.
A lighter version of Meethe Chawal can be prepared by reducing sugar and adding natural sweetness from dates or raisins. Brown rice, smaller amounts of ghee, and extra nuts provide satisfying flavor while making the dessert a more balanced festive option.
Fusion Meethe Chawal recipes may include chocolate, coconut, mango, berries, caramel, or citrus zest for a contemporary update. These ingredients introduce exciting flavor combinations, contrasting color, and creative presentation while maintaining the traditional rice-based foundation of the dessert.
Meethe Chawal can be gifted in decorative food-safe containers or elegant jars that preserve freshness during transport. Adding premium nuts, dried fruits, and festive packaging enhances the flavor, presentation, and overall appeal, making it a thoughtful favorite for celebrations.
Choose a chocolate that melts smoothly and complements the sweet, aromatic taste of rice-based desserts without overpowering traditional ingredients. A chocolate with balanced sweetness, creamy texture, rich flavor, and appealing color works well for festive dessert recipes.
You can create a chocolate version of Meethe Chawal by folding cocoa into the cooked rice, adding chocolate chips while the rice is warm, or finishing with a chocolate drizzle. These additions enrich the flavor, deepen the color, and give the classic dessert a modern festive touch.
Popular Navratri sweets include makhana kheer, sabudana kheer, rajgira laddoos, coconut barfi, sweet potato halwa, singhara halwa, shrikhand, and dry fruit laddoos. These festive desserts are loved for their comforting flavor, appealing color, and use of ingredients commonly enjoyed during fasting.
An easy Navratri sweet can be prepared by cooking roasted makhana with milk, cardamom, and a natural sweetener until creamy. Garnish with chopped nuts before serving to create a simple dessert with delicious flavor and an attractive festive presentation.
Sweets play an important role during Navratri because they are offered during prayers and enjoyed after fasting. They symbolize devotion, gratitude, and celebration, while their delightful flavor and festive color bring families together throughout the nine-day festival.
Quick Navratri sweets include coconut-date balls, fruit yogurt cups, makhana bites, dry fruit laddoos, chilled shrikhand, and no-cook nut bars. These recipes require minimal preparation while delivering satisfying flavor, vibrant color, and convenience for busy fasting days.
The shelf life of Navratri sweets depends on their ingredients. Milk-based desserts generally remain fresh for two to three days under refrigeration, while dry sweets prepared with nuts or coconut often last longer when stored in airtight containers.
Yes, low-sugar Navratri sweets can be prepared using dates, raisins, figs, or small amounts of jaggery instead of refined sugar. These natural ingredients provide enjoyable flavor while helping create lighter desserts suitable for many festive meal preferences.
Navratri sweets have evolved by incorporating modern ingredients, healthier preparation methods, and creative presentations. While traditional recipes remain popular, contemporary versions often feature unique flavor combinations, improved nutrition, and eye-catching color without losing their festive significance.
Classic Navratri sweets can be refreshed by adding fruit purees, cocoa, roasted seeds, flavored yogurt, coconut cream, or crunchy nut toppings. These simple ideas introduce exciting flavor combinations, enhance the color, and give traditional desserts a modern festive appeal.
Choose a chocolate that blends smoothly with fasting-friendly ingredients and offers balanced sweetness without overpowering traditional recipes. A creamy texture, rich flavor, and attractive color make it suitable for coatings, decorative drizzles, fillings, and festive dessert creations.
You can add a chocolate twist by mixing cocoa into kheer, coating dry fruit laddoos with chocolate, creating chocolate-filled coconut sweets, or decorating desserts with chocolate shavings. These additions enhance flavor, deepen the color, and create a favorite festive variation.
Traditional Baisakhi desserts include Pinni, Kada Prasad, Meethe Chawal, kheer, phirni, halwa, and jaggery-based sweets. These festive recipes celebrate the harvest season with rich flavor, inviting color, and homemade goodness, making them a favorite part of family gatherings.
To make Pinni, roast whole wheat flour in ghee over low heat until aromatic and lightly browned. Mix in powdered sugar, chopped nuts, seeds, and cardamom while warm, then shape the mixture into round balls and allow them to cool before serving.
Desserts are an important part of Baisakhi because they symbolize gratitude for a successful harvest and encourage sharing among loved ones. Their comforting flavor, festive color, and traditional recipes help create joyful celebrations filled with warmth, hospitality, and cultural heritage.
Beginner-friendly Pinni recipes require only a few pantry ingredients such as wheat flour, ghee, sugar, and nuts. The process is straightforward, making it easy for first-time cooks to prepare a delicious sweet with satisfying flavor and an attractive homemade appearance.
Yes, Pinni is an excellent make-ahead dessert because it stays fresh for several days when stored in an airtight container in a cool, dry place. Proper storage helps preserve its flavor, texture, and natural color without requiring refrigeration in many climates.
Healthier Pinni recipes can be prepared with jaggery instead of refined sugar, smaller amounts of ghee, and nutritious ingredients such as oats, flaxseeds, or mixed nuts. These changes provide wholesome flavor while creating a lighter festive treat.
Fusion Pinni recipes can include cocoa, coffee, dried berries, coconut, orange zest, or crunchy seeds to create exciting new combinations. These ingredients enhance the flavor, introduce fresh color, and give the traditional sweet a contemporary style without losing its festive appeal.
Pinni makes an excellent festive gift because it is easy to package and transport. Arrange the sweets in decorative boxes or jars, garnish with nuts, and choose attractive wrapping to create a thoughtful present with lasting flavor and beautiful presentation.
Select a chocolate that blends smoothly with roasted ingredients and complements the sweetness of Pinni. A creamy chocolate with balanced flavor, pleasant texture, and rich color is ideal for coatings, fillings, or decorative finishes in festive dessert recipes.
Give Pinni a chocolate twist by mixing cocoa into the dough, adding small chocolate pieces to the center, or coating each sweet with melted chocolate after shaping. These simple additions create deeper flavor, richer color, and a modern version of this favorite festive dessert.
Traditional Punjabi sweets include Pinni, Kada Prasad, Meethe Chawal, phirni, kheer, panjiri, jalebi, and various halwas. These desserts are closely connected with festivals and family celebrations, offering comforting flavor, rich ingredients, and vibrant color that make every occasion more special.
Punjabi sweets can be prepared at home using ingredients such as wheat flour, milk, ghee, sugar, jaggery, rice, nuts, and aromatic spices. Most recipes involve roasting, simmering, or slow cooking to develop rich flavor while creating authentic homemade desserts with appealing color.
Desserts hold special importance during Baisakhi because they celebrate the harvest season, express gratitude, and bring families together. Sharing traditional sweets reflects hospitality and happiness, while their festive flavor and colorful presentation make community gatherings even more memorable.
Easy Punjabi sweets include simple kheer, Meethe Chawal, jaggery laddoos, Pinni, and quick milk-based puddings. These recipes use common kitchen ingredients and straightforward techniques, making them suitable for beginners who want to prepare delicious sweets with traditional flavor.
Store Punjabi sweets according to their ingredients. Dry sweets should be kept in airtight containers at room temperature in a cool place, while milk-based desserts require refrigeration. Proper storage helps maintain freshness, flavor, texture, and attractive color for a longer period.
Healthier Punjabi sweets can be prepared with jaggery, dates, oats, whole grains, nuts, seeds, and reduced sugar. Baking or lightly roasting instead of deep frying also creates lighter desserts that preserve traditional flavor while offering a more balanced festive choice.
Traditional Punjabi sweets rely on time-tested recipes and regional ingredients, whereas modern versions often include innovative flavors, updated cooking techniques, and contemporary presentation. These creative adaptations introduce fresh color combinations while respecting the original taste and festive significance.
You can create exciting Punjabi sweet variations by adding cocoa, dried fruits, coconut, roasted seeds, fresh fruit, or flavored cream. These ingredients introduce new flavor profiles, improve texture, and add attractive color while keeping the desserts suitable for festive celebrations.
For Punjabi sweets, choose a chocolate that melts evenly and blends well with traditional ingredients such as nuts, milk, and ghee. A smooth texture, balanced sweetness, rich flavor, and glossy color make it suitable for festive dessert recipes and decorative finishes.
You can modernize Punjabi sweets by adding chocolate fillings, cocoa-infused mixtures, chocolate coatings, or decorative chocolate drizzles. These simple additions enhance flavor, deepen the color, and create a contemporary version of favorite traditional desserts without changing their festive charm.
Traditional Eid desserts often include seviyan, sheer khurma, shahi tukda, phirni, kheer, halwa, and various milk-based sweets. These festive treats are prepared to celebrate togetherness and hospitality, offering rich flavor, attractive color, and memorable moments shared with family and guests.
To prepare Shahi Tukda, fry or toast bread slices until golden, soak them lightly in sugar syrup, and top them with thickened sweetened milk. Finish with chopped nuts, saffron, or rose petals, then chill or serve warm for your favorite festive dessert.
Desserts are an important part of Eid celebrations because they symbolize joy, generosity, and togetherness. Families prepare and share sweet dishes with relatives, friends, and guests, making every gathering more festive with rich flavor, vibrant color, and traditional recipes passed through generations.
Beginner-friendly Shahi Tukda recipes use readily available ingredients such as bread, milk, sugar, and cardamom. Toasting the bread instead of frying makes preparation easier, while simple garnishes like almonds or pistachios create an attractive dessert with excellent flavor and presentation.
Yes, Shahi Tukda can be prepared in advance and refrigerated for up to two days in a covered container. For the best texture, keep the bread and milk mixture separate until serving so the dessert maintains its appealing flavor and fresh appearance.
A lighter Shahi Tukda can be prepared by baking whole wheat bread instead of frying it and using low-fat milk with less sugar. Fresh fruits, nuts, and natural sweeteners can enhance the flavor while creating a healthier version of this favorite dessert.
Fusion Shahi Tukda recipes may include chocolate sauce, coffee-flavored rabri, mango puree, caramel, berries, or crunchy cookie crumbs. These creative additions introduce exciting flavor combinations, modern presentation, and vibrant color while preserving the dessert's traditional foundation.
Shahi Tukda is best gifted when packed in secure, refrigerated containers that keep the bread crisp and the milk mixture fresh. Individual dessert jars or neatly arranged serving boxes create an elegant presentation, making this favorite festive sweet suitable for special occasions.
For desserts, choose a chocolate with a smooth texture, balanced sweetness, and good melting properties. A creamy milk chocolate works well for drizzling, fillings, and garnishing, while a richer dark chocolate provides deeper flavor and a more intense color in dessert recipes.
You can give Shahi Tukda a chocolate twist by mixing cocoa or melted chocolate into the thickened milk, adding chocolate shavings between the bread layers, or finishing with a warm chocolate drizzle. This creates a richer flavor, beautiful color, and a modern variation of the classic dessert.
Soufflé Desserts are defined by their light, airy texture created from whipped egg whites folded into a flavored base. When baked, they rise beautifully and develop a delicate structure, offering a soft interior, rich flavor, and an attractive golden color.
To prepare Soufflé Desserts, first make a flavored base using ingredients such as chocolate, vanilla, or fruit puree. Whisk egg whites until stiff peaks form, gently fold them into the base, transfer the mixture to prepared ramekins, and bake immediately until puffed and lightly browned.
Quick Soufflé Desserts include chocolate soufflé, lemon soufflé, vanilla soufflé, and individual microwave-inspired versions that reduce preparation time. These recipes offer a light texture, delicious flavor, and elegant presentation, making them suitable for both everyday meals and special occasions.
Soufflé Desserts are a favorite because they combine an airy texture with a rich yet delicate taste. Their elegant appearance, beautiful color, and customizable flavor options make them an excellent choice for dinner parties, celebrations, or impressive homemade desserts.
Soufflé Desserts are best enjoyed immediately after baking because they naturally lose volume as they cool. If leftovers remain, refrigerate them in a covered container and consume within one to two days, although the texture will be denser than when freshly baked.
Depending on the recipe, dairy-free milk, plant-based cream, fruit purees, or alternative flavorings can replace some traditional ingredients. While egg substitutes exist, they may not produce the same light rise, texture, or overall flavor that classic soufflé recipes are known for.
Soufflé Desserts stand out because of their airy structure and dramatic rise during baking. Unlike many dense desserts, they deliver a delicate mouthfeel, balanced flavor, and elegant presentation, creating a memorable dining experience that feels both light and sophisticated.
Soufflé Desserts can be prepared by beginners with patience and careful attention to technique. Properly whipping egg whites, folding the mixture gently, and baking without opening the oven door are important steps for achieving excellent texture, flavor, and color.
Choose chocolate with a smooth texture, rich cocoa content, and balanced sweetness for Soufflé Desserts. Good-quality chocolate melts evenly into the batter, enhances the flavor, creates a deeper color, and contributes to a refined and satisfying finished dessert.
The best results come from using fresh, high-quality baking ingredients rather than relying on a specific brand. Premium chocolate, fresh eggs, quality dairy products, and pure flavorings help produce Soufflé Desserts with excellent texture, rich flavor, and an appealing golden color.
Summer Frozen Desserts include ice cream, frozen yogurt, fruit sorbets, kulfi, granita, popsicles, semifreddo, frozen cheesecakes, and ice cream sandwiches. These chilled treats are appreciated for their refreshing flavor, vibrant color, and cooling effect during warm summer months.
An easy Summer Frozen Dessert can be made by blending fresh fruit with yogurt or cream, sweetening the mixture to taste, and freezing it until firm. Once set, scoop and serve with your favorite toppings for a refreshing homemade treat.
Quick recipe ideas include frozen banana bites, fruit popsicles, yogurt bark, berry sorbet, mango kulfi, frozen mousse cups, and chocolate-covered frozen fruit. These recipes require minimal effort while delivering refreshing flavor, attractive color, and satisfying texture.
Summer Frozen Desserts are especially popular because they provide a cooling break from high temperatures. Their icy texture, refreshing flavor, and seasonal fruit ingredients make them enjoyable for family gatherings, celebrations, and everyday treats throughout the warmer months.
Most Summer Frozen Desserts require ingredients such as milk, cream, yogurt, fruit puree, sweeteners, cocoa, vanilla, or fruit juice. Depending on the recipe, nuts, cookie pieces, fresh berries, or chocolate can also be added for extra flavor and texture.
Homemade Summer Frozen Desserts generally remain at their best for two to four weeks when stored in airtight freezer-safe containers. Proper storage helps retain their flavor, smooth texture, fresh appearance, and prevents unwanted ice crystals from forming.
Refreshing flavors such as mango, passion fruit, strawberry, raspberry, lemon, coconut, pineapple, peach, mint, and mixed berries are excellent choices for frozen desserts. These seasonal ingredients provide bright flavor, natural sweetness, and beautiful color in every serving.
Classic frozen desserts can be updated with layered fruit purees, crunchy granola, roasted nuts, cookie crumbs, caramel swirls, herbal infusions, or tropical fruit combinations. These additions introduce exciting flavor contrasts, interesting textures, and colorful presentation without making preparation complicated.
For Summer Frozen Desserts, select chocolate that freezes well while maintaining a smooth bite and pleasant texture. A chocolate with balanced sweetness, rich cocoa flavor, and glossy color pairs beautifully with frozen fruits, creamy desserts, and chilled treats.
Rather than choosing a specific brand, look for fresh, dependable ingredients that suit your recipe. High-quality chocolate, dairy products, fruit, and natural flavorings help create Summer Frozen Desserts with excellent texture, delicious flavor, and an appealing finished color.
Summer Milk Shakes are inspired by dessert favorites such as chocolate brownie, vanilla ice cream, mango cheesecake, strawberry shortcake, banana pudding, caramel, and cookies. These combinations deliver creamy flavor, refreshing texture, and vibrant color, making them perfect for hot weather.
Start by adding chilled milk, ice cream or frozen fruit, and your preferred flavoring to a blender. Blend until smooth and creamy, adjust the thickness if needed, then pour into a cold glass and garnish before serving immediately for the best flavor.
Beginners can easily prepare chocolate, mango, strawberry, banana, vanilla, or coffee milk shakes using just a handful of ingredients. These recipes require only blending and simple garnishes, making them quick to prepare while producing excellent flavor and attractive color.
Cold milk, frozen fruits, yogurt, ice cream, fresh mint, cocoa, vanilla, and crushed ice all contribute to refreshing Summer Milk Shakes. Cream, nuts, or nut butter can create a richer texture, while seasonal fruits add natural flavor and bright color.
Summer Milk Shakes are commonly prepared with milk, ice cream, fresh fruits, yogurt, sweeteners, cocoa, vanilla extract, ice cubes, and optional toppings like whipped cream or chopped nuts. These ingredients blend together to create smooth texture, delicious flavor, and appealing presentation.
Summer Milk Shakes taste best immediately after blending, but they can be refrigerated for a short period if necessary. Stirring or blending again before serving helps restore their creamy consistency, fresh flavor, and attractive color after the ingredients naturally begin to separate.
Popular Summer Milk Shake flavors include mango, pistachio, salted caramel, mixed berries, tropical fruits, coconut, mocha, cookies and cream, avocado, and peanut butter. These combinations provide refreshing flavor profiles and colorful presentations that appeal to a wide range of tastes.
Serve Summer Milk Shakes in chilled glasses decorated with chocolate drizzle, fruit slices, colorful sprinkles, cookie crumbs, whipped cream, or reusable straws. Layering different flavors or adding creative toppings gives each drink a unique appearance and memorable flavor experience.
A chocolate that dissolves easily and delivers a smooth, creamy finish is ideal for Summer Milk Shakes. Look for one with balanced sweetness, deep cocoa flavor, and rich color so it blends naturally with milk, ice cream, and seasonal fruits.
Instead of selecting a particular brand, choose fresh ingredients that match your preferred recipe. Quality milk, ripe fruits, premium chocolate, and natural flavorings contribute to better texture, richer flavor, vibrant color, and consistently enjoyable homemade Summer Milk Shakes.
The best Summer Shakes include mango, strawberry, banana, chocolate, vanilla, coffee, watermelon, coconut, pineapple, and mixed berry shakes. These refreshing beverages are known for their creamy texture, delicious flavor, and vibrant color, making them a favorite during hot weather.
To prepare Summer Shakes at home, blend chilled milk with fresh fruit, yogurt, ice cream, or your preferred flavoring until smooth. Add ice cubes if needed, adjust the sweetness to taste, and serve immediately for the freshest flavor and creamy consistency.
Popular Summer Shakes recipes include mango milk shake, banana shake, chocolate shake, strawberry shake, avocado shake, coffee shake, coconut shake, and pineapple shake. These recipes are simple to prepare and showcase refreshing flavor with naturally appealing color.
Summer Shakes are ideal for warm weather because they are served cold and often feature hydrating fruits, chilled milk, or yogurt. Their smooth texture, refreshing flavor, and cooling effect make them an enjoyable beverage throughout the summer season.
Summer Shakes are commonly made with milk, yogurt, fresh fruits, ice cream, cocoa, vanilla, honey, sugar, ice cubes, and optional toppings such as nuts or whipped cream. These ingredients create creamy texture, balanced flavor, and attractive color in every glass.
Summer Shakes are best enjoyed immediately after blending, but they can be refrigerated in a sealed container for a few hours if necessary. Stir or blend again before serving to restore their smooth texture, fresh flavor, and even consistency.
Popular Summer Shake flavors include mango, chocolate, vanilla, strawberry, lychee, watermelon, coffee, mint, coconut, peach, and blueberry. These combinations provide refreshing flavor, natural sweetness, and colorful presentation, making them suitable for family meals and gatherings.
You can easily customize Summer Shakes by adding oats, chia seeds, peanut butter, fresh herbs, frozen fruits, yogurt, cookie crumbs, or flavored syrups. These simple additions create exciting flavor combinations, improve texture, and enhance the overall color and presentation.
The best chocolate for Summer Shakes should blend smoothly into cold beverages while providing rich cocoa flavor without excessive sweetness. Chocolate with a creamy texture and deep color works especially well with milk, ice cream, and fruit-based shake recipes.
Instead of choosing a specific brand, select fresh, high-quality ingredients that match your recipe. Good-quality milk, ripe fruits, premium chocolate, and natural flavorings help produce Summer Shakes with smooth texture, excellent flavor, and vibrant color.
Swiss Roll Desserts are made using a thin sponge cake that is baked, rolled while warm, and filled with cream, jam, chocolate, or fruit fillings. Their signature spiral pattern, soft texture, delightful flavor, and attractive color make them easy to recognize and enjoy.
To prepare Swiss Roll Desserts, bake a light sponge cake in a shallow tray until just cooked. Roll the warm cake in a clean towel, allow it to cool, spread your preferred filling evenly, then roll it tightly again before slicing and serving.
Quick Swiss Roll Desserts include chocolate cream rolls, strawberry jam rolls, coffee-filled sponge rolls, vanilla cream rolls, and fruit-filled variations. These recipes use simple ingredients and easy techniques while delivering excellent flavor, appealing color, and beautiful spiral presentation.
Swiss Roll Desserts are a favorite because they combine a light sponge with creamy or fruity fillings in every slice. They are easy to customize for different occasions, offering attractive presentation, balanced flavor, and a soft texture that appeals to many dessert lovers.
Swiss Roll Desserts should be wrapped carefully or placed in an airtight container before refrigeration. This helps prevent the sponge from drying out while maintaining the filling's freshness, flavor, texture, and overall appearance for several days after preparation.
Common substitutes include whipped topping instead of fresh cream, fruit puree in place of jam, dairy-free cream alternatives, or gluten-free flour blends for the sponge. These changes allow different dietary preferences while preserving enjoyable flavor and texture.
Swiss Roll Desserts offer a unique combination of soft sponge and flavorful fillings rolled into elegant slices. Their decorative spiral design, versatile flavor options, and eye-catching color make them an excellent choice for celebrations, afternoon tea, or festive dessert tables.
Swiss Roll Desserts can be made by beginners with a little practice. Rolling the sponge while it is still warm helps prevent cracking, and evenly spreading the filling creates neat slices with consistent flavor, attractive color, and a professional-looking finish.
The best chocolate for Swiss Roll Desserts should melt smoothly, spread easily, and complement the soft sponge without becoming overpowering. Chocolate with rich cocoa flavor, balanced sweetness, and deep color works well for fillings, coatings, and decorative finishes.
Instead of selecting a specific brand, choose high-quality baking ingredients that suit your recipe. Fresh dairy products, premium chocolate, good-quality flour, and natural flavorings help create Swiss Roll Desserts with excellent texture, delicious flavor, and an appealing finished color.
Éclairs Desserts are classic French pastries made from choux pastry that is baked until light and hollow, then filled with cream, custard, or other sweet fillings. They are typically finished with a glossy topping, offering delicate texture, rich flavor, and an elegant golden color.
To make Éclairs Desserts at home, prepare choux pastry by cooking butter, water, and flour before mixing in eggs. Pipe the dough into long shapes, bake until crisp, cool completely, fill with pastry cream, and finish with a smooth chocolate or icing topping.
Popular Éclairs Desserts recipes include classic vanilla éclairs, chocolate éclairs, coffee éclairs, caramel éclairs, pistachio éclairs, and fruit-filled variations. Each recipe delivers a unique flavor, attractive color, and creamy filling while maintaining the signature light pastry shell.
Éclairs Desserts are a favorite because they combine crisp pastry, creamy filling, and smooth toppings in every bite. They are versatile enough for celebrations, afternoon treats, and festive occasions, offering balanced flavor, elegant presentation, and an impressive homemade appearance.
Éclairs Desserts are best enjoyed fresh, but they can usually be refrigerated in an airtight container for up to two days. Proper storage helps preserve the filling's freshness, the pastry's flavor, and the dessert's overall quality, although the shell may gradually soften.
Éclairs Desserts are commonly prepared with butter, water, flour, eggs, milk, sugar, vanilla, and cream. Many recipes also include chocolate, coffee, fruit purees, or flavored fillings to create different flavor combinations and enhance the dessert's presentation and color.
Unlike many baked desserts, Éclairs Desserts use light choux pastry that expands naturally during baking to create a hollow center for fillings. This distinctive texture, combined with creamy interiors and glossy toppings, gives them a unique flavor and refined appearance.
Common mistakes include undercooking the pastry, opening the oven too early, adding eggs incorrectly, or filling the pastry before it has cooled completely. Following each step carefully helps achieve crisp shells, smooth filling, excellent flavor, and an attractive golden color.
The best chocolate for Éclairs Desserts should melt smoothly and produce a glossy finish without becoming overly sweet. Chocolate with rich cocoa flavor, balanced sweetness, and deep color creates an excellent topping that complements the delicate pastry and creamy filling.
Instead of relying on a particular brand, choose fresh, high-quality baking ingredients for the best results. Premium chocolate, quality dairy products, fresh eggs, and pure flavorings contribute to superior texture, rich flavor, and beautiful color in homemade Éclairs Desserts.
Summer Ice Cream favorites include mango, strawberry, chocolate, vanilla, coconut, mint, berry, pistachio, and tropical fruit varieties. These frozen treats are loved for their refreshing flavor, creamy texture, vibrant color, and ability to provide relief during hot summer days.
A simple Summer Ice Cream can be made by blending chilled cream, sweetened milk, and your favorite fruit or flavoring before freezing the mixture until firm. Stirring occasionally during freezing helps improve the texture and creates a smooth, homemade dessert.
Quick Summer Ice Cream ideas include banana ice cream, yogurt-based frozen treats, fruit sorbets, chocolate ice cream, kulfi-inspired recipes, and berry blends. These recipes are easy to prepare with everyday ingredients while delivering refreshing flavor and eye-catching color.
Summer Ice Cream becomes especially popular because it offers a cool, refreshing way to enjoy dessert in warm weather. Its creamy texture, chilled serving temperature, delicious flavor, and colorful appearance make it a favorite choice for people of all ages.
Most Summer Ice Cream recipes require milk or cream, a sweetener, and a flavoring such as fruit puree, cocoa, vanilla, or coffee. Optional ingredients like nuts, cookie pieces, or fruit chunks can enhance the flavor, texture, and overall presentation.
Homemade Summer Ice Cream generally keeps well in the freezer for about two to four weeks when stored in a tightly sealed container. Proper storage helps prevent freezer burn while maintaining the dessert's flavor, creamy consistency, and attractive color.
Refreshing flavors such as mango, lemon, watermelon, lychee, strawberry, peach, pineapple, mint, coconut, and mixed berries are especially popular during summer. These seasonal ingredients provide bright flavor, natural sweetness, and vibrant color that suit warm-weather desserts perfectly.
Classic Summer Ice Cream can be reinvented by adding roasted nuts, fruit swirls, crunchy biscuit pieces, caramel ribbons, coffee, herbs, or layered toppings. These creative combinations introduce exciting flavor contrasts, interesting textures, and colorful presentations for a unique dessert experience.
The ideal chocolate for Summer Ice Cream should blend smoothly, harden evenly when chilled, and complement fruity or creamy ingredients. Chocolate with balanced sweetness, rich cocoa flavor, and deep color creates delicious frozen desserts and decorative toppings.
The best results come from selecting fresh, high-quality ingredients instead of relying on a particular brand. Good-quality dairy products, chocolate, fruits, and natural flavorings help produce homemade Summer Ice Cream with excellent texture, rich flavor, and appealing color.
You can make an easy homemade Cadbury Silk Ice Cream by melting Cadbury Dairy Milk Silk chocolate and mixing it with fresh cream, condensed milk, and chilled milk. You need to freeze the mixture for 6 to 8 hours and serve it chilled.
Yes. Cadbury Silk Ice Cream is easy to make without eggs. You need fresh cream, condensed milk, and melted Cadbury Dairy Milk Silk chocolate to give it a smooth and creamy texture without using eggs.
Cadbury Silk Ice Cream does not require an oven. All you need to do is prepare the chocolate mixture, pour it into a freezer-safe container, and freeze it until firm. You should stir it once during freezing to help improve the texture.
The main ingredients used in Cadbury Silk Ice Cream are Cadbury Dairy Milk Silk chocolate, fresh cream, condensed milk, chilled milk, and vanilla extract. Some recipes also include chocolate chips or nuts.
Homemade Cadbury Silk Ice Cream stays fresh in the freezer for about two to three weeks when stored in an airtight container. It is important to keep it properly covered to maintain its creamy texture.
One common mistake people make with Cadbury Silk ice cream is overheating the chocolate while melting it. Adding too much liquid or not freezing the mixture for enough time can also affect the texture of the ice cream.
Homemade Cadbury Silk Ice Cream allows you to control the sweetness and chocolate flavour. It is also free from unnecessary additives and can be customised with your favourite toppings and mix-ins.
You can add crushed cookies, roasted nuts, brownie pieces, caramel sauce, or fresh strawberries to Cadbury Silk Ice Cream. It also tastes delicious when served as an ice cream sundae.
Cadbury Dairy Milk Silk Roast Almond, Cadbury Dairy Milk Silk Oreo, and the classic Cadbury Dairy Milk Silk are excellent choices for homemade desserts and ice cream recipes because they have rich and creamy flavour.
Yes. Cadbury Dairy Milk Silk chocolate is good for baking cakes, brownies, cookies, and dessert fillings. Its smooth texture and rich chocolate flavour make homemade baked desserts even more indulgent.
Eggless Chocolate Desserts are any chocolate-based sweet made without eggs, from cakes and brownies to mousses and puddings. Substitutes like yogurt, condensed milk, or butter are used in these desserts to hold everything together.
You can make an eggless chocolate dessert at home by melting chocolate with butter, then adding in condensed milk and a bit of flour for a simple, fudgy brownie-style treat. You need to bake it until it is just set, then let it cool before cutting it into squares.
Chocolate mousse, fudgy brownies, no-bake chocolate tart, and chocolate pudding are all favorites that can be made easily without eggs. Each recipe uses different substitutes to achieve the rich and indulgent texture.
Eggless chocolate desserts are good for people who avoid eggs for dietary, allergy, or religious reasons, without any drop in flavor or richness. Many recipes also skip baking entirely, making them quicker to prepare.
Most eggless chocolate desserts stay fresh for about four to five days when stored covered in the fridge. Baked versions like brownies tend to hold up a little longer than mousse or pudding-based ones.
You need good quality chocolate, butter or cream, and a substitute like condensed milk or yogurt to make eggless chocolate desserts. Flour and a leavening agent are also important if you are baking rather than setting the dessert.
These desserts often depend more on the richness of chocolate to make up for the missing eggs, which gives you a denser, fudgier texture. This makes many eggless desserts feel extra indulgent.
A double boiler or microwave for melting chocolate, along with basic mixing bowls, are some of the basic equipment needed. A hand mixer helps if you are whipping cream for a mousse or ganache.
Cadbury Dairy Milk gives a classic, creamy sweetness that works well in many eggless recipes. Cadbury Bournville is another great pick if you prefer a deeper, less sweet chocolate flavor in your dessert.
There is not a single best brand for eggless chocolate desserts. Using good-quality chocolate, like Cadbury, along with fresh dairy and trusted ingredients, will give you the best homemade eggless desserts.
You need to chop up a few 5 Star bars, melt them down, and use them in shakes, brownies, or as a gooey filling between cake layers. Cadbury 5 Star has a soft caramel center that blends easily into most dessert recipes.
You can make milkshakes, brownies, cheesecakes, and even simple parfaits layered with cream and biscuits with 5 Star chocolate. The chewy texture of this chocolate pairs nicely with almost any chilled or baked treat.
Yes, you can use chopped 5 Star pieces in cake batter or brownie mix by melting them slightly while baking to create gooey pockets. This adds bursts of caramel that make each bite more indulgent.
5 Star melts well when it is heated gently, especially in a double boiler or microwave using short bursts. The caramel flavor and gooey texture of this chocolate makes it easy to put this into batters or sauces.
Yes, you can make a no-bake dessert using 5 Star by layering chopped 5 Star with whipped cream and crushed biscuits in a jar. Later, you need to chill it for a couple of hours to let the flavors turn into a rich and satisfying dessert.
Ingredients like cream, milk, vanilla, and roasted nuts all pair very well with 5 Star. Bananas and coffee also work nicely, adding depth without overpowering the chocolate's naturally sweet, chewy character.
Yes, you can use 5 Star as a filling between cake layers or a topping sprinkled over ice cream and puddings. Its soft, chewy texture adds a nice contrast when it is paired with something cold or airy.
Yes, you can use 5 Star to make ice cream. All you need to do is add chopped 5 Star into a homemade ice cream base before freezing. This ice cream will have the extra texture along with its rich, sweet chocolate flavor.
Yes, you can use 5 Star in dessert jars by layering crushed biscuits, whipped cream, and chopped 5 Star. A glass jar makes for an easy, no-fuss dessert. Chilling it for an hour or two helps all the flavors settle together nicely.
You can make desserts like milkshake, a dessert jar, or melt the chocolate over warm brownies for an easy treat using 5 Star. Chopping it into cookie dough before baking is another simple, fun option.
You can make Cadbury Silk Cake at home easily by mixing flour, butter, sugar, milk, and melted Cadbury Dairy Milk Silk chocolate into a smooth batter. You need to bake the cake until it becomes soft and moist, then top it with a rich chocolate ganache.
Yes. Cadbury Silk Cake can be made without eggs by using yogurt or condensed milk. These ingredients give the cake a soft texture and go well with the creamy flavour of Cadbury Dairy Milk Silk chocolate.
You can make Cadbury Silk Cake in a pressure cooker or a heavy-bottomed pan with a lid. This cake needs to be cooked on low heat until it rises well and is fully baked in the centre.
Cadbury Silk Cake is made with ingredients like Cadbury Dairy Milk Silk chocolate, flour, milk, butter, sugar, baking powder, and vanilla extract. You can also add chocolate chips or chopped nuts for extra flavor and texture.
Homemade Cadbury Silk Cake stays fresh for two to three days at room temperature when stored properly. If you refrigerate the cake, it can last for up to five days in an airtight container.
One of the most common mistakes that people make is overbaking while making Cadbury Silk Cake. Melting the chocolate at very high temperatures can also affect its smooth texture and flavour.
Homemade Cadbury Silk Cake has a richer chocolate flavour and can be customised according to personal preferences. You can keep the sweetness as per your preference and add your favorite toppings and fillings.
Some creative twists on the classic Cadbury Silk cake are that you can turn it into a layered cake by adding chocolate mousse or caramel filling. It also tastes delicious when it is topped with fresh berries, crushed cookies, or roasted almonds.
Cadbury Dairy Milk Silk, Cadbury Dairy Milk Silk Oreo, and Cadbury Dairy Milk Silk Roast Almond are all excellent choices for cakes and chocolate desserts because of their smooth and creamy texture.
Yes. Cadbury Dairy Milk Silk chocolate works wonderfully in cakes, brownies, muffins, and dessert fillings. The creamy consistency of this chocolate melts and gives homemade baked treats a rich chocolate flavour.
Cadbury Dairy Milk Silk works beautifully in desserts like mousse, truffles, ganache, and milkshakes because of its smooth, creamy texture. You can also melt it over brownies or add it to a rich chocolate cake batter.
Yes, Cadbury Dairy Milk Silk is good for baking because it melts down into a silky consistency that works well in batters and ganaches. The smooth texture of Cadbury Dairy Milk Silk makes it a great choice for cakes, brownies, and other baked treats.
Cadbury Dairy Milk Silk melts easily and smoothly, whether you are using a double boiler or microwaving it in short bursts. The silky texture of this chocolate makes it especially convenient for ganaches, sauces, and dessert fillings.
Cadbury Dairy Milk Silk comes in different sizes to suit different needs, from smaller bars for everyday snacking to larger ones for sharing or baking. You can pick whichever suits your need.
What sets Cadbury Dairy Milk Silk apart is its extra-smooth, melt-in-the-mouth texture compared to regular chocolate. This silkier consistency comes from its unique recipe, making it a favorite for both snacking and baking.
You can swap in Dairy Milk Silk for regular Dairy Milk in most recipes without much adjustment. Since Silk is smoother and melts a little more easily, your desserts will turn out even creamier.
Some Cadbury Dairy Milk Silk variants contain nuts while others do not, so it really depends on which flavor you are buying. Always check the ingredient list on the pack, especially if you are baking for someone with allergies.
Ingredient details can differ from region to region, so the most reliable way to know is by checking the label on your specific pack. This gives you the most accurate and up-to-date information.
The classic Cadbury Dairy Milk Silk is the best flavor for baking, since it is smooth, has a creamy base, and melts evenly into batters and ganaches. Flavored versions can work too, but they might alter the taste of your final dessert.
A gift pack or the larger bar size makes a lovely gifting option, especially during festive seasons. Choosing a flavor your loved ones like, or sticking with the classic one, is always a safe bet.
Eggless desserts are sweets made without eggs, using substitutes like yogurt, condensed milk, or mashed fruit for structure. You can make cakes and puddings to cookies and no-bake treats without eggs.
To make eggless desserts at home, you need to start with a base like yogurt, condensed milk, or whipped cream, then mix it with flour, sugar, and flavorings as needed. Bake the dessert, let it chill, or set the mixture depending on which dessert you are making.
Some eggless desserts recipes are chocolate mousse, no-bake cheesecake, banana bread, and eggless cookies that are rich and satisfying. Each recipe relies on simple substitutes that still give you great texture and flavor.
Eggless desserts are good for people avoiding eggs for dietary, allergy, or religious reasons, without sacrificing taste or texture. They are also quicker to prepare, since several eggless recipes skip baking altogether.
Most eggless desserts stay fresh for about three to five days when refrigerated in an airtight container. Baked cakes and cookies tend to last a bit longer than cream-based ones.
Common substitutes include yogurt, condensed milk, whipped cream, mashed banana, or a mix of vinegar and baking soda. These ingredients help bind and add moisture in place of eggs in various recipes.
Eggless desserts have a slightly different texture, sometimes denser or creamier depending on the substitute used, though the flavor remains equally rich. They also tend to be more inclusive for people with different dietary needs.
Some common mistakes are to skip proper measurements of substitutes like yogurt or condensed milk, which can affect the texture significantly. Not allowing enough time to set or chill for no-bake desserts is another common mistake.
Cadbury Silk is the best chocolate for eggless desserts like mousses and ganaches. Cadbury Fuse also adds a fun crunch if you're making something like a no-bake tart or bark.
There is not one single best brand that works best for eggless desserts. Using good-quality dairy, a trusted chocolate brand like Cadbury, and fresh ingredients gives the best homemade eggless desserts.
A dessert falls into this category when fresh or frozen blueberries are baked into the mix, whether that is a cake, crumble, or muffin. The berries soften and release their juices during baking, which adds natural sweetness to the dessert.
To prepare a baked blueberry dessert step by step, toss fresh blueberries with a bit of flour to prevent them from sinking; then add them to your cake or muffin batter. Later, pour it into a greased pan and bake until golden and set.
A simple blueberry crumble can be made quickly by layering berries in a dish, topping with a quick oat-butter mixture, and baking. Muffins are another quick option that can be ready in under 30 minutes.
Blueberries have a natural sweetness and a slight tartness that balance well with rich, buttery bases like cake or crumble. They are also packed with antioxidants, making the dessert feel a little more wholesome.
You can store baked blueberry treats in an airtight container at room temperature for a couple of days, or refrigerate for up to a week. Warming leftovers slightly before serving brings back that fresh-baked taste.
Frozen blueberries work like fresh ones, but you can toss them in four to prevent excess moisture from entering the batter. Yogurt or applesauce can also replace some butter if you want a lighter version.
Blueberries add a fresh, fruity element that is lighter compared to heavier, all-chocolate desserts. The natural tartness also cuts through the sweetness and gives the dessert a more balanced flavor.
Yes, most blueberry bakes just require simple steps like mixing the batter and adding berries, making them easy to make even for first-time bakers. Muffins and crumbles are especially easy if you are just starting out.
Cadbury Dairy Milk white chocolate might pair well with blueberries. This chocolate has a creamy sweetness that complements the fruit's natural tartness. Drizzling it over the baked dessert also adds a nice visual contrast against the purple berries.
There is not a single best brand for baked blueberry desserts. Using fresh, good-quality blueberries along with trusted baking ingredients will generally give you the best homemade results.
Baked Cadbury Dessert is any oven-baked dessert that has Cadbury chocolate as the key ingredient. It could be melted into batter or used as a filling. Some examples are chocolate cakes, brownies, or stuffed cookies.
You can make baked Cadbury dessert at home by melting your choice of Cadbury chocolate and adding it into a basic cake or brownie batter along with flour, sugar, and butter. Then bake until set, let it cool, and slice and serve.
Some of the best baked Cadbury dessert recipes are chocolate lava cake, Cadbury-stuffed cookies, and fudgy brownies. These desserts are rich and have melted chocolate at their core. In each recipe, chocolate takes centre stage in a different way.
Using Cadbury chocolate gives desserts a rich, smooth flavor that is hard to beat with cocoa powder alone. It also melts evenly, making it easier to achieve that gooey, indulgent texture people love.
Most baked Cadbury desserts stay fresh for about four to five days when they are stored in an airtight container at room temperature. If you refrigerate them, they can stay fresh for longer, especially the cream-filled varieties.
Flour, sugar, butter, and eggs or an eggless substitute form the base, with Cadbury chocolate melted in or used as a filling. Nuts, caramel, or fruit are sometimes added for extra flavor and texture.
The defining feature is the use of Cadbury chocolate, which brings a distinct, familiar flavor compared to generic cocoa-based desserts. This makes the dessert richer and more indulgent to taste.
Some common mistakes to avoid are overheating the chocolate before adding it into batter. This can turn the batter grainy instead of smooth. Overbaking is another common issue, since it can dry out what should be a soft, gooey dessert.
Cadbury Dairy Milk can be used in molten lava cakes, while Cadbury Fuse adds texture to stuffed cookies because of its caramel and wafer bits. Both bring something unique depending on what you are baking.
You can chop or melt Cadbury into batters for a deep, rich flavor, or use Cadbury Silk for a smoother, creamier ganache topping. Letting the chocolate melt gently keeps the texture smooth.
Baked Cake Dessert means any cake-based sweet that is baked in an oven, ranging from simple sponge cakes to layered, frosted versions. It covers everything, from everyday tea cakes to desserts made for celebrations.
A basic vanilla cake can be made with flour, sugar, butter, and eggs or an eggless substitute, and is mixed into a smooth batter. Later, it is baked until a skewer comes out clean, and then cooled before slicing.
Some popular baked cake dessert recipes include chocolate, red velvet, banana, and classic vanilla. These cakes suit almost any occasion. Each can be decorated with frosting, fruit, or a simple dusting of powdered sugar.
Cakes are celebratory and versatile. They work for a casual family dinner as well as for a big event. Baked cakes are also easy to customize with different flavors, fillings, and decorations.
An unfrosted cake stays fresh for about three to four days at room temperature when properly covered. Frosted cakes should be stores in the fridge and are best eaten within four to five days.
You need ingredients like flour, sugar, butter, and eggs or an eggless substitute for the base of most cake recipes. Baking powder or soda helps the cake rise, and flavorings like vanilla or cocoa add character to the cake.
Cakes are more structured and versatile than many traditional desserts. You can make layers, add fillings, and apply decorative frosting on a cake. This makes them adaptable for both everyday treats and special celebrations.
All you need is a basic oven, mixing bowls, and a cake tin to cover most simple recipes without much fuss. Piping bags or offset spatulas can help if you want to frost and decorate the cake more elaborately.
Cadbury Bournville is the best chocolate for baked cake dessert. It adds a rich, deep flavor to chocolate cakes. Cadbury Dairy Milk Silk works beautifully in a smooth ganache topping.
There isn't one single best brand for baked cake desserts. It is important that you use good-quality flour, eggs, and a trusted chocolate brand like Cadbury to get the best homemade results.
Baked Friendship Day Dessert means sweet treats that are baked specifically to celebrate and share with friends on Friendship Day. Some examples are cookies, brownies, or small cakes that are easy to package and gift.
As a friendship day dessert, you can bake simple chocolate chip cookies come together quickly with just flour, butter, sugar, and chocolate chips mixed into a soft dough. Bake until the edges turn golden, then let them cool before sharing with friends.
Brownies, cupcakes, cookies, and small loaf cakes are all popular choices for Friendship day, since they are easy to slice or portion for sharing. Many people also personalize these treats with fun toppings or decorations.
Baked treats are personal and thoughtful, which makes them a popular choice for celebrating friendships. They are also easy to package in cute boxes or jars, which adds a nice homemade touch to the gifts.
Most baked treats like cookies or brownies stay fresh for about a week when stored in an airtight container. Cakes that have cream fillings need to be refrigerated and are best enjoyed within four to five days.
You need basic baking staples like flour, sugar, butter, and eggs or an eggless substitute for most recipes. Depending on what you are making, you can also need chocolate, nuts, or fun toppings for decoration.
These desserts are less about tradition and more about personalization, since they are made with a specific friend's taste in mind. Packaging and presentation also tend to be different than traditional desserts as they are usually meant for gifting.
You need a basic oven, mixing bowls, and standard baking tins for most recipes. Piping bags or decorative molds can also be helpful if you want to add a more personalized touch.
Cadbury Gems works wonderfully for adding a colorful, playful touch to cookies or cupcakes made for the occasion. Cadbury Dairy Milk is another great option if you want something classic with creamy flavor.
There is no one single best brand for these desserts. Using good-quality baking ingredients and a trusted chocolate brand like Cadbury will generally give you the best homemade desserts for Friendship Day.
Bhapa Doi is a steamed Bengali dessert made by mixing hung curd, condensed milk, and a touch of milk, then steaming it until set. It has a soft, custard-like texture and a sweet, tangy flavor.
Bhapa doi is made by whisking together hung curd, condensed milk, and regular milk until it becomes smooth. Then pour the mixture into a greased dish. Steam it for about twenty minutes, then chill it in the fridge before serving.
Hung curd gives Bhapa Doi its thick, creamy texture, so it is generally recommended for the best results. Using regular curd without straining it first can leave the dessert watery and less firm once it is set.
Hung curd, condensed milk, and a small amount of regular milk are the most important ingredients to make bhapa doi. Some recipes also add a touch of cardamom or saffron for extra flavor and aroma.
You don't need an oven for Bhapa Doi at all. Steaming the mixture on the stovetop in a covered container is enough to give you the same soft, custard-like texture.
Bhapa Doi usually takes about twenty to twenty-five minutes to steam, plus a couple of hours to chill in the fridge. The chilling time helps it get the classic custard consistency.
Using curd that hasn't been strained enough often leaves too much liquid in the mixture, and prevents it from setting well. Steaming for too short a time can also leave the center soft and underset.
A properly steamed Bhapa Doi will look set around the edges with just a slight jiggle in the center, similar to a custard. A knife inserted should come out clean once it is fully cooked.
Cadbury Crackle can be a good option to make chocolate Bhapa Doi. It adds a fun twist to the dessert without overpowering the tangy curd base. Plus the crunchy texture can also make the dessert interesting.
Cadbury Bournville, with its deeper cocoa flavor will work well with the condensed milk nicely. This balance keeps the dessert rich without losing the classic tangy Bhapa Doi character.
You can prepare Bournvita Brownies by mixing Cadbury Bournvita with flour, butter, milk, sugar, and baking powder to make a rich batter. Make sure you bake it until the center is soft and fudgy before cutting it into squares.
You can make Bournvita Brownies without eggs by using yogurt or condensed milk. These ingredients give the brownies a moist texture and a delicious chocolate flavor. Eggless brownies are suitable for vegetarians or people with allergies.
You can make Bournvita Brownies not in an oven, but in a pressure cooker or a heavy-bottomed pan. All you need to do is pour the batter into a greased baking tin and cook on low heat until it is fully baked.
The main ingredients used in Bournvita Brownies are Cadbury Bournvita, flour, butter, milk, sugar, and baking powder. You can also add chopped nuts or chocolate chips if you want richer flavor and more texture.
If you store homemade Bournvita brownies in an airtight container, they will stay fresh for about three to four days. If you store the brownies in the refrigerator, they will last for up to one week.
Bournvita brownies become dry due to overbaking or too much flour in the batter. If you bake them till the center is set, you will get a soft and fudgy texture.
Bournvita brownies are different from regular desserts because they are known for their rich chocolate-malt flavor and soft texture. They are more indulgent than cookies and give a delicious twist on classic chocolate brownies.
You can serve Bournvita Brownies warm with vanilla ice cream, chocolate sauce, or fresh berries. They also taste delicious when you pair them with a glass of cold milk or a hot cup of coffee.
Cadbury Bournvita is an excellent ingredient for homemade desserts. This product has a signature flavor, which works the best for brownies, cakes, pancakes, cookies, and milkshakes. The best part about this product is also the nostalgic taste that everyone relates to.
Yes. Cadbury Bournvita is perfect for baking cakes and brownies. It adds a rich chocolate taste and a hint of malt that makes baked desserts more flavorful, enjoyable, and a bit nostalgic.
You can make Bournvita cake at home by mixing Cadbury Bournvita with flour, milk, butter, sugar, and baking powder. Make sure the batter is mixed until the cake is soft, moist, and slightly spongy.
Yes. Bournvita cake can easily be made without eggs. You need ingredients like yoghurt or condensed milk, which will give the cake a soft texture and keep it moist after baking.
Yes, you can make Bournvita cake in a pressure cooker or a heavy-bottomed pan with a lid. Bournvita cake without an oven needs to be cooked on low heat for excellent results.
Bournvita Cake is made with ingredients like Cadbury Bournvita, flour, milk, butter or oil, sugar, and baking powder. Some recipes also include chocolate chips or chopped nuts for extra flavour and texture.
You can store Bournvita cake in an airtight container at room temperature for up to two days. If you keep it refrigerated, it stays fresh for about five days and can be warmed slightly before serving.
Bournvita Cake can sometimes become dry if it is overbaked or if the batter is overmixed. When you use the correct measurements and baking time, you will get a cake that is soft and fluffy.
Bournvita Cake has a unique chocolate-malt flavour that makes it different from regular chocolate cakes. The best part about this cake is that comforting taste, which makes many people associate it with their favourite childhood drink.
You can make marble Bournvita Cake, add chocolate chips to the batter, or top it with chocolate ganache. You can also add chopped almonds and walnuts, which add a delicious crunch to every bite.
Cadbury Bournvita is one of the best products for homemade desserts. You can use this product to make cakes, muffins, brownies, cookies, pancakes, and other milk-based recipes. The best part about these desserts is the nostalgic taste that it carries that take people back to their childhood.
Yes, you can use bournvita to bake cakes and brownies. The rich chocolate flavour of bournvita blends well with other baking ingredients and adds a delicious twist to classic recipes.
You can make Bournvita Cookies at home by mixing flour, Cadbury Bournvita, butter, sugar, and milk into a dough. After that, you need to shape the cookies and bake them until they become crisp on the outside and soft inside.
Yes, you can easily make Bournvita cookies without eggs. Just make sure you are adding enough butter and milk to give the cookies a rich flavour and a crumbly texture.
Yes, you can prepare Bournvita Cookies in a pressure cooker or a heavy-bottomed pan. When you do not cook them in an oven, make sure to cook them on low heat until they become crisp and evenly baked.
Bournvita Cookies are made with ingredients like Cadbury Bournvita, flour, butter, sugar, milk, and baking powder. Some recipes also include chopped nuts or chocolate chips for extra flavour and crunch.
You can store Bournvita Cookies in an airtight container at room temperature. They stay fresh and crunchy for about a week if you store them properly in a cool and dry place.
Bournvita cookies can sometimes become dry if there is too much flour or if they are baked for longer than required. However, if you measure the ingredients properly, you will have a better texture.
Bournvita cookies stand out because of their chocolate-malt flavor and crisp texture. Unlike cakes or muffins, these cookies are easy to carry and make a convenient snack for any time of the day.
You can add oats, chopped almonds, chocolate chips, or a pinch of cinnamon powder to create different versions of Bournvita Cookies. Sandwiching them with chocolate spread is another delicious idea to try.
Cadbury Bournvita is the best product for making cookies, cakes, muffins, and brownies. This product has a rich chocolate flavour, which works well in both baked and no-bake dessert recipes.
Yes. Cadbury Bournvita is a very good ingredient for homemade desserts. It adds a delicious chocolate-malt flavour to cakes, brownies, muffins, and other baked treats. Bournvita also takes you back to childhood days when it used to be a favorite drink for many!
You can prepare Bournvita Ice Cream by mixing Cadbury Bournvita with chilled milk, fresh cream, and condensed milk until the mixture becomes smooth. Later, pour the mixture into an airtight container and freeze it for 6–8 hours before serving.
Yes. Bournvita Ice Cream is naturally easy to make without eggs. You need fresh cream and condensed milk, which gives it a rich and creamy texture without the need for any egg-based ingredients.
Bournvita Ice Cream does not require an oven. All you need to do is prepare the mixture, transfer it to a freezer-safe container, and freeze it until set. Stirring it once halfway through freezing can make it creamier.
The main ingredients used in Bournvita Ice Cream are Cadbury Bournvita, milk, fresh cream, condensed milk, and vanilla extract. You can also add chocolate chips or chopped nuts for extra flavor.
Homemade Bournvita Ice Cream stays fresh in the freezer for about two weeks when stored properly in an airtight container. It is important to keep the ice cream tightly sealed to help maintain its creamy texture.
Bournvita Ice Cream may become icy if the ingredients are not mixed properly or if there is too much liquid in the recipe. Make sure you are using full-fat milk, and cream to have better results.
Bournvita Ice Cream has a delicious chocolate-malt flavour that makes it different from regular ice creams. It gives a nostalgic taste that many people enjoy and makes for a comforting homemade dessert.
Some fun ways to serve bournvita ice cream are with crushed cookies, chocolate syrup, roasted almonds, or brownie pieces. It also tastes great in a chocolate milkshake or as part of an ice cream sundae.
Cadbury Bournvita is an excellent choice for making homemade desserts like ice creams, cakes, cookies, milkshakes, and other chocolate-based desserts because of its rich and familiar flavour.
Yes. Cadbury Bournvita is a wonderful product that can be used in cakes, brownies, muffins, and pancakes. Its chocolate-malt flavour adds a unique twist to homemade baked treats.
You can prepare Bournvita Muffins step by step by mixing flour, Cadbury Bournvita, milk, butter, sugar, and baking powder until it turns into a smooth batter. Later, you need to pour the batter into muffin moulds and bake until the muffins become soft and fluffy.
You can make bournvita muffins without eggs by using yogurt or condensed milk. These ingredients keep the muffins moist and give them a soft texture. This version is useful for vegetarians and people who are allergic to eggs.
You can make bournvita muffins without an oven and instead bake them in a pressure cooker or a heavy-bottomed pan with a lid. Make sure you are cooking them on low heat until they rise well and are cooked through in the centre.
The main ingredients used in Bournvita Muffins are Cadbury Bournvita, flour, milk, sugar, butter or oil, and baking powder. Some recipes also include chocolate chips or chopped nuts for added flavor and texture.
Homemade Bournvita Muffins stay fresh for about two days at room temperature if you store them properly in an airtight container. If you refrigerate the muffins, they can last for up to five days.
Bournvita Muffins can become dry or dense if the batter is overmixed or if they are baked for too long. For the ones with the perfect texture and flavor, make sure there is the right amount of ingredients and baking time, which keeps them soft and fluffy.
Bournvita Muffins are different from regular desserts as they have a unique chocolate-malt flavor that makes them different from regular muffins. They are soft, not very sweet, and make a great tea-time snack or lunchbox treat.
You can serve Bournvita Muffins warm with a drizzle of chocolate sauce or alongside a scoop of vanilla ice cream. They also taste delicious when you top them with whipped cream or chocolate shavings.
Cadbury Bournvita is one of the best choices for making homemade desserts like muffins, pancakes, cakes, and cookies. It adds a rich chocolate flavour and gels very easily into dessert recipes.
Yes. Cadbury Bournvita is good for baking cakes and brownies. The bournvita powder has a signature chocolate-malt flavour, which adds richness and makes baked desserts more flavorful, enjoyable, and nostalgic.
You can make Bournvita Pancakes at home by mixing flour, Bournvita, milk, sugar, baking powder, and a little butter. Later, you need to cook the batter on a non-stick pan until the pancakes become soft and golden brown.
Yes. Bournvita Pancakes can easily be made without eggs. You need to add milk and yogurt, which gives the pancakes a soft and fluffy texture, and makes them perfect for an eggless breakfast or dessert.
Yes. Bournvita Pancakes do not require an oven. They are traditionally cooked on a pan or griddle. These pancakes can be made quickly and easily without requiring any special equipment.
Bournvita Pancakes are made with ingredients like Bournvita, flour, milk, sugar, baking powder, and butter. If you want some extra flavor and texture, you can also include vanilla extract or chocolate chips.
If you plan to store the pancakes in an airtight container, you can refrigerate them for up to 2 days. Make sure you are reheating them in a pan or in a microwave before serving for the best taste.
Bournvita Pancakes can sometimes become dry or dense if the batter is too thick or if they are cooked for too long. If you want softer pancakes, avoid overmixing the batter and cook them on low to medium heat.
Bournvita Pancakes have a delicious chocolate-malt flavour that makes them different from regular pancakes. They are lighter than cakes and make a great breakfast or snack option for children and adults.
You can add sliced bananas, chocolate chips, chopped nuts, or a drizzle of honey to Bournvita Pancakes. Also try serving them with vanilla ice cream or chocolate sauce to make them more indulgent.
Regular Cadbury Bournvita is the best product for making desserts like pancakes, cakes, brownies, milkshakes, and other desserts. Its chocolate flavour blends easily into both baked and no-bake recipes.
Yes. Bournvita powder can help you make many baked treats. Cadbury Bournvita adds a rich chocolate-malt flavour to cakes, brownies, muffins, and cookies, and makes homemade desserts even more delicious.
You can make a Bournvita Smoothie at home by blending chilled milk, Cadbury Bournvita, bananas, and a few ice cubes until it becomes smooth. This smoothie is a quick and delicious drink that can be enjoyed at any time of the day.
Yes. Bournvita Smoothies are naturally eggless. The important ingredients needed for the Bournvita smoothie are milk, fruits, and Cadbury Bournvita, which makes it suitable for vegetarian dessert and beverage recipes.
Yes, Bournvita smoothie does not require an oven or any sort of cooking. All you need to do is blend all the ingredients together and serve them immediately to get the best flavor and texture.
Bournvita Smoothies are made with ingredients like Cadbury Bournvita, milk, fresh fruits such as bananas, yogurt, and ice cubes. Some recipes also include honey, oats, or nuts for extra flavour.
Smoothies taste the best when you consume them fresh, soon after they are made. If you want to store it, you can store it in a refrigerator for up to 24 hours in a sealed bottle or container.
A Bournvita Smoothie can become too thick if you add too much fruit or yogurt and not enough milk. Adjusting the liquid ingredients helps achieve a smooth, creamy consistency.
Bournvita smoothies have a rich chocolate-malt flavour and a creamy texture. The smoothies are not like milkshakes. Smoothies often include fruits or yogurt, which make them lighter and more refreshing.
Some easy variations of the Bournvita Smoothie can be made by adding strawberries, peanut butter, oats, dates, or vanilla ice cream. Chocolate chips and chopped nuts also make delicious toppings.
Cadbury Bournvita is an excellent ingredient for smoothies, milkshakes, cakes, cookies, and ice creams. The chocolate flavor of Bournvita blends very well with a variety of homemade dessert recipes and is also nostalgic.
Yes. Cadbury Bournvita is good for making cakes, brownies, muffins, and pancakes. It adds a delicious chocolate-malt flavour that makes baked desserts even more enjoyable.
Chikki is a traditional Indian sweet made by mixing jaggery or sugar with nuts like peanuts, sesame seeds, or dry fruits. Once the mixture cools and hardens, it turns into a crunchy, bite-sized treat enjoyed across India.
You can make chikki by melting jaggery or sugar in a pan until it turns into a thick syrup, then stir in roasted nuts of your choice. Pour the mixture onto a greased surface, flatten it out, and let it cool before breaking it into pieces.
You can make peanut chikki by roasting peanuts until they become fragrant, then set them aside while you melt jaggery into a sticky syrup. Mix the peanuts into the syrup, spread the mixture on a greased plate, and let it cool completely before cutting into shapes.
To make jaggery chikki, heat the jaggery in a heavy-bottomed pan until it melts into a smooth syrup. Make sure you are stirring occasionally to avoid burning. Later, add roasted nuts or sesame seeds, mix well, then spread the mixture and let it cool until it hardens into chikki.
Cooking the jaggery syrup to the right consistency is key to getting crispy chikki, so watch for a hard-crack stage when testing a drop in water. Another important step is spreading the mixture thin to let it cool and harden faster.
Gur chikki is made using jaggery, or gur, as its base, melted slowly until it forms a rich, thick syrup. Later, add in roasted peanuts or sesame seeds, spread the mixture out, and let it set before breaking into pieces.
Cook jaggery with a splash of water over low heat until it thickens into a glossy syrup that coats the back of a spoon. Mix in your roasted nuts, spread the mixture quickly, and let it cool until it becomes firm.
Yes, chikki can be made using sugar instead of jaggery if you prefer a lighter color and milder sweetness. The process stays the same, since sugar also forms a syrup that binds the nuts together nicely.
Cadbury Dairy Milk is one of the best chocolates to make chocolate chikki, since it melts smoothly and blends easily with roasted nuts or puffed rice. You can try a variety of chocolates that suit your taste preferences.
Cadbury Bournville is a nice option for making a chocolate coconut chikki. This chocolate has a rich, slightly less sweet flavor that balances well with the natural sweetness of coconut in this chikki.
Fudgy dark chocolate brownies, peppermint-swirled brownies, and nut brownies with a chocolate glaze are some of the most popular Christmas brownies. Each version has a different texture and flavor for the festive season.
An easy Christmas brownie recipe involves melting butter and chocolate together, then mixing sugar, eggs, and flour until the mixture has a fudgy texture. Then pour the batter into a lined tin and bake until the top has a crack.
Sweets add the celebratory vibes to any celebration, including Christmas. They also symboize generosity and shared joy. You can bake treats like brownies and pass them around to family and friends to spread happiness and joy.
A quick recipe for Christmas brownies would be making a brownie batter using melted butter instead of creamed butter to cut down on prep time. Later, baking in a single large tray instead of individual portions also speeds up the whole process.
If Christmas brownies are stored in an airtight container at room temperature, they stay fresh for about a week without losing their fudgy texture. Refrigerating them can extend freshness, especially in warmer weather, but the texture might alter a bit.
Yes, you can reduce the sugar and use dark chocolate with a higher cocoa content to keep brownies rich without making them very sweet. You can also add mashed bananas or applesauce to the batter to cut down on refined sugar.
Brownies have moved beyond the classic fudgy square, and now appear as layered bars, stuffed with caramel, or topped with festive sprinkles and candy. Many bakers also add spices like cinnamon or nutmeg.
You can add peppermint bark or crushed candy canes to give brownies a festive, minty crunch. Additionally, adding a caramel filling or topping them with crushed nuts also adds texture and flavor variety.
Cadbury Bournville is one of the best chocolates for Christmas brownies. It has a deep, slightly bitter taste that works beautifully in fudgy brownie batter. Its bold cocoa flavor complements well against sweet holiday toppings like peppermint or caramel.
You can add chopped Cadbury Fuse into the batter, which will add a caramel and wafery touch to the brownies. Additionally, topping the baked brownies with melted Cadbury Gems also gives them a colorful and festive finish.
Traditional Christmas cupcakes are spiced with cinnamon or nutmeg and topped with festive frosting in red, green, or white. Some versions also include dried fruit or a note of citrus for the holiday flavor.
You can make Christmas cupcakes at home by mixing flour, butter, sugar, and eggs into a smooth batter, and add a touch of cinnamon or vanilla for holiday flavor. Then bake the cupcakes until they become golden, let them cool completely, and top with frosting and festive decorations.
Desserts play a big role in Christmas celebrations. They symbolize joy, warmth, and togetherness during the festive season. Baking and sharing sweets like cupcakes has become a meaningful tradition for many families.
An easy Christmas cupcake recpes requires a simple vanilla or chocolate cupcake base topped with quick buttercream frosting. You can also add sprinkles or a dusting that makes the sweets festive and celebratory.
You can store frosted cupcakes in an airtight container in the fridge, where they will stay fresh for about four to five days. Make sure you are letting them sit at room temperature for a bit before serving, to soften the frosting.
You can use whole wheat flour and reduce the sugar slightly. At the same time, adding mashed banana or applesauce also keeps things lighter. Swap heavy frosting for a light whipped cream topping also to cut down on richness.
Traditional cupcakes stick to classic spiced flavors and simple frosting, while modern versions experiment with fillings, layered flavors, and decorations. Piping techniques have also become more intricate over the years.
You can add a peppermint swirl, a chocolate filling, or crushed cookies on top to create simple, festive variations. Using different colored frostings for a holiday theme also makes them look more visually appealing.
Cadbury Silk is the best chocolate to use for Christmas cupcakes. The chocolate works wonderfully as a ganache filling or topping for Christmas cupcakes, and melts into a smooth, creamy layer.
You can add chopped Cadbury Crackle into the batter that will add a light, crispy crunch in the cupcake. You can also top them with a drizzle of melted chocolate to give the cupcakes a festive, and decorative touch.
Some popular options for Christmas plum cake are rum-soaked fruit cake, eggless plum cake, and rich dark plum cake with caramelized sugar syrup. Each variation has its own take on the classic spiced cake.
An easy Christmas plum cake recipe requires you to soak chopped dry fruits in fruit juice or rum overnight. Then you need to fold them into a simple batter made with flour, butter, and sugar. Finally, bake it low until a skewer comes out clean.
Sweets are the most important part of Christmas as they add warmth and festivity to the celebrations. Sharing homemade treats like plum cake with family and neighbors has long been a cherished holiday tradition.
Quick recipes for Christmas plum cake include soaking dry fruits for just a couple of hours instead of overnight to speed things up without sacrificing flavor. You can also use a pressure cooker to bake the cake and cut down the total preparation time.
When Christmas Plum cake is wrapped tightly and stored in an airtight container, it stays fresh for two to three weeks at room temperature. If you refrigerate it, it can extend this even further, especially if the cake has rum or brandy.
You can swap refined sugar for jaggery, or reduce the overall sugar content and use naturally sweet dry fruits. This keeps the cake flavorful without making it very sweet or heavy.
Modern plum cakes are eggless, gluten-free, and contain low-sugar, and adapt to different dietary needs and preferences. You can also experiment with flavors like coffee, chocolate, and regional spices.
You can make the plum cake creative by adding a layer of chocolate ganache or cocoa powder to give the classic recipe a modern update. Some bakers also add exotic dried fruits like cranberries or apricots.
Cadbury Bournville is the best chocolate to make a Christmas plum cake. The deep cocoa notes of this chocolate balances the sweetness of the dried fruits. It blends well into the batter without overpowering the traditional taste.
You can add chopped Cadbury Fuse into the batter, which adds bursts of caramel and crunchy wafer along with the classic fruity flavors. Drizzling melted chocolate over the finished cake also gives it a festive, decorative finish.
An eggless Dairy Milk dessert uses Cadbury Dairy Milk chocolate as its star ingredient, and skip eggs entirely. These desserts use ingredients like yogurt or condensed milk to bind the mixture, and create rich, chocolatey treats everyone can enjoy.
You need to melt Cadbury Dairy Milk chocolate with butter, then mix in condensed milk and vanilla essence. Later, add flour or biscuit crumbs for texture. Chill or bake according to your recipe until it is set properly.
Dairy Milk mousse, chocolate truffles and no-bake tarts are some popular eggless dairy milk dessert options. Fudgy Dairy Milk brownies and layered pudding cups also work wonderfully, giving indulgent results with just a few simple ingredients.
These desserts suit vegetarians and those with egg allergies. Cadbury Dairy Milk's creamy, smooth chocolate gives rich flavour to the brownies without needing eggs, making the dessert both safer and easier to prepare at home.
If eggless dairy milk desserts are refrigerated in an airtight container, they stay fresh for 3-4 days. Freezing extends shelf life up to a month. Always bring chilled desserts to room temperature before serving for the best taste.
Cadbury Dairy Milk chocolate forms the base, which is paired with condensed milk, butter, cream and vanilla essence. Biscuit crumbs or flour add structure, and a pinch of salt balances the sweetness.
Eggless Dairy Milk desserts skip eggs, and rely completely on condensed milk or cream for binding. Regular desserts use eggs for structure. Both taste rich, but eggless versions suit more dietary preferences.
Some common mistakes to avoid are overheating the chocolate which will make the dessert grainy. Skipping proper chilling time also affects the final texture. Always melt chocolate gently and measure condensed milk for smooth, consistent results.
Dairy Milk cheesecake, chocolate bark and stuffed cupcakes are some of the best options. You can also make layered trifle and chilled pudding, which highlight the chocolate and give crowd-pleasing results perfect for celebrations.
You can melt Cadbury Dairy Milk chocolate as a base for ganache, frosting or fillings. Another option is to chop into chunks for cookies or brownies. You can also use it as a topping, or drizzle melted chocolate over cakes and puddings.
Eggless cake is a cake made without using eggs, and instead using ingredients like yogurt, condensed milk, or vinegar for structure. It turns out equally as soft and moist as a regular cake.
To make eggless cake at home, you need to mix flour, sugar, and baking soda together, then add yogurt, oil, and milk until you get a smooth batter. Pour it into a greased tin and bake until a skewer comes out clean.
Some of the best eggless cake recipes are vanilla cake, chocolate cake, and banana cake, which are popular and turn out soft and flavorful. Each recipe depends on simple substitutes like yogurt or condensed milk in place of eggs.
Eggless cake is best for those who avoid cakes because of dietary preferences, allergies, or religious reasons, without compromising on taste. Eggless cakes also have a slightly denser, moist texture that many people enjoy.
Eggless cake stays fresh for about three to four days when stored in an airtight container at room temperature. Refrigerating it can extend this to about a week without drying it out.
You can use ingredients like flour, sugar, oil, and a liquid like yogurt, buttermilk, or condensed milk to replace eggs in these recipes. Baking soda or baking powder helps the cake rise properly without the need for eggs.
Eggless cake has a slightly denser, moister crumb compared to traditional egg-based cakes. Thanks to substitutes like yogurt or condensed milk. The overall taste, however, is equally rich and satisfying.
Common mistakes like overmixing the batter can make the cake dense and tough instead of light and fluffy. Skipping the resting time for the batter or using cold ingredients can also affect how the cake rises.
Cadbury Bournville is the best chocolate for eggless cake. It adds a rich, deep chocolate flavor in eggless cakes, while Cadbury Dairy Milk adds a sweeter, creamier taste. Both melt smoothly and blend easily into the batter.
There is not one single best brand for eggless cake. Using good-quality flour, a trusted chocolate brand like Cadbury, and fresh dairy products will give you the best homemade cakes.
Eggless cheesecake means a cheesecake made without eggs. This cheesecake is set using gelatin, agar-agar, or it is simply chilled until firm. Eggless cheesecake also delivers the classic creamy, tangy flavor people love.
An easy eggless cheesecake recipe requires you to blend cream cheese, condensed milk, and a bit of lemon juice until it becomes smooth. Then it needs to be poured over a biscuit base. You chill it for a few hours until firm, and your no-bake cheesecake is ready.
No-bake classic cheesecake, chocolate cheesecake, and fruit-topped cheesecake are some popular eggless cheesecake ideas. Each version of this eggless cheesecake recipe relies on chilling rather than baking to set properly.
Eggless cheesecake is a good option for people who avoid eggs due to dietary preferences or allergies. Eggless cheesecake also delivers the same creamy texture. It is also simpler to make as many versions skip baking as well.
If eggless cheesecake is stored in the fridge in an airtight container, it stays fresh for about four to five days. When you keep it properly covered, it maintains its texture and prevents it from absorbing other fridge odors.
To make eggless cheesecake, you need cream cheese, condensed milk, a biscuit base, and a setting agent like gelatin or agar-agar. Lemon juice or vanilla extract is often added for extra flavor.
Eggless cheesecake relies on chilling rather than baking, this gives it a smoother, denser texture compared to many traditional baked desserts. The tangy, creamy flavor, however, stays true to classic cheesecake.
If you have a springform, that can make unmolding easier, though a regular dish works fine too if you don't mind serving it in slices. A hand mixer or whisk is usually all you need for the filling.
Cadbury Bournville is a good option to make chocolate cheesecake. This chocolate has a deep cocoa flavor that balances the tanginess of the cream cheese. Cadbury Dairy Milk Silk is another good option for a sweeter, creamier result.
There isn't one single best brand for eggless cheesecake. Using good-quality cream cheese, a trusted chocolate brand like Cadbury, and fresh ingredients will generally give you the best homemade cheesecake.
An eggless cookie does not contain eggs. They are made using butter, condensed milk or yogurt instead to bind the dough. It becomes crispy on the edges and soft in the centre, perfect for egg-free diets.
You need to cream the butter and sugar together, then add flour, baking soda, and a splash of milk to make an eggless cookie. Then mix into a soft dough, shape into balls, flatten slightly, and bake at 180°C for 12-15 minutes, until golden and ready!
Some popular eggless cookie recipe ideas are classic chocolate chip, oatmeal raisin and butter cookies. Double chocolate and peanut butter also add extra richness. Each recipe uses pantry staples, resulting in bakery-quality cookies without eggs.
Many people prefer eggless cookies for religious reasons, allergies or vegetarian diets. They taste just as delicious as regular cookies and are safer for those avoiding raw egg risks like salmonella during dough preparation.
Stored in an airtight container, eggless cookies stay fresh for up to a week at room temperature. Refrigeration extends this further. For longer storage, freeze the baked cookies for up to two months.
Basic ingredients for eggless cookies include butter, sugar, flour, baking soda, and milk or condensed milk. Vanilla essence adds flavour, while chocolate chips or nuts give texture to the cookies. These simple staples make soft and flavourful cookies every time.
Traditional cookies use eggs for binding and richness, while eggless cookies rely on butter, condensed milk or yogurt. Both taste similar, but eggless cookies suit vegetarians and those with dietary restrictions.
No special equipment is needed apart from a mixing bowl, a whisk, and a baking tray for eggless cookies. A hand mixer speeds up creaming butter and sugar, but creaming by hand also works perfectly for smaller cookie batches.
Cadbury's Dairy Milk can be used to make eggless cookies. It blends well in the dough and gives a smooth and rich chocolatey flavor to the cookies and does not affect their texture.
There is no single best brand that offers eggless cookies. But you can use chocolates like Cadbury's, which do not contain eggs, to make eggless cookies with chocolate flavor at home.
An eggless cupcake does not have an egg at all, and it relies on substitutes like yogurt, buttermilk or flax to bind the batter. The cake stays soft, moist, and fluffy, making it perfect for people who avoid eggs due to allergies or dietary choices.
To make eggless cupcakes at home, you need to mix flour, sugar, baking powder and a pinch of salt. Then you can add oil, milk, and vanilla essence, and whisk until smooth. Pour into liners and bake at 180°C for 18-20 minutes until a toothpick comes out clean.
Some of the best eggless cupcake recipes are vanilla, chocolate and red velvet. Chocolate -stuffed cupcakes and butterscotch versions are also loved by many. Each recipe uses simple pantry staples and gives bakery-style results without needing a single egg.
Eggless cupcakes suit vegetarians, those with egg allergies, and anyone following religious dietary restrictions. They often taste lighter and stay fresh longer. Plus, they are easier to prepare since you can skip the whisking and tempering steps.
If you store eggless cupcakes in an airtight container at room temperature, they stay fresh for 2-3 days. Refrigerating extends this to about a week. For longer storage, you can freeze them for up to two months without frosting.
Common ingredients used in eggless cupcake are all-purpose flour, sugar, baking powder, baking soda, oil and milk or yogurt. Vanilla essence adds flavour, while vinegar or lemon juice helps the batter rise properly, replacing the binding role eggs play.
Eggless cupcakes replace eggs with alternatives like yogurt or condensed milk, keeping the texture soft and moist. Regular desserts often rely on eggs for structure and richness. Both taste similar, but eggless versions suit more dietary needs.
Some common mistakes are overmixing the batter, which makes cupcakes dense instead of fluffy. Skipping the resting time before baking affects rise too. You should always measure ingredients accurately and avoid opening the oven door early, as this can cause cupcakes to sink.
Cadbury's Dairy Milk or Silk chocolate is good to make rich, fudgy cupcakes. Both melt smoothly and blend well into eggless batters. These chocolates give a deep chocolate flavour without compromising texture or the soft, airy crumb.
There is no single brand that is best for eggless cupcakes. But many bakeries across India have eggless cupcakes that taste good and are popular. If you plan to bake at home, you can use Cadbury's chocolates to add a chocolatey flavor to the cupcakes.
An eggless muffin is a soft, individually portioned baked item made without eggs, using substitutes like yogurt or buttermilk. It comes in flavors ranging from chocolate chip to banana and blueberry.
You can make eggless muffins at home by whisking together flour, sugar, baking powder, and a liquid like yogurt or buttermilk until you get a smooth batter. Then you have to pour this into muffin liners and bake until they become golden and a toothpick comes out clean.
Chocolate chip, banana walnut, and blueberry muffins are among the best eggless muffin recipes, turning out soft and flavorful without eggs. Each recipe relies on simple substitutes that create a light, fluffy texture.
Eggless muffins are good for people who avoid eggs for dietary, allergy-related, or religious reasons, without compromising on taste or texture. They are also quick to whip up, and thus a convenient grab-and-go breakfast or snack.
Eggless muffins stay fresh for about three to four days when they are stored in an airtight container at room temperature. Refrigerating them can extend this slightly, though they taste best within the first couple of days.
Flour, sugar, baking powder, and a liquid like yogurt, buttermilk, or milk with vinegar typically replace eggs in these recipes. Oil or melted butter adds moisture, keeping the muffins soft and tender.
Eggless muffins are lighter and less rich than many traditional desserts, which makes them suitable for everyday snacking. Their portable, single-serving size also sets them apart from cakes or larger bakes.
Overmixing the batter can make muffins dense and chewy instead of light and fluffy. Overfilling the muffin liners is another common mistake, as it can cause uneven baking or overflowed tops.
Cadbury Dairy Milk, chopped into chunks, is one of the best chocolates that go into muffin batter. It melts perfectly during baking, creating gooey pockets. Cadbury Gems is another fun option if you want colorful bursts throughout the muffin.
There is not one single best brand for eggless muffins. Using good-quality flour, fresh dairy, and a trusted chocolate brand like Cadbury will give you the best homemade eggless muffins.
Traditional gingerbread cookies are spiced treats made with ginger, cinnamon, and molasses, which gives them a warm, and slightly spicy flavor. They are often cut into festive shapes like stars, trees, or the classic gingerbread man.
To make gingerbread cookies at home, you need to mix flour, ginger, cinnamon, and molasses into a firm dough, then roll it out and cut it into your favorite shapes. Then bake until the edges are slightly golden, then let them cool before decorating.
Desserts are very important for Christmas, and they represent warmth, celebration, and time spent with loved ones. Sharing treats like gingerbread cookies has become an important part of holiday traditions in many households.
Easy gingerbread cookies are made with flour, butter, molasses, and ginger. The dough needs some chilling time before baking. After baking the dough it cut into simple shapes like stars, trees or gingerbread man.
You can store gingerbread cookies in an airtight container at room temperature, where they will stay fresh for about two weeks. When you keep the cookies away from moisture, the cookies stay crisp without turning soft.
You can use whole wheat flour and reduce the sugar and rely on molasses for sweetness for a lighter version. You can also add a bit of oats to the dough to boost the fiber content.
Traditional gingerbread cookies are made with molasses and warm spices, while modern versions have chocolate, citrus, or nut-based flavors. Decorating styles have also evolved with elaborate icing designs.
You can add orange zest, a chocolate drizzle, or a dash of nutmeg to the dough to create simple and flavorful variations. Sandwiching two cookies together with a bit of icing in between also makes for a fun twist.
Cadbury Dairy Milk is the best chocolate to make gingerbread cookies. The creamy sweetness of this chocolate pair well with the warm spices. It melts smoothly, making it easy to coat cookies evenly.
You can dip half of each cookie into melted Cadbury Gems or sprinkle crushed pieces on top to add a colorful, chocolatey touch. This gives the classic spiced cookie a fun,and festive upgrade.
Grate fresh carrots and cook them in ghee until they become soft. Then add the milk and let it reduce slowly, stirring often. Once thickened, mix in the sugar and cook until the halwa turns glossy.
To make suji ka halwa, roast semolina in ghee until golden and fragrant, stirring constantly to prevent burning. Then add warm water or milk along with sugar, and cook until the mixture thickens into a soft, grainy halwa.
Soak moong dal, then grind it into a coarse paste before cooking it slowly in ghee until golden brown. Then add warm milk and sugar gradually. Make sure you stir it often until the halwa turns rich and aromatic.
Bread ka halwa can be made by tearing bread slices into small pieces and cooking them in ghee until lightly toasted and fragrant. Then add milk and sugar, and keep stirring until the bread softens and the mixture thickens into a smooth, comforting halwa.
Carrot halwa can be made in a pressure cooker by cooking grated carrots with ghee for a couple of whistles until they are softened. Then open the lid, add milk and sugar, and let it simmer uncovered until the halwa thickens.
Calorie counts for gajar halwa differ depending on how much ghee, sugar, and milk go into the recipe. A typical homemade halwa generally has around 200 and 300 calories, though portion size makes a big difference.
You can make aate ka halwa by roasting whole wheat flour in ghee over low heat until it turns golden and releases a nutty aroma. Then gradually add warm water and sugar, stirring continuously until the halwa becomes smooth.
You need to roast besan in ghee slowly over low heat until it develops golden color and smells nutty. Then add warm water and sugar, stirring constantly, until the mixture thickens into a rich, smooth halwa.
Cadbury Gems might work well in chocolate halwa. They will add colorful bursts without altering the taste too much and overpowering the halwa with the taste of chocolate. You can also add dairy milk or 5 Star if you want the halwa to be more chocolatey.
Cadbury Bournville is one of the best dark chocolates to be used in a gourmet halwa recipe. The bold cocoa flavor of this chocolate adds a modern twist while still complementing traditional ingredients like ghee and nuts.
To make karanji, you need to prepare stiff dough with flour and ghee, then fill it with a sweet coconut and khoya mixture folded into small crescent shapes. Then deep fry them until they turn golden brown, and cool before serving.
You can make karanji saran by mixing grated coconut, khoya, sugar, and a touch of cardamom to form the filling. Then cook it briefly on low heat until it becomes slightly dry, then use it to stuff your karanji dough.
Rolling the dough thin and frying it on medium heat helps karanji turn out crispy rather than soft or chewy. Sealing the edges tightly also keeps the filling from leaking out during frying.
To make mawa karanji, yoou need to cook mawa gently with sugar until it thickens slightly, then use it as the filling for your karanji dough. Fold and seal the edges carefully before frying until they turn golden and crisp on the outside.
Maharashtrian-style karanji uses a coconut and khoya filling flavored with cardamom and a touch of nutmeg. Then this is stuffed in the dough and is folded into a crescent shape, then deep-fried until the karanjis become golden and crisp.
To fold karanji, you should place the filling in the center of a rolled dough circle, then fold it over into a half-moon shape. Press the edges together firmly, or use a fork to seal and create a decorative crimped pattern.
Cadbury Dairy Milk can be used to make chocolate-coated karanji. It adds a rich, sweet layer over the crispy exterior. Letting the coating set for a few minutes gives it a nice, firm finish.
To make the chocolate karanji variation, you need to swap the traditional coconut filling for a mixture of melted chocolate and khoya to create a fun chocolate twist. Cadbury Bournville works here.
Cadbury Fuse pairs nicely with karanji fillings, its caramel and wafer bits adding a bit of crunch with the traditional coconut and khoya base. It melts easily into the mixture without overpowering it.
Cadbury Silk Bubbly works well for no-fry versions. It works well because it is light, airy, and melt easily for a baked or steamed karanji filling. It keeps the texture soft and also adds a rich chocolate flavor.
To make Mysore Pak, you need to melt ghee and gently cook besan with sugar syrup, and sitr continuously until the mixture turns golden and starts leaving the sides of the pan. Later, pour it into a greased tray, let it set, and cut into squares.
Mysore Pak is traditionally made using besan, ghee, and sugar. All of this is cooked together until it forms a rich, sweet mixture. A generous amount of ghee is used for this recipe which gives the signature melt-in-the-mouth texture people love.
Mysore Pak is a classic South Indian sweet that originated in Mysore. This sweet is made by cooking besan with ghee and sugar syrup. It has a soft, crumbly texture and a rich, buttery flavor.
You can store Mysore Pak in an airtight container at room temperature, away from direct sunlight or moisture. This keeps it fresh for several days without affecting its texture or the buttery flavor it's known for.
Mysore Pak stays fresh for about a week when it is stored properly in an airtight container at room temperature. Keeping it away from humidity keeps its texture as it is, and prevents it from turning soggy.
For the crispy, brown mysore pak, you need to cook the sugar syrup to a slightly higher temperature before adding the besan mixture. Later, stir continuously and use enough ghee to create the signature tiny holes in the sweet.
Refrigeration is not necessary for Mysore Pak, since it stores well at room temperature in an airtight container. If you chill the sweet, it can harden the ghee and change its soft, melt-in-the-mouth texture.
Keep Mysore Pak in a clean, airtight container and place it somewhere cool and dry, away from direct heat or sunlight. This simple step helps it stay fresh and keeps its texture intact for several days.
Cadbury Fuse works nicely for a chocolate twist on Mysore Pak. This chocolate has rich choco and caramel flavor, and crunchy wafer bits. It melts smoothly into the besan mixture, adding a fun texture to the traditional flavor.
Cadbury Bournville is one of the best dark chocolates to use in a gourmet Mysore Pak recipe. It has a deep, slightly bitter edge that works beautifully in Mysore Pak.
To make peda at home, cook khoya in a pan with sugar until it thickens and pulls away from the sides. Make sure to stir continuously to avoid burning. Let the mixture cool slightly, and shape it into small discs or balls.
To make peda at home, crumble khoya in a pan and cook it gently with sugar until the mixture turns soft and glossy. Once it cools enough to handle, roll it into small balls and flatten them into traditional peda shapes.
To make milk peda, simmer the milk over low heat for a long time until it reduces and thickens into a rich, creamy mass. Later, add sugar and cook further until it comes together, then shape the mixture into small rounds.
You can make mawa peda by cooking mawa (khoya) with sugar over low heat, stirring until the mixture thickens and turns light golden. Add a touch of cardamom for flavor, then shape it into discs once it is cool enough to handle.
Milk Peda stays fresh for about a week when it is stored in an airtight container at room temperature. Refrigerating it can extend its shelf life, but it is best enjoyed within the first few days.
You can make peda with condensed milk by cooking condensed milk in a pan over low heat, stirring constantly until it thickens and starts to leave the sides. Later, let it cool slightly, and shape it into small rounds and let them take shape.
Keep Milk Peda in an airtight container, either at room temperature for a few days or in the fridge for longer freshness. Storing it away from moisture keeps the pedas soft, preserving its melt-in-the-mouth texture.
To make coconut peda at home, cook grated coconut with condensed milk or khoya on low heat till the mixture thickens and comes together easily. Later, shape it into small rounds once it is cooled and garnish with more coconut on top.
Either Cadbury Dairy Milk or Cadbury Fuse works well for a khoya chocolate peda. Fuse adds a fun crunch from its wafer bits, while Dairy Milk keeps things classic and creamy.
Cadbury Bournville or Cadbury Dairy Milk Silk both pair nicely with milk powder-based peda recipes. Bournville brings a richer, less sweet flavor, while Silk gives a smooth, creamy texture.
You can make chocolate sandesh by crumbling fresh paneer and cooking it gently with sugar and melted chocolate until the mixture turns smooth and glossy. Let it cool a little, then shape it into small rounds or traditional molds.
To make Sandesh, knead fresh paneer until smooth. Later, cook it with sugar on low heat until the mixture becomes soft. Add a pinch of cardamom for flavor, shape it into small discs, and let it cool.
To make nolen gurer sandesh, cook fresh paneer with nolen gur (date palm jaggery) over low heat until the mixture softens and turns a light caramel shade. Then shape it into small rounds once cooled to let the jaggery flavor shine.
To make paneer sandesh, knead fresh, soft paneer until it is smooth and lump-free. Then cook it briefly with sugar over low heat. Once the mixture cools, shape it into small rounds or press it into decorative molds.
To make steam sandesh, mix crumbled paneer with sugar and a touch of milk. Then steam the mixture in a greased tin for about fifteen minutes. Let it cool completely before slicing it into squares or diamond shapes.
Sandesh can be made in a microwave by mixing crumbled paneer and sugar in a microwave-safe bowl, and heating in short bursts, stirring in between, until it thickens. Then, let the mixture cool before shaping it into small rounds or pressing it into molds.
You need to mix milk powder with condensed milk and a touch of ghee, and then let it cook gently until the mixture turns soft and pliable. Shape it into small rounds once it cools enough to handle comfortably.
Cook the grated apple with a little sugar until it softens. Then mix it into crumbled paneer, which is cooked separately until smooth. Then mix both and shape the mixture into small rounds once it has cooled down.
Cadbury Silk Bubbly would be one of the best chocolates to make chocolate sandesh. Its subtle sweetness keeps the delicate flavor of the sandesh from getting overpowered. You can also try other milk chocolates.
Cadbury Bournville would work wonderfully with nolen gur, since its deeper cocoa notes balance the jaggery's sweetness nicely. This combination gives the sandesh a rich, well-rounded flavor without getting too sugary.
The traditional sweets for Diwali are shankarpali, laddoo, barfi, chakli, and karanji, along with some chocolates and dry fruits. These treats are shared with family and friends throughout the festive season.
To make shankarpali step by step, mix flour, ghee, and sugar into a stiff dough, then roll it out and cut it into small diamond shapes. Then, fry the pieces until golden brown, and let them cool before storing or serving.
Desserts bring warmth and sweetness to Diwali celebrations. They symbolize prosperity and joy shared among loved ones. Homemade sweets like shankarpali, laddoos, barfis, kaju katlis, etc., are often exchanged as gifts.
A simple sugar-coated shankarpali is a great starting point. It requires simple ingredients like flour, ghee, sugar, and a bit of frying practice. Following a basic dough-to-fry process makes it easy even for first-time cooks.
Shankarpali stores well in an airtight container at room temperature for up to two weeks. This makes it a convenient make-ahead option, especially during the busy days of Diwali preparation.
Baking shankarpali instead of frying it reduces oil intake while still giving you that crisp, satisfying texture. Using jaggery instead of refined sugar is another simple way to make it a little bit healthier.
Adding cocoa powder to the dough or dusting the fried pieces with chocolate shavings gives shankarpali a fun, modern twist. Rolling them in crushed nuts before serving also adds an interesting textural contrast.
Sugar-coated or chocolate-dusted shankarpali, packed in decorative boxes, makes a lovely Diwali gift. Pairing them with other festive sweets in a gift hamper adds an extra touch that makes the gift feel more special and festive.
Cadbury Perk works nicely as a topping or filling twist for shankarpali. It has a light, crispy wafer that adds a fun crunch. Crumbling it over freshly fried pieces gives the dessert a playful, festive touch.
Drizzling melted Cadbury 5 Star over cooled shankarpali adds a chewy caramel layer to the crisp texture. Letting the chocolate set for a few minutes before serving gives it a nice, finished look.
Make an easy homemade Toblerone cake by whipping up a simple vanilla or chocolate sponge, then layer it with a ganache made from melted Toblerone and cream. Stack the layers, coat the outside with more ganache, and finish with chopped Toblerone on top.
You can absolutely bake this cake eggless by using yogurt or condensed milk as a substitute in the sponge. The Toblerone ganache stays exactly the same, so you will not lose the rich flavor.
You can make a Toblerone cake without an oven with a heavy-bottomed pot or pressure cooker. Preheat the pot with a stand or salt layer inside, then bake the batter in a covered tin on low heat.
Flour, sugar, butter, and either eggs or an eggless substitute make up the sponge base. Toblerone chocolate and fresh cream need to be mixed separately to form the ganache that ties the whole cake together.
If Toblerone cake is kept in the fridge inside an airtight container, it stays fresh for about four to five days. Letting it sit at room temperature for a bit before serving brings out the flavor even more.
Overbaking the sponge is a common mistake, which leaves the cake dry instead of soft and moist. Pouring the ganache while it is still too hot can also cause it to slide right off the layers.
Baking it yourself means you get to load up on real Toblerone flavor in every layer, something store-bought cakes often lack. The texture also tends to feel fresher and less artificially sweet.
Adding a layer of caramel or crushed nuts between the sponge layers brings in extra texture and flavor. You could also turn it into cupcakes for a fun, individual-sized version of the same dessert.
The classic Toblerone milk chocolate bar works wonderfully in cakes, melting smoothly into ganache while keeping its signature nougat crunch in the mix. You can also use the dark chocolate version of Toblerone for some deep flavor.
Toblerone chocolate is the best for baking cakes and brownies. It melts down easily and brings a rich, nutty flavor. You need to chop it into chunks before baking to create delicious gooey pockets.
To make the fudge, start by melting Toblerone chocolate with butter and condensed milk over low heat, and stir until it becomes smooth. Later, pour the mixture into a lined tray, spread it evenly, and refrigerate for a few hours until it turns firm and fudgy.
Toblerone Fudge can be easily made without eggs. Ingredients like melted chocolate, butter, and condensed milk do all the work. These ingredients give a smooth, dense fudge, once it chills properly in the refrigerator.
There is no need of an oven to make Toblerone Fudge at all. All you need to do is just melt the ingredients together on the stovetop, pour the mixture into a tray, and let the refrigerator handle the rest until it becomes firm.
The main ingredients used in Toblerone Fudge are Toblerone chocolate, butter, and condensed milk. Some recipes also add a splash of vanilla extract or a pinch of salt to round out the flavor.
Toblerone Fudge stays fresh for about two weeks when you store it in an airtight container in the fridge. When you keep it well-covered, it prevents it from getting dried out and helps the chocolate flavor stay strong.
The reason for the fudge not turning out right and becoming grainy or too soft is that the chocolate gets overheated or the mixture doesn't chill long enough. When you keep stirring gently and giving it enough time in the fridge usually fixes both problems.
Toblerone Fudge stands out because it has a dense, chewy texture and the distinct honey-almond nougat flavor that you can feel in every bite. This fudge is richer and more indulgent than most everyday chilled desserts.
You can cut Toblerone Fudge into small squares and serve it alongside coffee, or layer it into a dessert platter with cookies and brownies. You can also drizzle extra melted chocolate on top to make it even more special.
Toblerone's classic milk chocolate bar is the best product for desserts, because of its smooth melt and signature nougat crunch. It blends easily into fudge, ganache, and other chocolate-based treats without losing its distinct flavor.
Toblerone chocolate melts smoothly and adds a rich, nutty flavor, making it a great choice for cakes and brownies. Chopping it into chunks before baking also gives your desserts a delicious, gooey texture.
For a fusion recipe, you can try layering a classic tiramisu with melted Toblerone instead of regular chocolate. Soak ladyfingers in coffee, spread a Toblerone-mascarpone mixture between layers, and chill until it sets nicely.
Making eggless versions of fusion desserts is easy. You need to add whipped cream or mascarpone instead of eggs that gives you that same rich, smooth texture, without changing the overall taste.
Fusion desserts made with Toblerone do not need an oven. Most recipes require melting chocolate, layering it with a base like biscuits or ladyfingers, and letting the fridge do rest of the work.
It depends on which dessert you make, but generically you will need Toblerone chocolate, cream or mascarpone, and a base like biscuits, ladyfingers, or puff pastry. Coffee, nuts, or fruit are also useful for additional presentation, flavor and texture.
Most fusion desserts made with Toblerone last around four to five days when kept in the fridge inside an airtight container. Since these often include cream-based layers, eating them fresh gives you the best flavor.
People often rush the chilling step, which leaves the layers unable to hold their shape when sliced. Overheating the chocolate is another frequent mistake, since this can make the dessert grainy instead of smooth.
When you make Toblerone Fusion Desserts at home, you get to control exactly how much Toblerone goes into every layer, unlike most store-bought versions. The homemade version is also fresher and more pronounced.
Some creative twists on the classic Toblerone Fusion Desserts are blending the chocolate in cheesecake batter or folding it into tiramisu. Pairing it with fruit like strawberries or oranges also adds a nice, fresh contrast.
The classic Toblerone milk chocolate bar suits fusion desserts particularly well, since it melts smoothly. You can also add the chocolatey version if you are a fan of chocolate in the fusion desserts.
Toblerone chocolate is good for baking cakes and brownies. It adds a rich, nutty note that works well in cakes and brownies. Chopping it into chunks before mixing it into the batter is also a good way of using the chocolate in Fusion Desserts.
To prepare Toblerone ice cream step by step, start by whipping together fresh cream, condensed milk, and melted Toblerone chocolate until the mixture turns smooth and well combined. Add some chopped Toblerone pieces, then pour it into a container and freeze for six to eight hours.
Toblerone Ice Cream can be made without any eggs. You need ingredients like whipped cream, condensed milk, and melted chocolate to create the same rich, creamy base that eggs are responsible for.
There is no need for an oven for this recipe. You just need to whip the base ingredients together, add the chocolate, pour everything into a container, and let it sit in the freezer till it becomes firm like ice cream.
The main ingredients used in Toblerone Ice Cream are fresh cream, condensed milk, and melted Toblerone chocolate. You can also add Chopped Toblerone pieces for little bursts of almond crunch.
If Homemade Toblerone Ice Cream is kept well in the freezer, it will last for about two to three weeks when stored in an airtight container. Storing it properly keeps the texture and flavor of the ice cream intact.
The reasons for Toblerone ice cream not turning out right are over-whipping or keeping the mixture in a container that is not airtight. Under-whipping the cream can also leave your ice cream icy instead of soft and creamy.
What sets Toblerone Ice Cream apart is the honey-almond nougat flavor, which is paired with a cold, creamy texture. This ice cream gives an indulgent experience than many everyday frozen treats.
Some fun ways to serve Toblerone ice cream are to scoop it into bowls and top it with extra chopped Toblerone, warm chocolate sauce, or crushed nuts. You can also serve it alongside brownies or waffles.
Toblerone's classic milk chocolate bar is the best product to make desserts, since it melts smoothly. This chocolate works wonderfully in ice cream, truffles, fudge, and other sweet treats.
Toblerone chocolate is good for baking cakes and brownies as it melts easily and brings a rich, nutty flavor that pairs perfectly with cakes and brownies. Chopping it into chunks before baking also creates pockets of gooey chocolate with each bite.
An easy homemade Toblerone milkshake recipe requires you to blend milk with melted Toblerone chocolate and a scoop of vanilla ice cream until everything turns smooth and frothy. Pour it into a tall glass and top it with whipped cream.
This milkshake is eggless by nature, so you need not swap out or adjust anything. Milk, melted chocolate, and ice cream blend together on their own to create a thick, creamy drink everyone can enjoy.
An oven never enters the picture with this recipe. All you really need is a blender to mix the milk, chocolate, and ice cream, and within minutes, your milkshake is ready to pour and enjoy.
Chilled milk, melted Toblerone chocolate, and a scoop of vanilla ice cream form the base of this milkshake. Some people also add a few ice cubes or a drizzle of chocolate syrup for extra richness.
This milkshake tastes best when you drink it fresh, right after blending. But if you want to store it, keep it refrigerated for a few hours at most, and do not forget to give it a good stir before serving.
A common mistake that people make with Toblerone milkshake is adding chocolate that's too hot straight into cold milk, which causes the mixture to seize or turn lumpy. Blending for too short a time can also leave bits of chocolate.
A homemade version lets you control exactly how much Toblerone goes in, giving you a richer, more authentic chocolate flavor. Store-bought shakes often rely on syrups instead, which rarely capture that same nougat-almond taste.
Adding a shot of espresso can turn this into a mocha-inspired drink with a caffeine kick. You could also blend in banana or peanut butter for a thicker, more filling milkshake experience.
The classic Toblerone milk chocolate bar blends smoothly into milkshakes and brings its signature nougat flavor along with it. The chocolate flavored bar can also be used in milkshakes that have a chocolatey touch to it.
Toblerone chocolate is best for cakes and brownies because it melts down smoothly and adds a rich, nutty flavor. Another alternative is to add chopped chunks before baking for chocolatey bursts.
You can make Toblerone no bake desserts step by step by crushing some biscuits and mixing them with melted butter to form the base, then press it firmly into a tray. Melt Toblerone chocolate with cream, pour it over the base, and refrigerate for a few hours until everything sets.
Eggs are not a part of these desserts. You just need crushed biscuits, butter, melted chocolate, and cream for the desserts that create a rich, layered dessert that sets perfectly in the refrigerator.
This dessert does not require an oven and relies on the fridge instead. Once you layer the biscuit base and chocolate mixture in a tray, and let it chill for a few hours, your no bake dessert is ready.
The main ingredients used in Toblerone no bake desserts are biscuits, butter, cream, and Toblerone chocolate. A few recipes also adds chopped nuts or a drizzle of caramel for some extra texture and flavor.
If you store the Toblerone no bake dessert in an airtight container inside the fridge, it stays good for close to two weeks. Keeping it covered properly stops it from drying out and helps the layers hold their shape.
When you have a soggy base, it means that the biscuits were crushed too finely or butter was added a little too generously. If the layers do not hold together, the mixture probably needs more time to chill.
Since there is no involvement of over here, this dessert saves a slot of time. Yet it has a rich, layered indulgence that people love. The honey-almond nougat flavor from Toblerone also gives this dessert a unique taste.
Some fun ways to serve Toblerone no bake desserts are with a dusting of cocoa powder or a handful of crushed nuts on top. Cutting it into neat squares and plating it alongside a scoop of vanilla ice cream also works.
Toblerone's classic milk chocolate bar is the perfect to make no-bake treats. It also has the signature nougat crunch, that elevates the taste of the no bake dessert.
Toblerone chocolate has a rich, nutty flavor, which works well with cakes and brownies, and it melts down smoothly when it is added to the batter. You can also break the chunks for the gooey texture.
To make Toblerone truffles, you need to melt Toblerone chocolate with cream over low heat until you get a smooth, glossy mixture. Once it cools down, roll it into small balls and coat them in cocoa powder or crushed nuts before chilling.
Toblerone Truffles are naturally eggless, since the recipe only needs melted chocolate and cream. These two ingredients form a rich, smooth truffle center once everything has properly chilled in the fridge.
There is no need for an oven when making Toblerone Truffles. All you need to do is melt the chocolate and cream together on the stovetop, then let the refrigerator do the rest of the work until it becomes firm.
The main ingredients that go into Toblerone Truffles are Toblerone chocolate and heavy cream. Many people also like adding a touch of butter or rolling the finished truffles in cocoa powder, nuts, or sprinkles. This gives extra flavor and texture.
Toblerone Truffles stay fresh for about one to two weeks when you store them in an airtight container in the fridge. When you keep them chilled, their soft texture and rich chocolate flavor is maintained throughout.
A common mistake people make is overheating the chocolate, which causes it to seize up and turn grainy instead of smooth. Not chilling the mixture long enough before rolling can also make the truffles fall apart.
Homemade Toblerone Truffles is different because it lets you control the sweetness and texture, and they taste noticeably fresher than most store-bought versions. You also get to enjoy that signature honey-almond flavor in every single bite.
You can roll your truffles in crushed pistachios, drizzle them with white chocolate, or add a pinch of sea salt on top for extra flavor. Mixing in a little orange zest also creates a fun, tangy twist.
Toblerone's classic milk chocolate bar is the best for desserts, because of its smooth melt and the signature nougat crunch running through it. It blends effortlessly into truffles, fudge, and other chocolate-based treats.
Toblerone chocolate is good for baking cakes and brownies because it melts smoothly and brings a rich, nutty flavor for cakes and brownies. Chopping it into chunks before baking also gives your desserts pockets of gooey, melted chocolate.
Bhai Dooj's traditional desserts include kaju katli, barfi, and laddoos that are usually exchanged between siblings as a part of the ritual. The celebration is symbolic of love, protection, and family ties.
Cook cashew powder with sugar syrup until it forms a smooth dough. Once it cools and sets, roll it thin and cut into diamond shapes to make kaju katli.
On the occasion of Bhai Dooj, sweets exchanged are a symbol of love and blessings shared between brothers and sisters. The act of sharing sweets enhances the bond between family members on this joyous occasion.
Simple recipes include no-cook coconut laddoos, quick besan laddoos, or a simple barfi using condensed milk to cut down on the usual sugar syrup preparation time.
Store Bhai Dooj sweets such as barfi and laddoos in an airtight container at room temperature for a week or so. Keep away from moisture to maintain freshness.
For a healthier version, you can use jaggery instead of refined sugar, use less ghee in barfi, and go for dry fruit-based sweets instead of the traditional ones that are high in sugar.
The traditional recipe calls for khoya, ghee, and sugar syrup, while contemporary versions may include chocolate coatings or fusion flavors, but they still honor the ritual's symbolic exchange of sweets.
Rose water can be added to barfi for floral notes, and laddoos can be coated in crushed nuts or be made a lighter version with less ghee without sacrificing much traditional flavor.
Cadbury Dairy Milk pairs beautifully with kaju katli or barfi, its creamy sweetness melting easily or coating these traditional Bhai Dooj sweets.
Give a simple festive modern twist to finished kaju katli or barfi with a thin coat of melted Cadbury Dairy Milk chocolate or drizzle it over laddoos.
Kheer, coconut laddoos, and simple fruit sweets are the usual choices, as Buddhist tradition calls for light and milky sweets rather than deep-fried or richer foods during the celebrations of Buddha Purnima.
Cook rice or vermicelli in milk and sugar with cardamom till thick. Garnish with nuts and saffron. This easy preparation in the style of kheer is just about right for most Buddha Purnima celebrations and requires little effort.
Sweets offered on Buddha Purnima signify purity, compassion, and sharing joy with others, the Buddhist ideals of giving. One nice way to mark the occasion is to offer desserts to family, monks, and neighbors.
For quick options, you can try instant kheer using condensed milk, no-cook coconut ladoos, or a simple fruit custard that comes together in less than thirty minutes with no fancy preparation needed.
Most milk-based Buddha Purnima desserts will remain fresh for about two to three days when stored in an airtight container in the refrigerator. Don't keep them at room temperature; keep them chilled at all times.
You can substitute jaggery for refined sugar, add more fresh fruit for natural sweetness, or reduce the quantities overall, but keep the cardamom and saffron for depth of flavor.
Often simple and milk-based, these desserts have been given a modern touch with fusion elements such as chocolate drizzles or fruit purees, but many families still prefer the original, understated recipes.
For a fruity twist, try mango kheer, coconut ladoos rolled in crushed nuts, or a chilled fruit custard layered with seasonal fruit for a lighter and refreshing variation.
Cadbury Dairy Milk is good grated into kheer or melted for a drizzle, as its mild sweetness complements delicate, milk-based desserts without overpowering their traditional notes of cardamom and saffron.
Melt Cadbury Dairy Milk chocolate and fold it into warm kheer just before serving, or drizzle it over coconut ladoos for an easy modern addition that respects the simplicity of the dessert.
Mix up a milk or cream base with whatever you want to flavor it with and then freeze it in molds or a container for a few hours. Halfway through, you should stir it so it stays smooth instead of icy.
Most of the modern recipes use condensed milk or cream instead of an egg-based custard like kulfi or popsicles. That makes it a lot easier to do, but you still get a nice creamy texture.
All of this happens in the freezer, so there is no baking involved in an oven or on a hob whatsoever. This means frozen desserts are among the easiest dessert types to make without needing much equipment.
Bases generally comprise full-fat milk, cream, sugar, and a flavoring such as fruit puree, chocolate, or roasted nuts. The more fat you add, the creamier or icier the end texture will be.
Most frozen desserts will last two to three weeks in a sealed, freezer-safe container. Put them on the back side of the freezer where the temperature is more even and consistent.
If it is icy and grainy, this is usually because there is not enough fat or because it has not been stirred while freezing. Whisking the base thoroughly before freezing helps trap air and results in a smoother texture.
Frozen desserts, unlike baked goods, require no heat (only chilling) to achieve their final texture. They are usually lighter and more refreshing too, particularly in the warmer months.
Skewers help to make it easy to handle, and you can serve in small cups with toppings or layered in a parfait glass. Rotating flavors and mix-ins keep the same basic recipe interesting from week to week.
As a general rule, kulfi, ice cream, or popsicles that have a rich, full-fat cream or milk base will be the creamiest. Dairy quality is a much larger factor than any one specialty ingredient here.
Frozen desserts work better as a side dish, say a scoop next to a cake, than as a component in the baking itself. They go especially well with warm brownies for a temperature contrast.
The traditional Ganesh Chaturthi desserts are based on modak, as it is believed to be Lord Ganesha's favorite sweet. Other choices for offerings are puran poli, laddoos, and coconut-based sweets during the festival.
Go for the classic ukadiche modak, steamed from a dough of rice flour and filled with jaggery and coconut, or opt for a simpler dough and fry it if steaming sounds like too much effort for the occasion.
Offering modak and other sweets to Lord Ganesha as prasad symbolizes devotion and the sweetness of life. It is believed that sharing the desserts with family and friends afterwards is auspicious.
Make an instant modak from a ready-made rice flour mix or make no-cook coconut ladoos or a simple besan laddoo that does away with steaming altogether.
Steamed modak will keep well for about a day at room temperature or 2-3 days in the fridge. Fried varieties and laddoos will last a little longer if stored in an airtight container.
Healthier versions use less jaggery, substitute whole wheat flour for refined flour, or prefer steamed modak over fried modak to cut down on added fat.
The traditional modak dough is hand-shaped and steamed, while newer versions include chocolate-stuffed or baked versions, but many families still prefer the classic coconut-jaggery filling.
For a modern twist, try the chocolate-stuffed modak, the dry fruit modak, which needs no cooking at all, or the mawa-based version for a richer, creamier filling.
Cadbury Dairy Milk melts beautifully into modak filling; its smooth texture easily combines with coconut and jaggery without overpowering the traditional flavor of the dessert.
Modak, steamed or fried with a small chunk of melted Cadbury Dairy Milk chocolate at the center, or drizzle over puran poli for an easy festive twist.
Popular choices include shrikhand, puran poli, and sweet neem-jaggery preparations, as Gudi Padwa traditionally combines bittersweet flavors, symbolizing life's mixed experiences across the coming year.
Whisk thick hung curd with sugar and cardamom till smooth, then garnish with saffron and chopped pistachios for a classic Gudi Padwa dessert.
The sweets, particularly the mix of jaggery and neem, represent embracing the good and the bad that comes one's way in the coming year, which is reflective of the balanced philosophy that Gudi Padwa celebrates.
You can make quick shrikhand using strained yogurt, no-cook coconut ladoos, or just jaggery and neem, which takes less time to prepare.
Shrikhand is fresh for 2-3 days in an airtight container in the fridge. Puran poli and other sweets last a little longer if stored properly.
The low sugar versions have less sugar in shrikhand, add more fresh fruits to give natural sweetness, or have less jaggery in puran poli but still keep the traditional balance of flavors.
While the symbolic combination of neem and jaggery is a constant and meaningful element, traditional Gudi Padwa sweets have evolved to include fruit-flavored shrikhand, chocolate variations, and fusion desserts.
Try a fruity shrikhand like mango or saffron, or a rich chocolate-stuffed puran poli, or a modern shrikhand parfait layered with fruit and crushed nuts.
Cadbury Dairy Milk is a good one to melt into shrikhand or puran poli filling, the creamy sweetness of the chocolate blending well without overpowering the traditional notes of cardamom and saffron in the dish.
Add melted Cadbury Dairy Milk chocolate to shrikhand just before serving or stuff a small piece into puran poli, an easy, decadent modern variation.
Common options are kheer, halwa, and laddoos, usually made as offerings to teachers and gurus as a token of gratitude and respect, which is the central theme of this occasion across Indian households.
Make a simple halwa by toasting semolina or besan in ghee and then adding sugar and water until thick. Serve warm to guests and family and garnish with nuts.
On Guru Purnima, desserts are a symbol of gratitude and respect for teachers. Sweets are usually offered to gurus first and then distributed among family and the community.
Easy recipes such as quick sooji halwa, no-cook coconut laddoos, or a simple kheer with condensed milk can drastically cut down on preparation time.
Store Guru Purnima desserts in an airtight container at room temperature for 2-3 days or refrigerate milk-based ones like kheer for a little longer for freshness.
You could opt to use jaggery instead of sugar, use less ghee in halwa, or opt for fruit-based sweets over traditional deep-fried and high-sugar preparations.
The traditional versions are based on ghee-laden halwas and simple milk-based sweets, whereas the modern versions often add chocolate, dry fruit toppings, or fusion flavors while retaining the offering spirit.
You can add saffron and cardamom to your classic halwa or layer laddoos with chopped nuts. You can also make a lighter halwa with less ghee, without losing too much on the taste front.
Cadbury Dairy Milk goes perfectly with halwa or laddoos. It melts easily and can be grated over the traditional offerings of Guru Purnima without its creamy sweetness overwhelming the taste of the halwa or laddoos.
Warm halwa drizzled with melted chocolate from a bar of Cadbury Dairy Milk or chocolate shavings folded into laddoo mixtures is an easy, modern twist that still feels celebratory and warm.
Payasam is the highlight of the Onam celebrations, made out of rice, jaggery, and coconut milk. It is usually served along with the other traditional sweets in the elaborate Onam Sadya.
Prepare a traditional Onam payasam by cooking rice or vermicelli in coconut milk with jaggery and cardamom until thickened. Garnish with fried coconut slivers and cashews.
Payasam is central to Onam, the harvest festival, symbolizing abundance and gratitude, and is traditionally served as the last course of the elaborate Sadya feast.
For beginners, a basic rice payasam made with condensed milk or a quick semiya payasam using vermicelli, which cooks much faster than traditional rice payasam.
Yes, you can make the payasam a day ahead and store it in the fridge. It will thicken when it gets cold, so you might need to add a little more milk and reheat gently on the stove.
You can also use jaggery instead of refined sugar for a guilt-free version, reduce the amount of coconut milk a little, or add more fruit to get the natural sweetness without having to depend on too much added sugar.
Fusion twists could be chocolate payasam with cocoa powder, mango-flavored versions with fresh pulp, or a chilled payasam parfait with fruit and nuts for a contemporary take.
Well-packaged laddoos, dry fruit sweets, or bottled payasam mixes are good for gifting, as they travel better than delicate, milk-based fresh preparations.
Cadbury Dairy Milk is good to be melted and added to payasam, giving a chocolatey twist to the dish. The creamy sweetness of the chocolate goes well with coconut milk without taking away from the traditional jaggery taste.
For an easy, decadent modern twist, stir melted Cadbury Dairy Milk chocolate into warm payasam just before serving, or drizzle it over the finished dish.
Pongal is one of the most famous traditional dessert prepared during Pongal made from rice, jaggery, milk, and ghee, symbolising prosperity and a bountiful harvest across Tamil Nadu households.
Cook rice and moong dal together until soft. Add melted jaggery, milk, and ghee and mix well. Serve warm and garnish with fried cashews and raisins.
Sweet Pongal is an offering to the sun god during the harvest festival, symbolizing gratitude, abundance, and the beginning of a new prosperous agricultural cycle.
You can make a quick sweet Pongal with easy recipes using a pressure cooker to make the rice and dal softer faster or use condensed milk to reduce the cooking time altogether.
Store sweet Pongal in an airtight container in the refrigerator, and it will stay fresh for about two to three days. Serve warm with a splash of milk.
Healthier options include reducing the amount of ghee, using brown rice instead of white rice, or substituting some of the jaggery with mashed fruit for natural sweetness and extra fiber.
Traditional Pongal is cooked in a clay pot with copious amounts of ghee, which is the hallmark of the dish, unlike the modern-day version that uses a pressure cooker and less ghee.
You can add grated coconut for extra texture, or cardamom and nutmeg for a deeper flavor, or a mix of jaggery and dates for a layered natural sweetness.
The melt-in-the-mouth Cadbury Dairy Milk adds a creamy chocolate note to the sweet Pongal, which surprisingly complements the jaggery and ghee base of the dish without overpowering it.
Or melt some Cadbury Dairy Milk chocolate into warm Pongal just before serving, or sprinkle chocolate shavings on top for a simple, festive modern touch.
Traditional desserts are sweets prepared using age-old recipes and methods passed down from generation to generation, usually using ingredients such as ghee, jaggery, milk, and regional spices instead of modern shortcuts.
Classic traditional dessert recipe, easy to make. Simmer rice in milk with sugar and cardamom till it thickens. Garnish with nuts and saffron.
Common ideas are halwa, laddoos, barfi, and kheer, which differ by region but have common ingredients like ghee, sugar or jaggery, and warming spices such as cardamom.
Traditional desserts are often chosen for their nostalgic, comforting flavors and cultural importance because these recipes are often linked to family memories, holidays, and long-standing cooking customs passed down through generations.
Most traditional desserts can be kept at room temperature for about a week if fried or made with ghee. Milk-based versions like kheer generally need to be refrigerated and will only last a few days.
All you need is simple hob cooking equipment and basic ingredients like ghee, sugar or jaggery, milk, flour or semolina, and warming spices like cardamom.
This likely refers to the contrast of traditional regional dishes with modern fusion reimaginings, which often include things like chocolate or strange flavors while keeping the traditional cooking base.
Some traditional desserts, like steamed modak or some halwas, require special equipment like a steamer or a heavy-bottomed pan, but most require nothing more than a normal hob.
High-quality dark or milk chocolate is great for use in traditional desserts, as it melts beautifully and doesn't overpower the dish's original ghee, jaggery, or spice-forward flavor profile.
For garnishing traditional desserts a trusted, good-quality chocolate brand known for smooth melting works best, but these recipes are ultimately judged by authentic ingredients, not any particular brand.
Whisk the custard powder or cornflour with a little cold milk to make a smooth paste, then stir into the sweetened milk and simmer until the mixture thickens to a glossy, pourable consistency. Serve warm or chilled.
Mix custard powder with a little cold milk to prevent lumps and add gradually to boiling sweetened milk. Cook until thick. Before chilling and serving, add vanilla or fruit flavoring.
Prepare a thick vanilla custard base by combining custard powder and milk. Cool completely. Fold in chopped seasonal fruits such as apples, bananas, grapes, and pomegranate. Chill thoroughly, then serve in individual bowls.
Caramelize sugar straight into a mold until golden, then pour a custard mix of milk, sugar, and eggs over it. Chill the dish and turn it out to serve. Or steam or bake in a water bath until set.
Put the milk, sugar, and a thickening agent such as cornflour or eggs in a saucepan. Gently cook, stirring until the mixture thickens. Pour into molds and chill until set into a firm, spoonable pudding.
For a thick custard, use custard powder, milk, and sugar. Let the custard cool completely. Fold in whipped cream before churning or freezing it in a container. Stir the custard occasionally to prevent the formation of ice crystals as it sets.
Make a base with custard powder and milk, allow it to cool completely, and then add the fresh mango puree to give color and flavor. Let the dish cool completely before serving. Garnish with chopped pistachios or diced mango.
Make a base custard by combining custard powder and milk, whisk in cocoa powder or melted Cadbury chocolate, and stir until the mixture is smooth and glossy. Serve warm as a comforting dessert or sweeten to taste and chill before serving.
It is possible to add a high-quality dark or semi-sweet cocoa powder to custard without making it grainy and to achieve a smooth, rich, and balanced chocolate flavor. Another good option is melted couverture chocolate if you want a glossier, more luxurious appearance.
The most even dissolving of unsweetened, good-quality cocoa powder in custard-powder-type mixes is obtained by avoiding lumps and grittiness. The sugar needs to be adjusted accordingly because cocoa powder is more bitter than melted chocolate and must be balanced with sweetness.
Melt Bournville chocolate with condensed milk, stir in crushed biscuits or nuts, shape into a lined tray, and refrigerate for 3 hours. It's not the setting that chills, but the heat.
Yes, most no-bake recipes are naturally egg-free, as they set by refrigeration rather than baking. Bournville chocolate provides flavor and the fat to bind ingredients.
There is no need for an oven here, as the dessert is set by refrigeration alone after mixing melted Bournville chocolate with strong binders such as condensed milk, crushed biscuits, honey, or dried fruit.
The basic ingredients are Bournville chocolate, condensed milk or cream, crushed biscuits, and nuts or dried fruit if you like. As the mixture cools and solidifies, it is the cocoa solids in the chocolate that give structure.
Covered and kept in the refrigerator, these desserts will last and stay fresh for five to seven days. This is much less when stored at room temperature, as dairy spoils faster unrefrigerated.
If you overheat Bournville chocolate when melting it, it will seize and become grainy rather than smooth. Another common fault is to chill for too short a time, leaving the dessert too soft.
Homemade versions give you complete control over sugar levels and can skip preservatives found in packaged sweets altogether. And the texture is fresher and fudgier too, because it hasn't been sitting on a shelf.
Roll the mixture into truffle balls covered in cocoa, build it up into a fridge cake, or shape it into festive barfi. Every twist keeps the base recipe of Bournville fresh.
The Bournville dark chocolate that is cooking grade melts most evenly and sets firmly, which is most important in no-bake recipes. The reliable texture produces consistent results without any special baking equipment or skills.
Yes, the same chocolate bar goes seamlessly from no-bake treats to traditional baked cakes and brownies. One versatile Bournville chocolate means you don't need to keep multiple specialty ingredients in the house.
Melt Bournville chocolate and butter, mix in the sugar and eggs, stir in the flour, and bake at 180°C for twenty-five minutes. It's still totally done, even with a slightly fudgy center.
To bind the batter naturally, replace eggs with mashed banana, thick yogurt, or a flax-water mixture. Whatever egg substitute you use, the Bournville chocolate keeps the texture fudgy.
Use a heavy-bottomed pot or pressure cooker without a whistle and cook on low heat for twenty-five to thirty minutes. Bournville chocolate still sets into a fudgy center by this hob method.
You'll need Bournville dark chocolate, butter, sugar, flour, eggs or an egg substitute, and a little baking powder. Add walnuts or extra chocolate chunks for texture and crunch (optional).
Brownies will stay moist for three to four days at room temperature or about a week if kept airtight in the refrigerator. Unlike milk chocolate, the cocoa in Bournville helps to keep the crumb moist.
Brownies are either overbaked and therefore dry or underbaked and therefore too raw and gooey to cut neatly. A few minutes ahead of time, tested with a toothpick, gets the perfect fudgy Bournville texture.
The flour and leavening are less than you'd find in a typical cake recipe, which gives it its dense, fudgy crumb. Bournville has a higher cocoa content, and the overall taste is deeper and less sweet.
Serve warm with a scoop of vanilla ice cream, a dusting of cocoa powder, or a drizzle of melted Bournville chocolate ganache. Cutting into shapes makes the presentation fun.
The Bournville dark chocolate cooking bar provides a rich, subtle sweetness to the brownies without taking over the other flavors. Its reliable melt makes every single batch a more predictable batter consistency.
Yes, this same chocolate will work just as well in a brownie batter as it does in a standard chocolate cake recipe. A trusted Bournville bar can help you simplify the process of baking a range of desserts without the need for substitutions.
Melt Bournville dark chocolate and mix with softened cream cheese, whipped cream, and sugar, and pour over a crushed biscuit base. Chill 4 hours or until firm. Slice and serve.
Omit the eggs entirely and set the filling with gelatin or agar instead of baking. This no-bake method keeps the Bournville cocoa flavor but gives a firm, sliceable texture in hours.
Line a tin with a biscuit-butter crust, chill the Bournville chocolate-cream cheese filling, pour it over the crust, and chill for several hours. The setting is by cold temperature, not heat, and by gelatin.
For a classic version, you'll need cream cheese, Bournville dark chocolate, crushed digestive biscuits, butter, and sugar. Whipped cream and a setting agent such as gelatin or agar for a firm, sliceable structure.
It will last for three to four days in the refrigerator in an airtight container. The cream cheese base just falls apart outside of that window, and the Bournville flavor just loses its punch.
A runny filling is generally a result of not enough chilling time or setting agent, and a crumbly base means not enough melted butter. Both problems are solvable by specifying exact ratios.
Bournville's higher cocoa percentage gives this cheesecake a rich, slightly bitter punch rather than the milder sweetness of typical milk-chocolate desserts, creating a denser, more grown-up taste.
Try mini portions in small glass jars, topped with chocolate shavings, a dusting of cocoa, or fresh berries. A drizzle of melted Bournville chocolate on each slice adds an extra visual and flavor impact.
For a classic, Bournville dark chocolate cooking bar is best, melting smoothly and keeping its shape after chilling, with balanced bitterness so the finished cheesecake doesn't taste too sweet.
Yes, the same Bournville dark chocolate bar used here works just as well in cake batter and brownie mixes. It has a consistent melting quality, which makes it a reliable multi-purpose cooking chocolate overall.
Melt Bournville dark chocolate and mix with softened cream cheese, whipped cream, and sugar, and pour over a crushed biscuit base. Chill 4 hours or until firm. Slice and serve.
Omit the eggs entirely and set the filling with gelatin or agar instead of baking. This no-bake method keeps the Bournville cocoa flavor but gives a firm, sliceable texture in hours.
Line a tin with a biscuit-butter crust, chill the Bournville chocolate-cream cheese filling, pour it over the crust, and chill for several hours. The setting is by cold temperature, not heat, and by gelatin.
For a classic version, you'll need cream cheese, Bournville dark chocolate, crushed digestive biscuits, butter, and sugar. Whipped cream and a setting agent such as gelatin or agar for a firm, sliceable structure.
It will last for three to four days in the refrigerator in an airtight container. The cream cheese base just falls apart outside of that window, and the Bournville flavor just loses its punch.
A runny filling is generally a result of not enough chilling time or setting agent, and a crumbly base means not enough melted butter. Both problems are solvable by specifying exact ratios.
Bournville's higher cocoa percentage gives this cheesecake a rich, slightly bitter punch rather than the milder sweetness of typical milk-chocolate desserts, creating a denser, more grown-up taste.
Try mini portions in small glass jars, topped with chocolate shavings, a dusting of cocoa, or fresh berries. A drizzle of melted Bournville chocolate on each slice adds an extra visual and flavor impact.
For a classic Bournville dark chocolate cooking bar is best, melting smoothly and keeping its shape after chilling, with balanced bitterness so the finished cheesecake doesn't taste too sweet.
Yes, the same Bournville dark chocolate bar used here works just as well in cake batter and brownie mixes. It has a consistent melting quality, which makes it a reliable multi-purpose cooking chocolate overall.
You can combine melted Bournville chocolate with a traditional base such as khoya or filo pastry and shape, chill, or lightly fry. This combines traditional Indian sweet-making with the taste of Belgian-style dark chocolate.
Yes, most fusion sweets such as chocolate modak or peda are made with khoya and Bournville chocolate instead of eggs. This is egg-free by default and can be directly adapted to most traditional Indian sweet-making methods.
Many fusion recipes are hob-cooked or set in the fridge and require no oven time at all Bournville chocolate melts easily over direct heat, so it's quick and easy to do hob fusion techniques throughout.
Typical ingredients include Bournville dark chocolate, khoya or mawa, ghee, nuts, and sugar or condensed milk. It directly links the traditional Indian sweet with the contemporary dark chocolate taste.
Fusion desserts contain dairy and must be kept in an airtight container in the fridge and eaten within 3-4 days. Never refrigerate hot preparations until they have cooled to room temperature.
Overcooking the khoya or adding too little fat during mixing often results in a dry and crumbly texture. This is rectified by adding ghee or condensed milk to the moisture to counterbalance the Bournville chocolate.
Fusion desserts combine two culinary traditions, using bittersweet Bournville chocolate and classic mithai techniques to create surprising textures. But the contrast in flavor and method makes them different from single-cuisine sweets altogether.
Chocolate-stuffed modak, chocolate gujiya, or chocolate peda rolled in crushed nuts are popular choices. Each replaces the traditional filling with a Bournville chocolate ganache but retains the classic shape.
The best counter to the natural sweetness of khoya-based mithai is a dark chocolate bar from Bournville with balanced bitterness. It keeps the ultimate sweet from being too sweet or one-dimensional overall.
Yes, the same chocolate can be used for both fusion sweets and traditional baking, making it a truly multi-purpose pantry item. One Bournville bar covers festive mithai as well as daily cake recipes.
Melt a Dairy Milk bar and stir it into softened cream cheese and whipped cream. Spread over a crushed-biscuit base. Chill several hours or until firm. Slice and serve cold.
Go the no-bake route. Use a bit of gelatin to replace the eggs and beat melted Dairy Milk into cream cheese. It sets in the fridge, retaining its rich, creamy consistency.
Melt the Dairy Milk and mix with cream cheese and whipped cream. Pour over the biscuit base and refrigerate for several hours until firm enough to slice.
It is often made with a buttery crushed-biscuit base, whipped cream or condensed milk, cream cheese, and melted Cadbury Dairy Milk chocolate. Sometimes a little gelatin is added to make sure the mixture sets well when it is chilled.
Stored in an airtight container, it will keep in the refrigerator for about three to five days. Because of the rich filling, it's best kept away from strongly scented foods, as the creamy filling tends to absorb the odors of its surroundings.
If your filling is runny, it usually means it hasn't been chilled enough or needs more setting agent. If you add too much sugar on top, you may upset the balance because the chocolate is already sweet.
This cake is made mostly of cream cheese rather than flour, and is dense, cold, and creamy, unlike a baked cake, which is fluffy and light. It is not baked in the oven but cooled and hardened.
Serve in small jars for parties, garnished with chocolate curls or a drizzle of warm caramel. Chilled squares, sprinkled with cocoa, are another easy everyday treat for guests.
The original bar melted into the filling most smoothly, providing a consistent sweetness with no lumps. It's better to keep nut or fruit varieties for topping, rather than to blend them in.
Yes, the same bar melts and bakes well in both cakes and brownies. However, it is good to cut down on the added sugar, since the chocolate is enough.
Melt a Dairy Milk bar, add crushed biscuits or roasted nuts, and once cool enough to touch, roll the mixture into little balls. Chill until set and firm for 1 hour.
Yes, these are made from melted chocolate and dry mix-ins instead of a baked batter, so there are no eggs involved whatsoever, making them an easy, safe treat to make with kids around.
Absolutely, this is a straight-up stovetop-and-fridge recipe. Melt the chocolate slowly, add any add-ins you want, roll into balls once it has cooled, and refrigerate until firm. No oven needed.
For a basic version, you need melted Dairy Milk chocolate, crushed biscuits or cornflakes and a spoon of condensed milk to help bind it all together neatly before rolling it into rounds.
They can be kept in the fridge in an airtight container for about 1-2 weeks. Outside of the fridge, a cool dry place will do, but the freshness won't last quite as long.
A common culprit is overheating the chocolate while melting it, which can cause it to seize and become grainy. And if you roll it before it is sufficiently cooled, the balls will immediately lose their shape.
When you make your own, you get to control the sweetness and use real melted chocolate for a richer flavor. The store bought versions tend to taste sweeter, and use preservatives to have a noticeably longer shelf life.
For variety, roll them in cocoa powder, desiccated coconut or chopped nuts, depending on the coating and texture. A little nut or bit of dried fruit in the middle is also a fun surprise bite.
The plain bar melts the most evenly and gives you a nice smooth base to add your add-ins to. Chopped nut or fruit varieties are good folded into the mixture, not melted completely.
Yes, this is the same melted chocolate you would use for cakes and brownies, and it works just as well for them, although you may want to reduce the added sugar a bit, since the chocolate is already quite sweet.
Gently melt a Dairy Milk bar and stir in a few dry ingredients, such as crushed biscuits or puffed rice; spoon into small molds; and refrigerate for an hour until firm and bite-sized.
Yes, these are just melted chocolate with dry ingredients mixed in and then set in the fridge, so no eggs are involved at any point. This makes them an easy, quick treat to make with kids.
Yes, it's a complete stovetop-and-fridge recipe. No oven needed. Simply melt chocolate gently, add in whatever you want, spoon into small molds or a tray, and chill until set.
A basic version needs melted Dairy Milk chocolate along with crushed biscuits, puffed rice, or chopped nuts for texture. Sometimes a little condensed milk is added to bring the ingredients together a little more neatly.
Stored in a cool airtight container, they will keep fresh for about a week to two weeks. If it's humid or warm weather, refrigeration adds even more to their freshness.
One common mistake is overheating the chocolate while melting it, which can cause it to seize and turn grainy in an instant. Keep the heat low and stir it frequently as it melts so that everything stays smooth.
They are meant to be firm and bite-sized, not like a soft mousse or pudding, so they hold their shape at room temperature and don't require a spoon or become soft and spoonable.
Roll them in cocoa powder, sprinkles, or crushed nuts before they set for better texture and color. They also make a simple homemade gift or party favor when packed in small boxes.
The original plain bar melts the most evenly here, which is a good base for the addition of add-ins. Completely melted works less well than chopped and folded in nut or fruit varieties.
The melted chocolate in this recipe is the same that can be used for cakes and brownies, in fact. You may want to cut back on the added sugar in the recipe a little, though, because the chocolate is pretty sweet by itself.
Butter and sugar are beaten together, then melted Dairy Milk chocolate is added and mixed in. Flour and a raising agent are folded in, and then the mixture is spooned onto a tray. Bake until the edges are golden brown but the centers are still soft.
Yes, a mashed banana or condensed milk is a great egg substitute here, keeping the dough soft and together as it bakes, and you end up with a chewy, chocolatey cookie that doesn't crack.
Roll the dough into small balls and shallow fry in a covered pan on low heat, turning once. That results in an oven-like chewiness, minus the oven.
Most recipes call for flour, butter, sugar, a leavening agent, and chopped or melted Cadbury Dairy Milk chocolate. The milk chocolate is sweetened naturally and with a hint of salt.
Stored in an airtight container at room temperature, cookies will stay crisp and fresh for about a week. Instead, raw dough balls can be frozen and fresh batches baked at any time.
Overbaking dries them out, and they end up crumbly rather than chewy. Adding the standard full amount of sugar to the chocolate, which already contains sugar, could make the cookie too sweet.
Store-bought are firmer and chewier, with more real chocolate flavor, and have no preservatives. When you buy cookies from the store, they usually have some stabilizers in them. This gives them a longer shelf life and also makes them crunchier and sweeter.
Try putting a whole square of chocolate in the center of each ball of dough, or dip the edges in sprinkles before baking. You can also make a yummy treat by sandwiching two cookies with cream.
The best way is to break a plain original bar up into chunks so that each cookie has pockets of melted chocolate. The ones with nuts or fruit give a slightly coarser texture, but don't melt quite as evenly.
Yes, the melted/chopped chocolate called for in this recipe works just as well in brownies and cakes. The only thing I would do is cut back a little on the amount of sugar added since the chocolate is so sweet.
Melt a bar of Dairy Milk with a little butter and condensed milk on low heat, stirring until smooth. Pour into a lined tray and refrigerate for a couple of hours till firm and set.
In fact, it is a naturally egg-free treat that is simple and safe for most people because it is made with melted chocolate, butter, and condensed milk, not eggs.
This recipe is definitely made entirely on the stovetop and in the refrigerator. Lightly combine all ingredients, spoon into a lined tray, and chill until set. No oven required at any point.
It is usually made by melting dairy milk chocolate, butter, and condensed milk, and a little cream is added to increase smoothness. Chopped nuts are often used to give food texture.
It will stay fresh for about one to two weeks stored in an airtight container in the refrigerator. You can also freeze it for long-term storage without changing the texture too much.
This is usually caused by the sugars drying out, either from overheating while melting or cooking too long on the stove. Stir gently over low heat to maintain the soft and creamy texture.
Unlike mousse or pudding, fudge is meant to be thick and solid enough to be cut into neat squares. Its structure comes from sugar and fat, not air or whipped texture.
Swirl in crushed nuts, dried fruit, or a ribbon of caramel before it sets to add additional texture. Additionally, a straightforward marbled appearance can be achieved by layering two chocolate shades.
You either use homemade chocolate or use classic Dairy Milk bar which melts most evenly, so the fudge has a uniform, velvety texture. Nut or fruit varieties are more effective when chopped and folded in at the end.
Indeed, the same melted chocolate that is employed in this recipe is also suitable for baking in cakes and brownies. However, it is advisable to reduce the amount of sugar added, as the chocolate is already quite sweet.
Slowly melt a Dairy Milk bar, then gently stir into whipped cream until well combined. Spoon into small glasses and chill for a few hours or until set into a light airy dessert.
This is true, since the recipe is based on whipped cream and not whisked egg whites, therefore no eggs. It is the cream alone that gives the light, airy texture people expect in a mousse.
Chilling is the only way of setting, requiring no oven. Melt the chocolate and fold it gently into the whipped cream. Spoon into cups and chill until set enough to hold their shape.
A simple version is to whip cream and melt Dairy Milk chocolate (sometimes with a little butter added for richness). A little tiny pinch of salt counterbalances the sweetness nicely.
It keeps for about two to three days in the refrigerator. The whipped texture of this window may start to deflate a bit when it sits for a long time, so it's best enjoyed soon after it's made.
Usually this is caused by not whipping the cream to soft peaks before folding in, or adding the melted chocolate when it's too hot, which can deflate air that has already been whipped into the mixture.
Mousse is known for its light, cloud-like texture; unlike a more firm dessert like fudge, it contains whipped air, not just sugar and fat. This results in a spoonable texture that is considerably softer.
You can also layer it in a glass with crushed cookies for a parfait look or top it with shaved chocolate and fresh berries. The little individual cups make serving at parties much easier.
The plain original bar is one of the smoothest with a consistent creamy taste with no lumps. You could add some fruit or nuts to the mix but it's better to use those types as a garnish.
Mousse is not baked so it is not considered a direct ingredient. But the melted chocolate that is used in this recipe can also be folded into cake batter or brownie mix separately.
Whisk together the milk, sugar and cornstarch over low heat until the mixture thickens, then stir in the melted Dairy Milk chocolate. Pour the mixture into cups and leave to cool in the refrigerator for a couple of hours until it sets into a smooth pudding.
Choose a basic cornstarch and milk base over a custard to eliminate eggs. It is whisked over low heat until it thickens and sets up beautifully in the refrigerator with the same smooth, creamy texture.
Since it is all cooked on the stovetop and then chilled, you don't need an oven. Pour the milk mixture into cups and refrigerate until set enough to serve. Cook the mixture until it is thick.
It usually tastes of melted Dairy Milk chocolate, sugar, cornflour or custard powder and milk. Sometimes a knob of butter is added at the end to add to the shine.
It will stay fresh in the refrigerator for about two to three days. To prevent a thick skin forming on top, press cling film directly on to the surface before chilling.
This usually happens when the cornstarch isn't whisked in smoothly before cooking, or when the mixture is cooked over too high a heat. The result is a lumpy pudding, with an uneven, clumpy consistency.
The gentle stovetop cooking allows the pudding to reach a soft, spoonable consistency, while baking creates a smoother, denser texture that is meant to be eaten with a spoon.
Serve hot in mugs on a cold day. Or chill in small jars, topping with whipped cream and chocolate shavings for a festive, party-ready look that kids often love.
In this location, the plain original bar melts most smoothly into the milk base for a consistent flavor with no lumps. Nuts or fruit are better used as a topping rather than being mixed in.
No, pudding is a cooked dessert, not something you eat with a spoon like a batter. But the melted chocolate here is just as good baked into cakes or brownies separately.
Blend together cold milk, a frozen banana and a few squares of melted or chopped Dairy Milk chocolate until smooth and thick. Pour into a glass and enjoy immediately while cold.
Yes, it's a naturally egg-free drink and quick to prepare, as there are no eggs involved at any stage – it's just blended, not baked or set with a binder.
No oven required at all as everything is blended together. Just blend milk, fruit and chocolate until smooth and pour straight into a glass to enjoy straight away.
A simple version is milk, a banana or other fruit and chopped or melted Dairy Milk chocolate. Some recipes add a spoonful of yogurt for extra thickness and tang.
Best enjoyed fresh, about ten to fifteen minutes after blending, as milk-and-fruit blends tend to separate and lose their smooth, thick texture the longer they sit out at room temperature.
You have to be careful not to blend too warm chocolate or else the smoothie will separate a little bit instead of being all smooth. It's also often not nice and thick, but rather thin, when you omit the frozen fruit.
Homemade versions allow you to control the sweetness and to use fresh fruit and real melted chocolate. Those you buy in a store or bottle are usually sweeter and thinner, with added stabilizers and syrups to give them body.
Add a spoon of peanut butter for a nutty twist or whizz in oats for a more filling version. And topping it with chocolate shavings makes it feel like more of a treat.
The plain original bar mixes most smoothly with no lumps so there is even chocolate flavor throughout. It's better to save a nut or fruit variety as a topping so you do not blend it directly into the drink.
Dairy Milk is suitable for baking cakes and brownies. You can also try making homemade chocolates at home, and use the same chocolate melted separately for cakes and brownies.
Steam a dough of rice flour and hot water until pliable, shape into small cups, fill with a mixture of coconut and jaggery, pleat the edges together, and steam for about ten minutes.
Cook the grated coconut with jaggery on low heat till thick and slightly sticky. Flavour with cardamom powder. Let it cool completely before using to fill modak dough.
In a pan, combine grated coconut, condensed milk, cardamom and cook for a short time until it thickens. Shape into modak using a mould without the need of any dough or steaming at all.
Mix chopped dried fruits like cashews, almonds, and raisins with a little ghee and jaggery, and use this as a filling inside dough modak, or shape it directly into no-cook modak balls.
Rub ghee on a modak mold or your palms. Shape some of the dough or coconut mix with your hands and steam it for a short time in a covered pot with a steamer basket.
Cook the khoya gently with sugar and cardamom until it comes together. Shape into a modak using a mold, chilling briefly if necessary to help it hold its form.
You can cook the grated coconut and jaggery until thick and glossy. Then let it cooldown for some time and use as a rich, traditional stuffing for steamed or fried modak.
For the modak stuffing, you need to heat a heavy pan over low heat and stir together coconut, jaggery, and a pinch of cardamom until it binds and no longer sticks to the sides.
For chocolate variations, a good quality dark or semi-sweet cocoa powder works well blended into the modak dough, giving a rich flavor without affecting the dough's ability to hold its shape.
To fill the modak, the smoothest milk chocolate melts most evenly because it becomes soft and gooey once steamed, but not grainy or separating from the surrounding dough.
Softened chana dal is mashed with jaggery and cardamom to form a smooth filling, which is then stuffed into a soft wheat dough disc, rolled gently, and cooked on a griddle.
Puran Poli is a sweet flatbread filled with spiced lentil and jaggery filling, wrapped in a wheat dough. Traditionally served with ghee and sometimes with a side of warm milk or amti.
Puran Poli Amti is a spiced, tangy dal-based curry that is traditionally served with puran poli. The leftover cooking liquid from the lentils is combined with tamarind and spices to balance.
Store cooled Puran poli in an airtight container at room temperature for a day or two or refrigerate for about four to five days, and reheat gently on a tawa before serving.
Whisk the batter ingredients briefly. Microwave the stuffed dough disc on a microwave-safe plate in short bursts, checking regularly, but a stovetop tawa will generally give better texture and browning.
Add the soaked and cooked chana dal to the jaggery and cardamom and mash until completely smooth to make the traditional Puran, which can be used as a rich, sweet stuffing for the dough discs.
If the filling is watery, cook it further over a low flame, stirring constantly, to evaporate excess moisture. You can also add a spoonful of roasted gram flour to help absorb the liquid.
For a lighter, faster version of Puran Poli with a distinctly tropical, coconut-heavy flavor, swap out some of the traditional dal filling for grated coconut and jaggery, cooked down until it thickens.
For a chocolate version, mix in a good quality dark or milk chocolate cocoa powder into the Puran filling, adding richness without making the mixture too wet to stuff properly.
Any variety of Dairy Milk chocolate melts gently into a coconut-based Puran Poli filling that blends with the dough as it cooks, and adds a mild sweetness that pairs nicely with coconut and jaggery.
Heat the ghee in a pan, add the semolina, and fry over low heat until fragrant and golden brown. Then add the hot water or milk and the sugar and stir until the mixture thickens and becomes soft and grainy.
Sheera is a sweet pudding made from semolina cooked in ghee with sugar and water or milk. It is flavored with cardamom and garnished with nuts and is popular in Maharashtra and other parts of India.
Add diced pineapple and sugar and heat until soft. Fold this into semolina cooked in water or milk to add a hint of fruitiness to the overall sweetness of the dish.
Roast semolina in ghee, then add warm milk instead of water, along with sugar, stirring constantly until it thickens into a richer, creamier version of the traditional Sheera recipe.
Sweet potato, grated or mashed, was roasted with semolina, ghee, and sugar to make a denser, well-combined, and naturally sweeter Sheera variation with an earthy flavor.
Toast whole wheat flour in ghee until it is a deep golden color and fragrant, rather than semolina. You can add water and sugar and stir until thick—a nuttier, denser Sheera.
Use jaggery instead of sugar in equal or slightly more quantity, dissolved in warm water separately before adding to the roasted semolina for a deeper, caramel-like flavor.
Sheera is a sweet dish prepared with sugar and ghee. A typical serving of Sheera contains about two hundred to two hundred and fifty calories. The calorie content depends on the amount of ghee and sugar used in the preparation and the serving size.
For the chocolate sheera, a high-quality cocoa powder works better than melted chocolate, as it blends smoothly without destroying the dish's grainy texture. Any variety of Dairy Milk chocolates can be an ideal option for making chocolate sheera.
Roast semolina with cocoa powder; add chopped dried fruits like almonds, cashews, and raisins to make a rich, textured chocolate dry fruit sheera with a crunch throughout.
Make a puree of ripe bananas and combine with butter, sugar, and eggs. Mix in flour and a small amount of baking soda. Divide the batter evenly between the liners and bake until a skewer inserted in the center comes out clean and the batter is golden.
If you don't have eggs, try adding another mashed banana, yogurt, or a flax egg, as ripe bananas already add moisture and natural binding. This makes the banana cupcake one of the easiest cupcakes to make eggless.
Before baking a banana cupcake, preheat a heavy-bottomed pan or pressure cooker with a stand inside over low heat. Cover and cook for about twenty-five to thirty minutes or until a skewer comes out clean.
For the banana cupcake, you will need ripe mashed bananas, flour, sugar, butter or oil, eggs or a substitute, and a little baking soda to make it rise. Sometimes cinnamon or chopped walnuts are added to improve the texture and warmth.
The banana cupcake will keep fresh for 2-3 days when stored in an airtight container at room temperature, or up to 1 week in the refrigerator. Bananas have natural moisture in it which keeps them soft for a long time.
Under-ripe bananas can lead to a less sweet and moist cupcake. And if the batter is overmixed, it can create too much gluten, which will make the cupcake tough instead of soft and tender once it's baked and cooled properly.
Banana cupcakes are made with mashed ripe bananas to provide natural sweetness and moisture. This makes them denser and more banana-bread-like in texture and flavor than lighter, airier cupcake varieties, as with standard vanilla or chocolate cupcakes.
To create a classic combination, top the banana cupcake with cream cheese frosting. For an added flavor, add caramelized banana slices. Drizzle with melted chocolate and chopped walnuts for a more decadent presentation.
Chocolate and banana create a classic flavor combination, and the natural sweetness of the banana is perfectly complemented by a rich milk or dark chocolate ganache. The sweetness of the cupcake is nicely offset by the mild, pleasant bitterness of the dark chocolate.
You want a good quality milk or dark chocolate that melts well for frosting or drizzling. The banana cupcake flavor really depends on using very ripe bananas, not a particular brand of chocolate.
Combine custard powder and milk to make a base custard, then whisk in cocoa powder or melted chocolate until the mixture is smooth and glossy. Refrigerate until completely chilled or serve warm for a comforting dessert. Adjust sweetness to taste.
Actually, when you use custard powder, chocolate custard is eggless anyway, as the cornflour thickens the milk and eggs aren't needed. This yields a chocolate dessert that is both simple and accessible for people with eggless dietary restrictions.
Chocolate custard is made on the stovetop so that you don't need the oven. All you need to do is simmer together the milk, sugar, cocoa powder, and custard powder until it thickens. Alternatively, it can be served warm or cold.
Chocolate custard needs milk, sugar, custard powder to thicken it, and either cocoa powder or melted chocolate for flavor. Sometimes it is decorated with chocolate shavings or a dusting of cocoa powder.
Chocolate custard will keep for about two to three days in the fridge in an airtight container. If you refrigerate overnight, a thin skin may form on top, so stir well before serving.
When too much cocoa powder is used and the sugar is not compensated for, the chocolate custard will taste bitter, not balanced. Another cause of lumping can be the direct addition of cocoa powder to hot milk without prior dissolution.
The biggest advantage to homemade chocolate custard is that you can determine how strong or how sweet you want the cocoa to be, usually using high-quality cocoa or chocolate. Store-bought chocolate custard may have artificial chocolate flavorings that make the flavor less rich and authentic.
Add a pinch of chili powder for a Mexican twist, fold in orange zest for a citrus contrast, or layer chocolate custard with crushed biscuits for a trifle-style presentation.
A premium-quality couverture dark or semi-sweet chocolate brand melts smoothly into the custard base to leave a rich, glossy finish without any graininess. Choosing a brand with a balanced cocoa content will help in reducing the overall bitterness.
The best results are gained by mixing a good-quality custard powder with a good-quality cocoa powder or couverture chocolate, as both contribute equally to the final flavor and texture rather than using one brand only.
Add the coconut milk or desiccated coconut to the flour mixture and fold into the mixture. Bake in greased cupcake liners until a skewer comes out clean. Cream the butter and sugar. Top with shredded coconut or coconut buttercream.
You can definitely use a mix of yogurt, condensed milk, or a flax egg to bind the batter and keep it stable. These alternatives keep the cupcake moist and tender but still allow it to rise properly in the oven.
Yes, you can improvise an oven using a heavy-bottomed pan or a pressure cooker by placing a stand inside it, preheating it on a low flame, and baking the cupcakes covered for about twenty-five to thirty minutes till they are completely done.
Coconut cupcakes are typically made from a combination of flour, sugar, butter or oil, egg or egg substitute, and coconut milk or desiccated coconut and topped with a coconut-flavored buttercream or a light sprinkling of shredded coconut.
If you frost the coconut cupcake with buttercream, refrigerate it for up to a week, or keep it at room temperature in an airtight container for up to two days. Cupcakes that have been refrigerated may be served at room temperature.
The chief cause of dryness is over-baking. Over-baking is caused by using too much flour in proportion to the liquid. Overmixing the batter can also lead to too much gluten, which results in a denser texture instead of a light crumb.
Coconut cupcakes have a slightly denser, moister crumb and a distinct tropical flavor, coming from the addition of coconut milk or desiccated coconut to the batter. This gives them a richer flavor than the plain vanilla cupcake.
For a piña colada twist, try adding pineapple chunks, swirling in mango puree for a tropical flavor, or topping with toasted coconut flakes and a drizzle of chocolate for an extra layer of texture and flavor.
A natural sweetness of coconut is ideal to be paired with a smooth milk chocolate ganache or drizzle. Dark chocolate offers a nice contrast for those who prefer a slightly more intense, less sweet flavor combination.
The success of the coconut cupcake depends on using fresh coconut milk or desiccated coconut, not on a particular brand of chocolate. But a good-quality milk or dark chocolate brand will work for garnishing.
Bring sugar, milk, and coconut milk to a simmer and then thicken with custard powder or cornflour dissolved in a little cold milk. Chill in individual bowls before serving. Cook until mixture is smooth and glossy.
Yes, coconut custard is naturally eggless if you use custard powder, as it uses cornflour to thicken the coconut milk mixture. This makes it a dessert that is both easy and fairly accessible for those who have dietary restrictions that exclude eggs.
Of course, you don't need an oven to make coconut custard. The whole mixture is cooked on the stovetop with sugar and a thickening agent and then chilled in the refrigerator before serving.
Coconut custard is a dessert that is normally topped with toasted coconut flakes or chopped nuts for texture and flavor. It is made by mixing sugar with custard powder or cornflour as a thickener and regular milk or coconut milk.
Coconut custard will keep in an airtight container in the refrigerator for 2 to 3 days. Give the coconut milk a good shake before serving, as it can separate a little when cold.
If you use too little liquid for the amount of thickener, the coconut custard will come out heavy instead of smooth and creamy. If cooked over high heat too long, the mixture may also become grainy and thicken unevenly.
Coconut custard is not like the traditional vanilla custard, as it has a distinct tropical flavor with a slightly richer texture, which comes from coconut milk. This results in a creamier and more fragrant profile than the traditional dairy-based custard varieties.
You could also try adding pineapple chunks for a tropical flavor, a drizzle of chocolate and toasted coconut flakes for more texture and flavor, or a splash of pandan extract for more fragrance. 9. Which is the best chocolate for coconut custard If you prefer a more pronounced overall flavor combination, then dark chocolate provides a lovely contrast, while a smooth milk chocolate drizzle complements the natural sweetness of coconut.
For garnishing, one can use any good-quality dark chocolate or milk chocolate brand of good repute. But in the end, the taste of coconut custard depends on the quality of coconut milk used and not on a particular chocolate brand.
Prepare a thick custard with custard powder and milk. When the custard has cooled, fold in chopped seasonal fruits such as apples, bananas, and grapes. Let cool in bowls for at least one hour before serving.
Yes, fruit custard is eggless by nature (made with custard powder) and uses cornstarch to thicken the milk instead of eggs. So this is one of the easiest Indian desserts to make without eggs.
Fruit custard, of course, doesn't need an oven, as the custard base is fully cooked on the stove, cooled, then mixed with fresh fruit. It is chilled before serving.
Fruit custard is a dessert prepared by mixing a thickened sweetened custard base of milk and custard powder with a mixture of chopped seasonal fruits like apple, banana, grapes, and pomegranate. It is then chilled and served cold.
Fruit custard can be kept in the refrigerator in an airtight container, where it will stay fresh for about one to two days. It's best to eat bananas immediately after preparing them, as they can turn brown over time.
The texture of fruit custard can be described as dense rather than creamy due to the overly thick custard base, which is a result of the use of custard powder. Adding fruits with high water content such as watermelon can also upset the balance of texture.
Fruit custard is a variation on the plain custard pudding, where a goodly amount of fresh, chopped seasonal fruits are folded directly into the chilled custard base. This results in a more varied texture and a lighter, fresher taste.
If you want a more vibrant flavor, you can try topping the dish with a scoop of vanilla ice cream, adding nuts such as cashews and almonds for a crunch, or incorporating tropical fruits like pineapple and mango.
A light drizzle of milk or white chocolate can be a lovely contrast to the fruity sweetness of fruit custard. But generally the dessert is left unchocolated to let the fresh fruit flavors come through.
The quality of fruit custard depends a lot more on the use of fresh, ripe seasonal fruits and a reliable brand of custard powder than any particular chocolate. If you plan to garnish with chocolate, pick a smooth, good-quality one.
Fold mango puree into a vanilla cupcake base; bake until the base is golden and a skewer comes out clean; then top with mango-flavored buttercream or a slice of fresh mango for a fruity touch.
The eggs can also be substituted with yogurt, condensed milk, or a flax egg mixed with mango puree, and these will also add moisture. This switch keeps the cupcake soft and flavorful without compromising texture or rise.
Place the liner filled with batter in a heavy-bottomed pan or pressure cooker with a stand and cook on low. It will act as a makeshift oven. Cover the dish and bake for about twenty-five minutes until it has reached its full set point.
Mango cupcakes are made from flour, sugar, butter or oil, eggs or substitutes, and fresh mango puree, which is folded into the batter to add flavor and moisture. The cake is often topped with mango buttercream or fresh mango pieces.
Mango cupcakes can be stored in an airtight container at room temperature for up to 2 days or refrigerated for up to 5 days. The mango puree adds moisture, and refrigeration is good for preventing the cupcake from going bad too soon.
If your mango puree is too watery, the batter can be too wet, and your cupcake can turn out dense or sunken. It is a good idea to strain off any excess liquid from the puree ahead of time so that the batter is of the right consistency for baking.
Store-bought versions often contain artificial mango flavoring or concentrate, while homemade mango cupcakes use fresh, seasonal mango puree, which makes for a more natural and vibrant flavor, which can sometimes lead to a less authentic and overly sweet taste.
For a zesty Indian twist, try a mango cheesecake-inspired filling, or layer mango cupcakes with coconut cream for a tropical flavor combination. Or, try pairing mango with a hint of chili or black salt.
The natural sweetness of mango is complemented by a light drizzle of white chocolate, the creamy flavor not competing with the fruit. Dark chocolate may also be more suitable if you want a more contrasting flavor combination.
The suggestion is to use a good quality brand of white or milk chocolate for the garnish, one that is known to melt smoothly. But the use of ripe, fresh mango will ultimately determine the flavor of the mango cupcake, rather than any particular brand of chocolate.
Make a base first using custard powder and milk. Let the custard cool completely, then fold in fresh mango puree for an added flavor and color. Chill, serve cold, then top with diced mango.
Also, it is naturally eggless, as the milk gets thickened with the help of custard powder and not eggs. For those who like or need to avoid eggs, this makes for an easy dessert choice.
The whole custard base is cooked on the stovetop, then cooled and blended with the mango puree, and no oven is required. This is how mango custard is made. Instead of baking, the final mixture is chilled in the refrigerator.
Milk, sugar, custard powder (as a thickening agent), and fresh mango puree (for the flavor and color) are required for mango custard. It is often garnished with diced mango pieces or chopped pistachios to improve the looks and texture.
Mango custard will stay good for about 2 days if kept in an airtight container in the refrigerator. The best flavor and texture are achieved by eating mango puree within this window, as it can change texture over time.
Adding mango puree to hot custard may cause it to curdle or lose its bright color. To get the best results, allow the custard to come to a completely cool temperature before adding the mango.
The homemade mango custard, made with fresh seasonal mango puree, has a natural, vibrant flavor, while the store-bought one often uses artificial mango flavorings, which can lead to an overly bright color and a less authentic taste.
Mango custard can be layered with crushed biscuits for a trifle-style treat, or added to a splash of coconut milk for a tropical twist, or topped with toasted nuts and a drizzle of honey.
A light white chocolate drizzle also works well with the natural sweetness of mango, where the creamy flavor of the chocolate doesn't overpower the fruit. Dark chocolate can also be used for a more contrasting, less sweet combination.
Ultimately the flavor of mango custard depends on the use of ripe, fresh mango rather than any particular chocolate brand. A high-quality white chocolate brand that is known for its smooth melting texture is an effective garnish, though.
Make a thick custard base by mixing custard powder and milk. Set aside to cool. Whisk in the whipped cream to give it a soft, airy, mousse-like texture. Let the contents cool before serving in glasses.
Mousse custard can surely be made without eggs by using custard powder as a base and adding whipped cream, instead of whipped eggs, to get the light, airy texture and structure.
This is a stovetop recipe that does not need to be baked. The custard base is cooked on the stovetop, cooled, and then folded with whipped cream. The final mixture is set only by refrigeration; no baking is required.
Flavorings for mousse custard are normally vanilla, fruit puree, or cocoa powder, depending on what the final flavor profile is. The base is made with milk, sugar, and custard powder; whipped cream is folded in for lightness.
Mousse custard will stay fresh in an airtight container for about 2-3 days in the refrigerator. It has whipped cream, so it is best eaten within that window to keep the light, airy texture.
Adding whipped cream to a warm custard base can cause the cream to deflate or melt, resulting in a denser, less airy texture. Allow the custard to cool completely before adding it to the rest of the ingredients.
You can control the sweetness and flavor intensity of homemade mousse custard because it is made with fresh cream and custard powder. Often stabilizers and preservatives are added to store-bought mousse custards, which can make the custard less delicate and sometimes a little artificial.
Add fruit puree and fold it in to make a fruity mousse custard, or add cocoa powder for a chocolate version. Or, you can layer with crushed biscuits in individual glasses for a stylish, trifle-style presentation.
Mousse Custard folds in a dark or milk chocolate that melts smoothly into the custard base for a rich flavor without sacrificing the light, airy final texture before whipped cream is added.
The best and most consistent results for flavoring mousse custard come from using a reputable, high-quality couverture chocolate brand that is known for its clean, even melting. The final texture is also equally affected by the quality of the fresh cream.
Phirni Popular varieties include classic saffron and cardamom Phirni, mango Phirni made with fresh pulp, and rose-flavored Phirni, all served chilled in traditional clay bowls called shikoras.
Simmer ground rice in milk and sugar till thick, flavoring with cardamom and saffron. Scoop into shallow bowls and chill for several hours, until set, before serving cold.
Sweets mark the end of Ramadan fasting. They mean joy, thankfulness, and celebration. Offering desserts such as Phirni to guests during Eid is a gesture of generosity and helps to foster family and community bonds.
Quick versions use rice flour instead of soaked and ground rice, and while the cooking time is greatly reduced, the texture remains smooth and thickened if chilled properly in the refrigerator.
Phirni will keep in the refrigerator in an airtight container for two to three days. Since it has milk in it, keep it in the fridge and don't leave it out.
Yes, you can cut down the amount of added sugar or replace it with jaggery or even use low-fat milk instead of full-cream milk to make the Phirni a little lighter without compromising on the traditional taste.
Phirni has evolved from a simple rice and milk dessert to include fruit purees, nuts, and modern flavors such as chocolate but is still served in the traditional clay bowl.
Go for mango or strawberry Phirni made with fresh fruit puree, try a saffron rose one for extra floral notes, or layer it with crushed biscuits for texture and crunch.
Phirni works particularly well with Cadbury Dairy Milk Silk, as its smooth, creamy texture mixes easily into the rice pudding base without upsetting its naturally delicate consistency.
Swirl melted Cadbury Dairy Milk chocolate through the Phirni just before it sets or top the chilled dessert with chocolate shavings for an easy, modern chocolate hit.
Seviyan is thin roasted vermicelli cooked with milk, sugar, and ghee, often flavored with cardamom, saffron, and nuts. It remains a much-loved Eid staple in South Asian households, especially in North India and Pakistan.
Roast vermicelli in ghee till golden brown; simmer in sweetened milk with cardamon until slightly thick. Serve warm or chilled, sprinkled with fried nuts, raisins, and a few strands of saffron.
Eid desserts are symbolic of gratitude, celebration, and generosity after a month of fasting. Sharing seviyan and other sweets with family, neighbors, and guests adds to the community spirit during the festival.
You can try classic doodh seviyan cooked in milk, dry seviyan simply cooked in ghee and sugar, or a faster version with condensed milk instead of reducing milk from scratch.
Once cooked, keep the seviyan in an airtight container in the fridge, and it will remain fresh for about two to three days. Reheat gently with a splash of milk before serving.
There are healthier options, like using less ghee, replacing sugar with jaggery or adding low-fat milk instead of full cream milk, and keeping the traditional cardamom and saffron flavorings intact.
Traditional seviyan is made with vermicelli roasted over the flame and milk that is slowly reduced, whereas in modern versions condensed milk is used and vermicelli is pre-made and cooked on the stovetop in less time, without much loss of flavor.
Try mango pulp for a fruity twist, layer the seviyan into a trifle with cream, or freeze it into kulfi-style bars for a refreshing, unconventional presentation.
For a chocolate touch to seviyan, a smooth milk chocolate like Cadbury Dairy Milk grated or melted works well, adding richness without overpowering the delicate cardamom and saffron notes already present in the dish.
For a decadent, contemporary fusion touch, stir in melted Cadbury Dairy Milk chocolate at the end of cooking, or drizzle warm ganache over the finished Seviyan just before serving.
Beat the custard powder with a little of the cold milk into a smooth paste and stir into the sweetened milk and simmer until thickened. Add a good splash of vanilla extract to the dish and serve warm or chilled as you like.
Vanilla custard is eggless by default when prepared with custard powder because the cornflour thickens the milk without the need for eggs. This is one of the easiest and most accessible eggless custard variations to make.
You don't need an oven for vanilla custard; this is made on the stovetop by simmering milk, sugar, and custard powder until it thickens. Now this can be served warm or cold from the fridge.
You will need milk, sugar, custard powder or cornflour to thicken, and vanilla extract or vanilla-flavored custard powder to give it its characteristic flavor. Sometimes it is sprinkled with a light dusting of nutmeg.
Vanilla custard will keep fresh for about two to three days in the refrigerator in an airtight container. When ready to serve, stir the custard well, as a thin skin may form on top when it is chilled.
Generally, lumpy vanilla custard is made by adding custard powder directly into hot milk, not by dissolving it in cold milk. The mixture can also thicken unevenly if it is cooked at too high a temperature.
Cornflour or custard powder is used to give vanilla custard its smooth, pourable texture, unlike puddings, which often use eggs or gelatin. The texture is lighter and silkier, and flavoring can be easily added to suit the dish.
Vanilla custard is a classic, comforting combination for any occasion. Serve it warm over fruit crumble, cool it as a base for a trifle layered with cake and fruit, or pour it over stewed fruit.
A dark or milk chocolate shaving or drizzle adds a visual contrast and richness without overpowering the delicate, all-too-recognizable vanilla flavor of vanilla custard.
If you use a good brand of vanilla custard powder, you will end up with a smooth and lump-free product. Also, any milk or dark chocolate you use to garnish should be from a reliable brand that is known for clean, even melting.
An eggless brownie contains no eggs. They are made using yogurt, condensed milk or buttermilk to bind the batter instead. These brownies still have that fudgy, dense texture minus the eggs.
You need to melt butter with chocolate, then mix in sugar and yogurt. Later, add in flour and cocoa powder. Pour the batter into a greased tin and bake at 180°C for 25-30 minutes, until just set.
A quick eggless brownie recipe can be made in microwave in under five minutes. One-bowl fudgy brownies also come together quickly, which requires minimal ingredients and barely any cleanup afterwards.
Eggless brownies suit vegetarians, those with egg allergies and anyone avoiding raw batter risks. They taste rich and fudgy, and turn out moister since substitutes like yogurt add extra softness.
You need to store eggless brownies in an airtight container at room temperature for up to four days. Refrigerating extends freshness to about a week. You can also freeze individual pieces by wrapping tightly for up to three months if needed.
Yogurt, condensed milk, buttermilk and mashed banana are the common substitutes in eggless brownies. Vinegar mixed with baking soda also helps with rising. Each substitute keeps the brownie moist while maintaining the classic fudgy bite.
Eggless brownies work for vegetarians and those with egg allergies, without compromising on taste. They taste richer since substitutes like condensed milk add extra moisture, making every bite soft and indulgent.
Yes, eggless brownies are simple to make for beginners. The one-bowl method requires no special skills, just mixing wet and dry ingredients together. There's no whisking or tempering involved, making the process easier.
Cadbury's dark chocolate is good to bake rich, fudgy brownies. The chocolate melts smoothly into the batter and gives the intense chocolate flavour brownies are known for, without any bitter aftertaste.
There is no single brand that gives you the best eggless brownies. But you can try baking these at home by using Cadbury's chocolate. Homemade brownies are reliable, making them a trusted pick among eggless dessert lovers.
Some of the most popular Chocolate Day Desserts are chocolate brownies, chocolate lava cake, mousse, truffles, cheesecakes, fudge, cupcakes, chocolate-dipped strawberries, cookies, and chocolate parfaits. These desserts are quite easy to make and are great to share with friends.
A simple recipe for Chocolate Day Dessert is to melt Cadbury Dairy Milk and mix it with fresh cream. Then fold in whipped cream and spoon it into your serving glass. Leave it in the fridge for a few hours and serve it garnished with chocolate shavings/sprinkles.
Sweets are a traditional way to express love, appreciation, and affection on Chocolate Day. Sharing homemade or store-bought chocolate desserts adds a thoughtful touch and makes celebrations with family, friends, or partners more memorable.
Some quick Chocolate Day Desserts that you can easily prepare include Chocolate mug cake, Oreo truffles, chocolate mousse, chocolate bark, no bake cheesecake cups, chocolate covered fruits and fudge.
The shelf life of most Chocolate Day Desserts is of 2 to 5 days when stored in refrigerator in airtight container. The dry desserts like cookies and chocolate bark can be stored even for two weeks.
It is possible to make desserts with low sugar content using dark chocolate, Greek yoghurt, fresh fruits, chia seeds, nuts or natural sweeteners like dates. This will allow to make tasty desserts which will be low in sugar content.
Nowadays Chocolate Day Desserts are not limited to traditional cakes and chocolates anymore. There are now no bake recipes, fusion recipes, healthier recipes, and even desserts made in an unconventional way inspired by other dessert trends around the world and social media.
You can try different variations of the basic Chocolate Day Dessert recipes by adding ingredients like salted caramel, chili, coffee, orange zest, pistachios, peanut butter, matcha, or Indian spices such as cardamom and saffron.
Cadbury Dairy Milk is good for making brownies, cakes, and chocolate sauces, whereas Cadbury Dairy Milk Silk works perfectly for mousses, cheesecakes, and truffles as it gives a rich, creamy texture to desserts.
You can sprinkle your desserts with chocolate chips, garnish them with cocoa powder and chocolate curls, add melted chocolate, or even use chocolate as a sauce layer for desserts.
The traditional list of desserts includes chocolate cakes, brownies, cheesecakes, pies, cookies, cupcakes, tiramisu, doughnuts, and puddings. Homemade sweets will be the perfect addition to your celebration and a great way to spend time with your family.
Select the dessert of your choice, collect all the necessary ingredients, prepare the dough or filling, and cook or cool it according to the recipe. Once your dessert is ready, cool and decorate with any topping: chocolate, nuts, fruits, whatever your dad loves.
Desserts can make your celebration more special with the touch of homemade desserts. It is quite a simple way to thank your dad for his contribution to the life of your family.
Some easy-to-cook desserts which require only simple ingredients include chocolate brownies, no-bake cheesecakes, cupcakes, chocolate mousse, cookie bars, banana bread, and chocolate chip cookies.
Many desserts can be prepared one day or even two days before the celebration. You should wrap them in airtight containers, refrigerate if there are some cream components, or keep dry baked desserts in a cool, dry place till serving.
Greek yogurt parfaits, oat cookies, flourless chocolate cake, chia pudding, fruit crumbles, and date-sweetened brownies are healthier desserts that have less sugar but maintain their rich taste.
It is an interesting idea to give your dessert a modern look, adding spices like cardamom, saffron, coffee, or salted caramel to your classic dessert filling or topping. Also, pistachios or peanut butter can be added to traditional dessert ingredients.
Among desserts that can serve as a nice gift, there are brownies, loaf cakes, chocolate truffles, cookies, fudge, cupcakes, and chocolate bark. Packaged in decorative boxes or reusable tins, they look really attractive.
For making cakes, brownies, and cookies, Cadbury Dairy Milk is a good choice, and Cadbury Dairy Milk Silk is great for rich ganaches, cheesecakes, mousses, and any other dessert fillings.
Use melted chocolate in your dough, add chocolate ganache on top of the dessert, use chocolate chips in the dessert, and garnish with cocoa powder, chocolate curls, or grated Cadbury chocolate.
Some of the traditional desserts that could be made for Friendship Day include cakes, brownies, cookies, cupcakes, cheesecakes, chocolate truffles, and puddings. All of these desserts could be prepared at home and distributed to friends as an expression of appreciation and closeness.
Choose any dessert you like, procure the ingredients for it, prepare the batter/filling of it, and bake/cool it depending on the type of dessert. The desserts could be decorated with frosting, chocolates, sprinkles, or fresh fruits before eating or gifting them to your friends.
Desserts will make the celebrations of Friendship Day more meaningful by getting friends together around something sweet. The sharing of homemade desserts shows love and care for your friends and helps in developing and strengthening bonds.
These are chocolate brownies, no-bake cheesecakes, Oreo truffles, chocolate mousse, cupcakes, cookie bars, and parfaits. These recipes do not require much effort from beginners.
The desserts should be stored in airtight containers to preserve them. Cream-based desserts, such as cheesecakes and mousses, should be stored in the refrigerator. The cookies, brownies, and loaf cakes could be stored at room temperature for several days.
Try Greek yogurt parfaits, fruit salads, dark chocolate energy bites, oat cookies, chia pudding, banana muffins, or date-based truffles. These desserts are made from healthy ingredients, but they also contain sweetness.
The traditional desserts are based on classic homemade recipes, such as cakes and cookies. As for modern desserts, they are more likely to be no-bake, healthy, fusion, or creative, inspired by current dessert trends.
You may experiment with such dessert flavors as coffee, caramel, berries, peanut butter, pistachio, or mint. You may personalize your desserts with coloured frostings, edible messages, or customized toppings.
Cadbury Dairy Milk chocolate is perfect for brownies, cakes, and cookies. As for the creams, mousses, truffles, and chocolate ganaches, it would be better to choose Cadbury Dairy Milk Silk chocolate.
Add the melted chocolate to the batter, garnish the dessert with it, put chocolate chips into the batter, or decorate the dessert with chocolate curls, cocoa powder, or shredded Cadbury chocolate.
Some of the desserts that are made for Halloween Desserts include pumpkin pie, chocolate cupcakes, brownies, cookies, caramel apples, cake pops, ghost-shaped meringues, candy bark, and spooky cheesecakes. All of these desserts are decorated with Halloween theme colors.
Gather the ingredients, prepare the batter or filling, and cook or chill the dessert as required. Once cooled, decorate with chocolate, colorful icing, candies, sprinkles, or spooky toppers to create a Halloween-themed presentation.
Desserts are an important part of Halloween parties, trick-or-treats, and even Halloween family celebrations because of their festive decorations.
Some of the recipes that are beginner-friendly for Halloween Desserts include chocolate brownies, Oreo spiders, ghost cupcakes, chocolate bark, mummy cookies, monster rice cereal treats, and no-bake cheesecake cups. These recipes are easy to make because of their simplicity.
Yes, there are a lot of Halloween desserts that can be prepared one or two days before and stored in an airtight container. The cream-based desserts should be stored in the refrigerator, whereas cookies and brownies should be stored at room temperature.
Some healthy recipes for Halloween Desserts include dark chocolate-dipped fruit, Greek yogurt parfaits, pumpkin chia pudding, oat cookies, chocolate-dipped banana bites, and date-based truffles.
Halloween desserts can be combined with Indian flavors in the form of the addition of cardamom, saffron, coconut, pistachios, or jaggery in brownies, cakes, or truffles. It can also be done by decorating traditional sweet desserts with Halloween designs made out of chocolate.
Chocolate truffles, decorated cookies, brownies, cake pops, fudge, candy bark, and chocolate-covered pretzels make the best Halloween gifts. These gifts can be packed in boxes or treat bags.
Cadbury Dairy Milk is ideal for brownies, cookies, and melted chocolate decorations, while Cadbury Dairy Milk Silk creates smooth ganache, mousse, and rich dessert fillings with a creamy texture.
Chocolate can be used in desserts by using its melted form, drizzling it over cakes, adding it to batters, or using it for decorating desserts by making chocolate spiders, webs, bats, and ghosts.
Gujiya, malpua, thandai, rasmalai, dahi bhalla, laddoo, kheer, and jalebi are some of the popular sweets for the celebration of Holi. Many families love to have chocolate-based desserts for the festival.
Prepare a crispy dough, roll it into small discs, stuff it with a mixture of khoya, sugar, nuts, and cardamom, seal it, and deep-fry or bake it till golden. Serve it once it cools down for best results.
Traditional gujiya is stuffed with sweetened khoya, finely chopped almonds, cashews, raisins, coconut, and cardamom. Some regions also use semolina or chironji stuffing in their gujiya.
Blend soaked almonds, fennel seeds, poppy seeds, pepper, melon seeds, cardamom, and saffron in a mixer and mix it with chilled milk and sugar. Then strain and serve it.
Thandai is traditionally a spiced milk drink without any intoxication. Bhang thandai consists of cannabis leaf paste and thus makes it an intoxicating drink with all other spices.
Yes, traditional thandai is usually prepared without the addition of bhang leaves. The drink is flavored with milk, nuts, seeds, saffron, and various spices, which make it non-intoxicating.
Serve gujiya, rasmalai, malpua, kheer, chocolate brownies, cheesecake bites, mousse cups, laddoos, and colorful cupcakes. These desserts offer a mix of traditional and modern flavors for festive gatherings.
Cadbury Silk is a good option to use in your gujiya, as it will give a rich and creamy texture to the filling of gujiya. You can even add some khoya and nuts to it.
Yes, you can very easily make a chocolate thandai at home by mixing melted chocolate or cocoa powder with the chilled homemade thandai.
For smooth and creamy desserts such as gujiya, mousse, and cheesecakes, one should use Cadbury Silk, whereas Cadbury Dairy Milk is suitable for brownies, cakes, and cookies.
Make festive desserts by mixing melted Cadbury chocolate with cakes, biscuits, fruits, cream, or nuts. Chill or bake, depending on your recipe. Do not allow the chocolate to overheat when melting.
Yes, Cadbury festive desserts can be made without eggs. You will need biscuits, cream, condensed milk, chocolate, and fresh fruits for such desserts. Many Cadbury festive recipes do not have eggs.
Yes, you can make no-bake cheesecakes, chocolate mousse, dessert jars, truffles, or biscuit-based desserts using Cadbury chocolate. Store them in the fridge till they set. It is essential not to reduce chilling time.
The ingredients of Cadbury festive desserts are usually Cadbury chocolate, cream, condensed milk, biscuits, cake, butter, nuts, fruits, and festive toppings. Avoid using overly watery fruits, as they will soften the layered desserts.
Store Cadbury festive desserts in an airtight container in the refrigerator to keep them fresh and with a nice texture. Make sure to eat them within the storage period. It is important not to expose them to heat because chocolate can melt.
Overmixing or overcooking of the ingredients or incorrect proportions can affect the dessert texture. Using too little cream or moist ingredients makes the desserts dry. Make sure not to miss proportions of the ingredients.
Cadbury festive desserts are distinguished from other desserts by their rich, creamy chocolate flavor, festive ingredients, and toppings. Such desserts are usually prepared for special occasions. It is important not to overload the dessert with many different tastes.
It is possible to make chocolate trifles, cheesecakes, mousse cups, brownies, dessert jars, truffles, cookie bars, or parfaits using Cadbury chocolate. Add fruits or nuts to create variation. It is recommended not to add too many toppings to one dessert.
Cadbury Silk is perfect for preparing mousse, cheesecakes, and ganache as it melts smoothly. If you want to bake a cake or cookies, use Cadbury Dairy Milk. If you want to make a cake, use Cadbury Cocoa Powder.
Yes, Cadbury chocolate used in Cadbury festive desserts can be used in cakes, brownies, cookies, and dessert fillings to add rich chocolate flavor. Avoid using Cadbury festive desserts instead of chocolate for cakes.
Mix up softened Cadbury chocolate ice cream with whipped cream, crushed biscuits, and melted Cadbury chocolate. Arrange in dessert glasses and chill before serving. Do not stir for too long since ice cream melts easily.
Yes, many varieties of Cadbury ice cream desserts are eggless. You can create a combination of Cadbury ice cream and brownies, cookies, fruits, and chocolate sauces. Always make sure to read the labels.
Mix together some layers of Cadbury ice cream with biscuit crumbs, chocolate sauce, whipped cream, and fruits in serving cups. Freeze a bit before eating. Do not leave it out for too long before serving.
Some common ingredients include Cadbury chocolate ice cream, whipped cream, chocolate sauce, biscuit crumbs, brownies, nuts, fresh fruits, sprinkles, and caramel. Do not use watery fruits, which will add extra water to the dessert.
Cadbury ice cream desserts should be eaten immediately or stored for 1-2 days in the freezer in an airtight container. Try not to thaw and freeze desserts several times because this process makes ice cream very soft.
A common mistake with these products is allowing the ice cream to fully melt before using it in a dessert. Make sure all the components are kept cool and that the process does not take long.
Homemade Cadbury ice cream desserts are highly customizable when it comes to choosing flavorings, toppings, and the amount of sweetness while using fresh ingredients. Shop-bought desserts offer the convenience of buying.
It is possible to layer Cadbury ice cream with waffles, brownies, cookie crumbs, roasted nuts, fresh berries, caramel, or even peanut butter. Make sundaes or parfaits out of it. Do not add too many flavors into the product.
Cadbury Silk is perfect for preparing mousse, cheesecakes, and ganache as it melts smoothly. If you want to bake a cake or cookies, use Cadbury Dairy Milk. If you want to make a cake, use Cadbury Cocoa Powder.
Yes, Cadbury products can be used in a variety of ways as fillings, toppings, or layers for baking cakes and brownies. These will add a richer taste and offer consistent results in your baked goods.
Blend chilled milk with Cadbury chocolate, vanilla ice cream, and ice cubes together to get the desired creamy texture. Put the mixture into a glass, decorate as you like. Avoid blending for long because the shake can become liquidy.
Milkshake is an egg-free recipe. Use chilled milk, Cadbury chocolate, ice cream, or frozen bananas for a creamy milkshake. Blend until smooth and serve immediately. Avoid adding too much ice, as it dilutes the flavor.
Milkshakes don't require oven cooking. Combine Cadbury chocolate, chilled milk, ice cream, and other flavorings that you like. Blend the ingredients till you receive the creamy consistency. Pour the mixture into glasses and serve immediately. Do not use hot ingredients to avoid melting the ice cream.
The most common ingredients are Cadbury chocolate, chilled milk, vanilla or chocolate ice cream, cocoa powder, whipped cream, and ice cubes. Do not use poor-quality chocolate; it will spoil the whole taste of the drink.
Cadbury milkshakes are most tasty immediately after mixing the ingredients. However, in case you need to store it, put the milkshakes into the refrigerator in a covered container for one day. Stir the mixture before you will eat it.
Too many ice cubes, insufficient blending, or improper ingredient proportioning can spoil the texture and taste of the shake. You should always use chilled ingredients to achieve the necessary consistency. Also, too much liquid can spoil the taste of the shake.
Cadbury milkshakes are creamy drinks that combine chocolate and milk into a refreshing treat, unlike spoonable desserts. They are quick to prepare and easy to customize. Avoid overloading them with extra sweeteners.
Decorate Cadbury milkshakes with whipped cream, chocolate pieces, cookie crumbs, sprinkles, caramel sauce, and mini marshmallows. The drink should be served in cold glasses. Do not use toppings that will get wet and soft during preparation.
Cadbury Silk is perfect for preparing mousse, cheesecakes, and ganache as it melts smoothly. If you want to bake a cake or cookies, use Cadbury Dairy Milk. If you want to make a cake, use Cadbury Cocoa Powder.
Yes, Cadbury products can be used in a variety of ways as fillings, toppings, or layers for baking cakes and brownies. These will add a richer taste and offer consistent results in your baked goods.
The preparation involves blending the Cadbury Dairy Milk chocolate with crushed biscuits, condensed milk, and butter, molding them into the desired shapes, and refrigerating till it gets chilled before cutting.
There exist several ways of preparing the no-bake desserts without the use of eggs. The recipes involve the use of chocolate, biscuits, cream, condensed milk, cream cheese, or yogurt.
The procedure involves layering the melted Cadbury chocolate with biscuits, whipped cream, fruits, or cream cheese, then refrigerating it until it gets firmly settled.
Common ingredients include Cadbury Dairy Milk chocolate, biscuits, butter, condensed milk, cream, cream cheese, cocoa powder, nuts, and fresh fruits. Avoid using ingredients that contain water because they will make the desserts unstable.
They remain fresh for up to three to five days when stored in the refrigerator and in an airtight container. Some recipes allow freezing. Avoid exposing them to the air because they will absorb other foods' odors in the fridge.
Incorrect proportions of the ingredients or failure to give sufficient time to settle usually causes them to remain soft and unstable. Carefully measure the ingredients and give enough time for settling. Avoid using too much water content, which would prevent them from getting firm.
The difference is that the homemade ones contain fresh ingredients, and you can modify their taste according to your preferences. Store-bought desserts concentrate more on convenience. Avoid over-complicating the recipe of the homemade dessert.
The variations include making the dessert jars, chocolate cheesecakes, biscuit bars, mousse cups, parfaits, or truffles using the Cadbury chocolate. Caramel, berries, coffee, or roasted nuts can be added. Avoid combining too many flavors together.
Cadbury Silk is perfect for preparing mousse, cheesecakes, and ganache as it melts smoothly. If you want to bake a cake or cookies, use Cadbury Dairy Milk. If you want to make a cake, use Cadbury Cocoa Powder.
Yes, Cadbury products can be used in a variety of ways as fillings, toppings, or layers for baking cakes and brownies. These will add a richer taste and offer consistent results in your baked goods.
Begin by melting the Cadbury chocolate with milk and cream. Mix in your preferred thickener or pudding base. Pour into serving bowls and leave it to cool till it sets. Do not overheat the Cadbury chocolate since it becomes grainy.
To make a pudding without eggs, use milk, Cadbury chocolate, cornflour, sugar, and cream. Cook until the mixture sets, then let it cool before serving. Watch out how much cornflour you use because if you use too much, the pudding will be rubbery.
Cadbury pudding is an egg-free recipe. Cook the milk, Cadbury chocolate, sugar, and cornflour over a stove until the mixture sets. Then divide it into portions and put it in the fridge. Be careful not to use high temperatures while cooking so that it does not burn.
Ingredients commonly used include Cadbury chocolate, milk, cream, sugar, cornflour or custard powder, vanilla, and butter. Some recipes also include biscuits and fruits. Never use low-fat dairy products.
Cadbury puddings can be stored in the fridge for about 2 or 3 days in an airtight box. It is recommended to serve them cold. Do not store them at room temperature.
Puddings could be too thin due to improper cooking or too thick due to using excessive amounts of cornflour. Overheating of Cadbury chocolate affects the pudding's consistency. Avoid incorrect measurements and improper cooking.
Cadbury Puddings are special since they provide a creamy texture along with a rich chocolate flavor. They are also simple to prepare and suitable for various events. Avoid making them taste like other desserts.
When serving your Cadbury pudding, decorate it with whipped cream, chocolate chips, crushed biscuits, fresh fruits, caramel, or nuts. You can also decorate it in dessert glasses. Try not to use decorations that will go soggy soon.
Cadbury Silk is perfect for preparing mousse, cheesecakes, and ganache as it melts smoothly. If you want to bake a cake or cookies, use Cadbury Dairy Milk. If you want to make a cake, use Cadbury Cocoa Powder.
Yes, Cadbury products can be used in a variety of ways as fillings, toppings, or layers for baking cakes and brownies. These will add a richer taste and offer consistent results in your baked goods.
For the cheesecakes, crush digestive biscuits with melted butter and put them in a pan. Mix the rest of the ingredients: cream cheese, whipped cream, melted Cadbury Silk, sugar, and vanilla to blend together. Apply this on the base and chill before serving.
Yes, since the main ingredient of this cheesecake is Cadbury Silk, it is quite easy to make eggless Cadbury Silk Cheesecakes.
The cooking process is quite simple, just mix the ingredients for the base, spread the filling, and chill in the fridge for several hours. There is no need for an oven, as the dessert will set during the process of chilling.
To prepare delicious cheesecakes, one needs digestive biscuits, melted butter, cream cheese, fresh cream or whipping cream, Cadbury Silk chocolate, powdered sugar, vanilla extract, and chocolate curls or cocoa powder to decorate them.
If you store them in an airtight container in the fridge, Cadbury Silk Cheesecakes will be fresh for 3 days. Remember to chill them till serving to keep their texture.
It is a common mistake to pour warm, melted chocolate directly into cold cream cheese, which can create lumps. Melt the chocolate, leave it to cool, and give it enough time to chill and set properly.
You can make your own cheesecakes by controlling the sweetness, amount of chocolate, and even adding other toppings as you wish. Also, homemade Cadbury Silk Cheesecakes will taste much fresher.
These cheesecakes can be decorated with fresh berries, caramel, crushed Oreos, nuts, brownie pieces, chocolate chips, or cookie crumbs. Even jars or mini-cakes will look nice at a party.
Cadbury Silk is a great choice for making creamy cheesecakes, mousses, and pudding. As for cooking cakes, use Cadbury Dairy Milk. For making brownies and chocolate cookies, use Cadbury Cocoa Powder.
Yes, Cadbury Silk will add a unique taste to your cakes and brownies and will give them a creamy texture and chocolatey taste.
Combine chilled milk, Cadbury Silk chocolate, vanilla ice cream, and ice cubes in a blender. Then pour the mixture into a glass and top it off with whipped cream, chocolate sauce, or chocolate flakes.
Yes, Cadbury Silk Milkshakes are eggless as they are made by combining milk, Cadbury Silk chocolate, and ice cream or cream. To make your milkshakes creamier, add fresh cream to them.
A milkshake recipe does not require an oven. Cadbury Silk Milkshakes are made using a blender. Only melted chocolate, chilled milk, and ice cream are required to prepare a rich chocolate drink.
The basic ingredients include Cadbury Silk chocolate, chilled milk, vanilla or chocolate ice cream, ice cubes, chocolate syrup, whipped cream, and any topping of your choice such as chocolate chips or Oreo crumbs.
Cadbury Silk Milkshakes taste best while freshly prepared. But if needed, you can keep them in a sealed bottle or container for up to 24 hours in the refrigerator and stir well before consuming.
Using warm milk or too many ice cubes reduces the taste of the milkshake and makes it very thin. Excessive blending reduces the creamy consistency of the milkshake.
The homemade variety of Cadbury Silk Milkshakes is much fresher than those available in stores. You can adjust the sweetness and consistency and add ingredients of your own choice. Also, they don't contain artificial flavors or preservatives.
Add elements such as coffee, peanut butter, caramel sauce, banana, Oreo, mint, hazelnut spread, or fresh fruits. You can rim your glass with chocolate syrup and decorate it with sprinkles to increase its festive appeal.
Cadbury Silk is perfect for preparing mousse, cheesecakes, and ganache as it melts smoothly. If you want to bake a cake or cookies, use Cadbury Dairy Milk. If you want to make a cake, use Cadbury Cocoa Powder.
Yes, Cadbury Silk chocolate is perfect for baking of all kinds, including brownies and cakes. It gives a rich chocolatey taste and blends well in batter.
Simply melt Cadbury Silk chocolate and allow it to cool. Fold it into whipping cream and flavor it with vanilla to prepare a delicious mousse to be served chilled with chocolate curls or berries.
Absolutely! Whipping cream, melted Cadbury Silk chocolate, and vanilla will give you an extremely flavorful mousse that becomes light and airy after just a couple of hours chilling in the fridge.
Yes, there is no need for an oven to prepare this dessert. All you will need to do is melt the chocolate, mix it with whipped cream, and chill the mixture until it becomes set.
There is usually Cadbury Silk chocolate, whipping cream, vanilla extract, and any topping like cocoa powder, chocolate curls, berries, or crushed nuts to flavor and decorate Cadbury Silk Mousse.
Keep it covered in the refrigerator in an airtight container or in covered serving glasses. It can stay fresh in the fridge for up to 3 days.
Excessive whipping of the cream or vigorous mixing may result in a dense mousse rather than an airy one. Mixing hot chocolate may also affect the consistency of your dessert.
The main difference between Cadbury Silk Mousse and pudding or ganache is that Cadbury Silk Mousse has a light and airy texture thanks to whipped cream, as well as a smoother taste due to Chocolate Silk.
Try adding coffee, orange zest, crushed Oreos, caramel, peanut butter, hazelnut spread, and fresh berries. Layering Cadbury Silk Mousse with crumbled cake or biscuits will give you a really yummy treat.
Cadbury Silk is perfect for preparing mousse, cheesecakes, and ganache as it melts smoothly. If you want to bake a cake or cookies, use Cadbury Dairy Milk. If you want to make a cake, use Cadbury Cocoa Powder.
Yes, Cadbury Silk chocolate is great for preparing cakes, brownies, and dessert filling, as it melts smoothly and gives a nice chocolate flavor to the dessert.
To prepare Cadbury Silk Puddings, melt the chocolate in warm milk, then add cornflour, sugar, and fresh cream, and cook. Let it chill for a while, then serve in bowls.
Yes, you can prepare Cadbury Silk Puddings without eggs. Cornflour will help to make the thick mixture, and the fresh cream along with melted Cadbury Silk chocolate will give the desired smoothness.
It is not necessary to bake Cadbury Silk Puddings in an oven. Just cook the pudding mixture on the stove and cool in the refrigerator.
The main ingredients used in Cadbury Silk Puddings are Cadbury Silk chocolate, milk, fresh cream, cornflour, sugar, vanilla essence, and toppings like cocoa powder, chocolate shavings, fruits, and nuts.
Homemade Cadbury Silk Puddings can last for up to 3 days. Refrigerate it in a tight container. Avoid leaving it at room temperature before serving.
If you put cornflour straight into the mixture without dissolving it, or if you increase the heat too much when cooking the pudding, it may develop lumps.
The difference between homemade and store-bought Cadbury Silk Puddings is that homemade preparation tastes better, and you can adjust the sweetness to your preferences.
Layer this pudding with biscuits, brownies, caramel, roasted nuts, peanut butter, coffee, and fresh fruits. You can also serve this pudding in dessert jars to get an elegant look.
If we want to make desserts, Cadbury Silk chocolate is the most suitable option because it is smooth and delivers a rich, creamy chocolate flavor.
Yes, Cadbury Silk Chocolate is a great option for baking cakes and brownies as it gives rich chocolate flavor and makes the baked items moist and smooth.
Warm fresh cream and mix it with chopped Cadbury Silk chocolate. Blend everything until smooth, let it cool slightly, then shape into equal pieces. Then shape them into round balls and dust with cocoa powder, nuts, or sprinkles.
Yes, Cadbury Silk Truffles do not include eggs. They consist of Cadbury Silk chocolate and cream, being easy-to-make sweet treats with a velvety texture.
Yes, Cadbury Silk Truffles do not require any baking. The chocolate mixture is prepared on the stove or in the microwave, cooled, and rolled into small balls.
Cadbury Silk Truffles are made from Cadbury Silk chocolate, fresh cream, butter, and additions like vanilla or coffee. Also, they are covered with cocoa powder, nuts, desiccated coconut, or chocolate sprinkles.
Store Cadbury Silk Truffles in the fridge in an airtight container for about seven days. Take them out of the refrigerator and keep at room temperature for several minutes before serving. Do not store in humid places.
Dryness and firmness can result from an excessive amount of chocolate and an insufficient amount of cream in the recipe. Also, overheating of the chocolate can negatively affect the texture. It is better not to mix the ganache excessively and use accurate measurements.
The Cadbury Silk Truffles contain creamy ganache inside and have a delicious, mouth-melting texture. Compared to other sweets such as fudge and chocolate balls, Cadbury Silk Truffles contain much more cream and are therefore softer.
Zest of oranges, espresso powder, sea salt, hazelnut paste, peanut butter, and crushed cookies may be added to the filling. The truffles may be covered with pistachio nuts, freeze-dried fruits, and cocoa powder. Watery components that might cause the mixture to separate should be avoided.
Plain Cadbury Silk chocolate is perfect for use in desserts as it easily melts, forming a ganache. This kind of chocolate is suitable for mousses, cheesecakes, and other dessert fillings. Blooming chocolate should be avoided.
Yes, Cadbury Silk chocolate may be used for cake and brownie baking, as it gives a great taste and texture. Chocolate may also be used for ganache and frosting. Overheating of the chocolate may cause it to become grainy.
Chocolate cake, brownie, cupcake, lava cake, chocolate cookie, truffle, mousse, cheesecake, and fudge are the usual Cakes & Baked Desserts prepared on Chocolate Day. These sumptuous treats are usually served to loved ones on this day.
Collect the ingredients and mix them into batter or dough, place it into the tin and bake until the dessert is cooked. Leave the dessert to cool down and then decorate with frosting, chocolate, fruits, etc.
Desserts make Chocolate Day more special by bringing people together over something sweet. They are commonly exchanged as gifts, served at gatherings, and enjoyed as a simple way to express love and appreciation.
Recipes for cakes & baked desserts such as chocolate cupcakes, brownies, vanilla sponge cake, banana bread, chocolate chip cookies, and marble cake are good choices for beginners as they include easy techniques and require only basic ingredients.
Yes, most cakes and baked desserts can be prepared the day or two prior to the occasion. They should be stored in a sealed container in a dry place, or refrigerated if the recipe includes cream.
Choose oat muffins, whole wheat banana cake, flourless chocolate cake, Greek yogurt loaf, apple cinnamon muffin, or date brownies that will allow you to limit the amount of refined sugar but still enjoy a tasty dessert.
Cardamom, saffron, rose, coconut, jaggery, or pistachio can be added to any usual cake or brownie, thus giving you a chance to create an amazing fusion treat by combining traditional Indian ingredients with a dessert.
Loaf cakes, brownies, cookies, cupcakes, tea cakes, chocolate muffins, and fruit cakes are perfect for gifting. You can wrap the dessert in a festive box or tin to preserve its freshness.
Cadbury Dairy Milk is suitable for cake batters and brownies, whereas Cadbury Dairy Milk Silk is used for creating creamy frostings, ganaches, cheesecakes, and dessert fillings.
Melt chocolate and add it into the batter, sprinkle chocolate chips in the dessert, drizzle the dessert with chocolate ganache, or decorate it with cocoa, chocolate curls, and grated Cadbury chocolate.
Khoya gujiya is still the most popular one, but there are coconut gujiya, dry fruit gujiya, mawa gujiya, chocolate gujiya, baked gujiya, and rose-flavored gujiya as well. These variations are popularly enjoyed during Holi.
First, prepare a dough using flour and ghee. Roll into small discs. Fill the center with sweetened khoya and nuts along with cardamom, seal the edges, and fry until they turn golden brown. Dip them in sugar syrup for a coating.
Sweets and dessert beverages symbolize joy, prosperity, and togetherness during Holi. Sharing them with family, friends, and guests is a cherished tradition that adds warmth to the celebrations.
One can cook chocolate gujiya, coconut gujiya, dry fruit gujiya, baked gujiya, or even air-fried gujiya. The usage of ready-made pastry sheets will save your time as well.
Khoya gujiya can last from 2 to 3 days at room temperature in an airtight container or even a week if it is stored in a refrigerator. Always keep gujiya in a dry and cool place.
There are some low-sugar gujiya recipes as well; simply replace sugar with dates, jaggery, or other natural sweeteners. In addition, you can use whole wheat flour instead of maida and add nuts, seeds, or coconut.
While khoya filling is still very popular, now there are a lot of new flavors that can be used to make gujiya, such as chocolate, dry fruits, cookies, and even combinations. There are also baked and air-fried gujiya.
Try to create your own gujiya with a filling of Cadbury chocolate, brownie crumbs, caramel, pistachios, coffee, Biscoff spread, and fresh coconut. It will also be nice to coat gujiya with melted chocolate or decorate them with sprinkles.
The best choice of Cadbury chocolate that can be used for gujiya is Cadbury Silk, as it blends nicely with khoya and nuts. You can even use Cadbury Dairy Milk or Bournville.
Add melted Cadbury Silk to the khoya filling or just drizzle melted Cadbury Dairy Milk onto your fried gujiya. Also, you can cover half of the gujiya with chocolate and sprinkle it with nuts.
Falooda trifle, thandai mousse, kulfi shakes, badam milk, rose milk, mango shakes, and chocolate milkshakes are some of the popular Holi beverages and desserts relished during the festive celebration.
Make a festive drink by mixing chilled milk with ice cream, nuts, saffron, and cardamom. Melted chocolate or fresh fruit could also be added to make a dessert-style beverage.
Sweets and dessert beverages symbolize joy, prosperity, and togetherness during Holi. Sharing them with family, friends, and guests is a cherished tradition that adds warmth to the celebrations.
Prepare thandai, rose milk, chocolate milkshake, mango lassi, banana shake, kesar pista shake, or cold coffee. These are festive drinks that take only a short time to prepare.
The majority of homemade Holi beverage desserts can last for up to 24 hours when refrigerated in covered containers. It is advisable to consume them on the day they are made for maximum flavor and quality.
There are numerous ways of preparing low-sugar Holi beverage desserts. These include using fresh fruits, dates, honey, or jaggery. Other ingredients used to reduce their caloric content include low-fat milk and yogurt.
Over the time, traditional Holi beverages such as thandai and lassi are nowadays being prepared using ingredients such as chocolate, coffee, cookies, fruits, and ice cream.
You may consider chocolate thandai, Oreo lassi, rose chocolate milkshake, mango saffron smoothie, coffee falooda, or brownie milkshake. They reflect the fusion of flavors while remaining festive.
Cadbury Silk will suit your Holi beverages and desserts better because of its smooth melting and rich creaminess for such drinks. Cadbury Dairy Milk will also maintain the balance of flavors.
You can add melted Cadbury Silk or Cadbury Dairy Milk with chilled milk, ice cream, or thandai. Such preparation can be decorated with whipped cream, chocolate sauce, or cocoa powder.
These shakes are refreshing milk-based drinks made according to flavors related to the festival, such as thandai, kesar pista, rose, and dry fruits. These shakes are usually consumed cold to celebrate the festival with your loved ones.
Blend chilled milk with your favorite ingredients such as nuts, fruits, ice cream, or chocolate. Add sugar or honey to taste, pour into glasses, and serve immediately with festive toppings.
Desserts are a symbol of happiness, prosperity, history and tradition celebrated during the Holi festival. People prepare them at their homes and offer them to the guests to celebrate this festive season.
There are many options available, like thandai shake, mango shake, rose shake, kesar pista shake, banana shake, strawberry shake, chocolate shake, and dry fruit shake. Such recipes can be easily made and require simple ingredients.
These shakes should preferably be made fresh. But if needed, these shakes may be stored in the refrigerator in a bottle or jug for up to 24 hours. Shake them well before consuming.
Low-fat milk, yogurt, fresh fruits, dates, nuts, seeds, or even natural sweeteners like honey may be used for making these healthy shakes.
Traditional Holi shakes are prepared using saffron, nuts, and spices, while modern shakes are prepared using chocolate, cookies, coffee, fruits, or ice cream, adding a modern touch to the traditional Holi drinks.
Some easy variations include chocolate thandai, Oreo shake, banana chocolate shake, rose pistachio shake, mango saffron shake, coffee shake, and mixed berry shake. These shakes can be easily made and are perfect for the festive occasion.
Cadbury Silk is one of the chocolates that can be used for preparing the Holi shakes because of its smoothness with milk. One can also use Cadbury Dairy Milk to make a rich-flavored drink.
Melt Cadbury Silk or Cadbury Dairy Milk with chilled milk and ice cream, along with a little amount of cocoa powder, and then top it with chocolate syrup and whipped cream.
Combine flour, milk, sugar, and cardamom to form a batter and leave for 20 to 30 minutes. Deep-fry small pieces in ghee till golden brown, dip them in warm sugar syrup, and enjoy your sweet malpua with rabdi or nuts.
Malpua is an Indian traditional sweet prepared by deep-frying a soft batter of flour and soaking it in sugar syrup. Malpua is popular during festivals and occasions like Holi and Diwali.
Use whole wheat flour instead of refined flour and combine with milk, sugar, fennel seeds, and cardamom. Deep-fry spoonfuls of batter and soak in sugar syrup after being crisp on the sides.
Prepare a batter by combining flour, milk, fennel seeds, and sugar. Deep-fry till golden brown and soak in light sugar syrup. Bengal- style Malpua is usually served with thick rabdi.
First, prepare malpuas and soak them in sugar syrup. Then decorate them with rabdi, which should be properly chilled. Garnish with chopped pistachios, almonds, saffron, and serve immediately.
Prepare batter by mixing semolina, flour, milk, sugar, and cardamom. Keep the batter for some time to make the semolina soft. Take spoonfuls of batter and deep-fry them, then soak them in sugar syrup after frying.
Mash ripe bananas and mix them with flour, milk, sugar, and cardamom to form a batter. Fry the batter till golden brown and soak it in sugar syrup.
Boil sugar and water in equal quantities until sugar dissolves completely. Add cardamom, saffron, or lemon juice if you like and keep on simmering until the syrup becomes a little sticky.
Good-quality milk or dark chocolate works best because it melts smoothly and complements the sweetness of malpua. Couverture chocolate gives a glossy finish, while Cadbury Silk creates a rich, creamy topping.
Cadbury's range of chocolates works great for chocolate banana malpua. It combines perfectly well with bananas and creates the most delicious combination. Alternatively, you can use dark chocolate.
Eggless pudding is a soft, creamy dessert made without eggs, using milk, cornstarch, or condensed milk to achieve its signature texture. It comes in flavors like vanilla, chocolate, caramel, and butterscotch.
To make eggless pudding at home, mix milk with sugar and cornstarch over low heat, stirring continuously until the mixture thickens to a smooth, custard-like consistency. Then pour it into serving bowls and chill until it is set before serving.
Chocolate pudding, butterscotch pudding, and caramel pudding are some of the popular choices that can be made without any eggs. Each of these recipes uses cornstarch or condensed milk to get the classic smooth, creamy texture.
Eggless pudding is suitable for anyone who avoids eggs for dietary reasons or preferences. But the pudding still tastes rich and creamy. Eggless pudding is also quick to prepare, needing just a stovetop and some chilling time.
Eggless pudding stays fresh for about three to four days when it is stored and covered in the fridge. Keeping a layer of cling film pressed directly on the surface will help prevent a skin from forming on top.
Milk, sugar, and a thickening agent like cornstarch or custard powder form the base of most eggless puddings. Flavorings like cocoa, vanilla, or caramel are added depending on which variety you're making.
Eggless pudding has a smooth, custard-like texture that sets it apart from cakes or baked desserts. It is also served chilled, which gives it a light, refreshing quality compared to heavier treats.
Not stirring the mixture constantly as it thickens can lead to lumps in the pudding. And skipping the chilling time or rushing it can also leave the pudding too soft to hold its shape.
Cadbury Bournville is the best chocolate for eggless pudding because it melts smoothly into it. While Cadbury Crackle can also work, as it adds a light, crispy texture if added at the end. Both work well depending on your preference.
There is not one single best brand for eggless pudding. Using good-quality milk, a trusted chocolate brand like Cadbury, and fresh ingredients will give you the best homemade eggless pudding.
Shrikhand is a classic Gujarati Indian sweet made with thickened yogurt, dry fruits, and saffron. Shrikhand is often prepared for celebrations and is considered a festive dessert.
Firstly, prepare fresh curd, tie it in a muslin cloth, and let it drain out the whey water until it thickens. Mix sugar, saffron, and dry fruits of your choice, whip the curd until smooth and creamy, and cool it before serving.
It is made of thickened yogurt, dry fruits, sugar, cardamom, and saffron.
Add mango pulp and fresh mango and follow the same process as making regular shrikhand.
To sweeten Shrikhand naturally, you may opt for wholesome and organic alternatives such as jaggery, raw honey, or some maple syrup. However, using powdered jaggery is better as liquid sweeteners often thin out the thick consistency of Shrikhand.
You can add some whipped cream, a spoonful of condensed milk, or milk powder to make the shrikhand thicker. If it hasn't reached that consistency yet, avoid blending it and allow it to set for 1-2 hours before consumption.
Strain the water content properly from the curd by wrapping it in a muslin cloth and hanging it over a bowl for 2-4 hours; that way, the whey content will be completely removed.
It depends on the preference of the person consuming it, whether they want to balance out the sweetness of shrikhand with dark chocolate or to make it creamier by adding in milk chocolate instead.
For a fusion chocolate amrakhand or shrikhand, the best chocolate is a premium semi-sweet or dark chocolate (54% to 55% cocoa).
Chocolate with 35-55% cocoa, mildly sweet and dark chocolate would work best with dry fruit shrikhand as it won't overpower the slight sourness and sweetness of shrikhand while still being able to feel the crunch from the dry fruits.
The best seasonal desserts highlight fresh ingredients available throughout the year. Spring often features berries, summer showcases mangoes and peaches, autumn includes apples and pumpkins, while winter desserts commonly use citrus, nuts, and warm spices for rich flavor and vibrant color.
Making seasonal desserts at home starts with selecting fresh produce that is naturally available during the current season. Combine these ingredients with simple baking or no-bake techniques to create delicious treats that offer fresh flavor, attractive color, and a homemade touch.
Store seasonal desserts according to their ingredients. Refrigerate desserts containing fresh fruit, dairy, or cream in airtight containers, while dry baked treats can often be kept at room temperature in a cool, dry place to maintain their flavor, texture, and color.
Seasonal fusion desserts combine traditional recipes with modern ingredients or international influences. For example, pair fresh seasonal fruits with puddings, cheesecakes, parfaits, or pastries to create unique flavor combinations, eye-catching color, and creative desserts suitable for every occasion.
Choose chocolate that melts evenly, complements seasonal ingredients, and provides balanced sweetness. A high-quality chocolate with smooth texture, rich flavor, and deep color works well with fruits, nuts, spices, and creamy fillings in a variety of seasonal dessert recipes.
Select desserts based on the ingredients and weather of each season. Light fruit-based recipes are refreshing during warmer months, while baked puddings, spice-infused treats, and rich chocolate desserts are often a favorite during cooler seasons for their comforting flavor.
Some of the easiest seasonal desserts include fruit salads, yogurt parfaits, no-bake cheesecakes, puddings, crumbles, baked fruits, and simple cakes. These recipes require minimal preparation while highlighting fresh seasonal ingredients with delicious flavor and natural color.
Seasonal ingredients influence the sweetness, moisture, texture, flavor, and color of desserts. Fresh fruits, vegetables, herbs, and spices available at their peak often improve the overall taste, reduce the need for extra ingredients, and create naturally vibrant dessert recipes.
Many seasonal desserts can be prepared in advance, including cheesecakes, puddings, brownies, dessert bars, fruit compotes, mousse, and baked pies. Preparing them ahead allows the flavors to develop while making festive gatherings and special occasions easier to organize.
Easy homemade seasonal desserts include fruit crisps, baked apples, mango puddings, berry parfaits, chocolate mousse, banana bread, pumpkin cakes, and chilled custards. These recipes use readily available ingredients and simple methods to deliver wonderful flavor, beautiful color, and satisfying homemade results.
Take your base ingredient, whether it's fruit, milk, or chocolate; add sugar; mix well; and chill or cook briefly as needed. Most simple desserts require only a few steps.
For quick desserts, leave the stove and oven behind with no-cook, no-bake prep that involves mixing, layering, and chilling ingredients until firm.
Baking, steaming, no-bake chilling, frying, or stovetop simmering are popular methods. Each is appropriate to different kinds of desserts depending on texture, richness, and time or equipment available.
Whipped cream for mousses and frostings, cream folded into batters for moisture, and cream as a base for ganache: cream adds richness, airiness and a smooth mouthfeel to desserts.
Homemade desserts are particularly suited to no-bake, no-cook preparation because it requires the least amount of equipment and skill and is most accessible to beginning cooks working in a typical home kitchen.
For beginners, no-bake desserts such as fudge, truffles, or easy puddings are generally the best choice, as they are more forgiving of minor timing mistakes than more delicate baked goods that need precision.
You will need the basic kitchen tools: mixing bowls, a whisk, a heavy-bottomed pan or hand mixer, measuring cups, a heavy-bottomed pan, and either a refrigerator or oven, depending on what method of preparation you choose.
In general, no-bake, no-cook preparation is the fastest. Desserts like truffles or fudge only need to be melted, mixed, and chilled instead of being baked or steamed for a long time.
Not really. Many desserts—fudge, truffles, and no-bake cheesecakes—only require a mixing bowl, hob, and refrigerator.
Frying and baking are generally best for the crispiest textures, as dry heat will draw out the moisture efficiently, while no-bake or steamed methods tend to yield softer, moister dessert textures.
The best desserts for festive celebrations include rich classics like sticky Toffee Pudding, Chocolate Kalakand, and Bournville dark chocolate Cheesecake. These treats offer a mix of warm spices, creamy textures, and rich holiday flavors.
Traditional sweets served during festivals include Kaju Katli, Gujiya, Modak, laddos, and more. These sweets carry deep cultural and regional significance.
Several festive desserts are easy to make at home, like Besan Ladoo , Coconut Barfi, Sooji Halwa and more. These simple sweets use basic ingredients, require minimal prep time, and come together in under 30 minutes.
The most popular festive sweets in India include Gulab Jamun, Kaju Katli, and various types of Ladoo, which are staples during celebrations like Diwali, Holi, and regional holidays across the country.
Quick festive Indian dessert ideas include Besan, Coconut Barfi, and Meethi Seviyan. These simple treats require minimal ingredients and take less than 30 minutes to prepare at home.
Try adding festive-related toppings and flavors to your sweets. A Kaju Katli for Diwali can be drizzled with chocolate syrup, or rakhi sweets can be dusted with cocoa powder for a festive touch.
The best no-bake Indian festive desserts feature quick, elegant options like Motichoor Ladoo Cheesecake, Dry Fruit Anjeer Roll, and Sandesh.
Dark chocolate with high cocoa content (54-70%) is best for festive desserts, because its high cocoa butter content ensures a glossy finish and a smooth melt.
You can use white chocolate to create a contrast with the look of a dark chocolate dessert, or use dark chocolate shavings or pieces on top of a traditional festive dessert to accentuate the flavor profiling.
Cocoa powder, melted baking chocolate, or chocolate shells can be added to traditional festive sweets. You can mix cocoa directly into milk fudge bases, dip traditional laddoos into liquid ganache, or layer crumbled mithai with melted chocolate.
Baked desserts are sweet desserts prepared by using ingredients like flour, eggs, butter, sugar, and flavorings in an oven until fully cooked. Some examples are: cakes, brownies, and cookies, offering complex textures, and rich flavors.
In a large heavy saucepan, combine sugars, butter, water, and chocolate. Combine with eggs, vanilla, flour, baking soda and salt. Pour into a baking pan. Bake at 165 C for 40-50 minutes.
Classic brownies, chocolate cakes, cheesecakes, cookies, fruit tarts, and muffins are worth trying. These desserts are beginner friendly, and offer a balance of rich flavors, and comforting textures.
People prefer baked desserts because they offer rich textures, and a homemade aroma. From cakes and brownies to cookies and pies, they are versatile, satisfying, and perfect for celebrations and family gatherings.
Baked desserts last for 3-5 days at room temperature, 1-2 weeks in the refrigerator, and 3-6 months in the freezer when stored in an airtight container.
To make baked chocolate brownies, you need the following ingredients: flour, cocoa powder, chocolate, butter, sugar, eggs, vanilla extract, and a pinch of salt. Additions like walnuts or cashews can add extra texture.
Baked desserts are cooked using an oven, have a structured base, and focus on fluffy or crumbly textures. In comparison, traditional desserts like puddings, cheesecakes, or other desserts are prepared by chilling or stovetop boiling.
Yes, baked desserts require specific tools to be prepared, such as an oven, measuring cups, and mixing bowls. Standard kitchen tools are essential for accurate preparation and even cooking of the dessert.
Dark chocolate is often considered the best choice for baked desserts because it delivers a rich, intense flavor and melts smoothly. Milk chocolate adds sweetness, making it ideal for cakes, brownies, and cookies.
Baked Desserts are best prepared at home with the help of an oven, as store-bought desserts can differ in taste and texture. The perfect baked dessert is made at home, and can be tweaked to the liking of the consumer.
Traditional Christmas desserts are rich fruitcakes, spiced cookies, chocolate logs, plum cake, gingerbread cookies, and Christmas pudding. These holiday desserts are enjoyed worldwide during the Christmas festive season.
Combine water, sugar, butter, dried fruits, and spices for 5 minutes. Stir together with caramel syrup, orange zest, eggs, flour, baking soda, salt, tutti frutti, and cashews. Bake at 180°C for 50-60 minutes.
Desserts are a symbol of abundance and togetherness during Christmas celebrations. They act as the final part of Christmas meals, are thoughtful gifts, and carry deep cultural meanings.
Beginner-friendly Christmas desserts include Oreo fudge, easy cake mix cookies, Cadbury Plum Cake, and Christmas pudding. These quick desserts require basic ingredients, making Christmas baking completely stress-free and enjoyable.
Yes, Christmas desserts can be made weeks or months in advance. Traditional cakes actually improve in flavor as they mature, while non-traditional cakes can be safely stored for longer periods.
Guilt-free Christmas desserts use swaps for sweeteners like Stevia or dates, and all-purpose flour. Common guilt-free desserts are: date bark, flourless peanut butter monster cookies, raw gingerbread cookies, cranberry tarts, gluten-free fruitcake, and cookies.
Fusion twists on Christmas desserts combine traditional Christmas classics with cultural flavors and modern ingredients. Some examples are as follows: Gulab Jamun Truffle, matcha-infused panettone, Peda Pie, and cardamom-spiced plum cake.
The best Christmas desserts for gifting are treats that taste delicious. The most prominent choices for Christmas dessert gifting are as follows: Christmas fudge, Cadbury Silk Brownie, and traditional plum cake.
The best chocolates for Christmas desserts are Cadbury Dairy Milk plain chocolate for melting into ganache, Bournville dark chocolate for a deep flavor, and Dairy Milk Fruit and Nut for a nutty, crunchy texture.
You can add a nice chocolaty twist to Christmas desserts by making chocolate puff pastry twists, shaping a Chocolate Puff Pastry Christmas Tree, or preparing homemade Peppermint Bark.
A dessert counts when it maximizes nutrient density and minimizes processed ingredients. It helps to shift the focus from empty calories to functional nutrition while still satisfying sweet cravings.
Blend soaked dates, vanilla, cocoa powder, and sunflower seeds. Roll into the shape of balls, melt dark chocolate and coat the balls with chocolate. Refrigerate for at least 30 minutes before serving.
Healthy desserts which are high in protein are the following: Greek yogurt parfaits, protein smoothies, chia puddings, and protein brownies. They use ingredients like nuts, seeds, dairy, and protein powder to provide high quality protein.
Healthy desserts are a good choice because they satisfy sweet cravings while providing good nutrition. They use ingredients like fruits, nuts, yogurt, or oats; often containing less refined sugar, more fiber for a balanced indulgence.
The Healthy Dessert can be chilled in the refrigerator for up to 3 days prior to coating with chocolate. You can freeze the finished truffles for up to 2-3 months. Thaw overnight in the refrigerator before serving.
Common substitutes used in healthy desserts include natural sweeteners (like honey or dates), healthy flours (like almond or oat). These swaps reduce refined sugar, lower bad fats, and add fiber or protein to the mix.
Healthy desserts help maintain stable energy levels, prevent sugar crashes, and provide good quality nutrients. Traditional desserts rely heavily on refined sugars and heavy fats, whereas healthy desserts use nutrient dense ingredients.
Yes, healthy desserts are beginner friendly because they require simple ingredients, minimal equipment, and easy techniques. Fruit based desserts and yogurt parfaits are quick to prepare, making them perfect for people who are new to baking.
The best chocolate for a healthy dessert is 70% or higher dark chocolate, such as Cadbury Bournville dark chocolate, or pure Cadbury cocoa powder. These choices offer rich antioxidants and less sugar than milk chocolate.
Healhty desserts are best prepared at home in order to avoid the additives and refined sugar and flour present in store-bought desserts. You can enjoy a wider variety when making healthy desserts at home.
A no bake dessert is a dessert that is made completely without an oven, or baking anywhere. Instead of using the oven, they're chilled in the refrigerator to set, or a stove is used for cooking.
Combine sugar, milk, butter, oats, coconut, peanut butter, vanilla, and cocoa powder in a saucepan over medium heat. Mold the batter into the shape of cookies and refrigerate. Serve chilled.
No bake desserts usually take 2-6 hours to set properly in the refrigerator, depending on the recipe and ingredients used. Cheesecakes, puddings, and mousse often need longer chilling time for a firm, creamy texture.
No bake desserts are a solid choice due to them being quick, beginner friendly, and keeping the kitchen out of chaos. They save time, avoid ovens entirely, and use simple ingredients to make things less cumbersome.
You can store them in an airtight container at room temperature for five days, or freeze them for up to three months. Separate layers with parchment paper to prevent sticking.
Some common substitutes in no bake desserts are graham crackers, cream cheese, and sweetened condensed milk, which are easily swapped with ingredients used in baked desserts.
No bake desserts can be prepared quickly when compared to baked desserts, and don't require an oven at all. They save time and use simpler ingredients, and make baking hassle-free.
Yes, no bake desserts are beginner-friendly because they skip out on the oven, use fewer kitchen appliances to cook, and require simple steps like mixing and chilling when compared to baked desserts.
The best chocolate for no bake desserts is high-quality dark chocolate (Cadbury Bournville for example) , and pure cocoa powder. Because no bake desserts rely on the chocolate melting smoothly, the chocolate must be chosen wisely.
Homemade no bake desserts are preferred if you want a fresher taste, as they differ in ingredients when compared to store-bought desserts. You also have the option to customize the dessert to your liking.
A baked anniversary dessert is an oven cooked dessert made to celebrate a yearly milestone, including options like molten chocolate lava cakes, red velvet mini cakes, or baked cheesecakes.
Make a cake or cheesecake batter, pour it into a baking mold, and bake until set. Cool completely, then decorate with frosting, fresh fruits, chocolate, or caramel sauce and serve.
Some of the recipes are: vanilla cake, chocolate cake, baked cheesecake, red velvet cake, black forest cake, chocolate lava cake, and fruit filled tarts. These desserts are elegant and flavorful for celebrating anniversaries.
Baked anniversary desserts give fresh flavors, have a beautiful presentation, and offer ultimate customization. They can be decorated with personalized designs and made in different flavors, hence making anniversaries memorable and enjoyable.
They stay fresh for 3-5 days when refrigerated in an airtight container. Cakes without fresh cream may last longer, while cheesecakes should be enjoyed within a few days for the best quality possible.
Ingredients used in baked anniversary desserts are as follows: flour, sugar, butter, eggs, milk, baking powder, vanilla extract, and chocolate or cocoa. Fresh fruits, whipped cream, nuts, and decorative toppings can add more flavor and richer textures.
Baked anniversary desserts are designed for a special occasion, often having unique decorations, high quality ingredients, and personalized themes. Regular desserts are made for everyday enjoyment and focus on simple flavors and convenience.
Avoid overmixing the batter, or underbaking. Always make sure to preheat the oven, cool the dessert completely before decorating, and use good quality ingredients to get the best texture and appearance possible.
High-quality dark chocolate is best for baked anniversary desserts due to it melting smoothly and providing a rich, balanced flavor. Cadbury Bournville is a popular choice for cakes, brownies, cheesecakes, and other desserts.
Baked anniversary desserts are best prepared at home with the help of an oven, as store-bought desserts can differ in taste and texture. The perfect baked dessert is made at home, and can be tweaked to the liking of the consumer.
A baked birthday dessert is prepared in the oven to celebrate birthdays. Some of the popular choices are: cakes, brownies, cheesecakes, and cupcakes, often decorated with frosting, sprinkles, candles, or fresh fruit for a truly memorable celebration.
Make a cake or cheesecake batter, pour it into a baking mold, and bake until set. Cool completely, then decorate with frosting, fresh fruits, chocolate, or caramel sauce and serve.
Some of the recipes are: vanilla cake, chocolate cake, baked cheesecake, red velvet cake, black forest cake, chocolate lava cake, and fruit-filled tarts. These desserts are elegant and flavorful for celebrating birthdays.
Baked birthday desserts give fresh flavors, have a beautiful presentation, and offer ultimate customization. They can be decorated with personalized designs and made in different flavors, hence making birthdays memorable and enjoyable.
They stay fresh for 3-5 days when refrigerated in an airtight container. Cakes without fresh cream may last longer, while cheesecakes should be enjoyed within a few days for the best quality possible.
Ingredients used in baked birthday desserts are as follows: flour, sugar, butter, eggs, milk, baking powder, vanilla extract, and chocolate or cocoa. Fresh fruits, whipped cream, nuts, and decorative toppings can add more flavor and richer textures.
Baked birthday desserts are designed for a special occasion, often having unique decorations, high-quality ingredients, and personalized themes. Regular desserts are made for everyday enjoyment and focus on simple flavors and convenience.
Avoid overmixing the batter, or underbaking. Always make sure to preheat the oven, cool the dessert completely before decorating, and use good quality ingredients to get the best texture and appearance possible
High-quality dark chocolate is best for baked birthday desserts due to it melting smoothly and providing a rich, intense flavor. Cadbury Bournville is a popular choice for cakes, brownies, cheesecakes, and other desserts.
Baked birthday desserts are best prepared at home with the help of an oven and the best Amul Dark Chocolate, as store-bought desserts can differ in taste and texture. The perfect baked dessert is made at home, and can be tweaked to the liking of the consumer.
You can mix a baked cheesecake with ice cream by blending chilled cheesecake pieces into softened ice cream, layering them into an ice cream cake, or making a cheesecake-milkshake blend.
Crush Oreo cookies with melted butter to form the crust. Whisk cream cheese, eggs, sugar, and vanilla for the filling. Layer, top with crushed Oreos, bake for 1 hour, cool, refrigerate until set, and serve chilled.
A fully baked cheesecake should have set edges with a slightly wobbly center about 2–3 inches wide. The surface should appear matte, not wet, and the internal temperature should reach approximately 150–155°F (65–68°C) before cooling.
A baked cheesecake takes about 4-6 hours to freeze solid for individual slices, and up to 12 hours or overnight for an entire cheesecake.
You can store no bake cheesecake in the refrigerator for up to 3-5 days, or in the freezer for up to 1 month, by wrapping it tightly in plastic wrap or placing it in an airtight container.
Yes, you can make a baked cheesecake without eggs by using greek yogurt, condensed milk, cream cheese or gelatin for structure. Hence, you can get a creamy and smooth dessert with the texture of a traditional baked cheesecake.
A no bake cheesecake typically takes 4-6 hours to set in the refrigerator, although chilling it overnight will produce the firmest texture. Avoid freezing to speed up the process, as it can affect the cheesecake's smooth and creamy texture.
For a chocolate baked cheesecake, use high-quality dark or chocolate with 50-70% cocoa. It melts smoothly, delivers a rich chocolate flavor, and blends well with the creamy filling without making the cheesecake overly sweet or dense.
For a baked cheesecake, Cadbury Bournville and Cadbury Dairy Milk Silk are good choices. They melt smoothly, offer rich chocolate flavor, and create a creamy, balanced cheesecake with a deep cocoa or sweet taste, depending on the preference.
Yes, you can use Cadbury Dairy Milk in a baked cheesecake, but it will produce a sweeter result compared to dark chocolate. It melts easily and blends well into the filling, if you prefer a mild but sweet chocolate flavor.
It means a dessert cooked in an oven that contains no eggs. Instead of eggs, ingredients like yogurt, milk, fruit purees, or baking soda are used to attain the right shape and texture.
Melt butter in a medium saucepan. Once melted, add brown sugar, almond flour, salt, corn syrup and vanilla extract. Bake for 6-8 minutes at 177 C, until golden brown around the edges.
Some popular baked eggless dessert recipes are as follows: chocolate brownies and fruit crisps with oat crumble. These desserts rely on alternative binders like yogurt, condensed milk or baking soda to achieve the same texture as using eggs.
They prefer baked eggless desserts because these are suitable for vegetarians, people with egg allergies, or anyone avoiding eggs. These desserts deliver a rich flavor, and soft texture without eggs, making them a versatile choice.
The shelf life of a baked eggless dessert is typically 1-2 days at room temperature, 4-5 days in the refrigerator, and 2-3 months in the freezer, depending on whether it contains dairy or perishable fillings.
You need the following ingredients to make baked eggless dessert: flour, sugar, butter, condensed milk, baking powder, vanilla extract, and your preferred additions like cocoa powder or chocolate for taste and texture.
Baked eggless desserts replace eggs with ingredients like yogurt or condensed milk, while maintaining a soft texture. They are ideal for vegetarians, people with egg allergies, or anyone looking for an eggless alternative.
No, baked eggless desserts do not require any special equipment. You only need standard kitchen tools like mixing bowls, a hand whisk, a spatula, and measuring cups.
High quality dark chocolate is best for baked eggless desserts because it melts smoothly and delivers an intense flavor. Cadbury Bournville dark chocolate works well for cakes, brownies, and other baked eggless desserts.
Baked eggless desserts are best prepared at home with the help of an oven, as store-bought desserts can differ in taste and texture. The perfect baked dessert is made at home, and can be tweaked to the liking of the consumer.
For a simple Bournville Fudge recipe, take Bournville dark chocolate of your choice and melt it in a saucepan. Mix it with condensed milk and pistachios. Pour it into a baking tray and refrigerate for 3-4 hours, until it takes shape. Serve chilled.
Yes, Bournville chocolate fudge does not use eggs, and you can easily make an eggless version at home. Traditionally, fudge requires sugar, butter, and milk or condensed milk rather than eggs.
To melt the Bournville dark chocolate, you can use either a saucepan or a microwave. And in order for the fudge to take its shape, refrigerate it for at least 3-4 hours or overnight, and then serve.
Bournville Fudge is typically made with Cadbury Bournville dark chocolate, condensed milk, butter, sugar, and vanilla extract. Ingredients like chopped nuts or cocoa powder can be added for extra texture and richer chocolate flavor.
Homemade Bournville Fudge typically lasts 1-2 weeks at room temperature, 2-3 weeks in the refrigerator, and up to 2-3 months in the freezer. Its high sugar content acts as a preservative.
The biggest mistake people make with homemade Bournville Fudge is using evaporated milk instead of sweetened condensed milk. Evaporated milk lacks the necessary high sugar content and thickness required to allow the emulsion to set into a firm, creamy texture, frequently resulting in a sticky, liquid texture.
It differs from store-bought commercial candy primarily in texture, ingredients and sweetness. While store-bought fudge relies on preservatives for a long shelf life, homemade versions deliver a richer, softer, texture with intense chocolate flavor.
Dark chocolate and orange go really well together, and you can incorporate that in the fudge batter, or serve it on the side. Or you can fold in chopped, toasted hazelnuts and swirl a ribbon of smooth caramel.
The best Bournville product for making desserts and homemade fudge is the Cadbury Bournville classic dark chocolate bar. Its higher cocoa content gives the chocolate a rich flavor and the perfect melting consistency.
Yes, Bournville is an excellent choice for baking cakes and brownies. Its intense, bittersweet dark chocolate profile balances the sweetness in baked goods perfectly, resulting in a rich, decadent flavor and a fudgy texture.
Blend soaked cashews into a smooth paste. Mix with melted Bournville chocolate, butter, heavy cream, and sugar or dates. Blend until creamy, refrigerate for 4 hours, then serve chilled.
Yes, you can make a mousse using Bournville chocolate without using eggs. Instead of eggs, the airy texture is achieved by using whipped heavy cream.
Traditional chocolate mousse is an unbaked, chilled dessert. You simply melt the chocolate, mix it with whipped cream, add sugar as preferred, and let it sit in the refrigerator for the mousse to take shape.
It is made with Cadbury Bournville dark chocolate, fresh cream, butter, sugar, eggs or whipped cream, and vanilla extract. Some recipes also include cocoa powder or coffee to enhance the rich, intense chocolate flavor and smooth texture.
Store Bournville Mousse in an airtight container in the refrigerator. Consume within 3-5 days. Keep it away from strong-smelling foods like onions or garlic, as the airy texture easily absorbs surrounding odors.
A dry or grainy texture in a Bournville chocolate mousse can happen when the fat in the cream separates. Meanwhile, a denser texture can be caused by overwhipping heavy cream, creating a tight and stiff structure for the mousse.
Bournville Mousse differentiates itself from traditional chocolate mousse through its intense dark cocoa flavor and firm texture. While a standard mousse is purely egg-based, Bournville Mousse is created using dark chocolate and heavy cream.
You can make a rich custard mousse by combining custard with melted Bournville chocolate and folding in whipped cream. Chill until set, and add fresh oranges or blueberries for a fruity twist that complements the chocolate flavor.
Cadbury Bournville 70% Dark Chocolate Bar is a great choice. The higher cocoa percentage gives your dessert a deep, intense flavor profile and a much firmer, more traditional mousse structure compared to the classic milk chocolate options.
Yes, Bournville is an excellent choice for baking cakes and brownies. Its intense, bittersweet dark chocolate profile balances the sweetness in baked goods perfectly, resulting in a rich, decadent flavor and a fudgy texture.
In a saucepan, melt Bournville dark chocolate butter. Add heavy cream and stir until it turns glossy. Take off the heat and refrigerate for 2 hours. Roll the mixture into balls and sprinkle evenly with Bournville cocoa powder.
Traditional Bournville truffles are generally made with just dark chocolate and heavy cream, without eggs. You can use eggless heavy cream or substitute condensed milk.
Melt Bournville dark chocolate and heavy cream gently on the stovetop or in a microwave. Chill the mixture for 2 hours until firm, roll into balls, and coat in cocoa powder.
They are made with Cadbury Bournville dark chocolate, fresh cream, butter, and vanilla extract.They are often coated with cocoa powder, chopped nuts, chocolate sprinkles, or shredded coconut for added texture and flavor.
Homemade Bournville truffles typically stay fresh for 1-2 weeks in the refrigerator or 1-2 months in the freezer. Because they are made with fresh ingredients like heavy cream and butter, they can spoil much faster than plain chocolate.
A common mistake people make with Bournville Truffles is boiling the heavy cream. This scorches the chocolate and causes the cocoa butter to separate, resulting in a greasy or congealed mixture instead of a silky smooth truffle.
Homemade Bournville truffles use fresh cream, butter, and Bournville dark chocolate for a rich, fudgy texture and flavor. Store-bought truffles often contain stabilizers and preservatives, resulting in a less authentic chocolate taste.
You can create a Kaju Katli fusion by pressing a cube of the barfi into the center of your truffle, rolling it into a ball, and dip in cocoa powder.
For making desserts, Cadbury Bournville 70% dark chocolate bar is a great choice. Its intense, bittersweet flavor profile provides a deep, rich chocolate foundation needed for baking.
Yes, Bournville is an excellent choice for baking cakes and brownies. Its intense, bittersweet dark chocolate profile balances the sweetness in baked goods perfectly, resulting in a rich, decadent flavor and a fudgy texture.
The most popular chocolate Diwali sweets are chocolate barfi, chocolate peda, and chocolate-infused fusion mithai like chocolate butterscotch barks or chocolate soan papdi. These modern treats blend rich cocoa with traditional dairy and nut bases.
Add condensed milk, milk powder, ghee and cardamom to a saucepan. Cook on low until thick, then mix in cocoa powder until smooth. Cool completely, shape into pedas and refrigerate for 10-15 minutes before serving.
Sweets are important during Diwali because they symbolize love, prosperity, and happiness. They act as offerings to deities and tokens of love shared among family and friends.
Chocolate Diwali sweets require ingredients like premium chocolate, cocoa powder, milk, condensed milk, nuts, dry fruits, butter, sugar, and cardamom or vanilla. They help create rich, festive Diwali desserts with a delicious chocolate twist.
The shelf life of Chocolate Diwali Sweets is typically 3-5 days at room temperature, 10-15 days when refrigerated, and up to a month or more for commercially packaged or vacuum-sealed varieties.
Yes, low-sugar and sugar-free chocolate Diwali sweet options are widely available, including sugar-free chocolate barfi, Dates and nut chocolate balls, and stevia-sweetened dark chocolate bars.
Chocolaty sweets during Diwali have now become an integral part of celebrations at numerous homes in India. Today, traditional sweets are combined with chocolate to create fusion delights that are widely loved.
Creative twists on classic chocolate Diwali sweets include motichoor ladoo truffles dipped in dark chocolate, besan barfi brownies with a rich fudgy texture, and chocolate diya pedas shaped like festive lamps.
For making Chocolate Diwali Sweets, you can choose from the wide collection of Cadbury products as per the recipe requirements to achieve the best results.
Almonds, cashews, pistachios, walnuts, and hazelnuts are among the best nuts for chocolate Diwali sweets. They add a crunchy, rich texture, while complementing chocolate flavours. Roasted or finely chopped nuts enhance texture even more.
Traditional Christmas biscuits are festive, spiced treats like gingerbread, and shortbread. People bake these cookies during winter using flour, butter, honey, and warm spices like cinnamon and ginger to celebrate the Christmas spirit.
Preheat the oven to 180 degrees Celcius. Add sugar, spices, flour, egg and mix. Shape dough into round balls. Put it on a baking tray, then bake for 10-15 minutes. Cool at room temperature and serve.
Desserts are a symbol of abundance and togetherness during Christmas celebrations. They act as the final part of Christmas meals, are thoughtful gifts, and carry deep cultural meanings.
The most popular shapes for Christmas Biscuits include stars, snowflakes, Christmas trees, gingerbread men, and hearts. These designs add charm and creativity, making biscuits more appealing for Christmas celebrations, gifting, and family gatherings.
Store them by first cooling at room temperature, and use airtight containers. Layer them with parchment paper, and keep the crisp cookies in a refrigerator for 3-5 days.
Some healthy biscuit options are as follows: almond flour shortbread, coconut ragi cookies, and date sweetened gingerbread. These biscuits swap refined flour and processed sugars for nutrient dense all purpose flour, nuts, and natural sweeteners like dates.
Traditional biscuits rely on spices and long shelf lives, while modern biscuits have extra sugar and vivid frostings. They differ mainly in their ingredients, decoration style, and baking purpose.
The variations of Christmas Biscuits are as follows: Cranberry Shortbread, Gingerbread Biscotti, and Peppermint Chocolate cookies. They require minimal effort, using simple mix and bake methods and flavor upgrades to standard biscuit dough.
Cadbury Dairy Milk Silk and Cadbury Gems are the best choices for baking Christmas biscuits. Chopped Cadbury Silk smoothly into cookies and holds their shape when pressed into warm dough, while Gems add color.
You can add a chocolate twist to Christmas biscuits by dipping them in melted chocolate or swirling cocoa powder into the dough. Incorporate melted dark or white chocolate, cocoa powder, or chocolate-hazelnut spread into the biscuits.
Traditional Christmas desserts include fruitcakes, spiced cookies, most prominently plum cake, gingerbread cookies, and Christmas pudding. These Christmas desserts are enjoyed worldwide during the festive season.
Soak candied cherries, almonds, raisins, currants, and dates in apple juice for 2 hours. Prepare the pan, coat fruit with flour, mix batter with dry and wet ingredients, fold in fruit, and bake at 135 C for 3 hours.
Desserts are a symbol of abundance and togetherness during Christmas celebrations. They act as the final part of Christmas meals, are thoughtful gifts, and carry deep cultural meanings.
Use ingredients like soaked dried fruits, butter, eggs, and rich syrups. Bake the cake at a low temperature, avoid overbaking, and store in an airtight container. Brushing with sugar syrup also helps retain moisture.
Yes, Christmas cakes can be made weeks or months in advance. Traditional cakes actually improve in flavor as they mature, while non-traditional cakes can be safely stored for longer periods.
Guilt-free Christmas cakes substitute regular flour with all-purpose flour, cinnamon, ginger, and orange zest. The use of organic eggs, virgin olive oil, and optional maple or raw honey instead of refined sugars is also prominent.
Fusion twists on a Christmas cake mean blending classic Christmas cake bases with global flavors or unique local spices. Some of them are as follows: Cadbury Bournville ganache, gulab jamun soaked fusion fillings, and matcha-infused frostings.
The best Christmas cake for gifting is a fruit cake made with dried fruits, nuts, and spices, soaked in apple or orange juice. It has a long shelf life, develops a deep flavor over time, and can be packaged nicely.
Cadbury Dairy Milk is best for baking sweet cakes, while Cadbury Bournville works best for rich dark chocolate cakes. Also, Cadbury Silk is ideal for melting into frostings or ganaches.
Adding a chocolate twist to a Christmas cake can be done by mixing dark chocolate chunks, cocoa powder, or chocolate ganache directly into the batter, or using Cadbury Silk or Bournville as chocolate between each slice.
The most popular Christmas cookies are as follows: gingerbread, sugar, and snowball cookies. These cookies are widely baked for family gatherings. Christmas cookies are regarded for their sweet flavors and soft or chewy textures.
Preheat the oven to 180°C. Mix butter and sugar in a large bowl; add egg, vanilla, flour, baking powder, and salt. Roll into cookie shapes and bake for 10 minutes.
Sweets play an important part during Christmas because they represent celebration and tradition. Ingredients like spices and dried fruits mark a seasonal luxury, bringing families together through baking and festive joy.
The best Christmas Cookies for gifting are: gingerbread cookies, sugar cookies, chocolate chip cookies, and butter cookies. Their attractive designs and delicious flavours make them the best choice for sharing during Christmas celebrations.
They can last for 1 week at room temperature, 2 weeks in the refrigerator, and up to 6 months in the freezer when stored properly. The exact time depends on the ingredients.
Yes, some examples of low-sugar cookies are as follows: almond flour crescent cookies, sugar-free German cinnamon stars, and low-carb soft-baked cookies. Instead of sugar, dates can be used as a natural sweetener.
Christmas cookies have evolved from medieval European spice and honey rations into global festive desserts, shifting from luxury items restricted by trade guilds to modern Christmas desserts.
Some creative twists on classic Christmas cookies include hot cocoa mix and eggnog sugar cookies. These creative ideas can enhance Christmas cookies with new flavors and textures.
Cadbury Dairy Milk Silk chocolates hold their shape well and melt properly. Chocolates like Cadbury Bournville or Cadbury Dairy Milk Fruit and Nut also work excellently to add a deep flavor.
You can add a chocolate twist to Christmas cookies by dipping baked cookies in melted chocolate, mixing cocoa powder into the base dough, or creating chocolate sandwich fillings.
The most popular Christmas sweet in India is kul kuls, along with plum cake and nevries. These desserts are important for the Christmas celebrations all across India.
Mix butter, flour, and sugar, adding a little milk to form a dough. Shape into kulkuls, deep-fry until crispy, drain on paper towels, cool slightly, then sprinkle with icing sugar before serving.
They are important during Christmas because they align with acts of hospitality, joy, and happiness. Desserts like plum cakes, cookies, and local delicacies imbue the Christmas season with warmth and celebration.
Festive flavors in Christmas Indian sweets are: cardamom, saffron, cinnamon, cloves, rose, dry fruits, and rich ghee. These spices, dry fruits and nuts and create comforting, yet celebratory sweets that fully compliment the Christmas spirit.
You can store them in an airtight box at room temperature for 2-3 weeks. Coat kul kuls with sugar powder as soon as you drain them from oil. Only then will the sugar powder stick to them.
Yes, there are many low-sugar Indian sweet options like date and nut barfi, sandesh, and ragi ladoo that use natural sweeteners like dates instead of refined sugar crystals.
They have evolved from colonial-era adaptations of British, Portuguese, and French cakes into a diverse fusion of local ingredients like coconut milk, jaggery, rice flour, and native spices.
Creative twists on classic Indian Christmas sweets are: gulab jamun cheesecake, kheer trifle, and chocolate barfi logs. These fusion ideas blend traditional desi flavors with the Christmas spirit.
Cadbury Dairy Milk Fruit and Nut and Roast Almond are ideal for making Christmas sweets like chocolate barfi, peda, or loaded plum cake chunks. They add a rich texture with real raisins and nuts.
You can add a chocolate twist to Indian sweets by mixing Cadbury Silk into barfi dough, dipping kaju katli in melted Bournville dark chocolate, or layering Cadbury Fruit and Nut chocolate with some coconut ladoos.
Some of the traditional Christmas desserts are as follows: fruitcakes, chocolate logs, plum cake, gingerbread cookies, and Christmas pudding. These Christmas desserts are enjoyed worldwide during the festive season.
Mix breadcrumbs, flour, spices, dried fruits, nuts, citrus, eggs, milk, and butter into a rich batter. Pour into baking molds, cover, and steam for 8-9 hours. Cool completely before storing in the refrigerator.
They are a sign of abundance and togetherness during Christmas celebrations. They act as the final part of Christmas meals, are thoughtful gifts, and carry deep cultural meanings.
Fresh berries, powdered sugar, whipped cream, custard, nuts, and dried fruits are some of the best garnishes for Christmas pudding. They add colour, enhance flavour, and create an amazing texture for traditional Christmas puddings.
Yes, Christmas pudding can be made in advance since maturing improves its flavor. It can be cooked 4 to 6 weeks ahead of time, then stored in a refrigerator and reheated on the day of consumption.
Instead of sugar, you can add cherries and chopped dates for flavor and sweetness. Flour can be substituted for ground almonds to ensure structure and flavor. Along with them, gluten-free breadcrumbs can be incorporated as well.
Some modern fusion twists on a Christmas pudding are as follows: combining dried fruits and steaming methods with salted caramel sauce centers, drizzles, or caramelized biscuit crumbs.
The best Christmas puddings for gifting are: classic fruit pudding, mandarin in the center pudding, and layered pudding in a jar. These options look festive and offer rich flavors.
If you are baking a homemade chocolate Christmas pudding, Cadbury Dairy Milk, or Cadbury Dairy Milk Fruit & Nut paired with dark cocoa works well as it melts easily in the batter.
A chocolate twist can be done by folding dark chocolate chunks directly into a traditional batter, making a no-bake chocolate biscuit pudding, or blending leftovers into truffles.
Blend curd, ghee, water, ice, flour, and gram flour into a smooth batter. Prepare sugar syrup. Fry batter in layers until crisp and golden, soak briefly in syrup, garnish with nuts, and edible silver leaf.
Ghevar is a disc-shaped, honeycomb-textured Rajasthani sweet made from a batter of flour, ghee, and milk. Deep-fried to a crispy, airy texture, it is soaked in sugar syrup and typically garnished with rabri, chopped nuts, saffron, and edible silver leaf.
The shelf life of Ghevar largely depends on its variety. Malai or Rabri Ghevar lasts just 1-2 days. Plain Ghevar lasts 3-7 days, while unsweetened plain Ghevar can last 20-30 days.
Store Ghevar in an airtight container at room temperature, or in the fridge depending on the toppings. Storing it properly keeps the honeycomb crunch intact for a longer period of time.
Whisk chilled ghee, flour, besan, milk, and water into a smooth batter. Fry in layers until crisp. Prepare one-string sugar syrup, sweeten the Ghevar, then top with rabri, pistachios, almonds, saffron, and silver leaf.
To make Chashni for traditional Ghevar, you need sugar, water, a pinch of cardamom powder, a few saffron strands, and a few drops of lemon juice. Boil them together for 4-5 minutes until the mixture becomes liquid.
Ghevar remains soft from the inside as adding thick clumps instead of a thin stream prevents the hot fat from cooking the core, leaving a heavy, doughy middle.
To make chocolate Ghevar, prepare a chilled batter of ghee, ice, flour, and cocoa powder, fry it in hot oil in a stream, and top it with sugar syrup and chocolate rabdi (malai).
The best chocolate to use for making a chocolate Ghevar is dark chocolate or a smooth milk chocolate like Cadbury Dairy Milk Silk, which provides a creamy texture.
For a chocolate Ghevar cheesecake fusion, 54% to 55% cocoa dark chocolate works best. This cocoa balance ensures the filling is rich and glossy without overpowering the traditional honey, ghee, and subtle flour notes of the Ghevar.
Mix maida, besan, baking powder, baking soda, yogurt, cardamom, and water; ferment for 10-12 hours. Prepare sugar syrup with sugar, water, saffron, and cardamom. Fry batter, dip in sugar syrup, then cool until coated well and serve warm.
To make jalebi without curd, use a combination of maida, a little rice flour for crunch, and a splash of lemon juice. Replace the curd with water and a pinch of baking soda to instantly ferment the batter.
Traditional jalebi recipes do not incorporate yeast. Instead, they use a rising agent like baking soda or baking powder to make the batter for jalebi.
Jalebi batter should rest for 8 to 12 hours to allow proper fermentation, which improves flavour, texture, and crispiness. In warmer temperatures, a short resting time may work, while cooler temperatures may require longer fermentation.
The best flour for Jalebi is refined all-purpose flour (maida), as it creates a smooth batter and crispy texture. You can also add a small amount of corn flour or rice flour to improve crunchiness.
To make a crispy and juicy jalebi batter, whisk maida, besan, melted ghee, and baking soda. Gradually, add water and plain yogurt to form a smooth, lump-free flowing batter with a ribbon-like consistency.
Combine sugar and water in a pan. Stir until sugar dissolves and the liquid comes to a boil. Add cardamom powder and saffron strands for flavor. Lower the heat and let it simmer for about 5-7 minutes before turning off.
To store jalebi for a long time, cool them completely, place them in an airtight container at room temperature for up to 3-5 days, or refrigerate them for extended storage.
For low sugar chocolate jalebi, high-quality dark chocolate, like Bournville cocoa powder is best. These options provide a deep, rich flavor that balances out the sweetness of syrup.
The best chocolate to use for making a chocolate jalebi is 50% to 60% dark chocolate , or Cadbury cocoa powder if you are mixing directly into the batter.
Wash the rice and cook it in milk for 10 minutes. Add condensed milk and cook for another 5-7 minutes. Stir constantly until it reaches desired consistency. Serve kheer garnished with nuts and elaichi powder.
Rinse and soak sabudana for 15 minutes. Cook on medium heat, add milk, cardamom powder, sugar and stir well. Do this for 25 minutes. Once cooked, take it off the heat and serve.
Kheer should be cooked for around 30-45 minutes on low heat until the milk thickens and rice softens. Slow cooking helps blend flavours, enhance creaminess, and create a rich texture.
Roast makhana and cashews in a pan. Heat milk on medium heat, add makhana, cardamom powder, and milk to the mix. Add ground makhana and mix well. Cook for 10-15 minutes and serve.
Simmer it slowly for a long time, allowing excess milk to evaporate. Adding more rice, crushed nuts, or milk solids like khoya also enhances thickness while giving the dessert a creamy texture.
In a pan, cook sevai with butter. Pour milk and sugar and mix till it comes to a boil. Add saffron strands and stir again. You can add nuts as needed. Mix well, cook for 3-4 minutes and serve.
Yes, rice should be soaked for 20-30 minutes before making kheer. Soaking helps rice cook evenly, and soften faster, creating a smoother consistency while reducing overall cook time.
Almonds, cashews, pistachios and raisins go well with kheer. They add a crunch, natural sweetness, and richness to the creamy dessert. Chopped or roasted dry fruits enhance flavour and texture.
The best chocolate to use for making chocolate kheer is high quality dark chocolate (50%-60% cocoa), or Cadbury Dairy Milk cocoa powder. It helps balance the natural sweetness and richness of the kheer.
Dark chocolate pairs best with saffron when making a chocolate kheer. The strong flavor of high cocoa dark chocolate cuts through the rich, creamy milk base without masking the aroma of saffron.
Traditionally, Navratri desserts do not contain chocolate, but focus on dairy products, fruits, nuts, pure cocoa powder, and fasting flours. You can create fusion desserts like chocolate barfi and makhana or nut laddoos made with cocoa.
Combine sugar and milk together and bring the mixture to a boil. Add sabudana, dark chocolate or cocoa powder, and walnuts. As the mixture starts thickening, pour into bowls and sprinkle chopped walnuts on top.
They symbolize divine offerings, gratitude, and fasting sustenance. Navratri desserts are shared to spread goodwill, and prepared using vrat-friendly ingredients that align with rituals for the 9-day fast.
Fruits like strawberries, bananas, apples, mangoes, and pomegranate pair well with Navratri Chocolate Desserts. They add natural sweetness, freshness, while balancing the chocolate flavours. Seasonal fruits also enhance the desserts and create delicious combinations.
You can store Navratri Chocolate Desserts in an airtight container in the fridge for 2-3 days. While heating up, a splash of milk should be added to retain its creamy consistency.
Healthy Navratri chocolate dessert options include singhara flour chocolate brownies, date and nut chocolate balls, and makhana chocolate kheer. These options use vrat-friendly flours and natural sweeteners like dates, instead of refined flour and sugar.
Traditional Navratri sweets exclude chocolate and rely on dairy, ghee, and fasting flours flavored with cardamom or saffron. Modern chocolate desserts introduce cocoa or fusion elements like date pastes or baked treats using vrat-friendly flours.
The best toppings for Navratri Chocolate Desserts are: almonds, pistachios, fresh fruits, and chocolate shavings. They add flavour, texture, and elegance while making desserts more attractive for the celebrations.
Cadbury Dairy Milk Silk (either plain or roast almond) is best for Navratri chocolate desserts because of its high cocoa butter creaminess, which melts smoothly for fondues, phirni fusions, or toppings.
Some chocolate twists can be added to the Navratri chocolate desserts by using cocoa powder or melted chocolate, combined with traditional ingredients such as sabudana, singhara flour, or laddoos.
Combine dry ingredients, then mix in butter and egg to form a dough. Shape, flatten, chill, and bake. Whisk butter, vanilla, powdered sugar, and salt into a fluffy filling, sandwich between two cookies, and serve.
You can completely skip the use of eggs in an Oreo cookie. Instead of eggs, you can incorporate baking powder and baking soda as the setting agents. Cornstarch can also be used.
Instead of baking the cookie dough, just cool it in the refrigerator for 10 minutes. Take it out, fill it with the Oreo filling, and enjoy.
These are the following ingredients that go inside an Oreo cookie: flour, cocoa powder, baking powder, baking soda, salt, sugar, butter, an egg, and vanilla extract.
Store-bought Oreo cookies typically have a shelf life of 7-9 months, while homemade cookies have a shelf life of 3-5 days at room temperature, up to 10 days in the refrigerator, and 2 months in a freezer.
The most common mistake is skipping the chilling step before baking. Warm dough spreads quickly in the oven, causing homemade Oreos to lose their round shape, bake unevenly, and develop a softer, less crisp texture.
The ingredient quality, texture, and flavor richness differ in both store-bought and homemade cookies. Packaged Oreos rely on a drier crunch, whereas homemade cookies offer a fresher and softer bite.
Elevate your classic Oreo cookies with these twists: Air Fryer Oreos (wrap in crescent dough and fry for 3 minutes), Oreo Cookie Butter (blend with butter), Oreo-Stuffed Cinnamon Rolls, or Melted Cheese/Peanut Butter Dipping.
For versatility and ease, Oreo Baking Crumbs (pre-crushed cookies) are the best base, while the Classic Oreo is ideal because it provides the ideal balance of a rich, bitter chocolate wafer and sweet cream, giving good results.
Yes, the cookie base adds a rich, dark chocolate crunch, while the cream melts into the batter, acting as a natural binder and sweetener. They are widely considered a game-changer for adding texture and depth to brownies.
Cook condensed milk, sugar, milk powder, and ghee until thickened. Stir in vanilla, cool slightly, then fold in crushed Oreos. Spread into a tray, refrigerate for 3-4 hours until firm, then slice and serve.
Yes, Oreo fusion desserts can be made eggless by using sweetened condensed milk, ghee, and milk powder instead. They help the dessert to retain its shape and texture in place of eggs.
You can use a pan to cook the Oreo fusion dessert mixture, and then cool it down in a refrigerator before serving, completely avoiding the use of an oven.
Oreo Fusion Dessert is made with condensed milk, sugar, milk powder, ghee, vanilla extract, and Oreo cookies mixed with the rest of the ingredients.
You can store Oreo Fusion Desserts in an airtight container in the refrigerator for 3-4 days, or freeze them to extend shelf life up to a month.
It can turn dry due to less ghee in the mixture, which gives it a smooth, creamy mouthfeel, and dense due to excessive milk powder and sugar in the dessert.
A cookies-and-cream Oreo barfi gives the Oreo cookies a traditional Indian twist, as barfis are generally considered a festive dessert enjoyed at times of celebration, with a combination of a smooth yet crumbly texture.
You can try making cookies and cream truffles, layered dessert jars, Oreo Tiramisu (Italian fusion), or cookies and cream kheer (Indian fusion), which can be some fun ways to experiment with.
Oreo cookies used for Oreo Fusion Desserts are widely considered versatile and delicious, in the way that they can be used in a multitude of desserts. They're also readily available in the market.
Oreo is an excellent ingredient for baking cakes and brownies, mostly used as a delicious add-in or crust. However, as a standalone batter, they can be too dense or dry unless you use specific moisture-rich recipes.
Crush Oreos and mix with melted butter for the crust. Blend cream cheese with powdered sugar, prepare chocolate pudding with milk and Oreos, layer both over the crust, refrigerate until set, and serve chilled.
Yes, typically when making an Oreo no bake dessert, eggs are not involved. Ingredients like cream cheese and chocolate pudding mix are used to keep up with the consistency, taste, and texture of an egg. 3. How to make Oreo No Bake Desserts without an oven? - It's already a no bake recipe
Crushed Oreo cookies, melted butter, cream cheese, powdered sugar, chocolate pudding mix, and cold milk are the ingredients that go into making a no bake oreo dessert.
The shelf life of homemade Oreo no-bake desserts depends on storage. In the refrigerator, they last for 3 to 5 days in an airtight container. In the freezer, they can be stored for up to 3 months.
The most common mistake is not chilling the dessert long enough. Skipping the recommended refrigeration time prevents it from setting properly, resulting in a runny texture instead of a firm, sliceable, or scoopable dessert.
Homemade Oreo no bake desserts differ from store-bought versions primarily by using real, whole ingredients like rich cream cheese, heavy cream, and actual crushed cookies, resulting in a fresher, more customized flavor.
Layer Oreo crumbs with chocolate mousse and fresh raspberries for a sweet-tart dessert. Or make a salted caramel Oreo icebox cake by alternating Oreos, whipped cream, and caramel sauce, then refrigerating overnight until soft and cake-like.
You can use Oreo sandwich biscuits or plain biscuits for making quick cookies-and-cream treats. It offers all the essentials: a signature chocolate flavor, a crust for making the base, a velvety cookie-and-cream filling mix, and actual Oreo cookie pieces.
No-bake Oreo dessert kits and mixes are not designed for traditional baking. Exposing ingredients like instant pudding, gelatin to oven heat will cause them to melt or collapse rather than bake into a cake or brownie.
To make a classic Payasam, you will need these simple ingredients: rice, jaggery, coconut milk, ghee, cashews, raisins, and cardamom powder. Swap rice for vermicelli if you want a Vermicelli Payasam.
Rinse rice, cook until soft. Stir jaggery, add coconut milk, and bring to a gentle boil. Simmer for 15 minutes, stirring frequently. Add water if needed, then mix in cardamom and ghee before serving.
Payasam is a traditional sweet dessert pudding. It is made by cooking ingredients like rice, lentils, or vermicelli in milk, sweetened with jaggery, and flavored with cardamom, saffron, and ghee roasted nuts.
Almonds, cashews, raisins, and pistachios are considered as the best dry fruits for payasam. They add a richness, sweetness, and a nice crunch to the dessert. Roasted nuts enhance the traditional flavour even more.
In order to make Dates Payasam, you just need to substitute jaggery with dates. It can be made using milk, dates, ghee, and cardamom. Because dates are naturally sweet, it requires no extra refined sugar or jaggery.
To make payasam thick, simmer whole milk with the grains on low heat until reduced, then add 2-3 tablespoons of sweetened condensed milk or blend in a tablespoon of soaked, ground cashews.
Add sweetened condensed milk towards the end of cooking. Once your payasam's base is fully cooked and slightly thickened, stir in the condensed milk and simmer for just 2-3 minutes.
Milk chocolate or a balanced dark chocolate works best for chocolate sabudana payasam, providing a smooth melt without overpowering the subtle, creamy texture of the tapioca pearls. Can Custard Be Used To Make Payasam Yes, custard powder can be used to make payasam. It yields a rich, thick, and creamy variation often called custard payasam or semiya custard kheer.
For making chocolate payasam, high-quality dark chocolate (50%-60% cocoa) or Cadbury cocoa powder works best. Dark chocolate provides a rich, balanced flavor that blends well with milk, without overpowering the traditional flavor.
Roast besan and flour in ghee until aromatic, then mix with cardamom. Cook sugar, water, and lemon juice to a hard amber syrup. Cool slightly, repeatedly stretch and fold into fine threads while coating with the flour mixture. Press into molds with chopped nuts and unmold to serve.
It is made of the following ingredients: ghee, all-purpose flour , besan, cardamom powder, sugar, water, half a lemon, saffron, almonds, and pistachios for garnishing.
Wrap in a thin food-grade plastic sheet or butter paper. It ensures freshness for a longer time at room temperature. If you keep it open, it will absorb moisture present in the air and become sticky. How To Prebake Soan Papdi Traditional soan papdi cannot be prebaked because it is a spun-sugar and gram flour confection that melts completely when exposed to oven heat..
To make sugar syrup for soan papdi, combine sugar, water, and lemon juice in a heavy-bottomed pan, cook on low heat until it reaches a light amber and one-string consistency, and avoid stirring while it melts.
Leftover soan papdi can be easily used for new creations like a creamy milkshake, rich kheer, or quick ladoos. Because it melts and dissolves easily, it adds sweetness and a nutty flavor.
If the sugar syrup is boiled past the correct stage into a hard-crack or rock stage, soan papdi turns solid and chewy instead of melting in your mouth.
The best chocolate for a healthy dark chocolate soan papdi uses high cocoa content (70% or more), real cocoa butter instead of vegetable fats (avoiding compounds), and clean natural sweeteners.
Chocolate soan papdi is traditionally made using unsweetened cocoa powder rather than melted chocolate. Adding Cadbury cocoa powder directly into the flour mixture during the roasting stage ensures delicate, flaky sugar threads maintain their texture without getting sticky.
Yes, Soan Papdi can be made without ghee by substituting it with plant-based oils like coconut oil or refined vegetable oil, though ghee is traditionally used for flavor and binding.
Some of the ideal desserts as summer smoothies are: blended combinations of fresh fruits, yogurt, milk, or ice cream with different flavors. Popular options are mango cheesecake, strawberry shortcake, and chocolate brownie served chilled.
Blend fruits, yogurt or milk, ice, and a natural sweetener or sugar until smooth. Adjust sweetness if needed, then pour into glasses and top with fresh fruit, mint leaves, or whipped cream before serving.
Some friendly summer smoothie recipes are as follows: mango yogurt smoothie, pineapple-coconut smoothie, or a mixed berry smoothie. Combine fresh or frozen fruit with milk, yogurt, and then blend until smooth.
They are made with chilled fruits, yogurt, milk, coconut water, and ice.Additions like bananas, oats, or peanut butter add a creamy, comforting texture while keeping the drink cool.
Watermelon, mango, pineapple, and strawberry smoothies are refreshing because they contain high water content and natural sweetness. When blended with yogurt, coconut water or ice, they create cool drinks, which are amazing for the summer season.
Yes, summer smoothies can be made ahead of time and stored in the refrigerator for up to 24 hours in an airtight container. Shake or stir before serving for the best taste.
Some trending flavours are: mango passion fruit, strawberry banana, tropical pineapple coconut, watermelon mint, blueberry yogurt, and peach raspberry. These combinations offer exquisite flavors, creamy textures, and a lot of seasonal appeal.
You can serve summer smoothies in colorful glasses, or coconut shells with straws. Top with fresh fruit, mint leaves or whipped cream, or add toppings like granola or coconut flesh for extra texture.
Dark chocolate is good for summer smoothies because it delivers a deep, intense flavor without being too sweet. Cadbury Bournville dark chocolate blends smoothly with milk, bananas, or berries.
Summer smoothies are best prepared at home in order to avoid the additives and refined sugar present in store-bought smoothies. You can enjoy a wider variety as well, when making summer smoothies at home.
Take warm water, add almonds, pistachios, khus khus seeds, dried rose petals, and blend with sugar and cardamom seeds. Take 4 tablespoons of this paste in a glass, add cold milk, and mix well. Serve chilled.
Thandai is a traditional, spiced Indian cold drink made from milk, sugar, and a blend of ground nuts, seeds, and aromatic spices. Derived from the Hindi word thanda, thandai translates to "that cools or "cooler."
Grind almonds, pistachios, khus khus seeds, dried rose petals, and cardamom seeds together to form Thandai powder. Make sure to grind in short bursts; otherwise, the ingredients will release their oil and won't form a proper powder.
Thandai is made of the following ingredients: warm water, almonds, pistachios, khus khus seeds, dried rose petals, sugar, cardamom seeds, and cold milk. Make sure to stir them well to get a thick and smooth consistency.
Bhang Thandai is a traditional Indian cold milk drink mixed with nuts, spices, and bhang (an edible paste made from the leaves and flowers of the cannabis plant). It is sweet, creamy, and cooling.
Thandai gets its traditional flavour from spices like cardamom, saffron, black pepper, fennel seeds, and rose petals. These ingredients create a refreshing aroma and unique taste. Almonds, pistachios further enhance its traditional flavor.
In order to make vegan thandai, you can substitute regular milk with a plant-based milk such as oat milk, almond milk, or light coconut milk.
Yes, thandai can be made completely without any milk by blending soaked nuts and seeds with water. Or you can also use plant-based milk like oat, almond, or coconut milk instead of regular milk.
The best chocolate to use in a chocolate thandai is good-quality dark chocolate (54% to 55% cocoa) or Cadbury Silk chocolate , depending on whether you want a rich cocoa contrast or a milky blend.
For a low-sugar chocolate thandai, use a 55%-70% sugar-free dark chocolate or Cadbury cocoa powder. Dark chocolate provides enough rich cocoa notes without overpowering the aromatic spices with excessive bitterness or sugar.
Some traditional Christmas desserts are as follows: rich fruitcakes, chocolate logs, plum cake, gingerbread cookies, and Christmas pudding. These desserts are enjoyed worldwide during the Christmas festive season.
Boil water, sugar, butter, dried fruits, and spices for 5 minutes. Mix with caramel syrup, orange zest, eggs, flour, baking soda, salt, tutti frutti, and cashews. Bake at 180°C for 50-60 minutes, until a toothpick comes out clean.
Desserts are a symbol of abundance and togetherness during Christmas celebrations. They act as the final part of Christmas meals, are thoughtful gifts, and carry deep cultural meanings.
Yes, Traditional Christmas Desserts can be made without alcohol by using fruit juices, flavoured syrups, or extracts as substitutes. Christmas cakes, puddings, and cookies can still retain rich flavours, festive aromas, and textures.
In order to store a traditional Christmas dessert properly for weeks or months, wrap it tightly in baking parchment and aluminum foil, place it in an airtight container, and keep it in a refrigerator.
Healthy traditional Christmas desserts swap refined flour and sugar for natural sweeteners and alternate flours. Healthy traditional Christmas desserts are: date bark, flourless peanut butter cookies, gingerbread cookies, cranberry tarts, and gluten-free fruitcake.
Traditional and modern Christmas desserts mainly differ in preparation time, ingredients, and style, shifting from heavy fruitcakes to lighter, no-bake desserts. Modern desserts can have mixtures of espresso glaze, salted caramel, or tropical fruits.
Some easy variations of a traditional Christmas cake are: eggnog cake, cranberry orange cake, and chocolate orange drip Cake. They swap heavy, soaked fruits for simple batters and spices.
Cadbury Bournville Dark Chocolate can be the best choice for a traditional Christmas dessert. Its rich, deep cocoa flavor cuts through the heavy sweetness of soaked dried fruits and spices effectively, balancing the flavors.
To add a chocolate twist to a traditional Christmas dessert, you can add melted dark chocolate directly into the batter, mix chocolate chunks with your soaked fruits, or drizzle a milk or white chocolate ganache on top.
Melt Cadbury Silk chocolate with butter. Whisk eggs and sugar until creamy, fold in the chocolate, then stir in sifted flour and cocoa powder. Pour into a baking pan and bake at 180 C for 30 minutes.
In order to make Cadbury Silk Brownies without eggs, you will need to use either condensed milk or heavy cream to achieve the same texture and consistency of a brownie that uses eggs.
A no-oven method to make Cadbury Silk Brownies is using a traditional kadhai or heavy-bottomed pan, which allows you to create a mock oven environment that bakes the brownies evenly without burning the bottom.
The main ingredients used in Cadbury Silk Brownies include Cadbury Silk chocolate, butter, eggs (or condensed milk), sugar, flour, and cocoa powder. Many recipes also add vanilla extract to enhance the overall flavor.
Cadbury Silk brownies can last for 3-4 days at room temperature and up to a week in the refrigerator. For the longest shelf life, they can be tightly wrapped and frozen for up to 3 months.
If your Cadbury Silk Brownies came out dry, cakey, or burnt, it is likely because the batter was overmixed, the oven temperature was too high, or you baked them for too long as overbaking impacts the gooey center.
Cadbury Silk Brownies stand out for their rich, velvety texture and melt in the mouth quality. Using premium milk chocolate instead of only cocoa powder creates a dense, fudgy consistency that makes them more indulgent than regular brownies.
Layer brownie cubes with chocolate pudding, whipped cream, and strawberries for a rich trifle. Or top a Cadbury Silk brownie with vanilla ice cream, chocolate sauce, and chopped nuts for a decadent brownie sundae.
The best product for this is the Cadbury Dairy Milk Silk Desserts Brownie bar. It features a gooey walnut brownie center surrounded by signature velvety Silk chocolate.
Yes, you can use Cadbury Silk by using it for melted chocolate ganache, folding in chopped chunks, or making glazes. Because Silk has a high milk and sugar content, it melts very smoothly and adds extra sweetness.
Whisk whipped cream in a bowl until soft peaks form. Melt Cadbury Silk milk chocolate in a pan with butter. Mix it with whipped cream, add condensed milk, and vanilla extract. Pour into baking molds and refrigerate for 4 hours. Serve chilled.
Yes, it can be made eggless. Eggs are often substituted for ingredients like condensed milk, heavy cream, or whipped cream in order to give the dessert a smooth and silky texture that is achieved with the use of eggs as well.
You don't require an oven to make Cadbury Silk Creamy Desserts, as most of the chocolate melting and ingredient mixing is done in a saucepan. The mixture is then set in the refrigerator and served chilled.
Cadbury Silk Creamy Desserts are made with Cadbury Silk milk chocolate, butter, whipped cream, condensed milk, and vanilla extract. These ingredients combine to create a rich, smooth, creamy dessert with an indulgent chocolate flavor and silky texture.
Store Cadbury Silk Creamy Desserts in an airtight container in the refrigerator for 2-3 days. When freezing, their shelf life increases to 1 month. Thaw before serving.
Too much chocolate or too little cream can make the dessert firm and dry rather than silky. Keeping a balanced ratio of chocolate to cream gives a creamier texture. Additionally, adding hot melted Cadbury Silk directly to whipped cream can melt the fat in the cream, causing it to lose volume and become dense.
Cadbury Silk Creamy Dessert offers a balance between the lightness of a mousse and the richness of a chocolate cream dessert, while showcasing the signature smooth, milky taste of Cadbury Dairy Milk Silk chocolate.
You can fold in crushed Oreo cookies for a crunchy mousse like texture, or dissolve 1 teaspoon instant coffee in 1 tablespoon hot water, stir it into the melted chocolate before folding in the cream to get a coffee mocha flavored dessert.
Different Cadbury Silk chocolate flavors can enhance desserts. Fruit & Nut adds a fruity twist, while Roasted Almond or Hazelnut varieties provide a rich nutty flavor, crunchy texture, and extra depth to mousse-like desserts.
Yes, you can use Cadbury Silk by using it for melted chocolate ganache, folding in chopped chunks, or making glazes. Because Silk has a high milk and sugar content, it melts very smoothly and adds extra sweetness.
Mix custard powder with milk. Add vanilla extract and sugar and stir well. Remove from heat and add Cadbury Silk chocolate. Pour into serving bowls and let it cool at room temperature. Refrigerate for 2-3 hours and serve.
Yes, if you're not using eggs, you can substitute them with ingredients like condensed milk and a custard powder mix that is readily available in the market.
Cadbury Silk Custard Desserts are easy to prepare without an oven. Follow the recipe steps as is and replace the baking with stovetop cooking or steaming.
The following ingredients go into Cadbury Silk Custard Desserts: custard powder (or eggs), milk, vanilla extract, sugar, and melted Cadbury Silk chocolate.
The shelf life of homemade Cadbury Silk custard dessert depends on the ingredients. Since it contains milk and custard, it should always be refrigerated and consumed within 3 days when stored in an airtight container.
A common mistake that people make is pouring custard powder straight into simmering milk which creates lumps.Always mix the custard powder with a small amount of cold milk to form a smooth slurry before adding it.
Homemade Cadbury Silk Custard Desserts delivers the signature creamy, milky taste of milk chocolate. You can adjust the sweetness to your liking. Store-bought custard desserts have a more standardized chocolate flavor, which may be sweeter, or less creamy.
Top the custard with fresh strawberries, raspberries, blueberries, or cherries. Fruit adds freshness and balances the sweetness. Or you can mix toasted almonds, hazelnuts, pecans, or pistachios into the topping for extra crunch.
For most homemade custard desserts, the Classic Cadbury Dairy Milk Silk is the best choice because it melts quickly and evenly. It has a smooth, creamy milk chocolate flavor. Also it mixes well into warm custard without becoming grainy.
Yes, you can use Cadbury Silk by using it for melted chocolate ganache, folding in chopped chunks, or making glazes. Because Silk has a high milk and sugar content, it melts very smoothly and adds extra sweetness.
For an easy Cadbury Silk Sweets recipe, melt Cadbury Silk chocolate with butter. Mix this with homemade coconut ladoo batter and roll into equal-sized balls. You have homemade Cadbury Silk Coconut Ladoo ready.
Yes, you can make an eggless version. The signature silk texture is achieved by replacing eggs with rich alternatives like sweetened condensed milk, yogurt, heavy cream, or whipped cream.
You don't necessarily need an oven to make a Cadbury Silk Sweet. You can make them using a refrigeration chilling method or stovetop cooking, as per the recipe requirements.
These are the following ingredients that are commonly used: Cadbury Dairy Milk Silk chocolate, butter, whipped cream, vanilla, powdered sugar, and condensed milk.
When stored in an airtight container inside a refrigerator, Cadbury Silk Sweets can last up to 3 days. In the freezer, it can be stored up to 1 month, although the texture might change when thawed.
A common mistake that people make is mixing hot chocolate with the whipped cream, as doing so can cause the mixture to deflate and melt, resulting in a soupy and runny base.
They're different because, in the case of homemade desserts, they rely on high quality ingredients; while store-bought versions utilize commercial emulsifiers and vegetable fats to achieve their signature velvety snap and extended shelf life.
Layer the Cadbury Silk Sweets with crushed Oreo cookies and whipped cream in clear glasses. Finish with chocolate shavings for a cookies and cream dessert. Or swirl salted caramel sauce instead of fully mixing it.
The classic Cadbury Dairy Milk Silk is the best choice. Its smooth, creamy texture and lack of chunky additions make it perfect for melting into ganache, batters, or frostings.
Yes, you can use Cadbury Silk by using it for melted chocolate ganache, folding in chopped chunks, or making glazes. Because Silk has a high milk and sugar content, it melts very smoothly and adds extra sweetness.
Some of the best chilled desserts are as follows: cheesecakes, ice creams, puddings, icebox cakes, and fruit custards. They are creamy, refreshing, easy to prepare, and perfect for hot weather, while offering delicious flavors.
Prepare a base using yogurt, cream, custard, or pudding. Layer with fruits, biscuits, or chocolate, then refrigerate until firm. Garnish with nuts, whipped cream, or berries before serving for extra flavor.
Chilled desserts that use the fewest ingredients are: chocolate mousse, yogurt parfaits, banana ice cream, panna cotta, and fruit sorbet. They only require only 3-5 ingredients, making them quick, budget friendly, and easy for beginners to prepare.
These desserts are perfect for warm seasons because they are cool, light, and refreshing. Made with fruits, yogurt and cream, they help beat the heat while offering creamy textures, without being overly heavy.
Fresh fruits, yogurt, whipped cream, cream cheese, milk, condensed milk, chocolate, custard, gelatin or agar-agar, biscuits, nuts, vanilla extract, and sugar or honey are used in chilled desserts for enhanced flavors.
You can store chilled desserts in airtight containers or cover them tightly with plastic wrap before refrigerating. Consume within 2-4 days. Add fresh fruit or crunchy toppings just before serving for the best texture.
The most demanded chilled dessert flavors include chocolate, strawberry, mango, blueberry, coconut, caramel, and pistachio. Seasonal fruits, mint, and honey, add refreshing twists, while layered combinations create rich and creamy desserts.
Fruit parfaits, chocolate mousse, yogurt cups, no-bake cheesecakes, and icebox cakes are some variations. You can customize them with seasonal fruits, nuts, caramel, or chocolate chips for a plethora of combinations.
Dark chocolate with 50-70% cocoa is proper for chilled desserts because it melts smoothly, sets well, and balances out the creamy texture. Cadbury Bournville delivers a rich flavor that pairs perfectly with mousses, cheesecakes, and parfaits.
Chilled desserts are best prepared at home in order to avoid the additives and refined sugar present in store-bought desserts. You can enjoy a wider variety as well, when making chilled desserts at home.
Mix crushed Oreos with melted butter for the crust. Blend paneer, condensed milk, and vanilla, then combine with dissolved gelatin. Pour over the crust, refrigerate for 3-4 hours until set, and serve chilled.
Typically, Oreo pudding is made without the use of eggs. Instead of eggs, cottage cheese and sweetened condensed milk are used in order for the pudding to take shape naturally.
To make Oreo Pudding without an oven, allow the pudding batter to cool down at room temperature. To set the pudding, cool it inside the refrigerator and serve chilled.
The ingredients that go into making Oreo Pudding are as follows: Oreo cookies, melted butter, cottage cheese (paneer), sweetened condensed milk, and vanilla extract.
Oreo pudding stays fresh in the refrigerator for up to 1 week. Seal it inside an airtight container to achieve best results. Avoid keeping it at room temperature for long hours.
Don't forget to properly cool down the pudding in the refrigerator, as it takes time to fully thicken. The Oreo crumbs should be thick and coarse, not fine; otherwise, they would dissolve completely into the pudding.
They have different textures, cookie crunch, and ingredients. Homemade Oreo pudding is fresher and can be made from higher quality ingredients, as well as customized to suit the consumer's needs.
You can fold creamy peanut butter directly into the pudding mix, or layer it between Oreo and cream layers. To give it a caffeine twist, add espresso powder into milk to give it an enhanced cocoa flavor.
Original Oreo instant pudding mix is a great product for making desserts, as it is highly versatile and can be used in parfaits, trifles, pie fillings, etc, and gives consistent results every time.
Yes, Oreo pudding mix is great for baking cakes and brownies, particularly as an additive to boost moisture, add flavor, and create a tender crumb. However, it is only an additive, not a flour substitute.
Some of the summer chocolate desserts are: chocolate mousse, frozen brownies, chocolate ice cream, and chilled chocolate cheesecake. These cool, creamy treats satisfy chocolate cravings while staying refreshing during hot weather.
Melt chocolate of your choice, combine with cream, yogurt, or milk. Layer with fruits or biscuits, chill until set, and top it off with berries, nuts, or whipped cream before serving cold.
Chocolate brownies, chocolate muffins, choco chip cookies, fudge, truffles, and chocolate covered strawberries are excellent picnic desserts. They are portable, easy to pack, require minimal serving effort, and stay fresh when stored in an airtight container.
These desserts are perfect for warm seasons because they are cool, light, and refreshing. Made with fruits, yogurt and cream, they help beat the heat while offering creamy textures, without being overly heavy.
Ingredients that are used in summer chocolate desserts are as follows: chocolate, whipped cream, milk, yogurt, butter, cocoa powder, condensed milk, vanilla extract, fresh fruits, nuts, biscuits, and sugar.
You can store them in airtight containers in the refrigerator to maintain freshness. Consume within 3-4 days for the best quality. Keep frozen desserts in the freezer and thaw slightly before serving for ideal consistency.
Some popular summer chocolate dessert flavors are: mint, orange, raspberry, strawberry, coconut, salted caramel, coffee, and hazelnut. Pairing chocolate with tropical fruits and berries creates refreshing desserts perfect for the summers.
Chocolate yogurt parfaits, frozen chocolate banana bites, chocolate fruit dips, brownie ice cream sundaes, chocolate pudding cups, and frozen mousse pops are some interesting variations. You can customize them with berries, nuts, or Oreo crumbs.
High quality dark chocolate is preferred for a summer chocolate dessert instead of a specific brand. However, you can take a look at Cadbury Bournville dark chocolate for your desserts.
Summer chocolate desserts are best prepared at home in order to avoid the additives and refined sugar present in store-bought desserts. You can enjoy a wider variety as well, when making summer chocolate desserts at home.
Yogurt desserts are perfect for warm weather because they are light, creamy, and refreshing. Some of the popular choices are as follows: parfaits, frozen yogurt, yogurt popsicles.
Whisk yogurt until smooth, and mix in honey/sugar and vanilla. Fold in fresh fruits or granola, layer in serving glasses, and chill before serving. Garnish with nuts or berries for a fruity or crunchy texture.
Parfaits, frozen yogurt bark, yogurt popsicles, and mango yogurt mousse are some beginner friendly recipes. They require simple mixing or layering, and little to no baking, making them quick and easy to prepare.
Adding juicy seasonal fruits, mint, and honey can make summer yogurt desserts refreshing. Other ingredients like vanilla, granola, nuts, coconut, and a touch of cinnamon create satisfying textures and flavors while keeping desserts light and delicious.
You can keep yogurt desserts creamy by using full fat yogurt, avoid overmixing, and chill immediately after preparation. Add fresh fruit, honey, or cream for extra richness, and store in an airtight container to maintain the texture and freshness.
Yes, summer yogurt desserts can be made ahead of time. Prepare them a few hours or even a day in advance and refrigerate until ready to serve.
Mango, mixed berries, peach, coconut, passion fruit, lemon, and matcha are some trendy flavors.Combine with honey, vanilla, pistachios, and fresh mint to create refreshing and creamy desserts with exceptional cooling capabilities.
You can serve summer yogurt desserts in parfait glasses, mason jars, waffle cones, edible chocolate cups, or frozen popsicle molds. Also, you can top them off with fresh fruits, granola, and nuts.
Dark chocolate with 50-70% cocoa is ideal for summer yogurt desserts because it balances yogurt's tanginess without being overly sweet. Cadbury Bournville melts smoothly and pairs beautifully with fresh fruits and creamy yogurt.
Summer yogurt desserts are best prepared at home in order to avoid the additives and refined sugar present in store-bought smoothies. You can enjoy a wider variety as well, when making summer smoothies at home.
The best winter chocolate desserts are the following: molten lava cake, hot chocolate brownie, chocolate bread pudding, chocolate truffles, chocolate mousse, chocolate pecan pie, and a rich chocolate cheesecake, offering comforting flavors which are best for cold weather.
Melt high quality dark chocolate, combine with butter, eggs, flour, and seasonal spices, then bake or chill as required. Serve warm with whipped cream, chocolate sauce drizzle or hot chocolate.
Winter flavours that pair well with chocolate desserts are as follows: cinnamon, nutmeg, ginger, orange, espresso, hazelnut, caramel, and vanilla. These ingredients enhance the depth of the chocolate, creating warm desserts that are perfect for the cold weather.
Because of their rich chocolate flavor, warm spices, and comforting textures, winter chocolate desserts are served warm and paired with hot chocolate, or a warm caramel sauce drizzle, becoming ideal for chilly weather.
Ingredients such as dark chocolate, cocoa powder, butter, cream, sugar, eggs, flour, vanilla, nuts, dried fruits, and spices such as cinnamon are used in winter chocolate desserts.
They should be stored in airtight containers to maintain freshness and flavor. Keep cakes, brownies, and truffles refrigerated when needed. Let chilled desserts thaw at room temperature before serving for the best texture.
Some popular flavours for winter chocolate desserts are: dark chocolate, milk chocolate, salted caramel, orange, hazelnut, coffee, cinnamon, vanilla, and berry combinations. These flavours enhance winter chocolate desserts taste.
Adding nuts, caramel, peppermint, orange zest, coffee, dried fruits, or warming spices can add a warm twist to winter chocolate desserts. You can create them by adjusting ingredients and toppings for different flavours to your liking.
Dark chocolate with 60-70% cocoa is preferred for winter chocolate desserts, offering an intense flavor that pairs gorgeously with spices and seasonal fruits. Brands like Cadbury provide excellent dark chocolate for winter chocolate desserts.
Winter chocolate desserts are best prepared at home in order to avoid the additives and refined sugar present in store-bought desserts. You can enjoy a wider variety as well, when making Winter chocolate desserts at home.
Winter desserts are warming sweets that highlight seasonal flavors like cinnamon, chocolate, caramel, and dried fruits. Some examples are: sticky toffee pudding, molten lava cake, bread pudding, fruit pies, and warm brownies.
Melt high quality dark chocolate, combine with butter, eggs, flour, and seasonal spices, then bake or chill as required. Serve warm with whipped cream, chocolate sauce drizzle or hot chocolate.
Some common nuts are as follows: walnuts, almonds, hazelnuts, pistachios, and chestnuts. They add a crunchy texture, while pairing amazingly with chocolate, caramel, cinnamon, dried fruits, and other spices in cakes, puddings, cookies, and tarts.
Ingredients like dark chocolate, cream, cinnamon, vanilla, caramel, dried fruits, nuts, and other spices create rich and warm flavors, cozy aromas, and satisfying textures which are comforting in cold weather.
They often have apples, pears, oranges, cranberries, pomegranates, and dried fruits like raisins and apricots. These fruits provide natural sweetness, seasonal flavor, and pair wonderfully with chocolate, nuts, cinnamon, and spices.
Yes, winter desserts can be made ahead of time. You can make cakes, puddings, and pies in advance, refrigerate them, then gently reheat before serving to restore their warmth, texture, and flavor.
Salted caramel, cinnamon, pumpkin spice, peppermint, orange, hazelnut, chestnut, and coffee are some of the trending flavors. These ingredients create comforting desserts which are exceptionally good for chilly weather.
You can serve winter desserts by warming them in festive bowls, topped with whipped cream, caramel sauce, toasted nuts, or chocolate shavings. Add cinnamon powder or fresh berries for a chocolaty or fruity twist.
Dark chocolate with 60-70% cocoa is preferred for winter desserts, offering an intense flavor that pairs gorgeously with spices and seasonal fruits. Brands like Cadbury provide excellent dark chocolate for winter desserts.
Winter desserts are best prepared at home in order to avoid the additives and refined sugar present in store-bought desserts. You can enjoy a wider variety as well, when making winter desserts at home.
A no bake cake requires absolutely no oven. Instead, it relies on refrigeration or freezing to set. It typically uses pre-cooked bases like crushed cookies, combined with cream, gelatin, or mousse fillings.
Pour water into a heavy-bottomed pan, place a trivet inside, and set the cake pan on top. Cover with a lid and steam over medium heat, maintaining a gentle simmer. Check doneness by inserting a toothpick into the centre.
Fillings for a no bake cake include the following: chocolate ganache, whipped cream, fresh fruits, cream cheese, caramel, and peanut butter. These fillings add richness, flavour, and texture while creating delicious combinations.
A no-bake cake is a great choice because it is fast, requires no oven, and is very easy to make. These simple no bake tricks reduce cooking stress and lower the risk of burning food.
No bake cakes can be stored in an airtight container in the refrigerator for 3-5 days, or in the freezer for 2-3 months. Because they often contain dairy, keeping them cold and sealed prevents spoilage and texture loss.
Most common substitutes used in no bake cakes are as follows: graham crackers or instead of base crumbs, coconut milk or cashew cream instead of heavy cream, and dates instead of sugar.
If you choose a no bake cake over regular baked desserts, you are offered convenience, lighter textures, and kitchen safety. It saves time, keeps your kitchen tidy, and is beginner friendly.
Yes, no bake cakes are very beginner friendly. They require no oven, involve simple mixing and chilling steps, and use basic, easy to find ingredients like crushed biscuits and cream for the cooking process.
The best chocolate for a no- ake cake is good quality dark baking chocolate (50% to 60% cocoa), paired with cocoa powder or Cadbury Bournville dark chocolate for balanced richness.
Homemade no bake cakes are preferred if you want a fresher taste, as they differ in ingredients when compared to store-bought desserts. You also have the option to customize the cakes to your liking.
No bake cheesecake is a chilled dessert made with a biscuit crust and a cream cheese filling that is set in the refrigerator instead of baking in an oven. It relies on whipped cream for its structure.
Mix the crust with cream cheese, sugar, vanilla, and whipped cream, then chill it in the refrigerator for 6 hours. No oven or gelatin is needed when using whipped cream for a no bake cheese cake.
A no bake cheesecake should be chilled for at least 4-6 hours before serving to set properly. For the best texture and flavour, refrigerating it overnight allows the filling to firm up and develop a smooth, creamy consistency.
Making a no bake cheesecake offers simplicity, no oven is required, and it gives a light, mousse-like texture. It is fast to assemble, foolproof against cracking, and ideal for people living in warm conditions.
No-bake cheesecake lasts for 3-5 days when tightly wrapped and stored in the refrigerator. Consume it within this window to prevent the crust from becoming soggy and to maintain maximum freshness.
Graham cracker crumbs, unsalted butter, sugar, cinnamon, cream cheese, whipped cream, and vanilla extract are all of the ingredients that are used in a no bake cheesecake.
The main difference between them is that baked desserts use eggs that cook in the oven to build a dense structure, while no bake cheesecakes use whipped cream or gelatin and set in a refrigerator.
Some mistakes to be avoided are as follows: don't use cold cream cheese, or rush the chill time. Always use softened block cream cheese, mix gently to keep it fluffy, and refrigerate for six hours to set.
The best chocolate for a no bake cheesecake is 60% to 70% dark chocolate, such as Cadbury Bournville or cocoa powder, because they melt smoothly and give a deep flavor without making the dessert too sweet.
For No Bake Cheese Cake, making it at home is preferred as store-bought desserts might not be up to the mark, not taste fresh and have limited customization options.
No bake pies are sweet desserts that do not require an oven, typically featuring a crust and a creamy filling. They rely on the refrigerator or freezer to set.
Make no bake pies by mixing ingredients like cream cheese or condensed milk with whipped topping, pour into a graham cracker crust, and chill until firm in the refrigerator.
Fruits like strawberries, blueberries, raspberries, mangoes and peaches pair well with no bake pies. They add freshness and natural sweetness while complementing creamy fillings, chocolate, or biscuit crusts for an exquisite experience.
These pies are quick, convenient desserts that require no oven, making them perfect for warm weather. They save time, reduce efforts, and offer a lot of flavor options with refreshing textures.
Most no bake pies last for 3-5 days in the refrigerator when stored properly. Their shelf life depends heavily on the perishable dairy ingredients used and whether they are stored in an airtight container or not.
They typically use a graham cracker crust made from biscuits, a filling of cream cheese, whipped cream, condensed milk, chocolate, fruit, peanut butter, vanilla, often topped with fresh fruit.
No bake pies require no oven and are set by chilling, making them quicker and easier to prepare. Regular desserts need baking, having firmer textures. Meanwhile no bake pies are creamier, lighter, and cool.
Avoid using warm ingredients, or overmixing whipped cream, as it can prevent the filling from setting. Press the crust firmly, chill the pie thoroughly, and use good quality ingredients for the best texture and flavor.
The best chocolate for no bake pies is high-quality dark chocolate (50% to 60% cocoa). Bars with high cocoa content melt into a smooth ganache and set firmly in the fridge without tasting too sweet.
Homemade no bake pies are preferred if you want a fresher taste, as they differ in ingredients when compared to store-bought desserts. You also have the option to customize the dessert to your liking.
Leftover Bournville chocolate can be turned into brownies, cookies, truffles, hot chocolate, a fresh chocolate bark, or melted over fruits. Small pieces also work well in muffins, pancakes, or homemade granola bars, adding a rich dark chocolate flavor without any waste.
Bournville chocolate is a great choice for baking because it melts smoothly and has a deep cocoa flavor. It works well in cakes, brownies, cookies, muffins, cheesecakes, and dessert fillings, creating a balanced taste that is not overly sweet.
Melted Bournville chocolate can be drizzled over cakes, spread as a glossy topping, or piped into decorative shapes. Chocolate curls, shavings, or thin shards made from chilled chocolate also give cakes an elegant homemade finish.
Bournville chocolate pairs beautifully with strawberries, bananas, raspberries, oranges, cherries, pears, and apples. The slight bitterness of dark chocolate balances naturally sweet fruits, creating desserts that taste rich without becoming overly sugary.
Eggless Bournville desserts can be prepared using ingredients like yogurt, mashed banana, applesauce, condensed milk, or flaxseed mixture instead of eggs. These alternatives help create soft cakes, brownies, and mousses while keeping the chocolate flavor rich and satisfying.
Bournville chocolate ice cream is made by melting the chocolate into warm milk and cream, then chilling the mixture before freezing. A no-churn version can also be made with whipped cream and condensed milk for a creamy texture.
Cadbury Bournville dark chocolate works well in brownies, cakes, mousse, truffles, cookies, cheesecakes, puddings, chocolate bark, and ice cream. Its rich cocoa flavor blends easily into both baked and no-bake desserts for everyday treats or special occasions.
Melt Bournville chocolate gently using a microwave or double boiler until smooth. Let it cool slightly before drizzling over cakes, cookies, brownies, fruit, or ice cream. A spoon or piping bag helps create neat, even chocolate lines.
Bournville hot chocolate is prepared by melting chopped chocolate into warm milk while stirring until smooth. A little cocoa powder, sugar, vanilla, or cinnamon can be added for extra flavor, then served warm with whipped cream if preferred.
Bournville chocolate cake is made by combining flour, cocoa powder, sugar, baking powder, milk, oil, and melted Bournville chocolate into a smooth batter before baking. Frosting with dark chocolate ganache makes the cake even richer and more indulgent.
Oreo cookies can be used to prepare cheesecakes, truffles, parfaits, milkshakes, ice cream, brownies, pudding, dessert cups, cake pops, and pie crusts. Oreo cookies also pair well with whipped cream, chocolate, fresh fruit, and cream cheese for quick homemade desserts.
No-bake Oreo desserts include cheesecakes, truffles, dessert cups, parfaits, refrigerator cakes, and layered puddings. Most recipes only need crushed Oreo cookies, cream cheese, whipped cream, or condensed milk, followed by chilling until firm.
Easy Oreo dessert ideas include milkshakes, mug cakes, dessert cups, ice cream toppings, chocolate bark, cookie sandwiches, and parfaits. Oreo recipes often require only a few ingredients and can be prepared in less than 30 minutes. How to make dessert with Oreo A simple Oreo dessert can be made by crushing Oreo cookies and layering them with whipped cream, chocolate pudding, cream cheese, or ice cream. Chilling the dessert before serving helps create better texture and richer flavor.
Oreo desserts without an oven include no-bake cheesecakes, refrigerator cakes, pudding cups, truffles, parfaits, and ice cream treats. Most Oreo recipes only need mixing, layering, and chilling, making them convenient for quick homemade desserts.
Oreo dessert cups are made by layering crushed Oreo cookies with cream cheese filling, whipped cream, chocolate pudding, or mousse in serving glasses. Refrigerating the cups for a few hours helps the layers set beautifully.
Festive Oreo desserts include festive truffles, layered trifles, decorated cupcakes, chocolate-dipped Oreo cookies, dessert boards, and themed cheesecakes. Colorful sprinkles, seasonal candies, or fresh berries make Oreo treats look perfect for celebrations.
Oreo ice cream is made by folding crushed Oreo cookies into whipped cream and sweetened condensed milk before freezing. For an extra creamy texture, adding a little vanilla extract or heavy cream works well.
Oreo ice cream sandwiches are made by placing a scoop of ice cream between two Oreo cookies, gently pressing them together, and freezing until firm. Rolling the edges in crushed Oreo cookies or sprinkles adds extra crunch.
Mix some flour, sugar, cocoa powder, baking powder, salt, and butter. Add crushed Oreo cookies and milk until smooth, then microwave the batter for about one minute. A topping of whipped cream, chocolate sauce, or crushed Oreo cookies adds extra flavor.
Bournvita can be used to make cakes, brownies, cookies, puddings, milkshakes, ice cream, mousse, truffles, and no-bake treats. Its chocolate malt flavor adds richness and pairs well with many homemade dessert recipes.
To make Bournvita desserts, combine the required ingredients with Bournvita, prepare the batter or mixture, then bake, steam, chill, or freeze according to the recipe. Allow the dessert to cool or set before serving.
Eggless Bournvita desserts can be made by replacing eggs with yogurt, condensed milk, mashed banana, or applesauce. These alternatives help create a soft texture while keeping the rich chocolate malt flavor intact.
No-oven Bournvita dessert recipes include chilled puddings, mousse, truffles, refrigerator cakes, ice cream, milkshakes, and steamed cakes. These recipes are simple to prepare and require little or no baking equipment.
Bournvita desserts commonly use Bournvita, milk, butter, flour, sugar, cocoa, cream, chocolate, biscuits, or nuts. The exact ingredients depend on whether you're making cakes, brownies, puddings, or frozen desserts.
Yes, Bournvita works well in cakes, brownies, and cookies by adding a rich chocolate malt flavor and mild sweetness. It is best used alongside cocoa powder or chocolate for a deeper, balanced taste.
Homemade Bournvita desserts usually stay fresh for two to four days when refrigerated in an airtight container. Frozen desserts can last longer, while baked treats are best enjoyed within a few days.
Repetitive. Brownies are already covered in Questions 1 and 6.
Yes, you can make a Bournvita milkshake at home by blending chilled milk, Bournvita, ice cream or ice cubes, and sugar if needed. Blend until smooth and serve immediately for the best taste.
Bournvita pairs well with milk, chocolate, cocoa, coffee, vanilla, bananas, nuts, cream, biscuits, caramel, and peanut butter. These ingredients complement its chocolate malt flavor and create rich, delicious homemade desserts.
Diwali celebrations feature popular sweets like ladoo, barfi, kaju katli, gulab jamun, jalebi, rasgulla, and soan papdi. These traditional treats are loved for their rich flavors and are commonly shared with family, friends, and guests.
Cadbury Dairy Milk is the most versatile choice for Diwali desserts because it melts smoothly and has a creamy flavor. Cadbury Bournville works well for richer treats, while Cadbury Milkinis is ideal for sweeter festive recipes.
Diwali chocolate desserts include brownies, mousse, truffles, fudge, cakes, cookies, and Cadbury Dairy Milk-based treats. These festive creations bring rich cocoa flavors and a modern touch to celebrations while offering variety beyond traditional sweets.
Gifting sweets during Diwali is popular because they symbolize happiness, prosperity, and good wishes. Sharing treats like ladoo, kaju katli, and festive gift boxes helps strengthen relationships and spreads joy among family, friends, and neighbors.
Diwali gift boxes often include kaju katli, assorted barfi, ladoo, dry fruit sweets, soan papdi, and Cadbury Celebrations gift box. Attractive packaging with a mix of traditional sweets and premium chocolates makes thoughtful festive gifts for family and friends.
Kid-friendly Diwali desserts include chocolate brownies, cupcakes, cookies, fruit-based treats, chocolate truffles, and colorful sweets. These desserts are fun, easy to enjoy, and can be made with mild flavors, creative designs, and festive decorations.
Easy Diwali homemade sweets include coconut ladoo, chocolate fudge, biscuit barfi, peanut chikki, dates rolls, and condensed milk barfi. These recipes need simple ingredients and are perfect for quick festive preparations.
Several Diwali sweets come together quickly, including coconut ladoo, chocolate fudge, biscuit barfi, peanut chikki, and dates rolls. Using condensed milk or ready-to-make ingredients helps create festive treats under 30 minutes.
No-bake Diwali desserts include chocolate truffles, biscuit cake, coconut ladoo, chocolate fudge, shrikhand, and chilled cheesecake cups. These festive treats skip the oven while still delivering rich flavors and attractive presentation.
Fun ways to add a chocolate twist to Diwali sweets include making chocolate-dipped mithai, festive chocolate bark with nuts, layered desserts, cocoa-flavored treats, and creative decorations with chocolate drizzles or toppings for a delicious modern touch.
Popular Mother's Day Dessert ideas include chocolate cake, strawberry cheesecake, fruit tarts, cupcakes, brownies, macarons, and creamy puddings. These treats are loved for their beautiful presentation, delicious flavors, and perfect balance of elegance and sweetness.
An easy Mother's Day Dessert is a no-bake chocolate parfait made by layering whipped cream, crushed biscuits, fresh berries, and melted chocolate. Chill before serving for a simple, delicious treat that looks festive with minimal effort.
A Mother's Day Dessert symbolizes love, gratitude, and celebration. Sharing a sweet treat brings families together, creates memorable moments, and adds a thoughtful finishing touch to a meal dedicated to honoring mothers.
Perfect pastries for Mother's Day include elegant options like fruit tarts, chocolate pastries, croissants, cream puffs, macarons, and mini cakes. These treats make a thoughtful dessert choice with beautiful presentation and delightful flavors.
The shelf life of a Mother's Day Dessert depends on the recipe. Cakes and brownies usually stay fresh for three to five days, while cream-based desserts are best enjoyed within two to three days when refrigerated.
Yes, low-sugar Mother's Day Dessert options include fresh fruit parfaits, yogurt-based treats, sugar-free cheesecakes, chia puddings, and dark chocolate desserts made with natural sweeteners. They offer a satisfying flavor while reducing added sugar.
Mother's Day Dessert traditions have evolved from simple homemade cakes and pies to creative treats like dessert jars, gourmet cupcakes, no-bake sweets, and personalized cakes, reflecting changing tastes, modern baking trends, and family celebrations.
Creative Mother's Day Dessert ideas include chocolate-filled cupcakes, layered dessert jars, floral-flavored cheesecakes, fruit-topped brownies, mini tart assortments, and elegant mousse cakes. These modern variations add fresh flavors while keeping familiar favorites.
Cadbury Dairy Milk is a great choice for a Mother's Day Dessert because its smooth, creamy texture melts easily for cakes, brownies, cheesecakes, chocolate sauces, truffles, and other homemade treats with rich chocolate flavor.
Add a chocolate twist to a Mothers Day Dessert by drizzling melted chocolate over cakes, dipping fresh fruits, decorating with chocolate curls, sprinkling grated chocolate, or using chocolate ganache as a rich topping or filling.
Popular National Festival Desserts include ladoos, barfi, jalebi, kheer, gulab jamun, rasgulla, and peda. These desserts are commonly prepared during celebrations because they carry traditional flavors and are shared with guests and family members.
An easy National Festival Desserts recipe is coconut ladoo, made using grated coconut, condensed milk, and cardamom. The ingredients are mixed, shaped into small balls, and topped with nuts for a simple festive sweet.
Sweets are an important part of National Festival Desserts as they are connected with rituals, gatherings, and celebrations. Offering and sharing desserts during festivals is a long-standing custom in many cultures.
Desserts perfect for festive gifting include ladoos, barfi, chocolates, cookies, cupcakes, and dessert jars. These treats are easy to pack, look attractive, and make thoughtful gifts for family, friends, and loved ones during celebrations.
The shelf life of National Festival Desserts depends on the ingredients used. Dry sweets like ladoos and barfi can last longer, while milk-based desserts like kheer should be refrigerated and consumed within a few days.
Yes, low-sugar National Festival Desserts options include fruit-based sweets, nut ladoos, and desserts made with natural sweeteners. These alternatives offer festive flavors while reducing the overall sugar content.
National Festival Desserts have evolved by combining traditional recipes with modern flavors and presentation styles. New variations include fusion sweets, chocolate desserts, and healthier versions while keeping the cultural essence alive.
Creative National Festival Desserts twists include chocolate-filled ladoos, flavored barfi, dessert jars, and fusion cakes. These modern versions give traditional sweets a fresh look while keeping familiar festive flavors.
The Cadbury Bournville Dark Chocolate Bar works well for festival desserts because its rich cocoa flavor balances the sweetness of traditional treats. Milk chocolate adds a sweeter taste, while white chocolate brings a smooth, creamy flavor.
A chocolate twist in National Festival Desserts can be added by mixing cocoa, chocolate chips, or melted chocolate into traditional sweets. Chocolate coatings and fillings also create a fun festive variation.
To make a refreshing Tang drink at home, simply mix Tang powder with chilled water and stir until fully dissolved. Add ice cubes for extra freshness, and adjust the powder or water to make the flavor stronger or lighter.
Yes, Tang is naturally egg-free because it is an instant fruit drink mix made with fruit flavors, sugar, and vitamins. You can prepare it by mixing the powder with cold water and serving it chilled.
Tang does not require an oven since it is an instant drink. Combine the powder with chilled water, stir until smooth, and serve over ice. It can also be used in no-bake desserts like popsicles and jellies.
Tang is typically made with fruit-flavored powder containing sugar, citric acid, natural and artificial flavors, vitamins, color, and other ingredients. It is mixed with water to create a refreshing fruit drink in just a few minutes.
Prepared Tang tastes best when consumed immediately but can be refrigerated for up to 24 hours in a covered container. Unopened Tang powder stays fresh for months when stored in a cool, dry place.
Adding too much or too little Tang powder affects the flavor. Using warm water instead of chilled water can also reduce the refreshing taste and overall drinking experience.
Homemade Tang refers to preparing the drink fresh by mixing the powder with water, giving you control over the flavor. Store-bought ready-to-drink versions come pre-mixed and offer a fixed flavor concentration.
You can give Tang a fun twist by blending it into smoothies, freezing it into popsicles, mixing it with sparkling water, or using it in mocktails, fruit jellies, and frozen desserts for extra fruity flavor.
Yes, Tang can be used to make fruit punch by mixing it with chilled water, fruit juices, and fresh fruit pieces. You can also add sparkling water or ice for a refreshing drink that's perfect for parties and gatherings.
There isn't one best Tang flavour for summer drinks. Orange Tang offers a refreshing citrus taste, mango adds tropical sweetness, and lemon provides a tangy, cooling flavor. The best Tang flavour for summer drinks depends on your personal taste and preference.
Thanksgiving Desserts usually focus on homemade favorites, with pumpkin pie often leading, followed by apple and pecan pies, sweet potato desserts, bread pudding, cheesecakes, and simple cranberry-inspired sweets enjoyed after the main meal.
For easy Thanksgiving Desserts, layer pumpkin puree, whipped cream, cream cheese, crushed cookies, and pumpkin spice into serving glasses. Refrigerate until chilled, then finish with chopped pecans or a light sprinkle of cinnamon before serving.
Thanksgiving Desserts are important because they bring families together after the meal. Sharing pies, cakes, and other seasonal treats marks a sweet ending to the Thanksgiving celebration.
Kid-friendly Thanksgiving Desserts include mini pumpkin pies, chocolate brownies, caramel apples, cookie turkeys, fruit parfaits, and cupcakes. These treats are fun to decorate, easy to serve, and offer familiar flavors that children enjoy during the holiday celebration.
Most Thanksgiving Desserts stay fresh for two to four days when refrigerated. Cakes, pies, cheesecakes, and puddings should be stored in airtight containers, while cookies and brownies may last up to one week at room temperature.
Yes, Thanksgiving Desserts can be made with less sugar by using fresh fruit, natural sweeteners, unsweetened applesauce, or sugar substitutes. Pumpkin parfaits, baked apples, and yogurt-based treats are flavorful low-sugar choices.
Thanksgiving Desserts have evolved from traditional homemade pies to include cheesecakes, dessert bars, parfaits, chocolate treats, and gluten-free or vegan recipes. Modern versions balance classic flavors with new ingredients.
Creative Thanksgiving Desserts include pumpkin pie cheesecake, pecan pie brownies, apple pie cupcakes, cranberry trifles, layered dessert jars, and chocolate-covered pumpkin treats. These modern versions keep traditional flavors intact while adding fresh variety.
Cadbury Dairy Milk works well in Thanksgiving Desserts because its smooth, creamy texture melts easily into brownies, cookies, cheesecakes, dessert dips, and festive treats. Dark or white varieties also pair nicely with seasonal flavors.
Add a chocolate twist to Thanksgiving Desserts by mixing melted chocolate into cheesecakes, brownies, pies, cookies, dessert bars, or drizzling it over pumpkin and apple treats.
Traditional Valentine's Day Desserts include chocolate-covered strawberries, heart-shaped cakes, red velvet cupcakes, macarons, cheesecakes, chocolate truffles, brownies, mousse, cookies, and fruit tarts. These sweet treats are popular for celebrating love.
To prepare Valentine's Day Desserts, gather your ingredients, mix the batter or filling, bake or chill as needed, decorate with frosting, chocolate, or fresh fruit, then let everything set before serving or gifting.
Valentine's Day Desserts symbolize love, appreciation, and togetherness. Sharing beautifully prepared sweets adds a thoughtful touch to celebrations, making dinners, parties, and gift exchanges feel more special while creating memorable moments with loved ones.
Beginner-friendly Valentine's Day Desserts include chocolate-covered strawberries, no-bake cheesecakes, brownie bites, chocolate mousse, heart-shaped cookies, dessert parfaits, and mug cakes.
Yes, many Valentine's Day Desserts can be prepared one or two days ahead and stored in the refrigerator. Brownies, cheesecakes, cookies, and truffles stay fresh when kept in airtight containers until ready to serve.
Guilt-free Valentine's Day Desserts include Greek yogurt parfaits, dark chocolate-covered strawberries, chia pudding, fruit salad, baked apples, frozen yogurt bites, and oatmeal cookies. They satisfy sweet cravings while using lighter ingredients and less added sugar.
Fusion Valentine's Day Desserts combine classic favorites with global flavors, including chocolate gulab jamun, red velvet tres leches, matcha brownies, cheesecake jars, chocolate rasmalai, and macarons with Indian-inspired fillings for a unique celebration.
The best Valentine's Day Desserts for gifting include chocolate truffles, decorated cookies, heart-shaped brownies, macarons, dessert jars, mini cheesecakes, chocolate-covered strawberries, and assorted sweet boxes.
For Valentine's Day Desserts, Cadbury Dairy Milk Silk Heart Blush and Cadbury Dairy Milk Fruit & Nut are excellent choices for gifting, while Cadbury Dairy Milk Silk, Silk Oreo, and Bournville Dark Chocolate work beautifully for baking, dipping, and decorating desserts.
Add a chocolate twist to Valentine's Day Desserts by drizzling melted chocolate, folding chocolate chips into batters, using chocolate ganache, adding cocoa powder to recipes, or topping desserts with chocolate curls, shavings, or chocolate-covered fruit.
Women's Day Desserts do not have one traditional menu; people usually celebrate with homemade cakes, cookies, pies, brownies, or family desserts that bring everyone together. Fresh flowers, bright colors, or handwritten messages often make them feel extra special.
Women's Day Desserts are easy to prepare by choosing a favorite family recipe or a simple bake. Mix the ingredients, bake or chill as needed, then finish with fruit, chocolate, or decorative toppings for a thoughtful homemade treat.
Women's Day Desserts are less about tradition and more about showing appreciation. Sharing something homemade or thoughtfully prepared is a simple way to celebrate achievements, express gratitude, and make the occasion feel warm and memorable.
Easy Women's Day Dessert recipes include chocolate cupcakes, no-bake cheesecakes, brownies, chocolate-covered strawberries, fruit parfaits, and cookie bars. These simple treats require minimal preparation while still looking festive and perfect for the occasion.
Store these Desserts in an airtight container to keep them fresh. Refrigerate cream-based desserts, cheesecakes, and fresh fruit treats, while cookies, brownies, and cakes can usually stay at room temperature for a few days.
Healthy Women's Day Desserts include yogurt parfaits, fruit salads, dark chocolate-covered strawberries, oatmeal cookies, chia pudding, and baked apples. These lighter treats offer natural sweetness while making the celebration feel both delicious and balanced.
Traditional Women's Day Desserts focus on classic cakes, cookies, and pastries, while modern versions include dessert jars, macarons, cake pops, and healthier options. Both celebrate the occasion, but modern recipes often feature creative flavors and presentations.
Easy Women's Day Dessert variations include chocolate cupcakes, berry cheesecakes, fruit parfaits, brownie bites, dessert jars, cookie sandwiches, and mini tarts. Changing flavors, fillings, or decoration creates fresh options while keeping the preparation simple.
The Cadbury Dairy Milk Silk bar is ideal. Its ultra-creamy, luxurious texture elevates elegant treats like strawberry fondues, mousse cups, or decorated cupcakes. It adds a premium, celebratory feel to any Women's Day dessert.
Add a chocolate twist to Women's Day Desserts by mixing melted chocolate into batters, drizzling it over cakes, folding chocolate chips into cookies, layering chocolate mousse, or topping desserts with chocolate curls for extra flavor and elegance.
The classic Basant Panchami desserts include saffron rice, yellow pulao, boondi ladoo, and Kesari Sooji Halwa. The yellow color here signifies the onset of spring. It also symbolizes devotion to Goddess Saraswati.
To prepare a classic yellow-hued Kesari Sooji Halwa, all you need is some semolina (sooji), ghee, and sugar. Cook everything over a medium flame until it turns into a cohesive dough, cool it down, and serve.
Desserts are an integral part of Basant Panchami, as it celebrates te onset of spring and also honors Goddess Saraswati. Sweets here celebrate prosperity, energy, and new beginnings with loved ones.
Some of the simplest and beginner-friendly Basant Panchami dessert recipes often include delicacies such as Kesar Meethe Chawal, Suji Kesari, Instant Coconut Ladoos, and Boondi Laddoo.
While not all, most of the Basant Panchami desserts like besan ladoo, boondi laddoo, kesar halwa, and meethe chawal can be prepared in advance and stored properly in airtight containers.
The healthy and guilt-free Basant Panchami dessert recipes often include treats like saffron makhana phirni, millet meethe chawal, and no-sugar fruit custard. Made with healthy ingredients, these are the perfect guilt-free ones.
To add some fusion twist to traditional Basant Panchami desserts, one may combine yellow-themed spring treats with global dessert styles like motichoor ladoo parfaits, saffron cardamom cupcakes, and mango tres leches cakes.
When it comes to gifting desserts on Basant Panchami, the best options often include kesar burfi, besan ladoo, boondi ladoo, meethe chawal, and kheer. All of these symbolize prosperity, warmth, and the arrival of spring.
For making creamy and chocolatey Basant Panchami desserts, Cadbury Dairy Milk and Cadbury Dairy Milk Silk are often considered the best choices, as they ensure a smooth, creamy milk chocolate profile that melts easily.
To add a chocolatey twist to Basant Panchami treats like kesar halwa, peeli mishti, or rice kheer, simply add some melted chocolate, cocoa powder, chocolate chunks, or a layer of rich chocolate spread and mix well.
Cadbury is best known for making high-quality milk chocolate, dark chocolate, cocoa powder, chocolate chips, and chocolate chunks. It is also known for manufacturing the popular range of Oreo sandwich cookies.
While the brand manufactures several products, Cadbury Dairy Milk and Bournville are indeed the two most popular products. While Dairy Milk is loved for its creamy, sweet, milky taste, Bournville is all about the rich intensity.
The main difference is in texture and formulation. While Cadbury Dairy Milk is a creamy, sweet milk chocolate that melts in the mouth, Cadbury Silk is a more luxurious version of the same.
For baking, options like Cadbury Dark Choco Cooking Block or Cadbury Baking Range Choco Melts are often considered the best options. However, Dairy Milk and Bournville are also quite popular in baking.
Yes. Cadbury chocolate is quite commonly used in homemade desserts. Be it the Dairy Milk or Bournville, these high-quality yet easily available Cadbury chocolates are everyone's favorite when it comes to baking at home.
Cadbury chocolate can be used in easy desserts like chocolate cake, brownies, mousse, tiramisu, parfait, ice creams, and more. Besides these are also used in no-bake cheesecake, pudding, and truffles as well.
For a classic, rich, creamy, airy chocolate mousse, it is best to include Cadbury Dairy Milk chocolate or Cadbury Bournville dark chocolate in the recipe. The rich cocoa content of these chocolates makes them a perfect choice for mousse.
For baking a rich cake, Cadbury Bournville dark chocolate or Cadbury Bournville cocoa powder are often considered the best choices. Both of them are popular for their rich, intense chocolate flavor.
When it comes to storing Cadbury chocolate, it is ideal to place it in a cool, dry, dark place like a cupboard or pantry, where the temperature is below 21°C. Refrigeration is not ideal, as cold air and moisture ruin its texture.
Being one of the most popular global chocolate brands, Cadbury makes sure the chocolates are easily available across local grocery stores, supermarkets, airports, and online grocery stores.
To use cocoa powder in baking, the most important thing is picking the right kind of cocoa powder based on the flavor profile and dessert type you need. Before adding it to a dough or batter, make sure it is sifted and bloomed well.
Yes. If you are making a chocolate brownie, cocoa powder is an essential ingredient. Mixed with other baking essentials like flour, sugar, butter, milk, and baking powder, a high-quality cocoa powder makes fudgy brownies that melt in the mouth.
Yes. Cocoa powder is often used to make delicious, rich chocolate frosting. For a perfect chocolate frosting, make sure a high-quality cocoa powder is mixed with butter, powdered sugar, milk, and vanilla extract.
Cocoa powder often tends to form lumps as it contains natural cocoa butter fats, which absorb moisture from the air during storage. Moreover, these fats are hydrophobic in nature, and therefore refuse to blend well with liquids.
Cocoa powder naturally tastes bitter as it contains healthy plant compounds called polyphenols and theobromine found inside the cacao bean. Moreover, they taste bitter as they contain no added sugar, milk, or fat.
Being extremely versatile in nature, cocoa powder pairs with a wide range of flavors. However, the most popular ones include vanilla, coffee, peanut butter, and sea salt. All of them perfectly balance the natural taste of cocoa.
Yes. Cocoa powder is often added to milkshakes and smoothies for a perfect chocolatey makeover. When a high-quality cocoa powder is used, it blends very well with cold milk, ice cream, and fruits like frozen bananas.
Yes. One can always make a chocolate mug cake using cocoa powder. Mix it with some flour, sugar, milk, egg, and oil, and microwave for 1-2 minutes to make a soft, fluffy chocolate mug cake.
Cocoa powder is used in several dessert recipes. The most common ones include cake, mug cake, brownies, hot chocolate, mousse, tiramisu, cupcakes, and more. One may also use it in milkshakes and smoothies.
Every Eid celebration has its favorite sweets, with Sheer Khurma leading the list. Many families also prepare Seviyan, Phirni, Kheer, Gulab Jamun, Ras Malai, Shahi Tukda, or Baklava to share with relatives and guests.
Across many homes, Eid desserts are served after the main meal. Favorites include Sheer Khurma, Seviyan, Phirni, Kheer, Gulab Jamun, Ras Malai, Shahi Tukda, and Baklava, though the selection often varies by family and region.
A homemade Eid Sheer Khurma starts by lightly toasting vermicelli in ghee before adding milk, dates, sugar, nuts, cardamom, and saffron. Let everything cook gently until rich and creamy, then enjoy it warm or chilled.
Sheer Khurma is a rich Eid dessert made with milk, dates, nuts, and vermicelli, whereas Seviyan is usually simpler, made with vermicelli, milk, and sugar. Sheer Khurma has a creamier texture and includes more festive ingredients, such as nuts and dates.
The best desserts for an Eid feast include Sheer Khurma, Phirni, Shahi Tukda, Ras Malai, Gulab Jamun, Kheer, Baklava, and chilled mousse. These desserts provide a sweet and satisfying finish to a festive Eid meal.
There are plenty of homemade Eid desserts you can make, including Sheer Khurma, Seviyan, Kheer, Phirni, chocolate truffles, date balls, and no-bake cheesecake cups. These desserts are easy to prepare and perfect for celebrating Eid with family and friends.
The best desserts for Eid gatherings include Sheer Khurma, Gulab Jamun, Ras Malai, Phirni, Shahi Tukda, Baklava, dessert cups, and assorted sweets. They are easy to serve, festive, and perfect for sharing during Eid celebrations.
Cadbury Dairy Milk is a great choice for Eid desserts because of its smooth, creamy texture. It blends well into brownies, cheesecakes, truffles, stuffed dates, and festive dessert platters, adding a rich chocolate flavor that everyone enjoys.
You can add chocolate to Eid sweets by mixing melted chocolate into Sheer Khurma, drizzling it over Shahi Tukda, filling dates with chocolate, coating dry fruits in chocolate, or creating chocolate versions of classic Eid desserts.
The best chocolate desserts for Eid include brownies, truffles, mousse, cheesecakes, chocolate-covered dates, lava cakes, dessert cups, and chocolate bark. These treats add a rich, festive touch to Eid celebrations and are always popular with guests.
The most popular Guru Nanak Jayanti desserts include Kada Prasad, Meethe Chawal, Panjiri, and Seviyan Kheer. Often prepared at home and Gurudwaras, these sweets are served as sacred offerings.
Kada Prasad is one of the easiest Guru Nanak Jayanti dessert recipes. Made with equal parts of ghee, sugar, and flour, the mixture is cooked with 2 to 3 cups of water until it forms a cohesive dough-like texture.
Sweets have always been an integral part of Guru Nanak Jayanti celebrations. To celebrate the divine grace, equality, and the joy of sharing, sweets are served as sacred offerings at Gurudwaras.
The list of some of the quick, easy, and simple Guru Nanak Jayanti desserts includes Kada Prasad, Gur Ka Halwa, Panjiri, and Suji Halwa. Made in 20 to 30 minutes, all they take are some pantry staples.
The shelf life of the Guru Nanak Jayanti desserts entirely depends on the specific sweet and its ingredients. While milk-based sweets stay fresh for 2-3 days, the dry sweets last for 30-90 days.
Yes. Several Guru Nanak Jayanti desserts can be made with low sugar. Be it the Kada Prasad, Meethe Chawal, or Panjiri, one may simply replace sugar with jaggery. One may also make sugar-free makhana kheer.
While the traditional Guru Nanak Jayanti desserts are firmly rooted in simplicity and local and natural ingredients, the modern festive desserts have included several fusion and Western flavors with ingredients like chocolates, yogurts, and more.
To add a creative twist to Guru Nanak Jayanti celebrations, one may try some Kada Prasad truffles, Phirni tartlets, or Kheer ice cream. Here, while the base remains traditional, the style and presentation are modern.
To make chocolatey Kada Prasad, Meethe Chawala, Panjiri, Halwa, or Kheer, Cadbury Dairy Milk, Cadbury Silk, and Cadbury cocoa powder are often considered some of the best options.
To add a chocolatey twist to Guru Nanak Jayanti treats like Kada Prasad, Panjiri, Meetha Chawal, and Kheer, simply add some melted chocolate, cocoa powder, chocolate chunks, or a layer of rich chocolate spread and mix well.
The most popular traditional Janmashtami desserts include makhan mishri, peda, dhaniya panjiri, and malpua. Made with simple kitchen staples, these sweet dishes are served as offerings to celebrate Lord Krishna's birthday.
To make some of the easy Janmashtami recipes like Makhan Mishri, Panchamrit, and Mathura Peda at home, all you need are ingredients like fresh butter, full-fat milk, granulated sugar, and dry fruits.
Desserts play a pivotal role in celebrating Janmashtami as they signify Lord Krishna's legendary love for milk and butter. Often served as sacred devotional offerings, these sweets bring joy and togetherness to the celebrations.
Easy Janmashtami dessert recipes often include traditional offerings like Makhan Mishri, Panchamrit, and Panjiri. Made in just 15 minutes, all these simple, quick, and easy recipes need dairy, sugar, and dry fruit ingredients.
To store Janmashtami desserts safely, it is essential to separate the milk-based sweets from dry treats. Make sure both types of sweets are kept in airtight containers and refrigerated well.
Some of the most popular healthy Janmashtami dessert options include makhana kheer, dhaniya panjiri, and dates and nuts ladoo. Made with wholesome ingredients and natural sweeteners, these are healthier than regular sweets.
While traditional Janmashtami desserts like gokul pitha, panjiri, and makhan mishri are often made at home, the modern desserts often include festive cheesecakes, truffle balls, and fusion pastries.
Some of the easiest Janmashtami dessert variations include Makhan Mishri, malpua, and kheer. Made with minimal ingredients, these desserts honor traditional offerings to Lord Krishna.
For making creamy and chocolatey Janmashtami desserts, Cadbury Dairy Milk and Cadbury Dairy Milk Silk are often considered the best choices, as they ensure a smooth, creamy milk chocolate profile that melts easily.
To add a chocolatey twist to Janmashtami treats like Makhan Mishri, Panjiri, Kheer, and Malpua, simply add some melted chocolate, cocoa powder, chocolate chunks, or a layer of rich chocolate spread and mix well.
The most popular traditional Mahashivratri desserts include 'sattvic' milk/fruit-based fasting-approved sweets such as sabudana kheer, makhana kheer, and singhara atta halwa. All these desserts rely on local and natural ingredients.
To make Mahashivratri desserts at home, one may opt for Sabudana Kheer. This creamy kheer is simply made by boiling soaked tapioca pearls with milk, sugar, and cardamom. Once ready, garnish it with some nuts and serve.
During an auspicious celebration like Mahashivratri, desserts are served as 'sattvic' (pure) offerings to Lord Shiva. These healthy and nutritious desserts are also considered nourishing to break the day-long fast.
Some of the easiest Mahashivratri dessert recipes include Sabudana Kheer, Makhana Kheer, Atte ka Halwa, and Singhare ka Halwa. Made with sago pearls, fox nuts, whole wheat flour, and water chestnut flour, these are fasting-friendly desserts.
Storage methods entirely depend on the ingredients of the dessert. While the milk-based sweets are refrigerated for 2–3 days, ghee or nut-based sweets are kept at a cool and dry place in airtight containers.
While all these desserts are made with local ingredients, to add a healthier twist, one may also include ingredients like fresh fruits, dried fruits, seeds, and natural sweeteners that are suitable for fasting.
While the traditional Mahashivratri desserts are all homemade delicacies made with simple and pure ingredients, the modern desserts often include some fusion elements and presentation styles that still keep the traditions alive.
Some of the easy and quick Mahashivratri dessert variations include Sabudana Kheer, Makhana Kheer, Singhara Atta Halwa, Sweet Potato Kheer, and Aloo Halwa. Made with milk, sago, fox nuts, and more, these desserts are perfect for the occasion.
To make chocolatey halwas and Kheer for Mahashivratri, Cadbury Dairy Milk, Cadbury Silk, and Cadbury cocoa powder are often considered some of the best options. One may also opt for Cadbury Bournville for a richer taste.
To add a chocolatey twist to Mahashivratri desserts like different types of halwas and Kheer, simply add some melted chocolate, cocoa powder, chocolate chunks, or a layer of rich chocolate spread and mix well.
The list of popular Monsoon desserts vary from region to region. Some common ones are jalebi, suji halwa, chocolate brownies, bread pudding, apple crumble, gulab jamun, malpua, gajar halwa, chocolate lava cake, cinnamon rolls, steamed puddings, and warm fruit cobblers. These delicious desserts go very well with the rainy season.
The easiest way to make Monsoon desserts involves mixing together flour, butter, sugar, eggs, cocoa powder, and Cadbury chocolate and making a smooth batter out of it. Serve this ready dessert with ice cream or whipped cream.
Some quick Monsoon dessert recipes include chocolate mug cake, bread pudding, chocolate mousse, fruit parfaits, brownie sundaes, cinnamon toast, chocolate-dipped bananas, no-bake cheesecakes, warm cookies, and dessert jars.
Monsoon desserts are popular because rich and warm desserts complement the season of rains. Desserts with flavors of chocolate, cinnamon, caramel and baked fruits are very popular and complement well with a hot cup of tea or coffee.
The main ingredients required for making Monsoon desserts include flour, butter, sugar, eggs, milk, vanilla, cocoa powder, Cadbury chocolate, seasonal fruits, cinnamon, nuts, and cream.
It varies depending upon the recipe used. Generally, the shelf-life of cakes, brownies, and cookies ranges from three to five days if kept in an airtight container. However, the shelf-life of cream-based desserts should not be more than two to three days.
Flavors such as chocolate, cinnamon, coffee, caramel, vanilla, ginger, cardamom, orange, apple, banana, and roasted nuts are the most popular ones when it comes to making desserts for the season of rains.
Make use of your imagination while preparing some tasty chocolate filled bread pudding, brownie waffles, cardamom spiced cheesecakes, caramel apple crumble, chocolate stuffed pancakes, dessert jars, cinnamon brownie bites, or even puddings topped with fruits.
For making Monsoon desserts, the best chocolate that can be used is the Cadbury dark chocolate for rich cocoa flavour and Cadbury milk chocolate for creaminess.
Cadbury is the best brand for Monsoon Desserts since its soft texture perfectly combines with nuts and dried fruits. Cadbury's chocolate perfectly fits Monsoon Desserts recipes such as brownies, fudge, bark, cakes, laddoos, dessert jars, and festive sweets.
While the options are plenty to explore, the most popular Raksha Bandhan sweets include motichoor laddoo, kaju katli, besan laddoo, kheer, gulan jamun, and rabdi. The sweet celebration is never complete without sweets.
To make an easy and simple kheer at home for Raksha Bandhan, all you need is some boiled rice, full-fat thickened milk, granulated sugar, nuts, cardamom, and saffron. Cook the rice in milk, sugar, and spice until it achieves a creamy texture and then serve.
Raksha Bandhan is a celebration of the sacred bond between brothers and sisters. And sweets are an integral part of one such auspicious occasion that celebrates love, warmth, and togetherness.
Some of the quickest recipes for Raksha Bandhan include rice kheer, kaju katli, besan laddoo, and halwas. Made in under 30 minutes, these sweet recipes are perfect for last-minute plans.
When stored in an airtight container at room temperature, the dry sweets like besan laddoo and motichoor laddoo stay fresh for 3-4 days. However, milky sweets like kheer and kaju katli need refrigeration to stay fresh for around 5 days.
Yes. To make sure the celebration is for everyone, one may try making alternatives like low-sugar kheer, nuts and dates laddoos, coconut-chia bites, and jaggery almond barfi. All of them taste delicious even with less sugar.
Over the years, te sweets of Raksha Bandhan have evolved from homemade simple kheers and laddoos to innovative fusion sweets, vegan sweets, health-conscious alternatives, and DIY gift hampers.
To add some creative twists to the classic Raksha Bandhan desserts, one may explore ideas like Gulab Jamun tartlets, Rasmalai cake, and Chocolate kalakand, and more, where traditional Indian sweets meet global flavors.
To make chocolate desserts for Raksha Bandhan, Cadbury Silk, Cadbury Dairy Milk, and Cadbury Bournville are some of the best options. Known for their rich, smooth, luxurious texture, these chocolates ensure an extra-creamy texture.
To add a chocolatey twist to the classic Raksha Bandhan desserts, simply melt some Cadbury Silk, Bournville, or Dairy Milk into the mixture, add some chocolate chips, layer with some chocolate ganache, or prepare some chocolate drizzle to serve with.
With something as delicious as Toblerone, you can go with desserts like cheesecake, chocolate mousse, tart, parfait, layered pudding, and more. Here, the honey-almond nougat and the chocolatey sweetness add a unique flavor to the desserts.
The list of the best and most popular Toblerone dessert recipes often includes rich, lusciously creamy, and chocolatey treats like no-bake cheesecake, mousse, brownies, parfait, pudding, and more.
When combined, the honey-almond-chocolate flavor of Toblerone often pairs perfectly with chocolate sponge cakes, creamy cheesecakes, and nutty almond-based cakes, as the chocolate also carries a similar flavor profile.
To make a Toblerone cheesecake, all you need to do is make a crust with digestive biscuits, a filling with cream cheese, sour cream, and melted Toblerone chocolate, and chill in the fridge. Top it with some melted chocolate and serve.
To make a Toblerone dessert, one may consider ingredients like milk, cream cheese, dried fruits, and cream. All of these pair really well with the signature milk chocolate, honey, and almond nougat flavors.
Several no-bake desserts, including cheesecake, mousse, parfait, pudding, layered chocolate fudge, chocolate tarts, and no-bake brownies, include Toblerone, as they offer a nutty, honey, chocolatey flavor profile like no other chocolate.
To make a quick and simple Toblerone milkshake, all you need is some full-fat vanilla or chocolate ice cream, full-fat milk, and some finely chopped pieces of Toblerone chocolate. Blend them well and serve.
A 3-Ingredient Toblerone Mousse is often considered the easiest Toblerone dessert to make. All it takes is some melted chocolate, melted marshmallows or cream, and whipped cream. Fold them all well, chill the mixture, and serve.
Yes. Known for its milky, sweet, chocolatey taste alongside the honey-nutty flavor profile, Toblerone is often considered great for baking cakes and brownies. Besides adding the chocolatey goodness, it also brings in a nutty and sweet undertone,
Rich and nutritious ingredients like milk, whipped cream, double cream, ice cream, fruit, dried fruits, and nuts often enhance the nutty-chocolaty, honey-based sweetness of Toblerone desserts.
Melt chocolate with warm cream and a little butter to create a smooth ganache. Chill the mixture until firm, scoop into small portions, roll into balls, coat generously with cocoa powder, and refrigerate before serving for the best texture.
Cocoa Powder Truffles are prepared with chocolate, fresh cream, butter, and cocoa powder, so no eggs are needed. It serves as a creamy chocolate treat that is easy to make and suitable for egg-free diets.
Absolutely. Cocoa Powder Truffles are a no-bake dessert, so an oven is not required. Simply prepare the chocolate mixture, chill it until firm, shape it into bite-sized balls, coat with cocoa powder, and refrigerate again before enjoying.
Cocoa Powder Truffles are made with chocolate, fresh cream, butter, vanilla extract, and cocoa powder for coating. Some people also add salt, coffee, or orange zest to make the truffles taste even better.
Store Cocoa Powder Truffles in an airtight container in the refrigerator for up to one week. If stacking them, place parchment paper between the layers to prevent sticking. They can also be frozen for up to two months and thawed in the refrigerator before serving.
Cocoa Powder Truffles may become dry if there is too much chocolate and not enough cream or if the mixture is chilled for too long before shaping. Measuring ingredients carefully and using good-quality chocolate helps create a softer, smoother truffle.
Cocoa Powder Truffles have a soft, creamy ganache center coated with cocoa powder, giving them a melt-in-the-mouth texture. Unlike brownies or fudge, they are not baked, and unlike hard chocolates, they remain smooth, delicate, and rich.
You can make Cocoa Powder Truffles in many flavors by adding chopped nuts, shredded coconut, espresso powder, peppermint extract, orange zest, or cinnamon. They can also be coated with crushed cookies, cocoa powder, sprinkles, or finely chopped nuts for extra texture.
For delicious Cocoa Powder Truffles, choose a high-quality unsweetened cocoa powder with a rich chocolate flavor. Natural cocoa offers a brighter chocolate taste, while Cadbury cocoa provides a darker color and smoother finish, making either a great choice.
Yes, cocoa powder is a must-have for chocolate cakes and brownies as it brings a deep cocoa flavor and enhances the overall taste. It helps create that classic chocolatey feel while keeping the dessert light and less sweet compared to using only chocolate.
Prepare Tang Mocktails by mixing the drink powder with chilled water, adding ice, and blending well. You can enhance the flavor with fruits, herbs, or garnishes for a refreshing homemade beverage.
Tang Mocktails are naturally egg-free, making them easy to prepare without any substitutes. Tang powder is simply mixed with cold water, stirred well, and served over ice with fresh fruit or mint.
No oven or cooking is required for Tang Mocktails. Tang powder is dissolved in cold water, mixed well with ice, and served fresh. Mint leaves or citrus slices can be added for extra flavor.
The main ingredients used in Tang Mocktails include Tang powder, chilled water, ice cubes, and optional additions like fruits, mint leaves, or sweeteners to enhance the taste and presentation.
Tang Mocktails are best enjoyed fresh to maintain their flavor and refreshing texture. However, they can be stored in the refrigerator for a short time. It is recommended to consume them soon for best taste.
Tang Mocktails may not turn out right due to incorrect ingredient ratios, insufficient chilling, or adding too many extra ingredients. Using the right measurements helps achieve a balanced flavor and consistency.
Tang Mocktails are refreshing beverages rather than traditional desserts. They offer a fruity flavor and cooling experience, making them a lighter choice for parties, celebrations, or everyday enjoyment.
Tang Mocktails can be served creatively in glasses with ice cubes, fruit slices, mint leaves, or decorative garnishes.
Since Tang is primarily a beverage mix, different flavors can be used to prepare frozen treats like popsicles, ice cream, or jellies, depending on your recipe and taste preference.
Tang is mainly used to make refreshing beverages rather than to bake cakes or brownies. Its fruity flavors work better in drinks and chilled treats instead of baked desserts.
The most popular traditional Valentine's Day cupcakes include options like vanilla, chocolate, red velvet, strawberry, and raspberry. With the pink/red frostings and heart-shaped base, these cupcakes are perfect for the occasion.
For this, all you need to do is combine baking staples like flour, sugar, eggs, baking powder, salt, milk, and butter. Bake the batter at 180°C for 20 minutes, and top with some pink or red-tinted buttercream.
Desserts are an integral part of the celebration of love. Nothing can make a loved one feel as special as desserts. They are the perfect mood boosters and the most thoughtful gifts that convey the emotional message as well.
While the options are endless, the most popular and easy cupcake recipes often include ideas like rich chocolate cupcakes, classic red velvet cupcakes, and strawberry/raspberry jam-filled vanilla cupcakes.
To store these cupcakes at room temperature for 2-3 days, make sure they are placed in an airtight container. If they contain buttercream frosting, make sure they are refrigerated. If you are freezing them, make sure they are unfrosted.
To add a healthy spin to the regular Valentine's Day cupcake recipes, one may try plant-based flours, natural sweeteners, and dark chocolate frostings with raspberry jam. One may also include healthy fruits like dates, avocado, and more.
While there are several modern flavors and fusion ideas these days, the primary difference lies in decoration and presentation. The traditional versions focus on red or pink frosting, modern decorations include intricate piping, geometric shapes, and so on.
The easiest variations often include simple ideas such as chocolate-covered strawberry cupcakes, red velvet cheesecake, and raspberry chocolate cupcakes. One may also try decorating them with some white chocolate shavings.
For making Valentine's Day cupcakes, the best option is Cadbury Dairy Milk Silk. Known for its silky, smooth, luxurious texture and slightly nutty aroma, this chocolate delivers an extra-creamy texture.
To add a chocolatey twist to Valentine's Day cupcakes, simply melt some Cadbury Silk or Dairy Milk into the batter, add some chocolate chips, and prepare some chocolate drizzle to serve with.
Yes, Cadbury 5 Star Dessert Bars melt when heated, though the caramel and nougat create a thicker texture than plain chocolate. Gentle melting over low heat or in short microwave bursts gives the best results.
Yes, Cadbury 5 Star Dessert Bars make a rich filling for cakes, cookies, pastries, and brownies. The soft caramel and nougat add a gooey center that pairs well with many baked desserts.
Yes, chopped Cadbury 5 Star Dessert Bars can be mixed into ice cream or used as a topping. The caramel, nougat, and chocolate add extra flavor, texture, and sweetness to frozen desserts.
Cadbury 5 Star Dessert Bars can be used in brownies, cheesecakes, milkshakes, ice cream, dessert bars, cookies, trifles, and chilled treats. Their caramel and nougat create rich flavor in many desserts.
Yes, Cadbury 5 Star Dessert Bars work well in cheesecakes as a filling, topping, or swirl. Their caramel and nougat add a creamy, chewy texture that complements both baked and no-bake cheesecakes.
Yes, Cadbury 5 Star Dessert Bars blend well with milk, ice cream, and ice to create a thick, creamy milkshake. A drizzle of chocolate sauce or whipped cream makes it even more indulgent.
Quick recipes with Cadbury 5 Star Dessert Bars include milkshakes, no-bake dessert bars, chocolate bark, ice cream sundaes, stuffed cookies, and simple parfaits that need only a few ingredients and easy preparation.
Yes, Cadbury 5 Star Dessert Bars can be microwaved in short 10–15 second intervals. Stir between each interval to help the chocolate, caramel, and nougat melt evenly without overheating.
Cadbury 5 Star Dessert Bars pair well with biscuits, vanilla ice cream, cream cheese, peanut butter, nuts, bananas, caramel sauce, coffee, and whipped cream, creating balanced flavors and enjoyable textures in desserts.
Cadbury 5 Star Dessert Bars taste especially good in brownies, cheesecakes, ice cream, cookies, milkshakes, dessert bars, and chilled parfaits, where their caramel and nougat flavors make every bite richer and more satisfying.
To prepare 5 Star Fudge, melt chopped Cadbury 5 Star bars with butter and condensed milk over low heat. Stir until smooth, pour into a lined tray, chill until firm, then cut into bite-sized squares.
5 Star Fudge does not require eggs. Melt chopped 5 Star bars with condensed milk and butter, stir until smooth, pour into a lined pan, and refrigerate until firm before cutting into pieces.
A no-oven 5 Star Fudge recipe requires a stovetop or microwave to melt the ingredients. Once mixed until smooth, refrigerate the fudge for several hours until firm before slicing and serving.
The main ingredients for 5 Star Fudge include Cadbury 5 Star chocolate bars, condensed milk, butter, and optional vanilla or salt. Chopped nuts or chocolate chips can add extra flavor and texture.
When stored in an airtight container, 5 Star Fudge stays fresh for about one week at room temperature or up to two weeks in the refrigerator. Freezing can extend its shelf life even longer.
5 Star Fudge may not set properly if the ingredients are overheated, measured incorrectly, or not chilled long enough. Excess moisture or uneven mixing can also affect the final texture and consistency.
5 Star Fudge stands out because it combines the signature caramel and nougat flavors of 5 Star bars with a smooth, creamy texture. It requires minimal preparation and delivers a rich chocolate treat.
5 Star Fudge can be served in gift boxes, dessert platters, or topped with chopped nuts and sprinkles. Small cubes also pair well with ice cream, milkshakes, or dessert tables.
A classic Cadbury5 Star is a great choice for making desserts. The classic 5 Star chocolate bar can be used in many recipes like fudge, brownies, milkshakes, and ice cream, depending on the flavor and texture needed.
Yes, Cadbury 5 Star can be considered to be used in cakes and brownies as a mix-in, filling, or topping. Its caramel and nougat create a rich, gooey texture, though it is not usually used as the main chocolate in baking.
To prepare a 5 Star Fusion Dessert, melt chopped 5 Star chocolate bars, combine with cream, biscuits, or cake pieces, layer as preferred, then chill until firm. Finish with nuts, chocolate drizzle, or fruit before serving.
A 5 Star Fusion Dessert can easily be made without eggs by using whipped cream, condensed milk, cream cheese, or yogurt for richness. These ingredients create a smooth, creamy texture while keeping the dessert delicious.
A simple no-oven 5 Star Fusion Dessert can be prepared by layering melted chocolate, crushed biscuits, cream, or pudding in serving glasses. Refrigerate for several hours until set, then garnish before serving.
A 5 Star Fusion Dessert commonly includes 5 Star chocolate bars, biscuits, whipped cream, condensed milk, butter, cream cheese, fresh fruits, nuts, or cake pieces. Ingredients can be mixed and matched for different dessert styles.
A freshly prepared 5 Star Fusion Dessert stays best for about 3 to 4 days when refrigerated in an airtight container. Keeping it chilled helps maintain its texture, flavor, and overall freshness.
A 5 Star Fusion Dessert may not turn out well if the chocolate overheats, ingredients are not mixed evenly, or chilling time is too short. Careful melting and proper refrigeration usually improve the final texture.
A 5 Star Fusion Dessert stands out by combining the chewy caramel and chocolate flavors of 5 Star bars with classic dessert recipes. This creates unique textures and flavors that feel richer than many traditional desserts.
A 5 Star Fusion Dessert looks appealing when served in dessert cups, mason jars, waffle cones, or mini glasses. Toppings like crushed cookies, nuts, caramel sauce, or fresh berries add extra flavor and presentation.
A classic Cadbury5 Star is a great choice for making desserts. The classic 5 Star chocolate bar can be used in many recipes like fudge, brownies, milkshakes, and ice cream, depending on the flavor and texture needed.
Yes, Cadbury 5 Star can be considered to be used in cakes and brownies as a mix-in, filling, or topping. Its caramel and nougat create a rich, gooey texture, though it is not usually used as the main chocolate in baking.
Baked Lemon Dessert is a sweet treat made by baking a lemon-flavored mixture until soft and creamy. It has a bright citrus taste with a light texture, making Baked Lemon Dessert a refreshing choice for any occasion.
To make Baked Lemon Dessert, mix lemon juice, zest, eggs or an egg substitute, sugar, butter, and flour. Bake until lightly set, cool completely, then chill before serving for the best flavor and texture.
Popular Baked Lemon Dessert recipes include lemon bars, lemon pudding cake, baked lemon cheesecake, lemon tart, and baked lemon custard. Each recipe offers a fresh citrus flavor and works well for everyday desserts or celebrations.
Baked Lemon Dessert offers a fresh, tangy flavor that feels lighter than many rich desserts. Its simple ingredients, refreshing taste, and variety of recipes make Baked Lemon Dessert suitable for family meals and special gatherings.
Most Baked Lemon Dessert recipes stay fresh for two to four days when stored properly. Creamy desserts like baked lemon cheesecake or custard should be refrigerated. In contrast, lemon cakes and bars can often be kept at room temperature for a short time or refrigerated if preferred.
Common Baked Lemon Dessert ingredients include lemon juice, lemon zest, sugar, butter, eggs or an egg substitute, flour, and vanilla. Some recipes also use cream cheese, yogurt, or condensed milk for extra richness.
Baked Lemon Dessert stands out because of its bright citrus flavor and balanced sweetness. Unlike many regular desserts, it has a refreshing taste that feels lighter while still offering a rich, baked texture.
Avoid overbaking Baked Lemon Dessert, using bottled lemon juice instead of fresh, skipping the lemon zest, or serving it before cooling. These mistakes can affect the flavor, texture, and overall quality of the dessert.
Cadbury Bournville Rich Cocoa Dark Chocolate is the best choice. Its intense, bittersweet profile balances the tartness of the baked lemon base beautifully without overwhelming it. Avoid sweet milk chocolates, which clash with the dessert's natural acidity.
There is no single best brand for Baked Lemon Dessert because results depend more on fresh ingredients and the recipe. Choose good-quality baking ingredients that fit your taste and budget for consistently delicious homemade desserts.
Baked Orange Dessert is a sweet treat made with fresh orange juice, orange zest, butter, sugar, eggs or egg substitutes, and flour. It has a soft, lightly baked texture with a fresh citrus flavor and is often served chilled.
To make Baked Orange Dessert, mix orange juice, orange zest, sugar, butter, eggs or an egg substitute, and flour until smooth. Bake until lightly set, let it cool completely, then chill before serving for the best texture.
Popular Baked Orange Dessert recipes include orange pudding, orange custard, orange soufflé, orange bread pudding, and baked orange cheesecake. Each recipe highlights fresh citrus flavor while offering a soft, creamy, or lightly fluffy texture.
Baked Orange Dessert offers a fresh citrus flavor, a light texture, and a refreshing finish after meals. It can be made with simple ingredients, prepared ahead of time, and enjoyed chilled for a delicious homemade dessert.
Baked Orange Dessert stays fresh for about 3 to 4 days when covered and refrigerated. Allow it to cool before storing, and avoid leaving it at room temperature for long to maintain its flavor and texture.
Baked Orange Dessert commonly includes orange juice, orange zest, sugar, butter, eggs or an egg substitute, flour, vanilla, and a pinch of salt. Some recipes also add cream for a richer and smoother texture.
Baked Orange Dessert stands out because fresh orange juice and zest provide a bright citrus flavor. Unlike many regular desserts, it combines a lightly baked texture with a refreshing taste that is often best served chilled.
Common mistakes include overbaking, using too much orange juice, skipping the zest, or serving it before chilling. Following the recipe carefully helps Baked Orange Dessert develop the right texture and balanced citrus flavor.
Cadbury Bournville Dark Chocolate is the best pick. Its rich, bitter taste pairs perfectly with sweet, warm baked orange. It creates a great flavor mix.
There is no single best brand for Baked Orange Dessert because the result depends on fresh ingredients and the recipe. Choose good-quality baking chocolate, butter, and vanilla from trusted brands for the best homemade flavor.
To make a simple Bournvita Milkshake, blend chilled milk, Bournvita, sugar or honey if needed, a few ice cubes, and a scoop of vanilla ice cream until smooth. Pour into a glass and serve immediately. You can top it with whipped cream or chocolate shavings for extra flavor.
Yes, Bournvita Milkshake is naturally eggless. It is usually made with milk, Bournvita, sweetener, and ice cream or ice cubes. If you prefer a dairy-free version, use almond, oat, or soy milk with your favorite plant-based ice cream.
You do not need an oven to prepare Bournvita Milkshake. Simply blend chilled milk, Bournvita, sugar, and ice cubes until creamy. Add ice cream if you like a thicker texture, then serve immediately for the best taste.
A classic Bournvita Milkshake is made with chilled milk, Bournvita, sugar or honey, ice cubes, and optional vanilla ice cream. Some people also add a pinch of cinnamon, coffee, or chocolate syrup for a richer and more flavorful drink.
Fresh Bournvita Milkshake tastes best when served right away. It can be refrigerated in a covered container for up to 24 hours. Stir or shake it well before drinking because the ingredients may settle over time.
A common mistake is using warm milk or not blending the Bournvita Milkshake long enough. This can leave powder lumps and impact the creamy texture. Using chilled milk and blending thoroughly gives a smoother and tastier drink.
Homemade Bournvita Milkshake lets you control the sweetness, thickness, and ingredients while keeping the flavor fresh. Store-bought versions are convenient but may contain preservatives, stabilizers, or extra sugar to extend their shelf life.
Bournvita Milkshake can be customized by blending in bananas, peanut butter, coffee, nuts, cookies, or chocolate chips. A scoop of ice cream, a drizzle of caramel, or a pinch of cinnamon also creates new flavors without much effort.
Classic Bournvita works well for desserts that need a balanced chocolate-malt flavor, while Bournvita with extra chocolate flavor is a better choice for recipes where you want a richer and deeper taste. The best option depends on the dessert and the flavor you prefer.
Yes, Bournvita can be used in cakes and brownies to add a chocolate-malt flavor and a richer taste. It blends well with baking ingredients and can enhance the overall flavor of desserts.
To make Cadbury Chocolate Desserts, melt the chocolate and mix it with ingredients like cream, milk, butter, or biscuits, depending on the recipe. Place it in the fridge or bake it before serving with your favorite toppings.
Cadbury Chocolate Desserts can be made without eggs by using condensed milk, yogurt, mashed banana, applesauce, or cornstarch, depending on the recipe. These substitutes create a soft, rich texture without changing the chocolate flavor.
Cadbury Chocolate Desserts can be made without an oven by chilling no-bake cheesecakes, preparing mousse, making chocolate fudge, or steaming certain desserts. Refrigeration or stovetop cooking also gives delicious results without baking.
Most Cadbury Chocolate Desserts include Cadbury chocolate, milk, cream, butter, sugar, cocoa powder, biscuits, flour, or whipped cream. The ingredients differ depending on whether the dessert is a cake, pudding, mousse, or fudge.
Most Cadbury Chocolate Desserts stay fresh for three to five days, when stored in an airtight container in the refrigerator. Frozen desserts can last longer, although the texture may change slightly after thawing.
Cadbury Chocolate Desserts may not turn out well if the chocolate overheats, ingredient measurements are incorrect, or the dessert is not chilled or baked long enough. Careful measuring and proper timing usually give better results.
Cadbury Chocolate Desserts stand out because Cadbury chocolate has a smooth, creamy texture and sweet flavor that blends easily into recipes. This creates rich, chocolatey desserts with a softer and more indulgent taste.
Cadbury Chocolate Desserts can be served in jars, dessert cups, waffle cones, or mini glasses. Fruits, nuts, whipped cream, chocolate shavings, or colorful sprinkles make them more attractive and enjoyable for any occasion.
Dairy Milk is great for creamy recipes, Dairy Milk adds a richer chocolate flavor, and Bournville works well for a deeper cocoa taste. The best choice depends on the dessert and preferred sweetness.
Cadbury Chocolates are excellent for cakes and brownies because they melt smoothly and add rich flavor. Combining Cadbury chocolate with a little cocoa powder creates an even deeper chocolate taste and color.
Cadbury Dessert Drinks can be made at home by blending chilled milk with Cadbury drinking chocolate or cocoa mix, ice cream if preferred, and ice. Toppings like whipped cream, chocolate syrup, or chocolate shavings add extra flavor and texture.
Cadbury Dessert Drinks can be made eggless since eggs are not required for this recipe. For a thicker and creamier texture, ingredients like ice cream, banana, yogurt, or a little cornstarch can be added while keeping the chocolate flavor rich.
Cadbury Dessert Drinks do not need an oven because they are blended instead of baked. A blender or shaker is enough to mix the ingredients, making this a quick dessert drink that can be prepared easily.
Cadbury Dessert Drinks are usually made with milk, Cadbury drinking chocolate or cocoa mix, sugar if needed, ice cream, and ice cubes. Extra ingredients like vanilla, coffee, or chocolate syrup can be added for different flavors.
Cadbury Dessert Drinks taste best when served fresh, but leftovers can be stored in the refrigerator for up to one day. Stir or shake well before serving because some ingredients may naturally settle over time.
Cadbury Dessert Drinks may turn out thick, thin, or less creamy if the ingredient balance is incorrect. Using enough milk, blending well, and adding ice cream or chilled milk usually creates a smoother texture.
Cadbury Dessert Drinks are smoother and lighter than thick chocolate milkshakes or mousse-based desserts. They are served as refreshing beverages, while many similar chocolate desserts are thicker, richer, and eaten with a spoon.
Cadbury Dessert Drinks can be customized with coffee, caramel, peanut butter, mint, cookies, bananas, or berries. Different toppings and mix-ins make it easy to create new flavors without changing the basic recipe.
The finest Cadbury product is determined by the recipe and personal taste preferences. Chocolate-based recipes are ideal for richer desserts and include a wide range of Cadbury items such as chocolates, cocoa powder, Bournville, ice cream, and more.
Cadbury products can add chocolate flavor to cakes and brownies, but the result depends on the recipe. Chocolate mixes, cocoa-based ingredients, or dessert blends can help create a richer taste and texture.
To prepare Cadbury Quick Desserts, first, combine the dessert mix with chilled milk, whisk until smooth, and refrigerate it until thick. You can add toppings like chocolate pieces, nuts, or cream before serving for extra flavor.
Alternatives like milk, cream, custard powder, or other egg-free ingredients can be used instead of eggs. These options help make the Cadbury Quick Dessert rich and flavorful.
A no-oven Cadbury Quick Dessert can be prepared by chilling, refrigerating, or steaming, depending on the recipe. These methods help achieve the right texture and consistency.
Cadbury Quick Desserts usually include ingredients such as milk, sugar, and other thickening agents. Additional items such as cream, nuts, fruit, or biscuits can be added to create different flavors.
Cadbury Quick Desserts can usually be stored in the refrigerator for 1-2 days when kept covered. Storage time may vary depending on the added ingredients, such as dairy, fruits, or toppings, used in the recipe.
Cadbury Quick Desserts may not turn out as expected if the ingredients were measured incorrectly, mixed too quickly, or not chilled long enough. Following the directions and giving it enough time to set usually improves the result.
Cadbury Quick Desserts stand out for offering rich flavors in a convenient way. They combine rich chocolate flavor with simple steps, making dessert preparation easier.
Cadbury Quick Desserts can be served creatively with whipped cream, chocolate pieces, nuts, fruits, or biscuit layers. Serving it in glasses, jars, or dessert cups can make it look more appealing.
The finest Cadbury product is determined by the recipe and personal taste preferences. Chocolate-based recipes are ideal for richer desserts and include a wide range of Cadbury items such as chocolates, cocoa powder, Bournville, ice cream, and more.
Cadbury products can add chocolate flavor to cakes and brownies, but the result depends on the recipe. Chocolate mixes, cocoa-based ingredients, or dessert blends can help create a richer taste and texture.
To prepare Cadbury Silk No-Bake Desserts, make a biscuit base, melt Cadbury Silk chocolate, mix it with whipped cream or cream cheese, spread the mixture over the base, and refrigerate until firm before serving chilled.
Cadbury Silk No-Bake Desserts can be made without eggs by using whipped cream, cream cheese, condensed milk, or yogurt. These ingredients create a smooth, creamy texture while keeping the dessert rich, light, and delicious.
The easiest way to make Cadbury Silk No-Bake Desserts is by preparing the layers, assembling everything in dessert cups or a dish, and refrigerating until fully set. No baking or steaming is required.
Cadbury Silk No-Bake Desserts usually contain Cadbury Silk chocolate, crushed biscuits, butter, whipped cream or cream cheese, and vanilla. Many recipes also include condensed milk, fresh fruits, nuts, or chocolate chips for extra flavor.
Cadbury Silk No-Bake Desserts stay fresh for about 3 to 4 days when refrigerated in an airtight container. Keep them chilled until serving and avoid leaving them at room temperature for extended periods.
Cadbury Silk No-Bake Desserts may not set properly if the chocolate is too hot, the cream was overmixed, or if the dessert was not chilled long enough. Following measurements carefully usually gives better results.
Cadbury Silk No-Bake Desserts are different because they require no baking, making them quicker and easier to prepare. They have a creamy, smooth texture and rich chocolate flavor, making them perfect for effortless homemade treats.
Serve Cadbury Silk No-Bake Desserts in dessert glasses, mini jars, parfait cups, or as chilled slices. Decorate with chocolate shavings, cookie crumbs, berries, caramel sauce, or chopped nuts for an attractive finishing touch.
Cadbury Silk Milk Chocolate is the best choice for desserts because it melts smoothly and creates a creamy texture.
Cadbury Silk chocolate works well in cakes and brownies because it melts smoothly and adds a rich, creamy chocolate flavor. It can also be used for fillings, frostings, drizzles, or decorating homemade baked desserts.
To make Cocoa Powder Fudge at home, melt some butter in a saucepan over heat, add cocoa powder, and stir until smooth. Next, add milk, vanilla extract, salt, and mix everything well. Fold in some sugar until the mixture becomes thick; now pour the mixture into a lined tray, smooth the top, and refrigerate for 2–3 hours before cutting into squares.
Yes, Cocoa Powder Fudge is eggless. It gets its texture from butter, condensed milk, and cocoa powder, instead of eggs. A dairy-free version of Cocoa Powder Fudge can also be made by using plant-based butter and condensed coconut milk; it will still be smooth and fudgy.
Yes, Cocoa Powder Fudge does not require an oven. Cook the ingredients on the stovetop until the mixture becomes thick and glossy, then pour it into a lined pan and chill it in the refrigerator until firm. This simple no-bake method is quick and easy.
Cocoa Powder Fudge is made with cocoa powder, butter, condensed milk, powdered sugar, vanilla extract, and salt. Some people also add chopped nuts, chocolate chips, or cream to make it even richer and more delicious.
To store Cocoa Powder Fudge, put it in an airtight container in the refrigerator; this way it can last for up to one week. To store Cocoa Powder Fudge for a longer time, wrap each piece separately and freeze it for up to three months. Let the fudge sit at room temperature before serving.
Cocoa Powder Fudge can become dry if cooked for a longer time or if too much cocoa powder or sugar is added. Stirring the mixture for long after it starts to set can also affect the texture of the Fudge.
The main difference is the texture. Cocoa Powder Fudge is rich, smooth, and firm, while other similar desserts are soft and creamy. Also, Cocoa Powder Fudge has a more solid bite and a strong chocolate flavor.
You can add chopped walnuts, almonds, or hazelnuts for crunch. Swirl in peanut butter, caramel, peppermint extract, orange zest, or espresso powder for different flavors. Adding white chocolate chips is also a great idea.
A good-quality unsweetened cocoa powder is best for making Cocoa Powder Fudge. This gives the fudge a rich chocolate taste and allows you to control the sweetness. You can choose Cadbury cocoa powder to create a smoother, darker flavor and a stronger chocolate taste.
Yes, cocoa powder works really well in cakes and brownies. It gives them a rich chocolate taste and a beautiful dark color while keeping the sweetness balanced. It mixes easily with the batter and helps create a soft, chocolatey texture in baked desserts.
To make Cocoa Powder Shakes, blend chilled milk, cocoa powder, sugar or any preferred sweetener, vanilla extract, and ice cubes until smooth and creamy. For a richer taste, add a scoop of ice cream or whipped cream before blending. Pour into chilled glasses and serve immediately.
Cocoa Powder Shakes are naturally egg-free, so no eggs are required. Simply blend cocoa powder with chilled milk, sugar, vanilla extract, and ice cubes until the mixture becomes smooth and creamy.
An oven is not required to prepare Cocoa Powder Shakes because they involve no baking or cooking. Simply blend all the ingredients until smooth, pour the mixture into chilled glasses, and serve immediately.
The main ingredients used in Cocoa Powder Shakes are cocoa powder, chilled milk, sugar, vanilla extract, and ice cubes. Optional additions such as ice cream, whipped cream, chocolate syrup, or coffee can be included to enhance the flavor and texture.
Cocoa Powder Shakes are best enjoyed immediately after preparation. However, they can be stored in an airtight container in the refrigerator for up to 24 hours. Stir or blend again before serving if the ingredients have separated.
If your Cocoa Powder Shake is too runny, reduce the amount of milk or add more ice cream or ice cubes. If it tastes bitter, increase the amount of sweetener. Blending the ingredients thoroughly also helps achieve a smoother consistency.
Unlike many traditional desserts, Cocoa Powder Shakes require no baking or cooking and can be prepared within minutes. Their smooth, drinkable consistency makes them suitable as a refreshing beverage, a light dessert, or even a quick snack.
Serve Cocoa Powder Shakes in chilled glasses topped with whipped cream, chocolate curls, a dusting of cocoa powder, or colorful sprinkles. You can also drizzle chocolate syrup inside the glass and garnish with crushed cookies, marshmallows, or fresh fruit for extra flavor and presentation.
For the best results, choose high-quality unsweetened cocoa powder when preparing Cocoa Powder Shakes. Cadbury cocoa powder also provides a rich chocolate flavor, blends smoothly, and creates an excellent base for a variety of desserts.
Yes, good-quality cocoa powder can be used in cakes, brownies, and other baked treats. The cocoa powder enhances the chocolate flavor, while the remaining ingredients can be adjusted according to the specific recipe.
Popular Dahi Bhalla dishes include dahi bhalla papdi chaat, South Indian style, Thayir Vada, and stuffed dahi bhalla. Different parts of India make Dahi Bhalla with different lentils and spices.
An easy Dahi Bhalla recipe starts by soaking lentils, grinding them into a batter, and frying soft bhallas or vadas. After soaking them in water, top with chilled yogurt, chutneys, and spices before serving.
Sweets are important during Holi because they represent joy, sharing, and celebration. Festive treats bring families together and add sweetness to colorful gatherings and traditions worldwide.
Quick Dahi Bhalla recipes can be made by using prepared lentil batter or ready-to-eat components to save time. Chilled yogurt and flavorful chutneys keep the dish fresh and tasty quickly.
The shelf life of Dahi Bhalla is usually one to two days when stored properly in refrigeration. Keeping chutneys separate can help maintain texture and freshness for a longer period.
Low-sugar Dahi Bhalla options can include less sweet chutneys and naturally flavored yogurt. Spices, herbs, and tangy ingredients add taste without needing extra sweetness, making it suitable for lighter versions.
Dahi Bhalla has evolved with new flavors, creative toppings, and modern presentations. Traditional recipes now include regional variations and unique combinations while keeping the original taste intact.
Creative twists on classic Dahi Bhalla include adding fruit-based flavors, different chutneys, crunchy toppings, or fusion elements for a fresh experience while maintaining the traditional recipe style and familiar taste.
Popular Holi Desserts include gujiya, malpua, rasmalai, gulab jamun, jalebi, kheer, shrikhand, phirni, and colorful festive treats. These traditional sweets are commonly prepared and shared with family and friends during Holi celebrations.
An easy Holi Dessert recipe is coconut ladoo. Mix condensed milk with grated coconut, cook for a few minutes until the mixture thickens, let it cool slightly, roll into balls, coat with coconut, and serve.
Sweets are important during Holi because they represent joy, sharing, and celebration. Festive treats bring families together and add sweetness to colorful gatherings and traditions worldwide.
Quick Holi Desserts include shrikhand, fruit custard, chocolate peda, no-bake truffles, chocolate-covered strawberries, and chocolate bark with nuts. These festive treats are quick to prepare and perfect for celebrating with family and friends.
The shelf life of Holi Desserts varies by recipe. Fresh milk-based sweets usually stay good for two to three days in the refrigerator, while dry sweets and chocolate-based treats can last up to one week.
Yes, Holi Desserts can be made with less sugar by using fresh fruits, dark chocolate, yogurt, nuts, or natural sweeteners. These ingredients keep desserts festive and flavorful while reducing overall sweetness.
Holi Desserts have changed over time by combining traditional sweets with chocolate, fresh fruits, and healthier ingredients. Along with classic recipes, fusion, no-bake, and low-sugar desserts have become popular festive choices.
Creative Holi Desserts include chocolate-filled gujiya, baked gujiya, saffron rasmalai, rose-flavored malpua, dry fruit shrikhand, and colorful phirni. These modern twists refresh classic Holi favorites while keeping their traditional festive charm.
Dairy Milk gives a creamy taste, Bournville adds a richer cocoa flavor, and White Chocolate offers extra sweetness. The right choice depends on the dessert you're making.
Cadbury Dairy Milk Silk is best for Holi desserts. Its ultra-creamy texture melts beautifully into fusion sweets like chocolate gujiya, rabdi, or thandai mousse, adding a rich, premium touch to festive celebrations.
Traditional Holi desserts include Gujiya, Malpua, Laddoos, Barfi, and Thandai-based sweets. Holi Fusion Desserts give these classic treats a modern touch by adding new flavors, colorful decorations, and fun serving styles for celebrations.
To prepare Holi Fusion Desserts, choose a traditional Holi sweet, add modern ingredients like chocolate or fruits, mix or layer everything, then bake, chill, or set as needed before decorating and serving.
Sweets are important during Holi because they represent joy, sharing, and celebration. Festive treats bring families together and add sweetness to colorful gatherings and traditions worldwide.
Beginner-friendly Holi Fusion Desserts include dessert cups, chocolate bark, fruit parfaits, and simple no-bake treats. These recipes require basic ingredients and easy steps, making them perfect for anyone starting to cook.
Yes, Holi Fusion Desserts can be made a day or two in advance and stored in an airtight container. Refrigerate them to keep them fresh, then add toppings or decorations before serving.
Guilt-free Holi Fusion Desserts use fruits, yogurt, nuts, or less sugar instead of rich ingredients. They are a lighter way to enjoy festive sweets while still celebrating Holi with delicious homemade desserts.
Fusion twists on Holi Fusion Desserts include adding chocolate, fresh fruits, cookies, or creamy fillings to traditional sweets. These simple changes create fun desserts while keeping the festive Holi flavors intact.
The best Holi Fusion Desserts for gifting include chocolate gujiya, fusion barfi, dessert jars, truffles, and brownie bites. These festive treats are easy to pack, attractive to present, and perfect for sharing during Holi.
Cadbury Dairy Milk is generally best because its smooth, classic flavor blends easily into traditional milk-based sweets, while vibrant variants like Gems perfectly mirror the colorful, festive theme of Holi.
Add a chocolate twist to Holi Fusion Desserts by mixing melted chocolate into recipes or using it as a topping, filling, or drizzle. It adds rich flavor and makes festive desserts more enjoyable.
To make an easy Oreo Cake, crush Oreo cookies and mix them with milk, baking powder, and sugar if needed, and then bake or steam until soft. Frost it with whipped cream or chocolate ganache for a simple homemade dessert.
Yes, you can make Oreo Cake without eggs by using milk, yogurt, condensed milk, or mashed banana to keep it moist. These ingredients will help keep the cake soft and fluffy, while making it suitable for those avoiding eggs.
You can make Oreo Cake without an oven by steaming the batter in a covered pot or cooking it in a heavy-bottom pan over low heat. This method creates a soft, moist cake without baking.
Basic Oreo Cake ingredients include Oreo cookies, milk, baking powder, sugar if desired, butter or oil, and vanilla extract. Toppings like whipped cream, chocolate chips, or crushed Oreo cookies add extra flavor and texture.
Fresh Oreo cake stays good for about two days at room temperature in a cool place or up to five days when refrigerated in an airtight container. Chilling also helps maintain its texture and freshness.
A common mistake while making Oreo Cake is overmixing the batter after adding baking powder, which can make the cake dense. Mixing just until combined helps create a lighter texture with a softer crumb.
Homemade Oreo cake usually tastes fresher, contains no preservatives, and allows ingredients to be adjusted for sweetness or texture. Store-bought versions are more convenient and often have a longer shelf life with added preservatives.
Oreo cake can be customized with cream cheese frosting, peanut butter, caramel, coffee, fresh berries, or chocolate chips. Layers, cupcakes, and ice cream cake versions are also fun ways to enjoy the classic flavor.
Regular Oreo cookies are the most versatile choice for making cakes because they crush easily and blend well into batters, crusts, and toppings. Double-stuffed varieties create a richer filling with extra creaminess.
Oreo works well in cakes, brownies, cupcakes, cheesecakes, and dessert bars. Crushed Oreo cookies add chocolate flavor and a crunchy texture, making baked desserts richer and more enjoyable.
To prepare Oreo Ice Cream, you will need whipped cream, condensed milk, vanilla extract, and crushed Oreo cookies. Fold these ingredients gently so the mixture stays light and airy, then put it in the freezer for 6 to 8 hours until firm. After that, scoop it and serve with some extra crushed Oreo cookies if needed.
Oreo ice cream can be made without eggs by using whipped cream and condensed milk to get a rich and creamy base. You can also use fat milk thickened with cornstarch. This way, the flavor stays delicious, and the texture remains smooth.
No oven is needed because Oreo ice cream sets in the freezer instead of baking. Pour the mixture into a container and freeze until firm. Stirring once during the first few hours will make it creamier.
The main ingredients in Oreo Ice Cream are Oreo cookies, whipping cream, condensed milk, and vanilla extract. Some people also add salt, chocolate chips, or chocolate syrup to make it taste even better.
Oreo Ice Cream can last for two weeks if stored in a container with a tight lid. This helps keep it fresh and prevents freezer burn and ice crystals, allowing the dessert to remain creamy and flavorful each time it is served.
If your Oreo Ice Cream is icy or too hard, it might be because the cream was not whipped enough or the mixture was overmixed. Freezing it uncovered can also affect the texture and reduce the rich, creamy finish.
Oreo Ice Cream is special because it has a frozen base and crunchy Oreo cookie pieces in every bite. It is different from baked desserts because it delivers a refreshing texture that feels rich, cool, and satisfying, especially on warm days.
Oreo ice cream can be served in waffle cones, brownie sundaes, cookie sandwiches, milkshakes, or layered dessert cups. Toppings like whipped cream, chocolate sauce, crushed Oreo cookies, or sprinkles can also be added.
Classic Oreo is great for making desserts at home. It is easy to add to homemade ice creams. You can make sundaes, milkshakes, ice cream cakes, frozen pies, and parfaits.
Oreo is great when served with freshly baked cakes and brownies. They add a delicious chocolate cookie flavor, a slight crunch, and extra texture. Crushed Oreo cookies can be mixed into the batter or used as a topping to make baked desserts.
To make an Oreo milkshake, you need Oreo cookies, chilled milk, vanilla ice cream, and a little sugar. Blend these until smooth, then pour the Oreo milkshake into a glass and top with whipped cream or crushed Oreo cookies for extra flavor.
Oreo milkshake is naturally egg-free when made with milk, Oreo cookies, and egg-free vanilla ice cream. Bananas, yogurt, or dairy-free ice cream can also be used to make the Oreo milkshake creamy and delicious.
You do not need an oven to make an Oreo milkshake; a blender is all you need to make this drink in minutes. Just blend the Oreo cookies with milk, ice cream, and ice cubes until smooth and serve chilled.
Oreo milkshake is made with Oreo cookies, chilled milk, vanilla ice cream, and ice cubes. Whipped cream, chocolate syrup, vanilla extract, or crushed cookies can also be added for extra flavor and a richer texture.
Oreo milkshake tastes best when consumed immediately. It can be refrigerated for up to 24 hours in a sealed container, but the texture may become thinner as the ice cream melts and the cookies soften.
A common mistake with Oreo milkshake is adding too much milk, making it watery instead of thick and creamy. Using warm ingredients can also reduce the rich texture and refreshing taste of the drink.
Homemade Oreo milkshake offers a fresher taste and allows you to control the sweetness, thickness, and ingredients. Store-bought versions are more convenient but may contain added flavors, and preservatives for a longer shelf life.
Oreo milkshake can be customized with peanut butter, coffee, mint, caramel, strawberries, or chocolate chips for new flavors. Toppings like whipped cream, cookie crumbs, sprinkles, or chocolate drizzle also make it more fun and attractive.
Classic Oreo cookies are a great choice for making milkshakes because they blend well and add a rich cookies-and-cream flavor. Depending on your taste, different Oreo varieties can also be used to create milkshakes with unique flavors and textures.
Yes, Oreo cookies can make cakes and brownies more enjoyable by adding a chocolatey cookie taste and a fun texture. They can be crushed into the batter, mixed into the layers, or used as a topping to give baked treats an extra twist.
To prepare Oreo Mousse, crush Oreo cookies, mix them with whipped cream and ingredients like cream cheese, sugar, vanilla extract, and milk or cream. Place the mixture in the fridge and chill until smooth. Add some extra cookie crumbs for more texture and flavor.
Oreo Mousse can be made without eggs by using whipped cream, cream cheese, or gelatin instead. These ingredients help make the dessert soft, creamy, light, and easy to make.
To prepare Oreo Mousse without an oven, crush cookies with whipped cream and other ingredients. Then chill the dessert in the refrigerator. This simple method helps the mousse set properly without baking.
Oreo mousse is commonly made with Oreo cookies, whipped cream, cream cheese, sugar, vanilla extract, and milk or heavy cream. Some people also include gelatin to give the mousse a firmer and more stable texture.
Oreo mousse stays fresh for about 2 to 3 days in the refrigerator when kept in an airtight container. Chilling helps it stay creamy and flavorful, so it is best enjoyed within this time for the best taste.
Oreo mousse may not turn out right if the cream is not whipped enough or if the ingredients are mixed too fast. Using chilled cream and following the right proportions helps achieve a smooth and stable mousse.
Oreo Mousse is special because it is light, creamy, and has a crunchy cookie flavor. Unlike heavier desserts, it combines a light mousse base consisting of crushed Oreo cookies.
Oreo mousse can be served in dessert cups, layered with cookie crumbs, topped with whipped cream, or decorated with chocolate pieces. Mini portions and creative layers make it more attractive for parties.
Classic Oreo cookies are the best choice because they blend smoothly, provide the signature cookies-and-cream flavor, and create a rich, creamy texture that works well in many desserts.
Yes, Oreo cookies are great for baking cakes and brownies. They add a rich chocolate cookie flavor and a crunchy texture when mixed into the batter or used as a topping. They can also be crushed into frostings and dessert fillings.
The most popular Eid Sheer Khurma variations include the classic version with dates and vermicelli, dry fruit Sheer Khurma, saffron Sheer Khurma, rose-flavored Sheer Khurma, and richer recipes made with condensed milk or extra nuts.
An easy Eid Sheer Khurma recipe is made by roasting vermicelli in ghee, simmering it with milk, then adding dates, sugar, cardamom, and mixed nuts. Cook until creamy and serve warm or chilled.
Sweets are an important part of Eid because they symbolize joy, gratitude, and togetherness. Families prepare festive desserts like Eid Sheer Khurma to celebrate the occasion and share them with relatives, friends, and neighbors.
Quick Eid Sheer Khurma recipes use roasted vermicelli, milk, dates, sugar, cardamom, and mixed nuts. They take about 20 minutes to prepare while still delivering a rich, creamy texture and traditional festive flavor.
Eid Sheer Khurma stays fresh for about 2 to 3 days when refrigerated in an airtight container. Let it cool completely before storing. If it thickens, reheat gently with a little milk to restore its creamy consistency.
Yes, Eid Sheer Khurma can be made with less sugar by relying on naturally sweet dates or using a sugar substitute. Plenty of nuts and milk help maintain a rich, creamy texture without adding much extra sugar.
Eid Sheer Khurma has evolved over the years with variations featuring saffron, rose, dried fruits, condensed milk, and different nuts. Despite these modern additions, it remains a cherished traditional dessert served during Eid celebrations.
Creative Eid Sheer Khurma variations include saffron, rose syrup, coconut, fresh fruits, or caramelized nuts. Serving it chilled in dessert cups or parfait glasses gives the traditional recipe a fresh and festive presentation.
Cadbury Dairy Milk is a popular choice for Eid Sheer Khurma because it melts smoothly into the milk and adds a mild chocolate flavor without overpowering the traditional ingredients.
A chocolate twist for Eid Sheer Khurma can be created by stirring melted Cadbury chocolate into the warm milk, then topping it with chocolate shavings or toasted nuts for a richer festive dessert.
The best Summer Falooda options include classic rose falooda, mango falooda, kulfi falooda, pista falooda, and strawberry falooda. These chilled desserts combine vermicelli, basil seeds, milk, and ice cream for a refreshing summer treat.
Summer Falooda is made by layering cooked vermicelli, soaked basil seeds, chilled milk, rose syrup, and ice cream in a tall glass. Garnish with nuts or fresh fruits before serving for extra flavor and texture.
Popular Summer Falooda recipes include rose, mango, strawberry, chocolate, pista, and kulfi versions. Each Summer Falooda recipe combines chilled milk, vermicelli, basil seeds, syrup, and toppings to create a cool and satisfying dessert.
Summer Falooda is perfect for hot weather because it is served cold and includes refreshing ingredients like chilled milk, basil seeds, and ice cream. Its light, cooling texture makes it a favorite summer dessert.
Summer Falooda commonly includes chilled milk, cooked vermicelli, soaked basil seeds, rose syrup, ice cream, and chopped nuts. Fresh fruits, jelly, or flavored syrups are often added to create different tastes and textures.
Summer Falooda is best enjoyed immediately after assembling. If needed, store the prepared ingredients separately in the refrigerator for up to one day, then combine them just before serving to keep the texture fresh.
Popular Summer Falooda flavours include rose, mango, strawberry, pista, chocolate, vanilla, and kulfi. These flavors pair well with chilled milk, vermicelli, basil seeds, and ice cream for a refreshing dessert.
Easy Summer Falooda variations include adding fresh fruits, jelly cubes, kulfi, flavored ice cream, or different syrups like mango and strawberry. These simple changes create delicious new versions without changing the basic recipe.
Cadbury chocolate powder dissolves easily for a smooth, chilled milk base. Use 55% semi-sweet dark chocolate for glass-drizzling; it melts beautifully and won't overpower the delicate sabja seeds and falooda vermicelli.
There is no single best brand for Summer Falooda because the taste depends more on fresh ingredients than packaged products. High-quality milk, ice cream, syrups, and vermicelli help create a rich and refreshing dessert.
Summer Fruit Desserts include fruit salad, berry parfaits, mango mousse, peach cobbler, watermelon sorbet, fruit tarts, and mixed berry trifles. These light, colorful desserts are refreshing, naturally sweet, and perfect for warm summer days.
Summer Fruit Desserts are easy to make by combining fresh seasonal fruits with yogurt, whipped cream, custard, or cake. Chill before serving, or freeze selected recipes like sorbet for a cool and refreshing homemade treat.
Popular Summer Fruit Desserts recipes include mango pudding, strawberry parfait, mixed berry trifle, fruit salad, peach crisp, watermelon sorbet, and fruit tarts. They are simple to prepare and highlight the natural sweetness of fresh fruits.
Summer Fruit Desserts are perfect for warm weather because they use fresh, juicy fruits with light ingredients like yogurt, cream, or custard. They are served chilled, making them refreshing, colorful, and enjoyable during hot summer days.
Summer Fruit Desserts commonly use fresh fruits like berries, mangoes, peaches, and watermelon with yogurt, whipped cream, custard, cream cheese, sugar, honey, lemon juice, mint, or crunchy toppings such as granola, nuts, or biscuits.
Store Summer Fruit Desserts in an airtight container in the refrigerator for up to three days. Keep cut fruits chilled, add crunchy toppings before serving, and avoid leaving desserts at room temperature for long periods.
Summer Fruit Desserts are available in refreshing flavors like mango, strawberry, blueberry, raspberry, peach, watermelon, pineapple, lemon, lime, and mixed berries. These fruity combinations create bright, naturally sweet desserts perfect for hot weather.
Easy Summer Fruit Desserts variations include layered parfaits, fruit salads, frozen popsicles, smoothie bowls, yogurt cups, fruit skewers, berry trifles, and no-bake cheesecakes. Each version is simple, refreshing, and easy to customize with seasonal fruits.
Cadbury Dairy Milk adds a comforting, sweet creaminess to tart summer berries and bananas. For a richer contrast with sweet fruits, use Cadbury Bournville dark chocolate to balance the flavors perfectly in warm weather.
There is no single best brand for Summer Fruit Desserts because the result depends more on fresh, ripe fruits and quality ingredients. Choose reliable baking and dairy products that suit your recipe and personal taste preferences.
Ideal Summer Kulfi options include classic malai, mango, pistachio, saffron, and chocolate flavours. These chilled desserts are perfect for hot days because they offer a creamy texture and rich taste with refreshing seasonal ingredients.
To prepare Summer Kulfi step by step, boil milk until thick, add sugar and flavours, cool the mixture, pour into moulds, and freeze until firm for a smooth homemade dessert.
Beginner-friendly Summer Kulfi recipes include mango kulfi, malai kulfi, and pistachio kulfi. These recipes use simple steps like simmering milk, adding flavours, pouring into moulds, and freezing until set for an easy homemade dessert.
Summer Kulfi becomes refreshing with fruits like mango and berries, while comforting flavours include cardamom, saffron, and nuts. Ingredients like condensed milk and cream add richness and create a smooth, creamy texture.
Common Summer Kulfi ingredients include full-fat milk, sugar, cream, condensed milk, cardamom, saffron, nuts, and fruit purees. These ingredients create the traditional creamy texture and sweet flavour expected in this dessert.
Summer Kulfi can be made ahead of time and stored in the freezer until serving. Preparing it early helps the flavours develop while keeping the dessert ready for gatherings or warm weather occasions.
Trending flavours in Summer Kulfi include mango, rose, chocolate, pistachio, coffee, and fruit-based varieties. Modern recipes also explore fusion combinations that mix traditional kulfi with unique flavours while keeping the classic creamy texture.
Fun ways to serve Summer Kulfi include adding nuts, fruit pieces, chocolate drizzle, or serving it on sticks. Creative presentations in cups or cones make this dessert more appealing for family and guests.
For Summer Kulfi, dark chocolate works well because its rich cocoa flavour balances sweetness. Milk chocolate adds creaminess, while white chocolate gives a sweeter taste, making each option suitable for different kulfi recipes.
The best brand for Summer Kulfi depends on personal preference and recipe needs. A quality chocolate brand with smooth texture and balanced flavour can enhance kulfi recipes while complementing the creamy frozen dessert.
Summer Mango Desserts taste best when the recipes stay light and chilled. Fresh mangoes pair especially well with smooth puddings, soft cheesecakes, creamy mousse, fruit custard, frozen treats, and layered desserts for warm afternoons.
Fresh Summer Mango Desserts begin with ripe mangoes blended into a smooth puree. The puree is mixed with the remaining ingredients, chilled until the texture firms, then finished with fruit, nuts, or herbs before serving.
For those new to desserts, Summer Mango Desserts such as mango custard, no-bake mango cheesecake jars, and frozen mango treats are easy choices. These recipes require minimal preparation while creating a refreshing homemade dessert.
Fresh mangoes, yogurt, whipped cream, coconut milk, condensed milk, mint, lime juice, and chilled cream cheese make Summer Mango Desserts refreshing. Vanilla, cardamom, and crunchy biscuit layers add comforting flavors and enjoyable texture.
Common Summer Mango Desserts ingredients include ripe mangoes, cream, milk, yogurt, condensed milk, sugar, gelatin or agar-agar, cream cheese, vanilla extract, coconut milk, biscuits, nuts, and fresh mint for garnish.
Yes, most Summer Mango Desserts can be prepared a day in advance and refrigerated until serving. Chilling improves texture and flavor, making desserts like mousse, pudding, cheesecake, and parfaits even more delicious.
Trending Summer Mango Desserts flavors include mango with coconut, passion fruit, lime, vanilla, white chocolate, pistachio, saffron, and cardamom. These combinations create refreshing, tropical desserts while complementing the natural sweetness of ripe mangoes.
Serve Summer Mango Desserts in mason jars, mini glasses, waffle bowls, hollowed mango shells, popsicle molds, or dessert cups. Garnish with fresh fruit, mint, toasted coconut, or chopped nuts for an attractive presentation.
White chocolate pairs best because its creamy sweetness enhances mango's tropical aroma. For a bold contrast, use 55% to 70% dark chocolate, which perfectly balances the syrupy sweetness of ripe summer fruits.
The best brand for Summer Mango Desserts depends on the recipe and personal preference. Choose high-quality chocolate, dairy products, and fresh mangoes from trusted brands available locally to achieve the best flavor and texture.
The best Summer Mousse options include mango, strawberry, lemon, chocolate, coconut, and mixed berry. These light, chilled desserts are refreshing, creamy, and perfect for warm weather gatherings, afternoon treats, or simple family desserts.
Summer Mousse is made by blending fruit puree or melted chocolate with whipped cream or a light mousse base. Chill the mixture until set, then serve cold with fresh fruits or simple toppings.
Popular Summer Mousse recipes include mango mousse, strawberry mousse, chocolate mousse, lemon mousse, blueberry mousse, coconut mousse, and passion fruit mousse. These chilled desserts are easy to prepare and perfect for hot summer days.
Summer Mousse is ideal for warm weather because it is light, airy, and served chilled. Fresh seasonal fruits and creamy textures create a refreshing dessert that feels satisfying without being overly heavy.
Summer Mousse commonly includes fresh fruit puree or melted chocolate, whipped cream, sugar, vanilla, and gelatin or a vegetarian setting agent if needed. Some recipes also use yogurt or cream cheese for extra richness.
Store Summer Mousse in an airtight container or cover serving glasses with plastic wrap before refrigerating. It stays fresh for about two to three days and is best served chilled for the freshest taste and texture.
Popular Summer Mousse flavours include mango, strawberry, raspberry, lemon, pineapple, coconut, chocolate, blueberry, and passion fruit. These fruity and creamy combinations offer refreshing dessert choices that suit warm summer weather perfectly.
Easy Summer Mousse variations include mango yogurt mousse, chocolate mousse, mixed berry mousse, coconut mousse, lemon mousse, and layered fruit mousse. Simple ingredients and minimal preparation make these desserts great for beginners.
Dark chocolate creates a rich Summer Mousse, milk chocolate gives a sweeter and creamier texture, while white chocolate offers a smooth, mild flavor. The best choice depends on the taste and texture preferred for the dessert.
There is no single best brand for Summer Mousse. Good-quality chocolate, fresh dairy products, and ripe fruits from trusted brands usually produce the best flavor, texture, and overall results in homemade mousse recipes.
Summer No Bake Desserts include cheesecake, mousse, parfaits, pudding, icebox cake, fruit trifle, panna cotta, and yogurt cups. These chilled treats are easy to make, require no oven, and are perfect for staying cool on warm days.
To prepare Summer No Bake Desserts, mix the ingredients, layer or pour them into serving dishes, chill until firm, and garnish with fresh fruit, chocolate, or nuts before serving. Most recipes need only simple mixing and refrigeration.
Beginner-friendly Summer No Bake Desserts include chocolate mousse, yogurt parfaits, Oreo cheesecake, fruit pudding, and no-bake cheesecake cups. These recipes use simple ingredients, require little preparation, and are easy for anyone making desserts at home.
Summer No Bake Desserts feel refreshing with fruits, yogurt, whipped cream, lemon, berries, and mint. Cream cheese, chocolate, coconut, and vanilla add a comforting touch, creating chilled desserts that are light, creamy, and perfect for warm weather.
Common Summer No Bake Desserts ingredients include cream cheese, whipped cream, yogurt, fresh fruits, cookies, graham crackers, chocolate, condensed milk, gelatin or agar-agar, vanilla, sugar, and nuts for extra flavor and texture.
Yes, Summer No Bake Desserts are great for making ahead. Most recipes stay fresh for two to three days when refrigerated, allowing flavors to develop while making serving much easier.
Popular Summer No Bake Desserts flavors include mango, strawberry, lemon, blueberry, passion fruit, coconut, peach, raspberry, watermelon, and chocolate. These fresh, fruity combinations create light, creamy desserts that are especially enjoyable during hot summer days.
Serve Summer No Bake Desserts in mason jars, mini glasses, dessert cups, waffle cones, or layered parfait glasses. Add fresh fruit, chocolate shavings, mint leaves, or colorful sprinkles to make every serving more appealing.
Cadbury Dark chocolate adds rich flavor, whereas Cadbury Milk chocolate pairs beautifully with berries, mango, lemon, and other summer fruits.
The best chocolate brand for Summer No Bake Desserts depends on the recipe and personal taste. Choose good-quality baking chocolate that melts smoothly, tastes rich, and blends well with fruits, cream, or cheesecake fillings.
Fresh fruit blends, creamy yogurt mixtures, and naturally flavored juices are perfect for making Summer Popsicles. Popular combinations include mango, watermelon, berries, pineapple, and citrus, creating frozen desserts that are light, colorful, and enjoyable throughout summer.
Start by choosing ripe fruits or juice for Summer Popsicles and blend until smooth. Pour the mixture into molds, add sticks, freeze until solid, then briefly run the molds under water before gently removing each popsicle.
Mango, strawberry, watermelon, and orange make excellent Summer Popsicles for beginners because they need only a few ingredients. Blend the fruit, fill the molds, freeze until firm, and enjoy a simple homemade frozen dessert.
Summer Popsicles stay refreshing with ingredients like watermelon, citrus fruits, berries, coconut water, mint, and yogurt. These ingredients create light, cooling flavors while adding natural sweetness and a creamy texture for enjoyable frozen treats.
Common Summer Popsicles ingredients include fresh fruits, fruit juice, yogurt, coconut water, milk, sugar, honey, lemon juice, and mint. These simple ingredients create colorful, flavorful frozen treats that are perfect for warm summer weather.
Summer Popsicles can easily be made ahead of time and stored in the freezer for several weeks. Keeping them in airtight molds or freezer-safe bags helps maintain their flavor, texture, and freshness until ready to enjoy.
Trending Summer Popsicles flavors include mango chili, watermelon mint, strawberry lemonade, pineapple coconut, peach, blueberry, kiwi, and mixed berry. These vibrant combinations offer refreshing tastes that are especially popular during warm summer months.
Summer Popsicles can be served on chilled platters, dipped in melted chocolate, sprinkled with chopped nuts, or paired with fresh fruit. Colorful serving trays and decorative wrappers make them more appealing for parties and family gatherings.
White chocolate goes well with fruity Summer Popsicles because of its sweet, creamy taste. Dark chocolate is a great choice for creamy popsicles, as it melts easily and forms a crisp chocolate coating after freezing.
There is no single best brand for Summer Popsicles because the ideal choice depends on personal taste and ingredients. Homemade popsicles using fresh fruits, quality chocolate, and natural flavors often provide the freshest and most customizable results.
Summer Sorbet Desserts include mango, lemon, raspberry, strawberry, watermelon, and mixed berry sorbets. These light, fruity frozen treats are refreshing, naturally colorful, and perfect for staying cool during hot summer days.
Summer Sorbet Desserts are easy to make by blending fresh fruit, sugar, lemon juice, and a little water until smooth. Freeze the mixture, stirring occasionally, until firm for a simple homemade frozen dessert.
Summer Sorbet Desserts can be served in fruit shells, layered with fresh berries, topped with mint, or paired with chilled fruit salad. These quick ideas need little preparation and taste fresh on warm days.
Summer Sorbet Desserts are popular because they are light, refreshing, and made with seasonal fruits. Their icy texture helps beat the heat while offering bright flavors that make them a favorite during summer gatherings.
Summer Sorbet Desserts usually need fresh fruit, sugar, lemon or lime juice, and water. Some recipes also include herbs like mint or basil to add extra freshness and enhance the natural fruit flavors.
Summer Sorbet Desserts stay fresh in an airtight container in the freezer for about one to two months. For the best texture and flavor, let the sorbet soften slightly before serving after freezing.
Summer Sorbet Desserts taste best with flavors like mango, strawberry, lemon, watermelon, raspberry, peach, pineapple, and mixed berries. These fruits create refreshing frozen treats with bright, natural sweetness perfect for warm weather.
Summer Sorbet Desserts can be modified by adding coconut milk, fresh herbs, sparkling fruit juice, spicy chili-lime seasoning, or layering different fruit flavors. These simple twists create refreshing desserts with exciting new tastes.
Summer Sorbet Desserts pair well with dark, milk, or white chocolate depending on the fruit. Dark chocolate complements berry flavors, milk chocolate adds creaminess, and white chocolate matches tropical fruits like mango and pineapple.
Summer Sorbet Desserts taste great with good-quality chocolate from any trusted brand. Choose dark, milk, or white chocolate based on the fruit flavor, focusing on smooth texture and balanced sweetness instead of a specific brand.
A simple Tang Ice Cream recipe can be made using milk, cream, sugar, and Tang powder. Once mixed well, the blend is chilled and frozen until it gets a smooth, creamy texture.
Yes, Tang Ice Cream can be prepared without eggs. Ingredients like cream, milk, and condensed milk help give it a rich taste and creamy texture.
Tang Ice Cream does not need an oven. The prepared mixture can be kept in a freezer-safe container and frozen until set, with occasional mixing for a smoother texture.
Tang Ice Cream usually includes milk, cream, sugar, and Tang powder. Some recipes may also use condensed milk or vanilla to add extra flavor and improve the texture.
Homemade Tang Ice Cream generally stays fresh for one to two weeks when stored properly in an airtight freezer-safe container. Proper storage helps maintain its taste and creamy texture.
A common mistake when making Tang Ice Cream is not mixing the ingredients properly, which may affect the overall taste and texture. Improper storage can also cause ice crystals to form.
Homemade Tang Ice Cream allows you to control ingredients, sweetness, and texture. Store-bought versions may have a different consistency, while homemade ice cream offers a fresher taste.
Creative twists on Tang Ice Cream include adding fruit pieces, chocolate, nuts, or dessert toppings. These variations introduce new flavors and textures.
There is no single Tang product that is best for making desserts. Since Tang is primarily a beverage mix, different flavors can be used to prepare frozen treats like popsicles, ice cream, or jellies, depending on your recipe and taste preference.
Tang is mainly used to make refreshing beverages rather than to bake cakes or brownies. Its fruity flavors work better in drinks and chilled treats instead of baked desserts.
Tang Popsicles can be made using Tang powder, water or milk, and a sweetener if needed. Mix everything well, pour the mixture into molds, freeze until set, and enjoy a refreshing homemade treat.
Tang Popsicles are naturally eggless. They can be made using Tang powder, water, milk, or fruit juice to create a simple and delicious frozen dessert.
Making Tang Popsicles does not require an oven. Mix Tang powder with your choice of liquid, pour the mixture into popsicle molds, and freeze until firm for an easy homemade frozen snack.
Tang Popsicles usually contain Tang powder, water or milk, sugar if needed, and optional ingredients like chopped fruits or cream. These simple ingredients create a colorful and tasty frozen snack.
Homemade Tang Popsicles can usually stay fresh in the freezer for about one to two weeks when stored properly in covered molds. For the best taste and texture, consume them sooner.
A common mistake when making Tang Popsicles is using too much liquid, which can reduce flavor. Keeping the right balance of Tang powder and liquid helps create a flavorful frozen treat.
Homemade Tang Popsicles let you control the sweetness, flavors, and ingredients used. Unlike store-bought, they can be customized with fruits, milk, or other additions based on personal preferences.
Creative Tang Popsicles ideas include adding fresh fruit chunks, blending with milk, creating layered flavors, or mixing different fruit combinations. These twists make the popsicles more exciting and unique.
There is no single Tang product that is best for making desserts. Since Tang is primarily a beverage mix, different flavors can be used to prepare frozen treats like popsicles, ice cream, or jellies, depending on your recipe and taste preference.
Tang is mainly used to make refreshing beverages rather than to bake cakes or brownies. Its fruity flavors work better in drinks and chilled treats instead of baked desserts.
Valentine's Day Desserts often feature favorites like fudgy brownies, chocolate-covered strawberries, red velvet cake, cheesecakes, heart-shaped sugar cookies, and creamy mousse. Many are finished with festive decorations to suit the occasion.
To make Valentine's Day Brownies, melt butter and chocolate, stir in sugar, eggs, and flour, then bake until the center is set. After cooling, decorate with chocolate drizzle, sprinkles, or heart-shaped toppings.
Desserts make Valentine's Day celebrations sweeter by creating moments of sharing and affection. Valentine's Day Brownies, cakes, and chocolates are often gifted or enjoyed together.
Beginner-friendly Valentine's Day Brownies recipes use simple ingredients like cocoa powder, flour, sugar, butter, and eggs. These brownies are easy to prepare and can be decorated with sprinkles or chocolate toppings for a festive look.
Valentine's Day Brownies can be made in advance and stored in an airtight container for about three to five days. Keeping them covered helps maintain their soft texture and rich chocolate flavor.
Guilt-free Valentine's Day Brownies can be made with healthier ingredients like whole-wheat flour, natural sweeteners, nuts, and dark chocolate. These versions offer a lighter option while still keeping the dessert rich and satisfying.
Fusion Valentine's Day Brownies feature creative flavors such as coffee, caramel, peanut butter, coconut, and fruit combinations. These variations add unique flavors while keeping the classic fudgy brownie texture that many love.
The best Valentine's Day Brownies for gifting are rich, fudgy, and beautifully packed. Heart-shaped brownies, chocolate-filled varieties, and decorated versions make thoughtful treats for partners, friends, and family.
Cadbury Bournville works well for Valentine's Day Brownies because its deep cocoa flavor adds richness. Milk chocolate creates a sweeter taste, while white chocolate gives a creamy texture and attractive contrast.
A chocolate twist can be added to Valentine's Day Brownies by mixing chocolate chips, cocoa powder, chocolate chunks, or a smooth chocolate swirl into the batter for extra flavor and a more indulgent finish.
Traditional Valentine's Day Cake options include red velvet cake, chocolate cake, strawberry cake, heart-shaped sponge cake, black forest cake, cheesecake, and flourless chocolate cake. These classic choices are popular for celebrating love with elegant flavors and romantic presentation.
To make a Valentine's Day Cake, prepare a cake batter, bake until done, cool completely, then frost with buttercream, whipped cream, or ganache. Decorate with strawberries, chocolate shavings, sprinkles, or heart-shaped designs for a festive finish.
Valentine's Day Desserts symbolize love, appreciation, and togetherness. Sharing beautifully prepared sweets adds a thoughtful touch to celebrations, making dinners, parties, and gift exchanges feel more special while creating memorable moments with loved ones.
Easy Valentine's Day Cake recipes include one-bowl chocolate cake, strawberry sheet cake, vanilla heart-shaped cake, red velvet loaf cake, mug cake, and simple sponge cake topped with whipped cream, fresh berries, or chocolate drizzle.
Store Valentine's Day Cake in an airtight container at room temperature for up to two days if not frosted. Refrigerate frosted cakes for three to five days, and let them reach room temperature before serving for the best texture.
Healthy Valentine's Day Cake options include whole wheat cakes, oat flour cakes, almond flour cakes, yogurt cakes, sugar-free chocolate cakes, and fruit-based cakes. They reduce refined sugar while still delivering delicious flavors for the celebration.
Traditional Valentine's Day Cake features classic flavors such as chocolate, vanilla, or red velvet with simple decorations. Modern versions include trendy fillings, drip designs, fresh fruit, gourmet chocolates, and creative flavor combinations for a contemporary touch.
Easy Valentine's Day Cake variations include chocolate, strawberry, vanilla, red velvet, coffee, lemon, cheesecake-inspired, and layered cakes. Simple toppings like whipped cream, berries, nuts, or chocolate ganache create different flavors without extra effort.
Cadbury Bournville works well for rich ganache and baking, Cadbury Dairy Milk adds creamy sweetness, while Cadbury Dairy Milk Silk creates smooth frostings and fillings. Each chocolate brings a different flavor to Valentine's Day Cake recipes.
Add a chocolate twist to Valentine's Day Cake by mixing cocoa powder into the batter, layering chocolate ganache, folding chocolate chips into the cake, or decorating with chocolate curls, shavings, truffles, or chocolate-covered strawberries for extra richness.
Some well-loved Valentine's Day Chocolate Desserts are chocolate truffles, brownies, lava cakes, mousse, cupcakes, and chocolate-covered strawberries. Many people prepare these chocolate treats at home or gift them to someone special.
A simple Valentine's Day Chocolate Dessert recipe is chocolate brownies. Combine flour, cocoa powder, sugar, butter, and eggs, bake the mixture, and serve warm brownies with chocolate chips, nuts, or a light topping.
Sweets are a big part of Valentine's Day Desserts as they bring a festive touch to the celebration. Chocolate desserts are shared as gifts, served at gatherings, and enjoyed while spending time with loved ones.
Quick Valentine's Day Chocolate Desserts include chocolate bark, no-bake cheesecake cups, chocolate-dipped strawberries, and brownie bites. These recipes require minimal preparation while still creating delicious treats.
The shelf life of Valentine's Day Chocolate Desserts depends on the ingredients and storage methods. Cakes and brownies usually stay fresh for three to five days, while creamy desserts like mousse, pudding, and truffles may last longer when stored properly in the refrigerator.
Low-sugar Valentine's Day Chocolate Desserts can be made using dark chocolate, natural sweeteners, fresh fruits, or reduced-sugar ingredients. Options like fruit chocolate cups and sugar-free mousse offer lighter choices without losing flavor.
Valentine's Day Chocolate Desserts have evolved from simple chocolate gifts into creative treats like customized cakes, fusion desserts, and elegant chocolate creations. Modern desserts focus on unique flavors, designs, and personalized experiences.
Creative twists on Valentine's Day Chocolate Desserts include adding fruits, nuts, spices, caramel, or unique fillings to classic recipes. Chocolate lava cakes, truffles, and cupcakes can be transformed with exciting flavors and decorations.
Cadbury Dairy Milk Silk is best. Its high cocoa butter content ensures an ultra-smooth, creamy melt. This works well for making creamy chocolate ganaches, cake glazes, and dessert decorations.
A chocolate twist can be added to Valentine's Day Chocolate Desserts by using chocolate chips, cocoa powder, melted chocolate, or chocolate ganache. These additions enhance flavor and make traditional desserts feel more festive.
Popular Valentine's Day Cookies include heart-shaped sugar cookies, chocolate chip cookies, red velvet cookies, shortbread cookies, Linzer cookies, and sandwich cookies with jam or chocolate filling. These Valentine's Day Cookies are festive, colorful, and perfect for sharing.
An easy Valentine's Day Cookies recipe combines butter, sugar, egg, vanilla, flour, and baking powder into a dough. Shape into hearts, bake until lightly golden, then decorate the Valentine's Day Cookies with melted chocolate or colorful icing.
Sweets are a big part of Valentine's Day Desserts as they bring a festive touch to the celebration. Chocolate desserts are shared as gifts, served at gatherings, and enjoyed while spending time with loved ones.
Quick Valentine's Day Cookies can be made using ready-made sugar cookie dough or a simple butter cookie recipe. Bake, then decorate with melted chocolate, sprinkles, or colorful icing for festive treats ready in little time.
The shelf life of Valentine's Day Cookies depends on the recipe and storage. Most baked cookies stay fresh for five to seven days in an airtight container, while decorated or filled cookies are best enjoyed within three to five days.
Yes, Valentine's Day Cookies can be made with less sugar by using natural sweeteners, whole wheat flour, oats, or almond flour. Adding Cadbury dark chocolate, nuts, or dried fruit also boosts flavor without relying on extra sugar.
Valentine's Day Cookies have evolved from simple homemade butter and sugar cookies to creative designs featuring colorful icing, chocolate, unique flavors, healthier ingredients, and personalized decorations, making them suitable for every taste and celebration style.
Creative Valentine's Day Cookies include stuffed chocolate cookies, red velvet cookies, cookie sandwiches, raspberry-filled hearts, salted caramel flavors, espresso-infused dough, and decorated sugar cookies with edible flowers, colorful sprinkles, or elegant chocolate drizzles.
Cadbury Dairy Milk works well for soft, sweet Valentine's Day Cookies, while Cadbury Bournville adds a richer cocoa flavor. Cadbury White Chocolate is ideal for drizzling or decorating, creating attractive cookies with different flavors and textures.
Add a chocolate twist to Valentine's Day Cookies by mixing cocoa powder into the dough, folding in chocolate chips, filling cookies with melted chocolate, or finishing them with a smooth chocolate drizzle for extra flavor and decoration.
To try this easy 5-star brownie recipe, make the batter with butter, sugar, eggs, cocoa powder, and flour. Chop the Cadbury 5 Stars into chunks and mix them with the batter. Bake it in a preheated oven for 20-25 minutes.
To try an eggless Cadbury 5 Star brownie recipe, replace eggs with alternatives like yogurt, applesauce, mashed banana, or a milk-vinegar mixture. One may also try some silken tofu for moisture and binding.
For a no-oven 5 Star brownie, one may opt for the stovetop method. Prepare the batter, place it on a preheated, covered, heavy-bottomed pan, and cook it for 25 minutes or until it is done.
To make a Cadbury 5 Star brownie, all you need is some kitchen staples like flour, butter, sugar, all-purpose flour, baking soda, cocoa powder, eggs, and some 5 Star chunks. One may also use some chocolate chips for added crunch.
When stored in an airtight container, these brownies can be stored for 4-5 days in the refrigerator. For longer storage duration, they can be frozen as well, after wrapping them in plastic wrap.
Some of the most common mistakes that people make while making 5 Star Brownies include overmixing the batter, overbaking them, not letting the brownie cool, and slicing them while hot.
The primary difference lies in ingredients, texture, and overall quality. While the store-bought ones are designed for longer shelf life and include preservatives and stabilizers, the homemade ones are made with fresh and high-quality ingredients.
While a plain and simple 5 Star Brownie also tastes delicious, it is even more fun to try creative options like raspberry swirl, dark chocolate crunch, or a nutty salted caramel. All of them pair really well with Cadbury 5 Star.
The best Cadbury products for making desserts are Cadbury 5 Star, Dairy Milk, Bournville, Choco Melts, and Cadbury Dark Choco Chips, as they are specifically formulated for smooth melting.
While Cadbury 5 Star is generally not ideal for melting, it is used in baking when chopped into chunks. It is usually used as sticky, chewy add-ins or pockets of chewy caramel in brownies.
For an easy Cadbury 5 Star cake at home, make the batter with flour, sugar, baking powder, salt, cocoa powder, eggs, butter, and milk. Add some chopped 5 Star chunks and bake for 25 minutes.
Yes. To try the eggless version of this Cadbury 5 Star cake, all you need to do is replace eggs with moisture-rich alternatives such as applesauce, Greek yogurt, flax eggs, or a milk-vinegar mixture.
To bake these Cadbury 5 Star cakes without an oven, you may follow the standard stovetop method. Prepare the batter, place the cake tin in a heavy-bottomed, preheated, covered pot, and cook it for 25 minutes.
A Cadbury 5 Star cake typically contains baking staples such as flour, sugar, baking powder, salt, cocoa powder, eggs, butter, and milk. Once the batter is ready, mix in some chopped 5 Star chunks.
When stored at room temperature in an airtight container, these cakes stay fresh for 2 to 3 days. When refrigerated, they can be stored for 4 to 5 days. However, the exact shelf life always depends on the ingredients.
While making a chocolate cake with Cadbury 5 Star, the most common mistake is overheating the chewy, sticky candy bar to melt it. Often, very large chunks are added to the batter. This leads to a sunken cake. These common mistakes often make the cakes tough and chewy.
The primary difference lies in ingredients, texture, and overall quality. While the store-bought ones are designed for longer shelf life and include preservatives and stabilizers, the homemade ones are made with fresh and high-quality ingredients.
To add some fun and creative twists to the Cadbury 5 Star cakes, one may explore ideas such as a caramel chocolate cake, chocolate chunk cake, or a miso chocolate fudge cake. An espresso mocha flavor also goes well with this.
The best Cadbury products for making desserts are Cadbury 5 Star, Dairy Milk, Bournville, Choco Melts, and Cadbury Dark Choco Chips, as they always ensure smooth melting.
While Cadbury 5 Star is generally not ideal for melting, it is used in baking when chopped into chunks. It is usually used as sticky, chewy add-ins to add a caramel flavor to the brownies.
To make some easy Cadbury 5 Star cookies at home, make a cookie dough with melted butter, sugar, egg, flour, and some chopped Cadbury 5 Star chocolate chunks. Bake the dough in a preheated oven for 20 minutes.
Yes. To try the eggless version of these cookies, simply replace eggs with other moisture-rich alternatives such as applesauce, Greek yogurt, flax eggs, or a milk-vinegar mixture.
Yes. To make Cadbury 5 Star cookies without an oven, follow the stovetop method, where the cookie dough is cooked in a heavy-bottomed pan or a kadhai on a stovetop. You can use a makeshift double-boiler or salt-and-trivet method inside a covered pot to trap heat just like an oven.
A simple and easy homemade batch of Cadbury 5 Star cookies usually contains melted butter, powdered sugar, egg, all-purpose flour, and some finely chopped Cadbury 5 Star chocolate chunks. Some recipes are eggless as well.
To store Cadbury 5 Star cookies properly, keep them in an airtight container and store them in a cool, dry place. To maintain the taste and texture, make sure they are away from heat and humidity.
These cookies sometimes turn out dry or dense due to factors like using too much flour, overbaking, overmixing the dough, or baking them at the wrong temperature. All of them ruin the final texture and taste of the cookies.
While regular chocolate cookies taste good, these Cadbury 5 Star cookies offer an even more delicious experience with their sweet, caramel flavor profile and gooey, chewy texture that serves comfort with every single bite.
To try some easy variations of the regular Cadbury 5 Star cookies, one may try options like nuts and caramel crunch, stuffed lava cookies, chewy caramel-choco chunks cookies, and more.
Fr making desserts, Cadbury Baking Range Choco Melts, Cadbury Dark Choco Cooking Block, and Cadbury cocoa powder are often considered the best. However, several recipes also include 5 Star, Dairy Milk, and Bournville.
Yes. While it doesn't melt easily due to its sticky and chewy texture, when used as chopped chunks, Cadbury 5 Star is often considered perfect for caramel-chocolate cookies with a gooey caramel center.
To prepare a simple and easy Cadbury 5 Star ice cream dessert, all you need is some 5 Star bars, full-fat ice cream, heavy cream, chopped nuts, raisins, dried fruits, and some chocolate syrup. Assemble them in layers for a perfect ice cream dessert.
To make eggless chocolate ice cream desserts, make sure the ice cream is eggless. Otherwise, most of these are naturally eggless. All they need is some full-fat ice cream, Cadbury 5 Star bars, chocolate chips, chopped fruits, and nuts.
Making ice cream-based desserts never needs an oven. To make these desserts, all you need to do is blend them well and assemble them in layers. Once done, make sure they are chilled well and garnished with nuts and syrup.
The main ingredients for a Cadbury 5 Star ice cream dessert include Cadbury 5 Star bars, heavy cream, condensed milk, chocolate chips, chocolate syrup, chopped fruits, and nuts.
As these desserts include ice cream, it is essential to freeze them to make them last. While the shelf life of commercial chocolate-based ice cream desserts is usually 9 months, the homemade ones can be stored for a month or two in the freezer.
A Cadbury 5 Star ice cream dessert may not turn out right due to factors like improper freezing, icy texture. The other most common reason is the fat and liquid elements separating instead of blending smoothly.
Cadbury 5 Star ice cream desserts are different from regular chocolate desserts as they feature the classic sweet, caramel, nutty-chocolatey flavor texture that blends with the other ingredients really well.
While the desserts taste delicious on their own, while serving add some more fun with toppings and syrups. Add some chopped nuts, chocolate chips, a dollop of whipped cream, or drizzle some chocolate syrup.
For making mousse from scratch, Cadbury Cocoa Powder is often considered the best choice. However, for no-bake, chilled chocolate desserts, one may also rely on Cadbury 5 Star, Dairy Milk, and Bournville.
Yes. When chopped properly and gently folded with other creamy ingredients, Cadbury 5 Star is often considered excellent for making desserts. One may easily explore ice cream dessert ideas with it.
To make an easy homemade Cadbury 5 Star milkshake, all you need is Cadbury 5 Star bars, cold full-fat milk, and some vanilla/chocolate ice cream. Blend them all until smooth and creamy.
Yes. In fact, most of the regular chocolate milkshake recipes are naturally eggless. All the take is some chopped or melted chocolate, full-fat milk, and some vanilla/chocolate ice cream.
Making a Cadbury 5 Star milkshake never requires an oven. All you need to do is blend all the above-mentioned ingredients in a high-speed blender until smooth and creamy, and pour them into serving glasses.
While there are several chocolate milkshake recipes, typically a Cadbury 5 Star milkshake contains cold full-fat milk, vanilla/chocolate full-fat ice cream, some chocolate syrup, and a Cadbury 5 Star chocolate bar.
As it is highly perishable in nature, it is ideal to consume the Cadbury 5 Star milkshake within a day. However, if you need to store it, refrigeration in an airtight container can keep it fresh for a day or two.
The most common mistake people make while making a Cadbury 5 Star milkshake is adding the whole, unchopped candy into the blender. Because of its sticky and chewy texture, it often jams the blades and prevents smooth blending.
While a store-bought Cadbury 5 Star milkshake often includes preservatives, stabilizers, and added sugar, this homemade milkshake includes the goodness of fresh ingredients for a richer and creamier taste.
To add some creative fun to it, one may serve this with a dollop of whipped cream on top or add some chocolate drizzle for added taste. A salted caramel rim or some crushed roasted peanuts also go well with this.
Cadbury Baking Range Choco Melts or Cadbury Dark Choco Cooking Block are often considered the best Cadbury products for making desserts. However, Cadbury Dairy Milk, Bournville, and Cadbury cocoa powder are also popular for baking.
While it is sticky and chewy in texture, when chopped into smaller chunks, Cadbury 5 Star is considered a great chocolate option for a sweet, chocolatey, smooth milkshake.
For this, all you need is some chopped Cadbury 5 Star chocolate, heavy cream, and white marshmallows. Simply melt the marshmallows and some cream, then mix in the melted chocolate, fold in the whipped cream, and refrigerate it for 1 hour.
For a rich, fluffy, and eggless Cadbury 5 Star mousse, simply mix some chopped Cadbury 5 Star with butter into a gooey mix. Once it cools down, whip heavy cream and fold the chocolate-butter mixture into it, and chill for a few hours.
For a no-oven Cadbury 5 Star mousse, simply combine some chopped Cadbury 5 Star with warm heavy cream over a warm water bath. Once it cools down, whip some chilled heavy cream and fold it into the mixture, and chill well.
A simple homemade Cadbury 5 Star mousse is made by combining some Cadbury chocolate, whipped heavy cream, and some sugar or condensed milk. Some recipes also include cocoa powder for more intense flavor.
A homemade Cadbury 5 Star mousse ideally lasts 3 to 5 days in the refrigerator or up to 1 month in the freezer. As it often contains dairy ingredients and eggs (optional), it should be stored in an airtight container.
A Cadbury 5 Star mousse often does not turn out right due to large chunks of chocolate, faulty fridge temperature, wrong whipping time, or incorrect folding technique. For that smooth, airy, and fluffy air texture, all of these are critical.
While regular chocolate mousse often includes standard baking chocolate and unsweetened cocoa powder, Cadbury 5 Star mousse stands out from the rest due to its signature sweet-caramel and chocolatey essence that creates the gooey delight.
To add some creativity to your Cadbury 5 Star mousse, serve it on layered dessert glasses. Add some fruity freshness or some berries to add a crunchy texture. One may also try a cafe-style mousse with chocolate syrup and shavings on top.
For making mousse from scratch, Cadbury Cocoa Powder is often considered the best choice. However, for no-bake, chilled chocolate desserts, one may also rely on Cadbury 5 Star, Dairy Milk, and Bournville.
Yes. When chopped properly and gently folded with other creamy ingredients, Cadbury 5 Star is often considered excellent for making mousse. One may also explore ideas like Cadbury mousse cakes and cheesecakes with the same.
An easy homemade 5 Star no-bake dessert is all about chopping some 5 Star bars, mixing them with some softened butter, folding in some powdered sugar and whipped heavy cream, and chilling the dessert for a few hours.
Yes. In fact, most of the no-bake, only-chill desserts are naturally eggless. Simply mix the ingredients like chopped Cadbury, softened butter, powdered sugar, whipped cream, and cream cheese, and chill the mixture well.
To make a no-oven Cadbury 5 Star no-bake dessert, simply mix some chopped Cadbury, softened butter, powdered sugar, whipped cream, and cream cheese, and chill the mixture well before serving.
The no-oven, no-bake chocolate desserts typically contain ingredients such as Cadbury 5 Star chunks, whipped cream, butter, powdered sugar, and cocoa powder. Some recipes may include chocolate syrup and some garnishes as well.
As these desserts are highly perishable, it is ideal to consume them within a day. However, if storage is needed, refrigeration in an airtight container keeps them fresh for 2-3 days. Long-term freezing is not recommended as it ruins the texture.
While making these Cadbury 5-Star no-bake desserts, the most common mistake is adding large chunks of chocolate. This ruins the smoot texture. Also, insufficient chilling prevents proper setting of the desserts.
The primary difference lies in ingredients and overall quality. While the store-bought ones carry preservatives and stabilizers for longer shelf life, the homemade desserts feature fresh ingredients and better quality.
To add a creative touch to these desserts, one may serve them in layers in a transparent glass or bowl for an aesthetic look. They can be layered with some sponge cake or chocolate ganache for a gourmet feel as well.
For making mousse from scratch, Cadbury Cocoa Powder is often considered the best choice. However, for no-bake, chilled chocolate desserts, one may also rely on Cadbury 5 Star, Dairy Milk, and Bournville.
Yes. While it is a bit difficult to melt the sticky, chewy Cadbury 5 Star bars, once they are chopped finely and mixed with butter or cream, they are excellent for these no-bake chocolatey delicacies.
Brownie Desserts can take on the form of classic brownies, brownie sundaes, brownie trifles, cheesecake brownies, brownie parfaits, brownie ice cream sandwiches, brownie bites, chocolate brownie puddings, brownie milkshakes, and layered dessert jars. It is a treat for everyday and festive occasions.
One can prepare Brownie Desserts by melting chocolate, mixing it together with butter, sugar, eggs, vanilla, flour, cocoa powder, and salt into a batter, and pouring it into a prepared pan. Once it cooks through, set it aside and slice it up later.
Some of the easy-to-prepare Brownie Desserts include chocolate brownies, brownie mug cakes, brownie bites, brownie sundaes, brownie parfaits, brownie ice cream sandwiches, and brownie dessert jars. Such dishes do not require much skill or complicated recipe steps.
Ingredients such as chocolate, butter, cocoa, and vanilla make Brownie Desserts comforting, while ingredients such as berries, orange zest, whipped cream, mint, or ice cream make them refreshing. In this way, one gets a dessert suitable for any season and occasion.
Common ingredients used for preparing Brownie Desserts are chocolate, cocoa powder, butter, sugar, eggs, flour, vanilla extract, baking powder, or salt. One may also use optional ingredients such as nuts, chocolate chips, caramel, coffee, or cream cheese.
Yes, one can prepare their Brownie Desserts in advance. One stores plain brownies in an airtight container at room temperature for several days, but keeps cream-containing ones in the refrigerator. Also, brownies can be frozen.
Popular Brownie Desserts flavors include salted caramel, espresso, peanut butter, hazelnut, raspberry, mint, orange, cookies and cream, cheesecake, and sea salt. Such flavors will spice up your Brownie Desserts without losing their rich chocolate flavor.
One can present Brownie Desserts by serving them hot with ice cream, making them in layers for trifles, creating parfaits out of them, topping with whipped cream, drizzling with chocolate sauce, using them in combination with fresh berries, or slicing them in small pieces for parties.
Using Cadbury Bournville chocolate gives a rich chocolate flavor and texture to Brownie Desserts. Using Cadbury milk chocolate gives sweeter and creamier results, while mixing the two types of chocolate gives Brownies a nice flavor and softness.
Choosing any particular brand depends on personal choice. There are multiple brands available in the market that offer different varieties of Brownie Desserts, but it is always advisable to prepare homemade Brownie desserts for extra freshness and quality.
To make Cadbury-inspired desserts at home, all you need is some Cadbury chocolate or Cadbury cocoa powder and the other baking essentials. Bake the batter or dough in a preheated oven and layer it with some chocolate cream.
Yes. One can easily bake delicious Cadbury baked desserts without eggs. To replace eggs, simply substitute them with alternatives like applesauce, Greek yogurt, milk-vinegar mixture, or flax eggs (flaxseed and water mixture).
Yes. Cadbury desserts can be easily made without an oven. For a no-oven version, you may make this using the stovetop method in a heavy pot or pressure cooker. Alternatively, a microwave can be used as well.
A chocolatey Cadbury baked dessert is typically made with ingredients such as flour, sugar, salt, baking powder, Cadbury chocolate, Cadbury cocoa powder, butter, and eggs. For some added chocolatey indulgence, one may go with some chocolate cream as well.
To store Cadbury baked desserts, place them in an airtight container in a cool, dark place. Refrigeration is needed when the desserts contain dairy. Otherwise, it often dries out the dessert and makes it sticky.
This happens due to common mistakes like overmixing the batter/dough, measuring flour incorrectly, or overbaking the batter. Overmixing often leads to gluten formation, which makes the baked desserts dense and dry.
While regular chocolate desserts include standard baking chocolate and unsweetened cocoa powder, Cadbury baked desserts stand out from the rest due to their signature chocolatey essence and high-grade ingredients.
To try some easy variations of the classic Cadbury baked desserts, one may try adding more to the indulgence by trying a rich chocolate mousse, some cheesecake, a creamy ganache, or making fudge frosting. The desserts can be served with some chocolate drizzles as well.
For baking desserts from scratch, Cadbury Dark Cooking Blocks are often considered the best choice. Made with real cocoa solids, these blocks melt smoothly and mix easily into baked goods.
Yes, Cadbury products are excellent for baking cakes and brownies. From Cadbury Dairy Milk and Cadbury Bournville to Cadbury Dark Cooking Blocks to Cadbury cocoa powder, all of them are perfect for baking.
To make these gooey, delicious Cadbury brownies, simply melt butter and chocolate together, whisk in eggs and sugar, and fold in flour and chopped Cadbury bars. Bake at 180° C for 25 minutes, then let them cool before slicing
To make delicious Cadbury brownies without eggs, simply use substitutes such as applesauce, silken tofu, Greek yogurt, milk-vinegar mixture, or flax eggs (flaxseed and water mixture).
To make Cadbury brownies without an oven, you may go with the standard stovetop method in a heavy pot or pressure cooker. Alternatively, a microwave can be used as well for some fudgy Cadbury brownies.
A chocolatey Cadbury brownie is typically made with ingredients such as flour, sugar, salt, milk, Cadbury chocolate, Cadbury cocoa powder, butter, and eggs. For some added chocolatey indulgence, serve it with a chocolate drizzle.
Cadbury brownies typically last 3 to 4 days at room temperature, up to 1 week in the fridge, and up to 3 months in the freezer. To keep them fresh and stop them from drying out, seal them in an airtight container or wrap them tightly in plastic
Cadbury brownies often don't turn out right due to certain common mistakes like overmixing the batter, overbaking it, or incorrect ingredient measurements. While overmixing causes gluten formation, overbaking causes dry brownies.
While regular chocolate brownies include standard baking chocolate and unsweetened cocoa powder, a Cadbury brownie stands out from the rest due to its signature chocolatey essence and high-grade ingredients.
To add some more fun to these Cadbury brownies, simply add some chocolate shavings on top or serve with a chocolate drizzle. Alternatively, serve it with a scoop of vanilla ice cream and some toasted walnuts
For baking desserts from scratch, Cadbury Dark Cooking Blocks and Dairy Milk are often considered the best choice. Made with real cocoa solids, these blocks melt smoothly and mix easily into baked goods.
Yes, Cadbury products are excellent for baking cakes and brownies. From Cadbury Dairy Milk and Cadbury Bournville to Cadbury Dark Cooking Blocks to Cadbury cocoa powder, all of them are perfect for baking.
To make a Cadbury-inspired cake at home, all you need is some Cadbury chocolate or Cadbury cocoa powder and the other baking essentials. Bake the batter in a preheated oven and layer it with some chocolate cream.
Yes. One can easily bake a delicious Cadbury cake without eggs. To replace eggs, simply substitute them with alternatives like applesauce, Greek yogurt, milk-vinegar mixture, or flax eggs (flaxseed and water mixture).
Yes. Cadbury cakes can be easily made without an oven. For a no-oven version, you may make this using the stovetop method in a heavy pot or pressure cooker. Alternatively, a microwave can be used as well.
A chocolatey Cadbury cake is typically made with ingredients such as flour, sugar, salt, baking powder, Cadbury chocolate, Cadbury cocoa powder, butter, and eggs. For some added chocolatey indulgence, one may go with some chocolate cream as well.
To store Cadbury cakes, place them in an airtight container in a cool, dark place. Refrigeration is generally not recommended, as it often dries out the sponge and makes the chocolate frosting go dull or sticky.
This happens due to common mistakes like overmixing the batter, measuring flour incorrectly, or overbaking the batter. Overmixing often leads to gluten formation, which makes the cake dense and dry.
While regular chocolate cakes include standard baking chocolate and unsweetened cocoa powder, a Cadbury cake stands out from the rest due to its signature chocolatey essence and high-grade ingredients.
To try some easy variations of the classic Cadbury cake, one may try adding more to the indulgence by melting the chocolate into a rich ganache or making fudge frosting. They can be served with some chocolate drizzles as well.
For baking desserts from scratch, Cadbury Dark Cooking Blocks are often considered the best choice. Made with real cocoa solids, these blocks melt smoothly and mix easily into baked goods.
Yes, Cadbury products are excellent for baking cakes and brownies. From Cadbury Dairy Milk and Cadbury Bournville to Cadbury Dark Cooking Blocks to Cadbury cocoa powder, all of them are perfect for baking.
To bake a Cadbury cheesecake at home, simply mix crushed cookies for the crust. Now whip some fresh cream cheese and mix it with melted Cadbury Dairy Milk chocolate. Chill for 5-6 hours, top with a chocolate ganache, and serve.
Yes. One can easily try an eggless Cadbury cheesecake by making a no-bake cheesecake. All you need is some chilled whipped cream and melted chocolate for filling, and crushed cookies for the base.
To try this no-oven version of cheesecake, first prepare the crust in a springform pan with crumbled buttery cookies, pour the cream filling over it, and chill for a few hours. Just before serving, add some ganache on top.
Cadbury cheesecakes mostly contain a crunchy cookie crust, some melted butter, melted chocolate, sugar, chilled whipped cream, and cream cheese filling. However, the ingredients may slightly vary from recipe to recipe.
Cadbury cheesecakes can be refrigerated for 3 to 5 days. If you buy them sealed from a store, they can last up to 7 days if unopened. Make sure they are always stored at a temperature below 4°C.
Overheating the melted chocolate is the most common mistake when it comes to making Cadbury cheesecakes. As Cadbury chocolate has a high sugar and milk content, overheating it often causes a burn or seizure. This ruins the smooth texture of the cheesecake filling.
While homemade Cadbury cheesecakes are usually made with high-quality ingredients like cream cheese, whipped cream, and melted Cadbury chocolate, the store-bought ones are often mass-produced with preservatives.
To add a creative twist to your Cadbury cheesecake, one may try flavor profiles like tart fruit swirls or berry compotes. Variations can be created in the crunchy cookie crusts as well.
For baking Cadbury Cheesecake from scratch, Cadbury Dairy Milk or Bournville are often considered the best choice. Made with real cocoa solids, both of them melt smoothly and mix easily into these baked delicacies.
Yes, these products are excellent for baking Cadbury cheesecakes, regular chocolate cakes, and brownies. From Cadbury Dairy Milk and Cadbury Bournville to Cadbury Dark Cooking Blocks to Cadbury cocoa powder, all of them are perfect for baking.
To make Cadbury cookies at home, simply combine softened butter, brown sugar, white sugar, an egg, vanilla extract, flour, baking powder, and some Cadbury chocolate chips. Scoop onto a baking tray and bake for 15 minutes.
To make delicious Cadbury cookies without eggs, simply use substitutes such as applesauce, silken tofu, Greek yogurt, milk-vinegar mixture, or flax eggs (flaxseed and water mixture).
To make Cadbury cookies without an oven, you may opt for the standard stovetop method in a heavy pot or pressure cooker. Alternatively, a microwave can be used as well for some crispy Cadbury cookies.
Chocolate cookies require a few simple baking basics to mix up a sweet treat. You will need flour to build the cookie's shape, baking soda to help it grow, and salt to balance the sugar. For flavor and texture, add butter, white sugar, brown sugar, eggs, and vanilla extract. Finally, mix in cocoa powder and chocolate chips for that rich chocolate taste.
To store Cadbury cookies, place them in an airtight container in a cool, dark place. Refrigeration is generally not recommended, as it often dries out the cookies and makes them hard and chewy in texture.
Cadbury cookies often turn dry and dense due to common mistakes like overmixing the cookie dough, measuring flour incorrectly, or overbaking the dough. Overmixing often leads to gluten formation, which makes the cookies dense and dry.
While regular chocolate cookies include standard baking chocolate and unsweetened cocoa powder, Cadbury cookies stand out from the rest due to their signature chocolatey essence and high-grade ingredients.
To try more varieties of Cadbury cookies, simply add mix-ins like Cadbury Gems, dried fruit, and nuts. One may also experiment with flavors like hazelnut and peanut butter when baking these cookies.
For baking cookies, one may use Cadbury cocoa powder, melted Dairy Milk, or Cadbury choco chips for that perfect crunch. Made with real cocoa solids, these Cadbury ingredients melt smoothly and mix easily into the cookie dough.
Yes, Cadbury products are excellent for baking cakes, brownies, and cookies. From Cadbury Dairy Milk and Cadbury Bournville to Cadbury Dark Cooking Blocks to Cadbury cocoa powder, all of them are perfect for baking.
For this, all you need is some Cadbury Dairy Milk chocolate, heavy cream, and white marshmallows. Simply melt the marshmallows and some cream, then mix in the melted chocolate, fold in the whipped cream, and refrigerate it for 1 hour.
For a rich, fluffy, and eggless Cadbury chocolate mousse, simply melt some Cadbury chocolate with butter. Once it cools down, whip heavy cream and fold the chocolate into it, and chill for a few hours
For a no-oven Cadbury chocolate mousse, simply melt some Cadbury chocolate with warm heavy cream over a warm water bath. Once it cools down, whip some chilled heavy cream and fold it into the mixture, and chill well.
A simple homemade Cadbury mousse is made by combining some Cadbury chocolate, whipped heavy cream, and some sugar or condensed milk. Some recipes also include cocoa powder for more intense flavor.
A homemade Cadbury mousse ideally lasts 3 to 5 days in the refrigerator or up to 1 month in the freezer. As it contains dairy ingredients and eggs (optional), it should be stored in an airtight container.
A Cadbury mousse often does not turn out right due to wrong fridge temperature, wrong whipping time, or incorrect folding technique. For that smooth, airy, and fluffy air texture, these three steps are critical.
While regular chocolate mousse often includes standard baking chocolate and unsweetened cocoa powder, Cadbury mousse stands out from the rest due to its signature chocolatey essence and high-grade ingredients.
To make sure your Cadbury mousse is fun, creative, and exciting, serve it as a layered dessert in glasses. Add some fruity freshness or berries for a crunchy texture. One may also try a cafe-style mousse with chocolate syrup and shavings on top.
For making mousse from scratch, Cadbury Cocoa Powder is often considered the best choice. However, for no-bake, chilled chocolate desserts, one may also rely on Cadbury Dairy Milk and Bournville.
Yes, Cadbury products are excellent for baking cakes and brownies. One may also explore ideas like Cadbury mousse cakes and cheesecakes with Dairy Milk and Bournville, as all of them are perfect for baking.
While there are several festive flavors available for Christmas cheesecake, the most popular ones are peppermint bark, gingerbread, and eggnog cheesecake. All of them carry the festive flavor like no other dessert.
An easy and festive Christmas cheesecake can be made with a crushed cookie crust, creamy vanilla-and-cream-cheese filling, and some fun and Christmassy edible decorations on top.
From celebrating the warm and spicy winter flavors to religious reasons and following traditions, sweets are an integral part of Christmas celebrations for many reasons across the globe.
While regular cheesecakes are quite common, one may also explore the quick and easy 3-Ingredient Holiday Cheesecake, No-Bake Reindeer Cheesecake, and Easy Christmas Cheesecake to add more fun to the festive vibe.
When refrigerated in an airtight container, Christmas cheesecake lasts 3 to 7 days. If frozen in a freezer-safe bag, it stays edible for 1 to 3 months. However, never store it at room temperature for more than 2 hours, as it is highly perishable.
Yes. One can easily make a low-sugar Christmas cheesecake by either cutting down the sugar content or replacing it with less sweet natural alternatives like honey, maple syrup, or agave.
Over the centuries, Christmas cheesecake has evolved from a simple ancient honey-and-cheese mixture into a rich, modern holiday dessert. Today, the festive cheesecake carries the flavors of the festival like never before.
To add a creative twist to Christmas cheesecake, one may simply incorporate the festive flavors and decorations like gingerbread cookie crusts or peppermint chocolate swirls. Also, add toppings like edible trees and snowmen.
For making mousse from scratch, Cadbury Dairy Milk, 5 Star, or Bournville are often considered the best choice alongside the baking choco blocks. However, for no-bake, chilled chocolate desserts, one may also rely on Cadbury cocoa powder.
One may easily add a chocolate twist to a Christmas cheesecake by making a chocolate cookie crust, swirling melted chocolate into the batter, or topping it with a glossy chocolate ganache and crushed candy canes.
Traditionally, Christmas desserts include plum cake, Yule log cake, Christmas pudding, gingerbread cookies, mince pies, fruit cake, truffles, and chocolate bark. Many people prefer to prepare homemade chocolate desserts to offer to their guests and give away as gifts during Christmas.
Melt good-quality chocolate and prepare your base for different recipes like cake, mousse, brownies, or cookies. Mix the ingredients, bake/ chill/ prepare your dessert as per the recipe. Decorate with festive decorations like sprinkles, nuts, candy canes, and edible glitter.
Christmas desserts bring warmth and joy to festive gatherings. They complete festive meals, add a sweet touch to family traditions, and are often shared during parties, gift exchanges, and celebrations, making every occasion feel more memorable.
There are some simple recipes for Christmas Chocolate Desserts, such as chocolate fudge, chocolate bark, no-bake cheesecake, Oreo truffles, chocolate-covered strawberries, mug cakes, and other similar desserts. Such easy Christmas desserts include only basic ingredients.
There are some Christmas chocolate desserts like Cakes, brownies, fudge, and truffles that can be prepared a few days in advance. Store them in the fridge or freezer, in an airtight container, before your celebration.
There are several healthier recipes for Christmas chocolate desserts, including dark chocolate bark with nuts, Greek yogurt chocolate mousse, chia chocolate pudding, oat brownies, banana cocoa bites, and fruits dipped in dark chocolate.
Give festive desserts an Indian-inspired makeover with chocolate-saffron, chocolate-cardamom brownies, and Kaju Katli Chocolate trifle flavors. These fusion recipes blend traditional festive ingredients with rich chocolate flavors.
Chocolate truffles, fudge, bark, cookies, brownies, hot chocolate mix jars, and chocolate-coated nuts make thoughtful edible gifts. Pack them in decorative tins, festive boxes, or glass jars with ribbons for an attractive homemade Christmas present.
Use Bournville for preparing brownies, cookies, and cakes due to its strong flavor. You can choose Cadbury Dark Milk for preparing richer desserts and Cadbury Silk for preparing mousse, cheesecakes, ganache, and any other festive fillings.
Add a new touch to some of your festive desserts by adding melted chocolate, Cadbury cocoa powder, chocolate chips, ganache, or chocolate curls to them. Add peppermint, orange zest, cinnamon, dried fruits, or roasted nuts to your desserts.
Popular Christmas desserts consist of Yule log cake, plum cake, fruit pudding, gingerbread cookies, chocolate brownies, cheesecakes, truffles, fudge, mince pies, and festive cupcakes. These treats are commonly served at family gatherings and holiday celebrations.
An easy Christmas dessert is chocolate bark. It consists of melting chocolate, spreading it on a tray, topping with dried cranberries, nuts, crushed candy canes or festive sprinkles, and breaking into small pieces.
Sweets symbolize celebration, togetherness, and generosity during Christmas. Families prepare and share desserts with loved ones, exchange homemade treats as gifts, and enjoy festive recipes that become part of cherished holiday traditions.
Quick Christmas desserts include chocolate bark, Oreo truffles, mug cakes, no-bake cheesecakes, chocolate mousse, dessert jars, and festive fruit parfaits. These recipes require minimal preparation while delivering delicious holiday flavors.
The storage period depends on the type of dessert. The shelf life of cookies and brownies is 4-7 days if stored in a sealed box, while the cheesecakes and mousse keep their freshness for 3-4 days if stored in a fridge. Freeze suitable desserts for longer storage.
Yes, low-sugar Christmas desserts can be made with the use of dark chocolate, fruits, Greek yogurt, oats, nuts, and natural sweeteners, such as dates or stevia.
Nowadays, the variety of Christmas desserts has extended from traditional cakes and puddings to cheesecakes, dessert jars, fusion sweets, vegan desserts, and no-bake desserts. Nowadays, people try various global tastes and modern presentation methods.
Variations of the traditional Christmas desserts are chocolate-filled plum cake, tiramisu trifles, brownie Christmas trees, cookie sandwiches, cheesecake cups, and dessert charcuterie boards. Seasonal spices and festive decorations make the traditional recipes unique.
Cadbury Dairy Milk is perfect for making cookies, brownies, and cakes because of its good melting characteristics and creamy taste. Cadbury Silk is perfect for cheesecakes and mousse, and Cadbury Bournville is good for festive dishes due to its strong taste.
A chocolate twist can be added to Christmas desserts in the form of melted chocolate to cake batter, decoration of puddings, trifle layers, dipped cookies, or decoration with chocolate curls, cocoa powder, chocolate chips, and festive chocolate shapes.
A traditional Christmas fudge is best defined as a sweet delight made with the goodness of sugar, butter, milk or cream, and chocolate/vanilla. Once the mixture is chilled enough, it is shaped into dense, creamy squares and served.
To try an easy Christmas fudge at home, all you need is some white sugar, butter, evaporated milk, marshmallow cream, and semi-sweet chocolate chips. Once the mixture is ready following a melt-and-pour method, chill it well and cut into squares.
From celebrating the warm and spicy winter flavors to religious reasons and following traditions, desserts are an integral part of Christmas celebrations for many reasons across the globe.
While chocolate fudge is one of the most popular easy recipes, the other ones are Peppermint bark fudge, Grinch swirl fudge, and vanilla-chocolate swirl fudge. Perfect for the holiday season, these no-bake treats are an absolute delight.
To store the Christmas fudge at room temperature for two weeks, place it in an airtight container. Freezing is needed for long-term storage. While freezing, make sure there is parchment paper between layers.
To explore healthy Christmas fudge options, one may simply replace dairy and refined sugar with whole-food ingredients like dark chocolate, nut butters, and natural sweeteners.
While traditional fudge recipes strictly rely on boiling sugar, milk, and butter to a precise temperature and hand-beating it, modern recipes often resort to melted chocolate chips and sweetened condensed milk for the texture.
Some of the easiest variations of Christmas fudge include peppermint bark fudge, Grinch fudge, and cookies and cream fudge. Made in under 30 minutes, these are perfect to enjoy the festive vibe.
To make chocolate fudge for Christmas, Cadbury Silk, Cadbury Dairy Milk, and Cadbury Bournville are some of the best options. Known for their rich, smooth, luxurious texture, these chocolates ensure an extra-creamy texture.
You can easily add a chocolate twist to a non-chocolate Christmas fudge by incorporating a contrasting double-chocolate swirl, mixing in crushed candy canes, or folding in holiday candies
Desserts that are traditionally prepared at Christmas time include plum cake, Christmas pudding, fruitcake, Yule log, gingerbread cookies, mince pies, truffles, fudge, cheesecakes, and festive chocolate desserts. Moreover, many people prefer preparing no-bake desserts due to their convenience and tasty flavor.
First of all, mix the base of no-bake desserts, which consists of crushed biscuits, chocolate, cream, or condensed milk. Then, layer or shape the dessert and garnish it with festive toppings like sprinkles or nuts. Finally, cool your dessert in the fridge for several hours.
Christmas desserts bring warmth and joy to festive gatherings. They complete festive meals, add a sweet touch to family traditions, and are often shared during parties, gift exchanges, and celebrations, making every occasion feel more memorable.
Chocolate biscuit cake, Oreo truffles, no-bake cheesecakes, chocolate mousse cups, peppermint bark, and chocolate fudge are suitable for beginners. All those Christmas no-bake dessert recipes are easy to prepare, as they involve using simple products and mixing techniques.
Yes, there are many Christmas no-bake desserts that can be made in advance and kept until the moment of serving or gifting. Cakes, brownies, and cookies need airtight storage, while cheesecakes, mousse, and truffles must be kept in the refrigerator.
Greek yogurt parfaits with berries, dark chocolate date bites, chia pudding, oat-based energy balls, frozen yogurt bark, or avocado chocolate mousse may be a great choice.
Fusion Christmas no-bake desserts combine Indian ingredients such as gulkand, pistachios, saffron, cardamom, coconut, or crushed digestive biscuits with classic Christmas recipes. Also, one may use traditional Christmas flavors combined with the products used in mithai.
For gifting, the best Christmas no-bake desserts are chocolate truffles, fudge, chocolate bark, date balls, cheesecake jars, layered dessert cups, and festive cookie bites. Pack them in beautiful boxes or jars to complete the look.
For the preparation of cheesecakes, fudge, and chocolate bark, the best product is Cadbury Dairy Milk due to its creamy texture. To make richer desserts, such as mousses, truffles, or dessert fillings, one should choose Cadbury Dairy Milk Silk.
The chocolate can be added to the batter of the cakes, poured over the puddings, filled into pastries, dipped into cookies, and garnished with chocolate curls, chips, cocoa powder, and festive chocolate decoration.
Christmas sweets include a variety of candies, plum cakes, fruit cakes, chocolate truffles, fudge, ginger cookies, marzipan, mince pies, toffees, candy canes, and special laddoos. They consist of both traditional sweets and modern home-made ones, which make a contribution to the atmosphere of the celebration.
The easiest Christmas sweets you may prepare are fudge. The process requires melting chocolate with condensed milk and butter, pouring it into the tray, and then cutting it into square pieces.
Christmas sweets represent warmth, celebration, and the joy of sharing. They are served after festive meals, offered to guests, packed into gift boxes, and enjoyed during family gatherings, making every celebration feel more memorable.
If you want to prepare something quickly, consider making chocolate truffles, peanut clusters, chocolate bark, festive popcorn, coconut balls, and dessert cups. It will take you just a little time and a few ingredients.
Provided that Christmas sweets are kept properly, most of them last several days. The dry sweets like cookies and fudge keep their freshness up to seven days. And the sweets made with cream have to be kept in the fridge and consumed within three to four days.
Absolutely. Prepare sweets with dark chocolate, nuts, seeds, oats, fresh fruits, and naturally sweet ingredients like dates. These recipes offer festive flavors while keeping added sugar to a minimum.
Modern Christmas sweets combine traditional flavors with innovative ideas. Apart from classical cakes and cookies, you can find recipes for healthy, fusion, vegan, and no-bake Christmas sweets.
There are many recipes with slight twists. For example, chocolate marzipan, brownie bites with festive toppings, cheesecake cookies, plum cake pops, chocolate-dipped dried fruits, or Indian sweets with cocoa. You can just add some changes to your favorite recipes.
Cadbury Dairy Milk can be used for preparing sweets because of its creamy texture. The best choice for smooth fillings and ganache will be Cadbury Silk. Cadbury Bournville gives you a deep cocoa taste in festive treats.
Add chocolate chunks to festive dough, cover your homemade sweets with melted chocolate, use cocoa in traditional recipes, and decorate desserts with chocolate chips and ganache.
Traditional Christmas dessert platters often include fruit cake, Christmas pudding, gingerbread cookies, Yule Log cake, panettone, and Classic Stollen. Many people also include eggnog-flavored cakes and desserts as well.
To make a classic Christmas chocolate truffle, you need to mix chopped dark chocolate with warm heavy cream until the chocolate melts into a smooth ganache. Next, chill it well, roll the mixture into small balls, and coat them with colored powdered sugar.
From celebrating the warm and spicy winter flavors to religious reasons and following traditions, desserts play many roles, and they are an integral part of Christmas celebrations across the globe.
The best nut options for Christmas truffles often include hazelnuts, pistachios, and walnuts. All of them add a nice crunch and rich flavor that match the sweet chocolate.
Yes. These bite-sized Christmas truffles are easy to make and can be made a day or two ahead. Make sure they are refrigerated well in an airtight container. Take them out of the fridge just before serving.
To make guilt-free, low-sugar Christmas truffles, one may opt for easy and simple 3-Ingredient date and nut Truffles, spiced Gingerbread balls, and vegan dark chocolate orange truffles.
To bring in some fusion twists on Christmas truffles, one may combine flavors of Indian mithai, mince pie, and regional spices that perfectly blend with these modern chocolate treats.
The best chocolate truffles for Christmas gifting often include festive flavors like peppermint bark, eggnog, salted caramel, and spiced rum or Irish cream. All of them carry the Christmassy vibe like no other flavor.
To make creamy, chocolatey Christmas truffles, it is ideal to use Cadbury Dairy Milk, Bournville, Cadbury baking chocolate blocks, or cocoa powder. All of them are perfect for the festive chocolatey delights.
(Truffles are already made with chocolate. Not sure how to add a chocolatey twist to it. )
Among the best Cinnamon Desserts, one may find cinnamon rolls, coffee cake, apple crumble, cinnamon cookies, churros, bread pudding, cinnamon cheesecake, muffins, brownies, and cinnamon sugar doughnuts. All these treats highlight the warm, aromatic flavor of cinnamon in different ways.
To make Cinnamon Desserts at home, one will need flour, butter, sugar, eggs, cinnamon, vanilla, baking powder, and milk. One will need to prepare a batter or dough, evenly add cinnamon, then follow the recipe, cool completely, and decorate if necessary.
The most popular Cinnamon Dessert recipes include cinnamon rolls, apple pie, cinnamon loaf cake, churros, cinnamon cupcakes, bread pudding, baked apples, cinnamon brownies, and rice pudding.
Cinnamon Desserts are especially popular during cooler months as cinnamon adds warmth and a comforting aroma. The spice pairs well with seasonal fruits, chocolate, nuts, and rich desserts, making these recipes ideal for festive celebrations and family gatherings.
Most Cinnamon Desserts require plain flour, butter, sugar, eggs, milk, vanilla extract, baking powder, ground cinnamon, and a little salt. Additional ingredients that are used include apples, nuts, raisins, cream cheese, and chocolate.
Place the leftover Cinnamon Desserts into an airtight container. Dry desserts can be stored at room temperature for several days, whereas desserts filled with cream should be stored in the refrigerator. Freezing individual portions allows them to be stored for a long time.
Popular flavors for Cinnamon Desserts are apple, pear, vanilla, caramel, maple, pumpkin, chocolate, orange, coffee, cream cheese, pecans, and walnuts.
Easy Cinnamon Desserts include cinnamon mug cake, cinnamon sugar cookies, baked apples, cinnamon pancakes, muffins, waffles, blondies, cheesecake jars, puff pastry twists, and cinnamon-flavored rice pudding. You can make some easy variations by adding some whipping cream, nuts, or chocolate to recipes.
Dark to milk chocolates can be added to Cinnamon Desserts. Choosing Cadbury Bournville is also a great choice since its intense cocoa flavor combines well with cinnamon. Cadbury milk chocolate provides a creamy taste, whereas Cadbury Milkinis gives a soft contrast in cheesecakes, cookies, and dessert bars.
Choosing any particular brand depends on personal choice. There are multiple brands available in the market that offer different varieties of Cinnamon Desserts, but it is always advisable to prepare homemade Cinnamon desserts for extra freshness and quality.
Dry Fruit Desserts include dry fruit laddoos, halwa, barfi, kheer, cakes, cookies, brownies, puddings, cheesecakes, and dessert jars. These treats combine the natural sweetness and crunch of nuts and dried fruits for festive and everyday occasions.
Make Dry Fruit Desserts by chopping almonds, cashews, pistachios, raisins, dates, and other dried fruits. They should then be mixed with such ingredients as flour, butter, milk, chocolate, or condensed milk according to the chosen recipe.
The following Dry Fruit Desserts are suitable for beginners: dry fruit laddoos, chocolate bark, date rolls, kheer, pudding, fudge, cookies, no-bake cheesecake, dessert jars, and energy bites. Such desserts can be cooked using simple ingredients and without complicated techniques.
Dry Fruit Desserts feel comforting with ingredients like dates, figs, almonds, cashews, butter, milk, and warm spices. Fresh fruits, citrus zest, yogurt, or whipped cream add a lighter touch while balancing the richness of the dried fruits.
Most Dry Fruit Desserts contain ingredients such as almonds, cashews, pistachios, walnuts, raisins, dates, figs, butter, milk, condensed milk, sugar or jaggery, flour, vanilla, cardamom, cinnamon, and chocolate. The list of ingredients varies according to the type of dessert.
Yes, Dry Fruit Desserts are perfect for preparing in advance. Once cooked or cooled and set, they can be stored in airtight containers. Cream-based desserts can be kept refrigerated, while laddoos, cookies, and bars will remain fresh at room temperature for a couple of days.
Popular flavors of Dry Fruit Desserts are chocolate, caramel, cardamom, saffron, rose, orange, cinnamon, coffee, vanilla, coconut, and maple. They pair perfectly with the flavor and texture of nuts and dried fruits without overshadowing them.
One can serve Dry Fruit Desserts in dessert jars, mini glasses, festive gift boxes, parfaits, chocolate cups, and bite-sized portions. The desserts can be garnished with chopped nuts, edible flowers, chocolate drizzle, and fresh fruits.
The best option for Dry Fruit Desserts is Cadbury dark chocolate, which perfectly goes with almonds, walnuts, dates, and figs, giving a rich flavor of cocoa. Cadbury milk chocolate gives a sweet taste, while Cadbury white chocolate creates a creamy contrast to the dry fruit desserts.
Cadbury is the best brand for Dry Fruit Desserts since its soft texture perfectly combines with nuts and dried fruits. Cadbury's chocolate perfectly fits Dry Fruit Desserts recipes such as brownies, fudge, bark, cakes, laddoos, dessert jars, and festive sweets.
Some popular desserts made from eggnog are cheesecakes, cupcakes, trifles, puddings, mousses, cookies, ice cream, and parfaits. The creamy nature of eggnog and the hints of nutmeg and cinnamon give it its characteristic taste.
One of the easy eggnog dessert recipes is no-bake cheesecake. The no-bake cheesecake requires mixing cream cheese, eggnog, sugar, and whipped cream and layering the mixture on the biscuit base.
The Christmas sweets add festivity and warmth to the celebrations. They bring the whole family together around the table, serve as thoughtful gifts, and ensure that many generations carry forward the festive traditions.
Some quick recipes for eggnog desserts include eggnog mousse, dessert jars, parfaits, milkshakes, chocolate bark, and pudding cups. Such recipes are easy to prepare while accentuating the delicious taste of eggnog.
Most eggnog desserts should be stored in the fridge and consumed within 2-4 days. As they may contain dairy products, it is better to keep them in airtight containers.
Low-sugar eggnog desserts can be prepared using sugar-free eggnog, dark chocolate, Greek yogurt, fresh cream, and natural sweeteners. Such desserts do not contain too much added sugar but still have a festive taste.
The range of eggnog desserts has extended from eggnog puddings to cheesecakes, cupcakes, brownies, frozen desserts, and no-bake desserts. New varieties are now incorporating healthier ingredients and vegan components along with festive flavors.
Some examples of creative variations include eggnog tiramisu, eggnog brownies, cheesecake bars, chocolate-filled cupcakes, layered trifle, and ice cream sandwiches. Adding caramel, coffee, or spiced chocolate gives a festive touch to the variation.
Cadbury Dairy Milk can be used in all kinds of eggnog desserts, including cakes, brownies, and cookies. Cadbury Silk is also very good for preparing richer desserts like mousse and cheesecake.
Adding melted chocolate to the batter or filling, drizzling chocolate ganache over the dessert, adding chocolate chips between the layers, or sprinkling cocoa powder and chocolate curls makes the eggnog dessert richer and more festive.
Making a fruit cream dessert at home is all about whipping some cold heavy cream with powdered sugar and vanilla until fluffy, gently folding in the chopped fruits like apples, mangoes, and bananas, and chilling for 2 hours.
To make an easy fruit salad dessert, simply chop the fresh fruits of your choice. In a separate bowl, whisk some whipped heavy cream and sweetened condensed milk. Toss the creamy sauce with the fruit, chill, and serve it cold.
A fruit dessert is best described as a sweet treat made with the goodness of fruits. Often paired with ingredients such as sugar, cream, or baked pastries, these desserts rely on a natural balance of sweetness and tartness.
To make a fruit jelly dessert, simply dissolve a gelling agent in warm liquid, stir in the chopped fresh or canned fruit, and let it set in the fridge. One may use either gelatin or agar-agar for gelling.
A sorbet is a classic frozen dessert made with fruit juice. It includes fruit juice or fruit extracts, ice, and sugar./honey/maple syrup to create a sweet-tangy, icy, refreshing dessert with all the goodness of fruits.
To make fruit desserts with custard powder, simply mix the powder with cold milk. Heat the mixture with sugar until it thickens, allow it to cool completely, fold in your favorite chopped fruits, and chill well before serving.
To make a baked fruit dessert (a crumble or a cobbler), prepare a fruity base and filling and top it with a crunchy, streusel-like layer made from flour, butter, oats (optional), and sugar. Bake it, allow it to cool, and serve.
For a kid-friendly chocolate fruit skewer, it is ideal to use chocolate chunks or milk chocolate melting wafers. Both of them melt smoothly and bring in a sweet-chocolatey taste that pairs well with fruits.
For a quick chocolate trifle, it is ideal to use semi-sweet or dark chocolate to bring in that perfect balance of richness and sweetness. Here, the bright, tangy flavors of fresh fruits blend perfectly with chocolatey indulgence.
Couverture chocolate is the best option for a chocolate-dipped fruit platter. With its high cocoa content, it smoothly melts into a thin, shiny, glossy layer that coats the fruits perfectly.
Making a fusion shake at home is all about blending classic milkshakes with modern dessert flavors for a perfect contrast. Simply combine the liquid base with flavor bases like fruits or ice creams and add nuts, spices, or syrups.
Yes. Fusion shake recipes are naturally eggless. The most popular recipes rely on ingredients such as dairy, fruits, or ice cream to keep the shake thick and creamy. One may use plant-based ingredients as well.
Making any kind of fusion shake does not involve an oven at all. Instead, it entirely depends on a microwave (for melting chocolate) or a blender. For that perfect frothy and creamy texture, blending is the key here.
Fusion shakes are all about bringing together different flavors and textures to create a blended drink. Usually, it combines milk, different flavors of ice cream, and mix-ins like candy, fruit, chocolate, nuts, and more.
As almost all fusion shakes include dairy products, refrigeration is mandatory. To store them for a day or two, refrigerate the shakes in an airtight container. However, before consuming, give it a good stir for that creamy, thick consistency,
A fusion shake becomes dry or dense due to certain mistakes in measuring and blending. The most common mistake is using the wrong liquid-to-powder ratio. It also becomes dense if it contains too many heavy ingredients.
The smooth coming together of flavors and textures is what makes the fusion shakes different from other desserts. Here, one can easily blend an Indian flavor with a Western one to bridge the gap between cultures and cuisines.
While fusion shakes are a lot about innovation, one may play around with several flavor combinations. The list of the most popular ones often includes tropical matcha, berry-basil shake, mango-chocolate shake, and more.
To make chocolatey fusion shakes, it is ideal to use premium dark chocolate or high-quality drinking chocolate powders, as they melt/dissolve smoothly and create a balanced taste.
There is no specific brand that is considered best for making fusion shakes. Across the world, several cafes and restaurants make different types of fusion shakes that taste simply delicious. At home, you may try it with Cadbury cocoa powder or hot chocolate mix.
Some of the top Gingerbread Desserts include Gingerbread cake, cookies, cheesecake, trifle, cupcakes, brownies, loaf cake, pudding, Tiramisu and Gingerbread fudge. The warm spices of these desserts make them ideal for holidays and the winter season.
To prepare Gingerbread Desserts at home, you need flour, butter, brown sugar, molasses, eggs, ginger, cinnamon, cloves, nutmeg, and baking soda. Mix all these ingredients into a batter or dough, prepare as instructed, let it cool, and decorate with frosting or whipped cream.
Popular Gingerbread Dessert recipes include Gingerbread cookies, cake, cheesecake, cupcakes, trifle, Cinnamon rolls, Blondies, pancakes, loaf cake and Gingerbread flavored mousse.
Gingerbread desserts are associated with winter season because they consist of warming spices such as ginger, cinnamon, cloves and nutmeg. This makes Gingerbread desserts popular for Christmas gatherings and dinners.
Majority of Gingerbread desserts require the following ingredients including plain flour, butter, brown sugar, molasses, eggs, baking powder/baking soda, ginger, cinnamon, cloves, nutmeg, vanilla extract, pinch of salt, decorative icing and sprinkles.
Gingerbread desserts should be stored in an airtight container after cooling down completely. While cookies can last for several days at room temperature, other desserts must be refrigerated. To store them for the long term, you can pack them in portions and freeze for up to two months.
Some popular flavors for Gingerbread desserts include vanilla, caramel, orange zest, dark chocolate, maple, coffee, apple, pear, pumpkin, and cream cheese. These flavor combinations complement the rich spiced flavors of Gingerbread desserts without masking their taste.
Easy variations of Gingerbread desserts include gingerbread mug cake, parfaits, cookie bars, brownies, ice cream, milkshake, cheesecake jars, waffles, pancakes, and Gingerbread festive trifles. Simply adding chocolate chips, nuts, dried fruits, and citrus zest will provide new flavors.
The best type of chocolate for Gingerbread Desserts is usually the dark one, which is complemented with spices and sweetness. On the other hand, milk chocolate provides a milder dessert, while the white one will provide additional festive flavor.
Choosing any particular brand depends on personal choice. There are multiple brands available in the market that offer different varieties of Gingerbread Desserts, but it is always advisable to prepare homemade Gingerbread desserts for extra freshness and quality.
Some of the most popular traditional heart-shaped desserts include jam tarts, cute red velvet cupcakes, shortbread hearts, molten chocolate lava cake, and cookies. Decorated in red and pink, these are the perfect heart-shaped desserts.
To make heart-shaped desserts at home, all you need is some baking staples, and most importantly, some molds and cutting tools. The most popular ones are metal cookie cutters and a heart-shaped baking pan.
Desserts are an integral part of the celebration of love. Nothing can do the job of making the loved one feel special like desserts. They are the perfect mood boosters and the most thoughtful gifts that convey the emotional message as well.
While the options are countless, the most popular ones are puff pastry jam hearts, heart-shaped rice krispie treats, mini red velvet/chocolate cakes, and heart-shaped bento cakes.
To store these heart-shaped desserts at room temperature for 2-3 days, make sure they are placed in an airtight container. If they contain buttercream frosting or any dairy-based ingredient, make sure they are refrigerated. If you are freezing them, make sure they are unfrosted.
To add a healthy spin to these heart-shaped recipes, one may try ideas like strawberry-topped Greek yogurt bark, stuffed nut-butter dates, baked desserts with dark chocolate, fruit crumbles with chocolate drizzle, and more.
While there are several modern flavors and fusion ideas these days, the primary difference lies in decoration and presentation. While the traditional versions focus on red or pink frosting, modern decorations include intricate piping, geometric shapes, and so on.
Some of the easiest variations of these heart-shaped desserts include strawberry-topped brownies, jam-filled tarts and cookies, mini red velvet cupcakes, mini chocolate heart cupcakes, and more.
For making heart-shaped desserts, the best option is Cadbury Dairy Milk Silk. Known for its silky, smooth, luxurious texture with a slightly nutty aroma, this chocolate ensures an extra-creamy texture.
To add a chocolatey twist to heart-shaped desserts, simply melt some Cadbury Silk or Dairy Milk into the batter, add some chocolate chips, and prepare some chocolate drizzle to serve with.
To make a hot chocolate shake at home, simply blend some milk, vanilla/chocolate ice cream, and hot chocolate powder until smooth. Once done, pour the mixture into a glass and top it with whipped cream.
A hot chocolate shake is naturally egg-free. Instead of eggs, almost all of the recipes rely on the smooth blending of ingredients like milk, chocolate, cocoa powder, ice cream, and sweeteners.
Making any kind of hot chocolate shake does not involve an oven at all. Instead, it entirely depends on a microwave (for melting chocolate) or a blender. For that perfect frothy and creamy texture, blending is the key here.
A hot chocolate shake usually includes ingredients like full-fat milk, ice cream, melted chocolate, hot chocolate mix, or cocoa powder. Some recipes also include chocolate syrup and whipped cream.
Once the hot chocolate shake is ready, it becomes highly perishable. It is ideal to consume it within 2 to 3 days in the refrigerator. As it contains dairy, refrigeration is a must. Avoid leaving it at room temperature for more than 2 hours.
While making a hot chocolate shake, the most common mistake is blending hot liquid with ice. The blender lid often blows off, and the mixture is spread everywhere as the trapped heat expands under pressure.
While store-bought ones are formulated around longer shelf life, they often use powdered milk, refined sugar, and artificial flavors; homemade hot chocolate shakes contain high-quality ingredients.
While they taste amazing already, to add a creative twist to it, one may try adding some warm spices for a gourmet touch. Adding rich extracts and crushed baked goods also creates delicious flavor contrasts.
There is no specific commercial brand, as many of them manufacture high-quality hot chocolate mixes. However, Cadbury is indeed one of the most popular brands that is preferred globally.
It is difficult to select any commercial brand as the best one, as hot chocolate shakes are mostly available in restaurants and cafes. However, if you wish to try it at home, make sure it includes the Cadbury hot chocolate mix.
A 3-ingredient no-churn ice cream is the easiest recipe to make with Cadbury Oreo cookies. All you need is some Cadbury Oreo sandwich cookies, fresh cream, and condensed milk. Mix them well and chill them in the refrigerator before serving.
Yes. One can easily make some delicious ice cream using Cadbury Oreo biscuits, some heavy whipping cream, and sweetened condensed milk. Without any special ice cream machine, you can try this at home by chilling only.
Yes. You can always make a mug cake using the chocolate Oreo biscuits, milk, and a tiny pinch of baking powder. When mixed well in a microwave-safe mug, simply microwave it for 1-2 minutes for a soft, warm, and rich chocolate mug cake.
While the Oreo cookies are extremely versatile in nature, the fillings like cream cheese, vanilla buttercream, and chocolate ganache often pair perfectly with them. All of them perfectly balance the rich taste of the cookie.
Yes. Chopped or crushed Cadbury Oreo cookies are often used in several dessert doughs to add a crunchy, chocolatey twist. Here, the rich cocoa-based cookies add the chocolatey taste, while the cream filling brings in the sweetness.
Classic Oreo biscuits go perfectly with cream cheese, peanut butter, and mint flavors. Here, the bittersweet cocoa taste of the cookie pairs perfectly with these sweet, nutty, minty flavors.
Yes. With Oreo, you can try several no-bake and only-chill desserts. The most popular no-oven Oreo desserts include no-bake cheesecakes, truffles, mousse, parfait, and layered pudding cups.
While there are several popular Oreo desserts available across the world, the most common ones are Oreo ice creams, Oreo puddings, Oreo truffles, Oreo cheesecake, and cookies-and-cream milkshakes.
Yes. Using just a few basic ingredients like crushed Oreos, milk, and a hidden piece of chocolate in the middle, you can make an ooey-gooey Oreo lava cake in a microwave. All it takes is just a few minutes.
Yes. Oreo biscuits can be blended into creamy, frothy milkshakes, smoothies, cold coffee, or thick milk blends. Make the drink using chilled milk, vanilla ice cream, and chocolate syrup, and then add the cookies.
To try this 15-minute Oreo custard recipe, all you need is some milk, sugar, vanilla custard powder, and Oreos. To make this, simply heat the milk with sugar, whisk in the custard powder until thick, and fold in the Oreos for a creamy delight.
Yes. Several Oreo custard recipes are completely eggless. Instead of eggs, these custard recipes use cornstarch as a thickening agent to make sure the custard is thick and creamy in texture,
To make a no-oven Oreo custard without an oven, you only need some full-fat milk, store-bought custard powder, and Cadbury Oreo cookies. Cook the base on your stovetop for 10 minutes and let it chill to set.
Oreo Custard typically contains Cadbury Oreo cookies, full-fat milk, refined sugar, and vanilla custard powder. Once the base is ready, mix in the crushed Oreo cookies.
The shelf life of Oreo Custard entirely depends on how it is stored. If a highly perishable custard is refrigerated, it stays fresh for 2 to 3 days. In the freezer, it can be kept for 1-2 months.
The most common mistake while making a creamy and delicious Oreo Custard is adding the crushed Oreo cookies into the hot custard too early. This often melts the cookie cream and turns the custard into a muddy mess.
While homemade Oreo custards are usually made with high-quality ingredients like Cadbury Oreo, milk, sugar, eggs, custard powder, and melted Cadbury chocolate (optional), the store-bought ones are often mass-produced with preservatives.
To add some creative, fun twists to your Oreo custards, you may add some fresh summer fruits, berries, frozen treats, dried fruits, and nuts. While it sounds simple, all of them can bring a fun twist to the desserts.
For baking desserts like Oreo custard from scratch, Cadbury Oreo is often considered the best choice. However, for no-bake, chilled chocolate desserts, one may also rely on Cadbury dark choco cooking block, Cadbury Dairy Milk, and Bournville.
Yes, Cadbury Oreo is often considered for baking cakes and brownies. Moreover, other Cadbury products such as Dairy Milk, Bournville, and cocoa powder are also perfect for baking.
To make an easy, no-bake Oreo summer dessert, all you need is some Oreos, fresh cream cheese, softened butter, chocolate pudding, milk, and whipped topping. Assemble it well and chill for a few hours before serving.
Yes. There are many delicious eggless versions of Oreo summer desserts. Made with crushed Oreo cookies, heavy cream, condensed milk, and more, these eggless Oreo desserts are simply delicious.
To make a no-oven Oreo summer dessert, try this Oreo Fluff made with Oreo cookies, softened cream cheese, and condensed milk until smooth. Once the mixture is ready, chill in the fridge for 2 hours and serve.
Oreo summer desserts usually include simple ingredients such as crushed cookies, butter, heavy cream, melted chocolate, cream cheese, instant pudding mixes, and more. Made with these delicious ingredients, they taste delicious.
The shelf life of these desserts varies based on ingredients. While some can be refrigerated for 3-5 days, others can be frozen for months. As all of them include dairy ingredients, it is a must to store them in airtight containers.
While making Oreo summer desserts, the most common mistake is rushing the chilling phase. As they are not baked, chilling time is essential so the moisture from the cream softens the cookies enough.
While homemade Oreo summer desserts are usually made with high-quality ingredients like Cadbury Oreo, cream cheese, whipped cream, and melted Cadbury chocolate, the store-bought ones are often mass-produced with preservatives.
To add some creative, fun twists to your Oreo summer desserts, you may add some fresh summer fruits, berries, frozen treats, dried fruits, and nuts. While it sounds simple, all of them can bring a fun twist to the desserts.
For baking Oreo summer desserts from scratch, Cadbury Dark Cooking Blocks are often considered the best choice. However, for no-bake, chilled chocolate desserts, one may also rely on Cadbury Oreo cookies, Cadbury Dairy Milk, and Bournville.
Yes, Cadbury products are excellent for baking cakes and brownies. From Cadbury Dairy Milk, Cadbury Oreo cookies, and Cadbury Bournville to Cadbury Dark Cooking Blocks to Cadbury cocoa powder, all of them are perfect for baking.
Traditional red velvet desserts include red velvet layer cake, red velvet cupcakes, and red velvet whoopie pies. All of them feature a unique flavor, a soft crumb paired with cream cheese frosting that melts in the mouth.
To make a classic red velvet dessert at home, combine flour, cocoa powder, buttermilk, vinegar, and red food coloring. Mix your wet and dry ingredients gently, bake the batter into a soft cake or cupcakes, and top it with a rich cream cheese frosting.
Desserts are an integral part of the celebration of love. Nothing can do the job of making the loved one feel special like desserts. They are the perfect mood boosters and the most thoughtful gifts that convey the emotional message as well.
Some of the easiest red velvet dessert recipes include cake mix crinkle cookies, mug cakes, and cream cheese brownies. While you may try them at home from scratch, you may also try using boxed mixes.
It entirely depends on whether they are frosted with dairy-based cream cheese or left plain. While the store-bought ones stay in the refrigerator for up to 5 days, plain baked desserts stay at room temperature for 2 days.
Healthy red velvet dessert options include red velvet Greek yogurt bowls, oat-flour protein mug cakes, and beetroot-tinted cookie bars. These alternatives replace heavy fats and refined sugars with wholesome swaps.
While there are several modern flavors and fusion ideas these days, the primary difference lies in decoration and presentation. While the traditional versions focus on red or pink frosting, modern decorations include intricate piping, geometric shapes, and so on.
Some of the most popular and easy variations of red velvet desserts include cookies, brownies, and whoopie pies. All of these desserts feature a classic choco-tangy flavor profile.
For making red velvet desserts, the best option is Cadbury Dairy Milk Silk. Known for its silky, smooth, luxurious texture with a slightly nutty aroma, this chocolate ensures an extra-creamy texture.
To add some chocolatey fun to your red velvet delicacies, simply melt some Cadbury Silk or Dairy Milk into the batter, add some chocolate chips, and prepare some chocolate drizzle to serve with.
The most popular traditional romantic desserts often include chocolate lava cake, red velvet cake, chocolate-covered strawberries, some dark chocolate truffles, and tiramisu. The chocolatey indulgence often makes the celebration even more special.
While they sound quite fancy and elaborate, making romantic desserts at home actually is quite simple. All you need is some of the baking staples, an oven, a cookie cutter, and a heart-shaped baking tin to better your dessert game.
Desserts are an integral part of the celebration of love. Nothing can do the job of making the loved one feel special like desserts. They are the perfect mood boosters and the most thoughtful gifts that convey the emotional message as well.
While there are many options to explore, some of the easiest romantic dessert recipes include chocolate lava cakes, red velvet cupcakes, strawberry parfaits, chocolate mousse, chocolate-dipped strawberries, and chocolate fondue.
To store romantic desserts at room temperature for 2-3 days, make sure they are placed in an airtight container. If they contain buttercream frosting or any dairy-based ingredient, make sure they are refrigerated. If you are freezing them, make sure they are unfrosted.
To add a healthy spin to the dessert options, one may explore naturally sweet ideas such as dark chocolate-dipped strawberries, berry and Greek yogurt parfaits, and dark chocolate-filled dates.
While there are several modern flavors and fusion ideas these days, the primary difference lies in decoration and presentation. While the traditional versions focus on red or pink frosting, modern decorations include intricate piping, geometric shapes, fancy edible toppings, and so on.
Some of the easiest romantic dessert options include chocolate fondue with fruit dippers, chocolate mousse, chocolate pudding, no-bake cheesecakes, and berry tiramisu parfaits.
For making romantic desserts, the best option is Cadbury Dairy Milk Silk. Known for its silky, smooth, luxurious texture with a slightly nutty aroma, this chocolate ensures an extra-creamy texture.
To add a chocolatey twist to romantic desserts, simply melt some Cadbury Silk, Bournville, or Dairy Milk into the batter, add some chocolate chips, layer with some chocolate ganache, or prepare some chocolate drizzle to serve with.
To make a delicious batch of Toblerone brownies at home, make the batter with the baking staples like butter, sugar, eggs, flour, milk, cocoa powder, and some finely chopped Toblerone. Bake the brownie batter in a preheated oven.
Yes. To try this eggless version, simply replace eggs with moisture-rich alternatives like applesauce, yogurt, curd, or condensed milk. One may also go with a milk and vinegar mixture for this recipe.
Yes. Toblerone brownie can be made without an oven by using a stovetop method or a microwave. Simply make the batter, place it in a preheated, covered, heavy-bottomed pan over low-medium, and heat it for 30 minutes.
A classic Toblerone brownie is made of butter, sugar, and eggs, melted chocolate, flour, cocoa powder, and some finely chopped Toblerone bar chunks. When mixed with the indulgence of Toblerone, the result is an ooey-gooey, fudgy brownie.
To store these Toblerone brownies at room temperature for 3-4 days, place them in an airtight container. Refrigeration is ideal for a week-long storage. To freeze them for 2-3 months, wrap them individually in plastic wrap.
When baked in an oven, Toblerone Brownie can turn out dry or dense due to several common factors such as overbaking, overmixing, or using the dry and wet ingredients in the wrong ratio.
The primary difference lies in the taste, texture, and flavor. While the regular chocolate desserts also carry the chocolatey flavor, Toblerone takes it to the next level with its sweet, chocolatey, nutty goodness.
While a plain and simple Toblerone brownie also tastes delicious, it is even more fun to try options like raspberry swirl, dark chocolate crunch, or a nutty salted caramel. All of them pair really well with Toblerone.
For making desserts like Toblerone brownies, cheesecakes, or mousse, it is ideal to use Cadbury's Toblerone milk chocolate. Filled with the goodness of chocolate, honey, and almonds, this is perfect for any dessert.
Yes, owing to its sweet taste and nutty-chocolatey texture, Toblerone is often considered great for baking cakes and brownies. With every single bite, it adds a unique honey-and-almond nougat crunch.
For this Toblerone cheesecake at home, make the crust with digestive biscuits and melted butter. Top it with a cream cheese, sugar, double cream, and melted Toblerone filling. Assemble it and chill.
Yes. Toblerone cheesecake can easily be made eggless following the no-bake method. To replace eggs, make the filling with whipped cream, sugar, melted chocolate, and cream cheese. Note: The store-bought Toblerone bars always contain egg whites in the nougat. For a completely eggless recipe, it is better to prepare the chocolate bar at home as well.
Yes. A creamy, cheesy, chocolatey Toblerone cheesecake can easily be made without an oven. Instead of being made in an oven, the assembled cheesecake solely relies on chilling in the refrigerator.
A Toblerone cheesecake ideally includes simple ingredients like double cream, cream cheese, sugar, butter, biscuit crust, melted Toblerone chocolate, and a chocolate topping.
To store Toblerone cheesecake in the refrigerator for 3 to 5 days, place it in an airtight container. To freeze it for up to 2 months, cover it tightly and place them in a freezer-safe bag.
A Toblerone cheesecake may turn out dry or dense due to common mistakes like overbaking the mixture, overmixing the mixture, mixing ingredients in wrong ratios, and not cooling the cake properly.
While regular cheesecakes also bring in a creamy, cheesy comfort wit every single bite, Toblerone cheesecake adds the goodness of Swiss chocolate with a nutty crunch to this dessert like nothing else.
While Toblerone cheesecake is often made with the milk chocolate version, one may try making both baked and unbaked cheesecakes with the white or dark chocolate version.
For making desserts like Toblerone cheesecake or Toblerone mousse, it is ideal to use Cadbury's Toblerone milk chocolate. Filled with the goodness of chocolate, honey, and almonds, this is perfect for any dessert.
Yes, owing to its sweet taste and nutty-chocolatey texture, Toblerone is often considered great for baking cakes and brownies. With every single bite, it adds a unique honey-and-almond nougat crunch.
To make an easy, rich, airy Toblerone mousse at home, simply combine some finely chopped Toblerone chocolate, warm heavy cream, and optional whipped egg whites. Once the mixture is ready, chill it for a few hours.
Yes. To try this eggless version of Toblerone mousse, simply replace double cream with some whipped cream, melted Toblerone, and powdered sugar. Made in just a few minutes, this recipe is a must-try at home.
For a perfect Toblerone mousse, you don't need an oven. Once the mixture is ready with the simple kitchen staples like whipped cream/double cream, cream cheese, sugar, and melted chocolate, all you have to do is chill the mixture well.
A creamy, airy, rich Toblerone Mousse includes ingredients like whipped cream/double cream, cream cheese, sugar, and melted chocolate. Some of the recipes also include eggs.
When refrigerated in an airtight container, Toblerone mousse is often stored for 3-5 days. It is not recommended to store it at room temperature, as it is highly perishable. Freezing is not recommended as well, as it ruins its airy texture.
The most common mistake people make while making a mousse is adding the melted chocolate to the cream while it is still too hot. Another common issue is overmixing the ingredients, as it often results in a dense, runny texture.
The primary difference lies in ingredients, texture, and overall quality. While the store-bought ones are designed for longer shelf life and include preservatives and stabilizers, the homemade ones are made with fresh and high-quality ingredients.
To add a creative twist to the classic Toblerone, one may try adding some boozy liqueur, layer the mousse glasses with multi-colored chocolates, or pair it with some chocolate shavings on top.
For making desserts like Toblerone mousse, brownies, or cheesecakes, it is ideal to use Toblerone milk chocolate. Filled with the goodness of chocolate, honey, and almonds, this is perfect for any dessert.
Yes, owing to its sweet taste and nutty-chocolatey texture, Toblerone is often considered great for baking cakes and brownies. With every single bite, it adds a unique honey-and-almond nougat crunch.
To make chocolate truffles at home, all you need is some high-quality chopped chocolate and warm heavy cream. Melt the chocolate in the heavy cream and chill the mixture until firm. Once ready, scoop and roll them into balls.
These bite-sized chocolate balls need two simple ingredients: some premium-quality chocolate and some warm heavy cream. However, some recipes also include unsalted butter and vanilla extract.
To make a rich, glossy, and shiny chocolate truffle icing, start by heating heavy cream until simmering. Next, pour it over finely chopped dark chocolate and stir until smooth. Cool the mixture and chill well.
While milk chocolate truffles are the most popular ones, these bite-sized chocolatey treats are also available in white chocolate and dark chocolate variations. Some of them also include dried fruits and nuts for added taste.
A truffle dessert cake is nothing but an ultra-rich, chocolatey cake that takes the regular classic chocolate cake to the next level. It features a moist sponge cake with a creamy filling coated in a smooth chocolate glaze.
To make a rich, glossy, and shiny chocolate truffle ganache, start by heating heavy cream until simmering. Next, pour it over finely chopped dark chocolate and stir until smooth. Make sure the chocolate and the cream are in a 2:1 ratio.
To make sure your chocolate truffles are crack-proof, keep the ganache center and the chocolate coating at similar temperatures. To prevent cracking, avoid dipping ice-cold truffles into warm chocolate.
This is nothing but a rich, moist, more chocolatey version of the regular chocolate cake. It features a moist and soft sponge cake with creamy filling coated in a smooth and glossy chocolate glaze.
To make a chocolate truffle cake, simply bake a moist chocolate sponge cake and layer it with silky chocolate ganache. Finally, cover the cake entirely with a creamy, chocolatey, rich frosting for a premium feeling.
For homemade chocolate truffles, it is best to use high-quality couverture chocolate bars. With their high percentage of cocoa butter, they melt smoothly and create a silky texture.
Oreo Cupcakes can be easily made from a simple mixture of crushed Oreo cookies, flour, sugar, baking powder, oil, and vanilla. Combine the ingredients to prepare the cupcake batter, fill the cupcake liners halfway, and bake until soft. If desired, top the Oreo Cupcakes with Oreo buttercream.
Yes, it is possible to replace eggs in Oreo Cupcakes with ingredients such as yogurt, applesauce, mashed bananas, or a vinegar and baking soda combination. These substitutes help keep Oreo Cupcakes to remain moist.
Oreo Cupcakes can be made by steaming without using an oven. Place Oreo Cupcakes in a pot with a lid or cook them in a flat-bottom pot over very low heat. Check if the toothpick comes out dry; Oreo Cupcakes are ready.
Oreo Cupcakes usually have flour, sugar, baking powder, milk, oil or butter, vanilla extract, and crushed Oreo cookies. The frosting is often made with butter, powdered sugar, cream, and crushed Oreo cookies for extra flavor.
Oreo Cupcakes stay fresh for up to two days when kept at room temperature in an airtight container. If placed in the refrigerator, they can last up to five days. You can also freeze Oreo Cupcakes for about a month without losing their texture.
One mistake people make when making Oreo Cupcakes is overmixing the batter, as this can make the Oreo Cupcakes dense or too soft. Another mistake is filling the cupcake liners too full, which can cause them to bake unevenly or overflow during cooking.
Homemade Oreo Cupcakes usually taste fresher and have a softer texture than store-bought ones. You can also control the sweetness, add more Oreo flavor, and get creative with toppings when made at home. Store-bought Oreo Cupcakes are convenient and last longer due to added preservatives.
Oreo Cupcakes can be made more creative by using cream cheese frosting, adding chocolate filling, making peanut butter swirls, drizzling caramel, adding mint flavor, or using mini Oreo cookies as toppings. Oreo flavors can also be mixed to create fun variations for special occasions.
Regular Oreo cookies work well for making Oreo Cupcakes because they can be crushed and mixed into the batter. Oreo baking crumbs are also convenient for recipes, and mini Oreo cookies make great toppings.
Yes, you can use Oreos to make cakes and brownies. They add a chocolate flavor and crunchy texture to these desserts. Also, Oreos mix easily into the batter, making homemade baked desserts richer and more enjoyable to eat.
Traditional Holi chocolate desserts include chocolate-coated gujiyas, spiced thandai truffles, colorful rose-pistachio festive barks, creamy white chocolate thandai mousse, and rich chocolate ganache-stuffed gulab jamuns.
Melt dark or white chocolate, mix with traditional ingredients like thandai spices, khoya, or nuts. Use this mix to stuff gujiyas, roll into truffles, layer into mousse, or set into colorful, festive barks.
Sweets are important during Holi because they represent joy, sharing, and celebration. Festive treats bring families together and add sweetness to colorful gatherings and traditions worldwide.
Make quick Thandai Truffles by mixing melted white chocolate with thandai spice powder and rolling into balls. Or, pour melted dark chocolate over crushed biscuits and nuts to set a festive Holi Bark.
Keep dry sweets like gujiyas in airtight jars at room temperature. Refrigerate milk-based treats like rabdi or mousse to keep them fresh. Always seal tightly to block out moisture and strong kitchen smells.
Enjoy healthy treats like air-fried date and cocoa gujiyas, antioxidant-rich dark chocolate thandai energy balls, dairy-free chia thandai pudding, and roasted makhana clusters coated in low-sugar dark chocolate and festive spices.
Traditional desserts rely on deep-frying, ghee, and sweet milk spices like cardamom. Modern chocolate versions blend these classic bases with bittersweet cocoa, chocolate shells, and lighter cooking methods like baking or chilling.
Easy variations of Holi Chocolate Desserts include adding dried fruits, roasted nuts, colorful sprinkles, coconut, cookie crumbs, or flavored fillings. These simple changes create festive treats with different textures, flavors, and visual appeal.
Cadbury Bournville Dark Chocolate is best for balancing sweet traditional fillings. For a creamier, sweeter fusion, use Cadbury Dairy Milk or Cadbury Silk, which melt smoothly for easy dipping and drizzling.
Infuse desserts with cocoa powder dough, stuff them with chocolate spreads, or dip fried treats into melted ganache. Top with festive nuts, colorful sprinkles, and sea salt to enhance the rich flavor.
When it comes to sweets, there is no specific best brand that can cater to all. Across nations and regions, there are a thousand different kinds of sweets. However, Cadbury is one of the brands that is used to make many of these sweets.
When you are looking for a dessert from a specific brand, make sure you check the list and quality of the ingredients. For a perfect dessert, it is essential to use premium-quality ingredients, all within their expiry dates.
These are two of the world's most popular desserts. Across countries and continents, countless places make different varieties of these two desserts. While Cadbury ingredients are often used in these, there is no specific best brand for these.
When buying chocolate for desserts, make sure you check the quality and cocoa percentage of the chocolate. While many brands are available, you may consider using Cadbury for that perfect texture and quality.
Yes. One can easily blend chocolates from different brands in one dessert recipe. Just make sure they are similar in types, and they mix well with each other to avoid any kind of baking disaster.
As baking needs several ingredients, it is difficult to identify just one specific brand used by professional bakers. While some brands are internationally reputed, several regional brands are there as well for baking ingredients.
Yes, using products from different brands often affects the taste and texture of a dessert if the quality varies significantly. Whether it's the flour, sugar, or fat content, all the ingredients need to blend with each other well.
While several brands are available for dessert ingredients across the globe, Cadbury surely is one of the most loved and popular brands when it comes to ingredients like chocolate, choco chips, and cocoa powder.
These premium desserts are all about enjoying the decadence of chocolate like never before. The premium desserts often include Cadbury milk chocolate bars and Cadbury cocoa powder for that perfect taste and texture.
While it is difficult to point out one best brand for easy and quick desserts, Cadbury indeed is one of the most popular brands used globally for dessert ingredients like chocolate and cocoa powder.
Special occasion desserts include cakes, cupcakes, brownies, cheesecakes, cookies, trifles, puddings, fruit tarts, and dessert bars. The best choice depends on the celebration, guest preferences, serving style, and whether a homemade or store-bought dessert is preferred.
Cakes are a classic dessert for birthdays, weddings, anniversaries, baby showers, graduations, retirement parties, holiday gatherings, and milestone celebrations. Different flavors, fillings, and decorations make cakes suitable for both casual and formal events.
Trending desserts for celebrations include mini cakes, dessert cups, macarons, cheesecakes, chocolate treats, fruit-based desserts, and creative fusion sweets. These Occasion desserts are popular for their attractive presentation and unique flavors
Festive desserts for any occasion include cookies, fruitcakes, pies, trifles, fudge, brownies, cheesecakes, and decorated cupcakes. Seasonal flavors, colorful decorations, and simple serving make every occasion feel more joyful and memorable for everyone.
For a family occasion, sheet cakes, brownies, banana pudding, fruit salad, ice cream sundaes, and dessert bars are excellent choices. These desserts are easy to prepare, simple to share, and enjoyed by guests of all ages.
Cupcakes, brownies, cookies, dessert cups, cake pops, and dessert bars are practical desserts for any Occasion. Individual portions make serving easier, reduce cleanup, and keep guests moving comfortably during both small and large celebrations.
Chocolate desserts perfect for festive gatherings include chocolate cakes, brownies, truffles, mousse, cupcakes, chocolate tarts, and dessert bars. These Occasion desserts add a rich flavor to celebrations and are easy to decorate, share, and enjoy with guests.
There is no single best chocolate brand. High-quality dark, milk, or white chocolate can all deliver excellent results, with the right choice depending on the recipe, flavor, sweetness, and desired texture.
Desserts that pair well with festive meals include pies, cheesecakes, fruit tarts, puddings, cookies, and cakes. These Occasion desserts balance rich main dishes with sweet flavors and provide a satisfying finish to holiday dinners and celebrations.
Brownies, chocolate cupcakes, truffles, mini cheesecakes, chocolate mousse cups, and dessert bars are excellent for a party Occasion. These bite-sized desserts are easy to serve, simple to enjoy, and perfect for entertaining larger groups.
Melt Bournville chocolate and pour it into sweetened cream or milk, and then pour it into molds or a container and freeze for six to eight hours. Stirring halfway through stops ice crystals from forming.
Yes, a condensed milk & cream base sets beautifully without eggs, unlike traditional frozen treats of the custard style. Bournville still delivers a full chocolate taste in the cocoa solids, without the need for egg-based thickening.
Sure thing, as the only step involved is freezing and there is no baking involved at any point. The Bournville chocolate just melts into the base, and then it's straight into the freezer.
Typical recipes use full-fat milk, cream, condensed milk, sugar, and melted Bournville chocolate for depth. Some versions add nuts or a dusting of cocoa powder for a contrast in texture.
Store in an airtight, freezer-safe container in the back of the freezer where the temperature is most constant. This prevents ice crystals from forming, keeping Bournville chocolate's texture smooth and creamy.
If it is dry, this usually means that the base lacks fat or cream, and if the texture is dense, this means that the base was not sufficiently aerated. Both problems are solved by whisking the Bournville chocolate mixture well before freezing.
These tend to be denser and less churned than regular ice cream, closer to a kulfi texture. Bournville's bittersweet chocolate also delivers a more robust cocoa flavor than you'd get in the usual milk-chocolate options.
For a change, try chocolate kulfi sticks, layered frozen mousse cups, or nutty chocolate popsicles. Swirling melted Bournville chocolate through vanilla cream before freezing creates a ripple effect throughout.
Bournville dark chocolate bar, cooking-grade, melts into cream bases most evenly without seizing or becoming grainy. The same cocoa content means that you can expect the same smooth results every time, batch after batch.
The same chocolate bar used for frozen treats is also good melted and mixed into cake batter or brownie mix. A Bournville bar is so versatile; it is as good covering baked as frozen chocolate desserts.
Melt Bournville chocolate and pour it into sweetened cream or milk, and then pour it into molds or a container and freeze for six to eight hours. Stirring halfway through stops ice crystals from forming.
Yes, a condensed milk & cream base sets beautifully without eggs, unlike traditional frozen treats of the custard style. Bournville still delivers a full chocolate taste in the cocoa solids, without the need for egg-based thickening.
Sure thing, as the only step involved is freezing and there is no baking involved at any point. The Bournville chocolate just melts into the base, and then it's straight into the freezer.
Typical recipes use full-fat milk, cream, condensed milk, sugar, and melted Bournville chocolate for depth. Some versions add nuts or a dusting of cocoa powder for a contrast in texture.
Store in an airtight, freezer-safe container in the back of the freezer where the temperature is most constant. This prevents ice crystals from forming, keeping Bournville chocolate's texture smooth and creamy.
If it is dry, this usually means that the base lacks fat or cream, and if the texture is dense, this means that the base was not sufficiently aerated. Both problems are solved by whisking the Bournville chocolate mixture well before freezing.
These tend to be denser and less churned than regular ice cream, closer to a kulfi texture. Bournville's bittersweet chocolate also delivers a more robust cocoa flavor than you'd get in the usual milk-chocolate options.
For a change, try chocolate kulfi sticks, frozen mousse cups layered, or nutty chocolate popsicles. Swirling melted Bournville chocolate through vanilla cream before freezing creates a ripple effect throughout.
Bournville dark chocolate bar, cooking-grade, melts into cream bases most evenly without seizing or becoming grainy. The same cocoa content means that you can expect the same smooth results every time, batch after batch.
The same chocolate bar used for frozen treats is also good melted and mixed into cake batter or brownie mix. A Bournville bar is so versatile; it is as good covering baked as frozen chocolate desserts.
Whip cream and fold in condensed milk and melted Bournville chocolate. Freeze for 6 hours in an airtight container. You won't need a churning machine for this smooth no-churn way.
The no-churn whipped cream and condensed milk method is egg-free and perfectly smooth. Yes! Bournville chocolate is so rich and flavorful that you don't need a custard base at all.
No oven; all you need is the freezing alone . This sets the texture after mixing the cream with the melted Bournville chocolate. Six to eight hours in the freezer finishes it off.
To make a basic batch, you'll need heavy cream, condensed milk, melted Bournville chocolate, and a splash of vanilla for depth. Some recipes add cocoa powder to enhance the chocolate flavor profile.
Homemade ice cream can be stored for about 3 weeks in a closed, freezer-safe container without losing texture. You can also press cling film directly onto the surface to help stop ice crystals.
You'll probably get a hard, icy texture instead of a creamy one if you don't whip before freezing. Folding lightly, not stirring vigorously, preserves the air pockets that make it soft.
The homemade kind doesn't use stabilizers or artificial flavoring but real cream and the genuine flavor of Bournville chocolate. The result is richer and more natural, but it does melt faster.
Swirl in chocolate chips, crushed brownie pieces, or roasted nuts before freezing for bursts of flavor and texture. Or serve it with fruit puree for a lighter, brighter variation.
The dark chocolate from Bournville melts smoothly into cream without seizing, giving a consistently glossy, well-blended ice cream base. The balanced bitterness also prevents the final result from being too sweet.
Yes, the same chocolate bar is just as good melted into the cake batter or brownie mix later. One versatile Bournville bar takes care of both the frozen and baked chocolate dessert categories.
Cream butter and sugar. Add melted Bournville chocolate. Fold in flour and baking soda. Bake at exactly 180°C for thirty-five minutes. Test with a clean toothpick to ensure it is cooked all the way through.
Yes, replacing eggs with curds, condensed milk, or a mixture of flax and water keeps the cake moist and well-risen. Bournville chocolate still has full flavor, no matter what egg substitute is used.
Bake in a heavy pot or pressure cooker placed on a stand on a low flame for thirty-five to forty minutes. If you don't have a built-in oven, this hob trick works.
The key ingredients are flour, sugar, butter, Bournville dark chocolate, baking soda, and milk (to give a moist, soft crumb). Some recipes add coffee to strengthen the taste of the chocolate without adding sugar.
Store airtight at room temperature for three to four days or longer if refrigerated properly. The cocoa in Bournville helps the crumb stay moist for longer than its milk chocolate equivalents.
If you overmix the batter, you will develop too much gluten and get a dense, tough cake, not a light cake. An inaccurate oven temperature can also cause sinking or uneven baking throughout.
Homemade versions have a deeper, not-so-sweet cocoa flavor, as Bournville has the higher cocoa content that is not diluted by preservatives. It also gives you full control over sugar levels, unlike packaged versions.
Or for a quick fix, try a molten lava center, a marbled swirl with vanilla batter, or single-serve chocolate mug cakes. These variations keep the same Bournville base recipe interesting every time.
One can go for homemade chocolates, or the Bournville dark chocolate cooking bar gives the cake a rich, balanced flavor that isn't too sweet. Its even, smooth melt means the batter will be mixed evenly, with no stubborn lumps.
Yes, it is the same chocolate bar, and it makes a seamless transition between cake batter and denser brownie recipes. You can count on one Bournville chocolate to effortlessly take you through multiple dessert categories without any substitutions.
Melt Bournville chocolate with butter. Whisk eggs and sugar, and combine with the chocolate mixture. Mix with sifted flour and cocoa powder. Pour into a baking mold, bake for 20-25 minutes, and refrigerate overnight.
Yes, you can make Bournville brownies without eggs. Instead of eggs, you can use ingredients like yogurt and condensed milk to bind the batter and retain moisture.
To make Bournville brownies without an oven, you can cook them on your stovetop using a heavy pot or a kadhai lined with a wire stand. This method yields a rich texture.
The ingredients that go into Bournville Brownies are as follows: Bournville chocolate, butter, eggs, sugar, flour, and cocoa powder. Instead of eggs, condensed milk and yogurt can be used.
Bournville brownies can typically last for 3-4 days at room temperature, 7-10 days in the refrigerator, and up to 3 months in the freezer. Because of the high sugar and fat content, they hold their moisture well.
The most common mistake when making Bournville Brownies is overbaking or serving them too soon. It dries out the rich, dark chocolate center. Remove them when slightly underdone, and cool completely before serving.
Homemade Bournville brownies use real butter and high-quality cocoa, creating a rich, fudgy texture; whereas store-bought versions often contain processed fats and preservatives, resulting in a lighter, cake like texture with a less intense chocolate flavor.
Fold fresh raspberries or orange marmalade into the batter for a fruity twist. The fruity flavors balance out with the rich Bournville chocolate; or top the brownies with chopped nuts and vanilla ice cream for a classic brownie sundae.
Cadbury Bournville cocoa powder is a prominent choice for chocolate desserts. When paired with Bournville dark chocolate, it creates a bittersweet flavor that balances sweetness, while delivering a deep chocolaty taste.
Yes, Cadbury Bournville is a highly recommended choice for baking cakes and brownies. Its rich flavor and high cocoa content deliver a deep, intense chocolaty taste and a luxurious fudgy texture to your baked goods.
In a bowl, mix refined flour (maida), cocoa powder, baking powder, and baking soda. Take a saucepan, mix coffee with water, then add Cadbury Bournville dark chocolate with melted butter and stir well. Mix dry and wet mixtures together. Pour into a baking mold and bake at 176°C for 40 minutes.
Yes, Bournville cakes can be made eggless. You can easily replace eggs by using ingredients like yogurt paired with baking soda, or a mixture of milk and vinegar. These swaps react to create a perfectly moist and fluffy crumb, even without standard cake batter binders.
Yes, you can easily make a Bournville cake without an oven. Two popular methods include making a quick Bournville Mug Cake in the microwave or preparing a rich no-bake biscuit cake using crushed biscuits, butter, and melted Bournville chocolate.
Bournville Cakes have the following ingredients: refined flour, cocoa powder, baking powder, baking soda, coffee, water, Cadbury Bournville dark chocolate, and melted butter.
Keep Bournville cakes in an airtight container in a cool, dark place to maintain moisture and chocolate quality. For longer shelf life, wrap individual slices in plastic wrap and store them in the refrigerator for up to 3 days or in the freezer for up to 3 months.
They can turn out dry due to too much flour or too little liquid in the cake mixture. Extra density is caused by overmixing the batter or incorrect temperature of the ingredients (cold eggs).
The primary difference between them is that Bournville Cakes are richer, less sugary, and more intense in their flavor profile. Bournville Cakes are fudgier and denser as well compared to traditional cakes.
Add hot espresso to your batter and fold in chopped dark chocolate chunks. Top with a decadent ganache made from Bournville and heavy cream. Or make a Melted Lava Mug Cake by melting a few chunks of Bournville with butter, mixing with sugar, an egg yolk, and a spoonful of cocoa. Microwave in a mug for roughly 2 minutes for a quick single-serving dessert.
You can use Cadbury Bournville Baking Cocoa Powder for making desserts. It delivers a deep, intensely rich dark chocolate flavor to cakes, brownies, and cookies without altering the sugar balance of your recipe.
Yes, Bournville is good for baking cakes and brownies. Its rich, intense dark cocoa profile provides a deep, authentic chocolate flavor and adds a fudgy texture to batters. Whether you use the Bournville Cocoa Powder for your sponge or melt the Bournville Dark Chocolate Bars into your batter, it delivers a decadent result.
Melt a Dairy Milk bar with some butter, add sugar and eggs, and fold in flour and a spoonful of cocoa powder. Bake until the top is set but the middle is still soft and fudgy.
To bind the mixture, replace the eggs with a few tablespoons of thick curds or condensed milk. The brownie is still dense and fudgy; the familiar creamy chocolate taste is still there.
Cook in a heavy-bottomed vessel or kadhai on a low flame with a layer of salt or sand at the bottom and a stand to keep the heat uniform. Cover and check after 30 minutes to see if it is ready.
A basic recipe involves a melted Dairy Milk bar, butter, sugar, eggs, flour, and a little cocoa powder to enhance the flavor. Optional ingredients are often added to improve the texture, such as nuts or more chunks of chocolate.
It will last about three days in an airtight container at room temperature or up to a week in the fridge. A quick warm-up before serving will restore some of the fudgy softness and flavor that was present right after baking.
Overbake and the cake will be dry and the fudgy center will be gone; underbake and the center will be raw and gooey. The bar is already sweet and the addition of additional sugar can easily topple it over.
This cake is meant to be dense and fudgy with little rise, not a fluffy cake. A few moist crumbs, rather than a perfectly clean toothpick, is the true signal that the toothpick is done.
Serve warm with a scoop of ice cream for a simple and indulgent finish kids love, or crumble over a parfait or drizzle with extra melted chocolate.
Here the original plain bar melts most smoothly into the batter for a consistent, creamy chocolate flavor. Nut or fruit varieties are best chopped and folded in, rather than melted all the way through.
The milk chocolate in the brownie melts and bakes evenly due to its functional design for this kind of baking. The finished brownie, however, is well-balanced and not overly sweet when a little bit of the added sugar is removed.
Add a Dairy Milk bar, butter, and sugar to the batter. Fold in flour and a leavening agent. Bake until a toothpick inserted in the center comes out with just a few moist crumbs.
Yes, you can replace eggs with thick curd and a pinch of baking soda, or you can use condensed milk instead. Both keep the crumb soft and moist, and the melted chocolate stays sweet and familiar.
Line an empty pressure cooker with salt and heat it. Remove the whistle and gasket and place the tin on a stand inside the cooker. Cover the cooker and cook on a low to medium heat for about forty minutes.
The easiest one needs flour, sugar, a little butter or oil, baking powder, milk or curd, and a melted Dairy Milk to get the sweetness and creamy chocolate taste right.
It is good for approximately 2-3 days at room temperature in an airtight container and approximately 1 week in the refrigerator. For the softest texture, allow slices to stand out briefly before serving.
Overmixing the batter creates a build-up of gluten, which causes the crumb to be tough, not soft. Also, the cake can be overly sweet and heavy if too much melted chocolate is added without making appropriate changes to the sugar.
You get no preservatives at all with homemade versions, and you can adjust the sweetness, producing a creamier, fresher taste. Stabilizers are often added to bakery versions to produce a more uniform, softer texture and longer shelf life.
For a molten center, pack more of the chunks into the center, or try a swirled marble effect with plain and chocolate batter. Cupcakes are also a simple, portion-controlled alternative that people find appealing.
So, stick with a simple, original Dairy Milk bar, which will melt beautifully into the batter. Bars that include nuts or bits of fruit are best folded in rather than melted all the way.
Yes, it bakes very well consistently. It is useful, though, to cut down on the amount of added sugar in the recipe so that the finished cake is not too sweet, as the bar contains sugar and milk.
Dairy Milk truffles Melt a Dairy Milk bar with a little bit of cream. Chill till firm and roll into small balls and coat with cocoa powder or melted chocolate. Serve cold.
Yes, truffles are made by melting chocolate and cream and then chilling them to set so there are no eggs at all, so they are easy and safe for most people to eat.
Truffles are an oven-free treat by nature. Heat the chocolate with cream and chill until firm enough to scoop. Roll into balls, coat with and refrigerate until ready to serve.
The classic version has a centre of melted Dairy Milk and cream, coated in either cocoa powder, sprinkles or extra melted chocolate for texture.
Stored in an airtight container in the fridge, they will keep fresh for about a week to two. They also freeze well for longer storage and not much noticeable change in flavor or texture.
Overheating the chocolate when you melt it can cause it to dry out and the mixture will be grainy rather than smooth. If the center cools too much before you roll it, it will be hard to shape truffles evenly.
Truffles should be soft and creamy on the inside with a slightly firmer coat, unlike firmer fudge, which gives a richer, more melt-in-the-mouth bite than a dense, sliceable square.
Instead of cocoa powder, roll some in crushed nuts or coconut for different coatings. Another idea for a nice surprise center is to add a little piece of dried fruit or nut in the center.
The plain original bar melts best for the center, giving an even, creamy flavor throughout. The nut or fruit varieties are best if they are finely chopped and folded in, not melted completely.
Yes, the same melted chocolate used here bakes up well into cakes and brownies too, although it’s worth trimming the added sugar slightly as the chocolate itself carries plenty of sweetness.
Whisk the cream until it is soft. Then add the condensed milk and the melted Cadbury Dairy Milk chocolate to the cream and mix well. Freeze for six to eight hours. This simple no-churn recipe gives you a rich, creamy texture without needing a machine.
The no-churn method (which uses condensed milk and whipped cream) actually leaves out eggs entirely, unlike a traditional custard base. But even so, the whipped cream is smooth because of the natural air inside it.
There is no need for an oven; this is set solely by means of freezing. Whip the cream and fold in the melted chocolate and condensed milk. Pour into a container and freeze until firm and scoopable.
Most editions have melted Dairy Milk chocolate, condensed milk, and whipped cream as part of the mix for extra flavor and natural sweetness. Often a pinch of salt is added to balance the taste.
It will keep for two to three weeks in an airtight container in the freezer. However, for the best texture, you should eat within the first week of freezing.
The most common mistake is to skip whipping the cream to soft peaks, resulting in an icy, not creamy, texture. The chocolate is already sweet so generally you don’t need to add any more sugar.
Store-bought versions tend to use less stabilizer, which means a richer, faster-melting bite, and homemade versions are made with real cream. Commercial versions have stabilizers to make a firmer scoop that holds its shape a little longer.
Stir in crushed cookies, chopped nuts, or a ribbon of caramel before freezing for added texture. The basic version also becomes a fun, shareable treat for kids when you sandwich the scoops between two cookies.
The plain original bar melted most smoothly into the cream base, delivering even sweetness without lumps. Nut or fruit varieties are better chopped in as chunky mix-ins instead of melted.
Yes, the same melted chocolate used here works just as well baked into cakes and brownies (although trimming a little added sugar keeps the finished baked treat from tasting overly sweet overall).
Mix a scoop of ice cream with a few squares of melted or chopped Cadbury Dairy Milk chocolate and cold milk until smooth and frothy. Serve chilled in a glass immediately.
Oh, and there are no eggs at any point in the process, either — it’s just blended, not baked or set. A naturally egg-free treat you can whip up in minutes.
No oven needed, all done in a blender. Mix cold milk , chocolate, and ice cream until frothy . Pour into glass to enjoy.
A traditional version blends cold milk, a scoop of ice cream, and chopped or melted Dairy Milk chocolate. In some recipes, a spoonful of chocolate syrup adds something extra in depth and richness.
It is best to drink the beverage immediately after blending, within 15-20 minutes, as milk-based beverages lose their frothy quality as they sit at room temperature.
Anyway , warm it up and mix it with the chocolate or just skip the ice cream . It tends to be thin and watery rather than thick and frothy . Chill the glass and ingredients ahead of time—this helps them stay creamy longer.
Homemade versions allow for the control of sweetness and the use of real melted chocolate for a more robust flavor. Store-bought or café versions tend to be thicker and sweeter with stabilizers and syrups.
Top with whipped cream and chocolate shavings, or mix in a scoop of cookies for a fun twist on the classic cookies and cream. It is even better if it is served in a tall glass with a straw.
The plain original bar mixes in the best, with no lumps, and makes a consistent chocolate flavor throughout the drink. It is best to use nut or fruit varieties for garnish instead of putting them directly in the preparation.
Not directly, as it is a poured beverage rather than a batter or dough. But the very same chocolate that gets mixed in works just as well melted and used in separate cakes and brownies.
For a creamy, cheesy Oreo cheesecake, start by making a simple crust with crushed Cadbury Oreo cookies and melted butter. Chill the base and top it with a rich filling made of whipped cream, cream cheese, and sugar. Refrigerate it well.
To make an eggless Oreo cheesecake, simply prepare the cookie and butter crust and top it with a cream cheese, whipped cream, sugar, vanilla, lemon filling with some chopped Oreos, and chill it for 4-6 hours.
The no-oven Oreo cheesecakes primarily depend on proper chilling instead of oven baking. Make the crust with cookies and butter, top it with creamy, cheesy, sweet filling, and, instead of baking, refrigerate it well for a firm texture.
A delicious Oreo cheesecake typically requires ingredients such as Cadbury Oreo cookies, butter, whipped cream, cream cheese, sugar, pure vanilla extract, eggs (optional), and freshly squeezed lemon juice/zest.
When refrigerated in an airtight container, an Oreo cheesecake ideally lasts for 4 to 7 days. If frozen, it stays for 1-2 months. However, as they are highly perishable, it is usually recommended to consume them in 3-4 days.
An Oreo cheesecake often turns out wrong due to reasons like using cold cream cheese, over-whipping the batter, or a faulty butter-to-crumb ratio in the cookie crust. A greasy crust often happens if the Oreo cream fillings are not scraped properly before making the base.
An Oreo cheesecake is a dessert that seamlessly combines the popularity of Oreo cookies with the creamy, cheesy comfort of a cheesecake. The result is a crunchy and velvety, rich texture that is rarely found in standard cakes or pies.
While they taste delicious all by themselves, to add some fun and creativity to it, one may serve them in cheesecake jars or bake them in muffin tins for a cute miniature version. They can be decorated with some cream swirls and drizzles as well.
While there are several flavors and types of Oreos available in the market, it is always the chocolate cookie and white cream combination of classic Oreo cookies that serves best for making desserts.
Yes, Cadbury Oreo cookies are often considered excellent for baking cakes and brownies, as both the cookies and the sweet cream filling melt perfectly into the batter or add a crunchy-sweet twist to the desserts.
Plum Cake gets its moist and rich texture from ingredients such as soaked dried fruits, butter, and milk. Soaking the fruits helps them stay soft and juicy, while butter adds richness. Using the right amount of liquid and avoiding overbaking also helps keep the cake moist.
Cadbury Dairy Milk Silk is a great choice for adding a smooth, creamy chocolate flavour to Dahi Bhalla. You can melt it and drizzle it over the prepared Dahi Bhalla or add small chocolate pieces as a topping.
Yes, you can give traditional Dahi Bhalla a chocolate twist by adding melted Cadbury chocolate as a drizzle or topping. For extra flavour, you can also garnish it with chocolate shavings, nuts, or crushed biscuits.